
Related Manuals for Dell Venue 11 Pro-7140


Summary of Contents for Dell Venue 11 Pro-7140
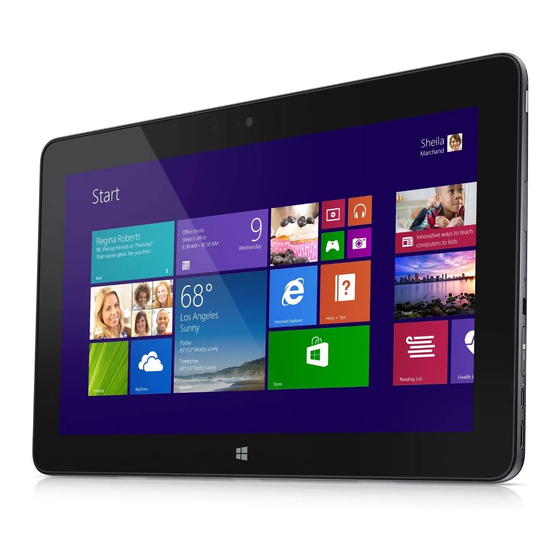
- Page 1 Dell Venue 11 Pro-7140 User’s Guide Regulatory Model: T07G Regulatory Type: T07G002...
- Page 2 備註、警示及警告 備註: 「備註」表示可以幫助您更有效地使用電腦的重要資訊。 警示: 「提醒」說明可能會損壞硬件或導致數據遺失,並告訴您如何避免問題。 備註: 「警告」表示有可能導致財產損失、人身傷害甚至死亡。 © 2014 Dell Inc. All Rights Reserved. Trademarks used in this text: Dell ™ , the DELL logo, Venue ™ , and Wi-Fi Catcher ™ are trademarks of Dell Inc. Intel ® , Xeon ®...
-
Page 3: Table Of Contents
Contents 1 Working on Your Tablet......................... 5 Before Working Inside Your Tablet............................5 Turning off Your Tablet.................................5 2 Setting Up Your Tablet......................... 7 Charging the Tablet................................7 Turning On Your Tablet.................................8 Turning off the Screen................................8 3 Using Your Tablet.........................9 Screen Orientation................................9 How to lock / unlock the screen orientation........................ - Page 4 10 Cleaning Your Tablet......................... 32 11 Troubleshooting........................33 Battery problem................................... 33 System problem...................................33 Touchscreen problem................................. 34 Checking Your Wireless Network Card..........................34 Network problem.................................34 12 System Setup........................... 36 System Setup (BIOS) Options............................36 Updating the BIOS ................................42 13 Specifications...........................43 14 聯絡 Dell........................... 46 Contents...
-
Page 5: Working On Your Tablet
Damage due to servicing that is not authorized by Dell is not covered by your warranty. Read and follow the safety instructions that came with the product. - Page 6 b) Slide to shut down your tablet. NOTE: You can also turn off your tablet without sliding down the screen. Press and hold the Power button for >10 seconds to turn off your tablet. You can perform this force shutdown, if your tablet is not responding / behaving unexpectedly or touch is not working.
-
Page 7: Setting Up Your Tablet
Setting Up Your Tablet Topics: • Charging the Tablet • Turning On Your Tablet • Turning off the Screen Charging the Tablet CAUTION: Charge the battery in an ambient temperature of 0 °C to 40 °C. CAUTION: Use only the power adapter and power cable that came with your tablet. Using unauthorized power adapters or power cables may cause severe damage to your tablet. -
Page 8: Turning On Your Tablet
Battery icon Description Your tablet is plugged in, and either no battery is detected or the battery is not working correctly. Battery is at low level. Battery is at critical level. Turning On Your Tablet NOTE: Use this tablet in an ambient temperature between 0 °C and 40 °C. 1. -
Page 9: Using Your Tablet
Using Your Tablet Topics: • Screen Orientation • How to lock / unlock the screen orientation • Gestures • The Windows Start Screen • Split Screen • Using Headphones • Installing the Micro-SD Card • Installing the Micro-SIM Card Screen Orientation For optimal viewing experience, the screen orientation changes automatically to portrait or landscape format depending on how you hold the tablet. -
Page 10: Gestures
1. Swipe from the right edge of the display to access the Charms bar. 2. Touch Settings → Change PC settings → PC and devices → Power and sleep. 3. Under Brightness, slide left or right to turn on / turn off the automatic brightness option. NOTE: You can turn on / turn off the slider to have the screen automatically adjust the brightness, based on the ambient light. -
Page 11: The Windows Start Screen
Gesture Actions Functions Zoom out Reduce the view of an image or web page Touch the display with two fingers and then move the fingers closer Rotate Rotate an object by 90 degrees Touch the display with two or more fingers and then move the fingers in a clockwise or counter-clockwise arc Right-Click To perform a right-click on your tablet, Touch and Hold your finger for 2 seconds on any section of the screen or an icon and then release... -
Page 12: How To Access The Start Screen
2. Swipe up from the middle of the display to get the Apps view. 3. Swipe from the top or bottom of the display to access the Customize icon at the bottom-right corner. 4. Touch the Customize icon at the bottom-right corner. 5. -
Page 13: Swipe Right
Swipe Right Swiping-in from the right edge of the display reveals the Charms bar. Charms provide access to the system commands, such as Start, Search, Share, Devices, and Settings options. If your tablet is running on an application or performing actions, pressing the Start icon takes you back to the Start screen. -
Page 14: Installing The Micro-Sd Card
NOTE: These are the default options on the tablet, which display only when you connect a device to the audio port. Depending upon your device, you can select any of these options. WARNING: Listening to loud music for extended period of time can lead to hearing loss. 1. -
Page 15: Installing The Micro-Sim Card
Installing the Micro-SIM Card Perform the following steps: a) Pull at the edge to release the cover that secures the Micro-SIM card. b) Insert the Micro-SIM card and press the cover to secure the Micro-SIM card Using Your Tablet... -
Page 16: Managing Your Tablet Settings
Managing your tablet settings Topics: • Wi-Fi setting • Mobile broadband setting • Refreshing / Recovering / Re-setting your tablet Wi-Fi setting Turning On/Off Wi-Fi 1. Swipe from the right edge of the display to access the Charms bar. 2. Touch Settings →... -
Page 17: Mobile Broadband Setting
Mobile broadband setting Turning On/Off mobile broadband 1. Swipe from the right edge of the display to access the Charms bar. 2. Touch Settings →Change PC settings → Networks → Airplane mode. 3. Swipe Mobile broadband icon left or right to turn mobile broadband on or off. Connecting to a mobile broadband network 1. - Page 18 4. The estimated data usage will be shown once the mobile broadband network is enabled. NOTE: You can choose the option Connect automatically to connect the mobile broadband automatically. NOTE: Your tablet will automatically prioritize Wi-Fi networks over mobile broadband networks, when both are available. If your tablet is connected to the mobile broadband and any of saved Wi-Fi connections comes within range, it will disconnect from the mobile network and connect to the Wi-Fi automatically.
-
Page 19: Refreshing / Recovering / Re-Setting Your Tablet
Enabling PIN lock 1. Swipe from the right edge of the display to access the Charms bar. 2. Touch Settings → Network 3. Touch and hold Your Service Provider or right-clicked if docked. 4. Touch View connection properties→Security→Use a PIN. 5. - Page 20 Remove everything and re-install Windows This option enables you to recycle or start over your tablet completely, and you can reset to its default / factory settings. If you want to perform this action: 1. Click Get Started. The Reset your PC window opens. 2.
-
Page 21: Synchronizing Your Tablet
Synchronizing your tablet Topics: • Using Microsoft account Using Microsoft account If your computer has Microsoft Windows 8.1 installed, you can synchronize user settings of your tablet with your computer using a Microsoft account. When you sign in with your Microsoft account on your tablet, you can automatically synchronize your settings, including internet browser history, application settings, and personal files etc., with other Windows 8.1 PCs and Windows 8.1 tablets. -
Page 22: Optional Stylus Features
NOTE: This Stylus only works with the Dell Venue 11 pro series tablets. It is not designed to work the earlier family of Dell tablets. Also, the stylus purchased for use with any other Dell tablets is not supported by the Dell Venue 11 pro series tablets. -
Page 23: Using The Optional Stylus With Your Tablet
Using the Optional Stylus with Your Tablet The Stylus is ergonomically designed to work with your tablet for long time periods. The user can seamlessly switch between pen and finger entry without any manual mode switching. The stylus supports features such as palm rejection, hovering, and pressure sensing, which allow for industry leading accuracy and ease of use with no calibration necessary. -
Page 24: Desktop Dock Features
Desktop Dock Features This section provides information about the features available on the Desktop dock. Feature Functionality 1 USB 3.0 connector Connect USB devices, such as flash memory. 2 Audio connector Connect headphones or external speakers. 3 Power status light Indicates the power status. -
Page 25: Docking Your Tablet
Topics: • Docking Your Tablet • Connecting the Power Adapter Docking Your Tablet The following images show how to dock your tablet: Desktop Dock Features... -
Page 26: Connecting The Power Adapter
Connecting the Power Adapter Connect one end of the power adapter to a wall socket and the other end to the power-connector port on the desktop dock. Desktop Dock Features... -
Page 27: Thin Travel Keyboard Dock Features
Thin Travel Keyboard Dock Features This section provides information about the features available on the Thin keyboard dock. Table 1. Feature Functionality 1 Magnets Magnets to enable docking. 2 Docking pins Allows the tablet to make electrical contact with the dock. 3 Docking Connectors Connect the docking connector on the tablet. - Page 28 2. Slide the tablet downward until the tablet clicks into place.. 3. Attach the keyboard cover and slide it down to attach the dock to the tablet. NOTE: When the connection is made, you need to manually turn the on-screen keyboard off if it is displayed on the screen.
-
Page 29: Mobile Keyboard Dock Features
Mobile Keyboard Dock Features This section provides information about the features available on the keyboard dock. Feature Functionality 1 Docking connectors Connect the docking guide slots on the tablet. 2 Rotatable hinge Allows the tablet to rotate around the hinges. 3 Touch pad Allows you to move the mouse pointer on the screen and provides the function of a mouse. -
Page 30: Undocking Your Tablet From The Keyboard Dock
NOTE: When the connection is made, you need to manually turn the on-screen keyboard off if it is displayed on the screen. Undocking Your Tablet from the Keyboard Dock 1. Push and hold the button on the Mobile Keyboard dock. 2. -
Page 31: Battery Behavior
Battery behavior When AC power is connected, the tablet gets charged first followed by the dock. During discharge or when AC power is not connected, the dock battery gets used first followed by the tablet. Mobile Keyboard Dock Features... -
Page 32: Cleaning Your Tablet
Cleaning Your Tablet CAUTION: Before you clean your tablet, disconnect all cables. Clean your tablet with a soft cloth dampened with water. Do not use liquid or aerosol cleaners, which may contain flammable substances. 1. Turn off your tablet. For more information on turning off your tablet, see Turning Off Your Tablet. 2. -
Page 33: Troubleshooting
Unplug the Dell AC power adapter from the wall and verify that the outlet is functioning. • Try to connect with another Dell AC power adapter (if available). • Check all cable connections and plug back into the wall, then back into the tablet. -
Page 34: Touchscreen Problem
Docking station not working as expected • Un-dock / Re-dock your tablet. If the issue still continues, power cycle your tablet on the dock. • Try to dock your tablet with another Dell docking station (if available). Touchscreen problem Problems Possible causes Possible solutions... - Page 35 No wireless connection 1. Check if the wireless radio is on. See Settings. 2. Try to get closer to the wireless access point. 3. Try to connect to another known wireless access point. 4. Reset the wireless router if using a private network;...
-
Page 36: System Setup
2. Press and hold the Volume Up button when the Dell logo appears on the screen. 3. When the F12 Boot Selection menu appears, press the Volume Up button to change the boot selection to the BIOS Setup option. - Page 37 Option Function Core Count Displays the core count of the tablet. Processor ID Displays the processor ID of the tablet. Current Clock Speed Displays the current clock speed of the tablet. Minimum Clock Speed Displays the minimum clock speed of the tablet. Maximum Clock Speed Displays the maximum clock speed of the tablet.
- Page 38 Table 6. Date/Time Option Function System Date Displays the system date. System Time Displays the system time. Table 7. System Configuration Option Function USB Configuration Allows you to configure the integrated USB controller. The options: • Enable Boot Support • Enable USB3.0 Controller •...
- Page 39 Option Description Default Setting: Not set Strong Password Enable strong password - This option is disabled by default. Password Configuration This field controls the minimum and maximum number of characters allowed for the admin and system passwords. Changes to these fields are not active until they are committed via the apply button or saving changes before exiting setup.
- Page 40 Option Function • • • • If you enable the Custom Mode, the relevant options for PK, KEK, db, and dbx appear. The options are: • Save to File- Saves the key to a user-selected file • Replace from File- Replaces the current key with a key from a user-selected file •...
- Page 41 Enabling the Fastboot will prevent F2 BIOS access through USB or Thin / Travel keyboard. You can still access the BIOS Setup, by pressing the Volume Up button after the Dell logo screen appears. Extended BIOS POST Time Allows you to create an additional pre-boot delay. The options are: •...
-
Page 42: Updating The Bios
It is recommended to update your BIOS (system setup), on replacing the system board or if an update is available. For tablet, ensure that the battery is fully charged and connected to a power outlet 1. Re-start the tablet. 2. Go to dell.com/support. 3. Enter the Service Tag or Express Service Code and click Submit. NOTE:... -
Page 43: Specifications
Specifications NOTE: Offerings may vary by region. The following specifications are only those required by law to ship with your computer. For more information about the configuration of your computer, go to Help and Support in your Windows operating system and select the option to view information about your computer. System Information Chipset Intel core M-5Y70/5Y71 and 5Y10/5Y10c... - Page 44 Ports and Connectors Memory card reader one microSD card reader Docking port one Dell 40–pin dock connector Subscriber Identity Module (SIM) port one micro SIM slot Display Type TFT-LCD with eDP interface , Full-HD (1920 x 1080) Size 10.8 inches Full High-Definition (FHD)
- Page 45 AC Adapter Type Input voltage 100 VAC to 240 VAC Input current (maximum) 0.60 A Input frequency 50 Hz to 60 Hz Output power 23.4 W Output current (30 W) 1.2 A / 2.0 A Rated output voltage 19.5 Vdc 19.5 Vdc Temperature range: Operating 0 °C to 40 °C (32 °F to 104 °F)
-
Page 46: 聯絡 Dell
聯絡 Dell 備註: 如果您沒有有效的互聯網連線,則您可以在購機發票、裝箱單、賬單或 Dell 產品目錄中找到聯絡資料。 Dell 提供多種線上和電話支援與服務選項。可用性依國家/地區及產品而異,且某些服務在您所在地區可能無法使用。如需聯絡 Dell 解決銷售、技術支援和客戶服務問題,請: 1. 轉至 dell.com/support。 2. 選擇您的支援類別。 3. 在頁面底部的選擇國家/地區下拉清單中確認您所在國家或地區。 4. 根據您的需求選擇相應服務或支援連結。 聯絡 Dell...