Table of Contents
Advertisement
This is the full text and images from the manual. This may take 3 full minutes for all images to appear.
If they do not all appear. Try clicking the browser "refresh" or "reload button" or right click on the image, choose "view image" then go back. It should now appear.
This will allow me to continue to buy new manuals and pay their shipping costs.
If you use Pay Pal, use the link below. Use the above address for a check, M.O. or cash.
PRAKTICA BM These instructions refer also to the PRAKTICA BM. Only the information given for the self timer is
only applicable to the PRAKTICA BMS.
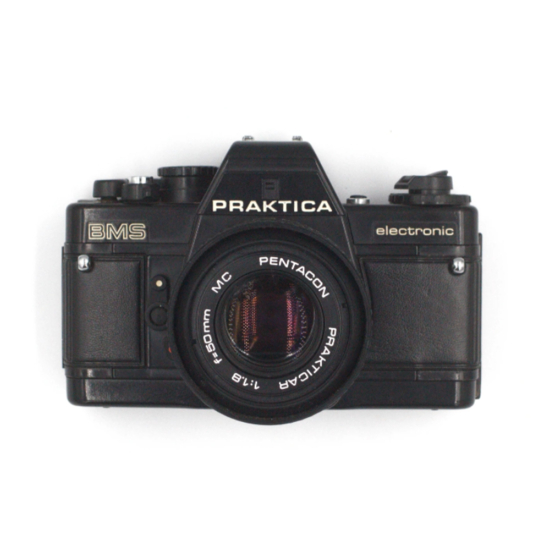
Praktica BMS
This camera manual library is for reference and historical purposes, all rights reserved.
This page is copyright © by
This page may not be sold or distributed without the expressed permission of the producer
I have no connection with any camera company
On-line camera manual library
To print, try printing only 3 or 4 pages at a time.
Back to main on-line manual page
If you find this manual useful, how about a donation of $3 to:
M. Butkus, 29 Lake Ave., High Bridge, NJ 08829-1701
and send your e-mail address so I can thank you.
Most other places would charge you $7.50 for a electronic copy or
$18.00 for a hard to read Xerox copy.
It'll make you feel better, won't it?
Posted 9-27-'03
, M. Butkus, NJ.
Advertisement
Table of Contents

Summary of Contents for Praktica BMS
- Page 1 If you use Pay Pal, use the link below. Use the above address for a check, M.O. or cash. PRAKTICA BM These instructions refer also to the PRAKTICA BM. Only the information given for the self timer is only applicable to the PRAKTICA BMS.
- Page 2 1 Film speed dial 2. Rewind button with crank 3 Window for aperture setting reflection into viewfinder 4 Cocking lever 5 Frame counter 4www.butkus.org 6 Cocking /ever for self-timer 7 Release button for self-timer 8. Lens unlocking key 9 Filter thread 10 Aperture setting ring 11 Film speed index 12 Battery check button...
- Page 3 23 Eyepiece with accessory holder 24 Shutter 25 Film cartridge space 26 Film sprocket 27 Take-up spool 4www.butkus.org 28 Camera back 29 Battery compartment lid with locking button 30 Rewind release button 31. Tripod socket 32. Plug-in frame {memo holder} Technical features ·...
- Page 4 · focusing system: Fresnel lens with diagonal triple wedge, microprism ring and ground glass ring · Viewfinder image shows 95% of picture sides - electronic flash synchronization at 1/60s - PRAKTICA bayonet (flange focal length 44.4mm; inner diameter 48.5mm) - self-timer (approx. 8s) with release button - memo holder on camera back - power source: 6 V primary battery - light receiver: silicon photocell - measuring and control range: 0...
- Page 5 Opening the camera back Pull the rewind button (2) up to unlock the camera back (Figure 3). Open the back fully -the frame counter resets to start position. 4www.butkus.org Loading the film Place the film cartridge into the cartridge space (25). Push in the rewind button (2); turn it, if necessary. Thread at /east 1 cm of the film leader into the slit of the take-up spool (27).
- Page 6 Setting the shutter speed Turn the shutter speed dial (15) until the desired speed faces the index ("125-in Figure 6). The LED next to "125" will flash when the release button is slightly pressed. 4s to 1/15s - for shots where the object brightness is low, a tripod is needed 1/30s to 1/1000s - for shots where the object brightness is sufficient 4www.butkus.org Symbol 60...
- Page 7 A Triple wedge The triple wedge system allows highly accurate focusing. Optimum sharpness is obtained when contours and lines flow naturally. The object focused on is out of focus when the contours of the center wedge are out of alignment. B Microprism ring The subject is in proper focus when the image in this field is clear and does not flicker.
- Page 8 All original PRAKTICA lenses with the M 42x1 screw-in thread can be attached to this model by means of the PRAKTICA adapter. With the exception of the light measurement, which is made at working aperture. there are no restrictions in camera operation when a screw-in lens is used.
- Page 9 · In case of defects, do not try to repair the camera yourself but call on a service workshop. Please follow the above instructions. Improper use of the camera may lead to defects which are not covered by our guarantee. Further development of the PRAKTICA BMS may result in minor deviations from the details contained herein.


Need help?
Do you have a question about the BMS and is the answer not in the manual?
Questions and answers