Table of Contents
Advertisement
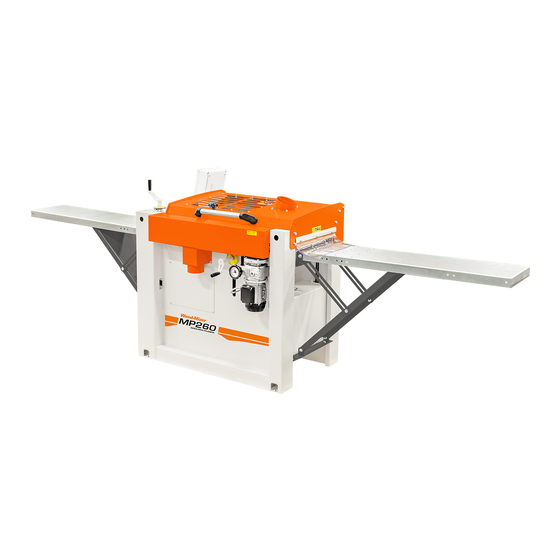
Quick Links
Advertisement
Table of Contents

Related Manuals for Wood-mizer MP260


Summary of Contents for Wood-mizer MP260
- Page 1 MP260 Planer Moulder Safety, Operation, Maintenance & Parts Manual MP260 A1.00 Safety is our #1 concern! Read and understand all safety information and instructions before oper- ating, setting up or maintaining this machine. April 2018 Form #2332...
- Page 2 Printed in the United States of America. All rights reserved. No part of this manual may be reproduced in any form by any photographic, electronic, mechanical or other means or used in any information storage and retrieval system without written permission from Wood-Mizer 8180 West 10th Street Indianapolis, Indiana 46214...
-
Page 3: Table Of Contents
Table of Contents Section-Page MP260 Planer Moulder SECTION 1 INTRODUCTION About this manual...................1-1 Getting service..................1-1 Warranty ....................1-3 SECTION 2 SAFETY Safety instructions ..................2-1 Owner’s Responsibility............2-1 Safety symbols..................2-1 Electrical lockout procedures ..............2-4 SECTION 3 SETUP Site preparation..................3-1 Chip collection ..............3-2 Feed tables (optional) ............3-3 Electrical .................3-5... - Page 4 Table of Contents Section-Page SECTION 5 MAINTENANCE Overview ....................5-1 Workspace ....................5-1 During use ....................5-1 After each use..................5-2 Lubrication points...................5-2 Cleaning the metal feed rollers...............5-5 Table lift assist chain adjustments............5-6 Replacing feed chain gear sprocket set screw ........5-8 Removing and replacing feed chains............5-9 5.10 Replacing Belts..................5-10 Replacing stationary vertical cutter belt......5-10...
-
Page 5: Introduction
Only persons who have read and understood the entire operator's manual should operate the Wood-Mizer Planer Moulder. The Planer Moulder is not intended for use by or around children. Getting service Wood-Mizer is committed to providing you with the latest technology, highest quality equipment, and strongest customer service available on the market today. - Page 6 (Indianapolis Office Only) 8 a.m. to 5 p.m. 8 a.m. to 12 p.m. Closed Please have equipment serial number and your customer number ready when you call. Wood-Mizer will accept these methods of payment: Visa, Mastercard, or Discover Prepayment ...
-
Page 7: Warranty
Wood-Mizer Limited Product Warranty Wood-Mizer LLC (“Warrantor”), an Indiana corporation with its principal place of business at 8180 West Tenth Street, Indianapolis, IN 46214-2400 USA, warrants to the purchaser (“Purchaser”) that for the time periods specifically stated herein and subject to the terms,... - Page 8 Introduction Warranty Planer Moulder One year One year Blade Maintenance Equipment BMS, BMT, BMST One year One year Options and Accessories Various One year* Date of purchase One year Moulders, Kilns MP, SD One year One year Replacement Parts Various 90 days 90 days Warranty on Options will match the warranty on the primary equipment when purchased on same invoice.
- Page 9 Introduction Warranty replace or repair, in Warrantor’s sole and subjective discretion, any defective part at War- rantor’s principal place of business without cost to the Purchaser if such defect exists. The determination of whether a product is defective shall be made by Warrantor in War- rantor’s sole and subjective discretion.
- Page 10 This warranty cannot be amended, except in writing, which refers to this warranty that is signed by both Warrantor and Purchaser. Effective: January 1, 2018 © 2018 Wood-Mizer LLC – 8180 West 10 Street, Indianapolis, IN 46214 doc072519 Introduction...
-
Page 11: Safety
Wood-Mizer Planer Moulder. All Wood-Mizer Planer Moulder owners should be thoroughly familiar with all applicable safety instruc- tions and laws and comply with them fully while using or towing the Planer Moulder. - Page 12 Safety Safety symbols IMPORTANT! indicates vital information. NOTE: gives helpful information. OBSERVE SAFETY INSTRUCTIONS IMPORTANT! Keep children away from the area. Read the entire operator's manual before operating the Planer Moulder. Take notice of all safety warnings throughout this manual and ...
- Page 13 Safety Safety symbols PLANER MOULDER SETUP DANGER! Do not operate the Planer Moulder without all covers and guards in place. Failure to follow this may result in serious injury or death. WARNING! Set up the planer moulder on solid, level ground. Failure to follow this may result in serious injury or death.
-
Page 14: Electrical Lockout Procedures
Safety Electrical lockout procedures DISPOSE OF WOOD BY-PRODUCTS PROPERLY IMPORTANT! Properly dispose of all wood by-products, including sawdust, chips, and other debris, including operation waste such as oil, filters, etc. KEEP SAFETY LABELS IN GOOD CONDITION IMPORTANT! Ensure that all safety decals are clean and readable. Replace all damaged safety decals to prevent personal injury or dam- age to the equipment. - Page 15 Safety Electrical lockout procedures Maintenance hazards include: Blade contact Missiles (thrown blades/wood chips) Pinch points Electrical Kickbacks Failure to lockout may result in: Serious injury and death Crush Amputation Blindness Burn Puncture Shock Electrocution To control maintenance dangers: Lockout procedures must be followed (see OSHA regulation 1910.147). ...
- Page 16 Safety Electrical lockout procedures training and more rigorous periodic inspections. When tagout is used and the energy iso- lating devices are lockable, the owner/operator must provide full operator protection (see OSHA regulation 1910.147, paragraph (c)(3)) and additional training and more rigorous periodic inspections are required.
- Page 17 Safety Electrical lockout procedures 7. Ensure that the equipment is disconnected from the energy source(s) by first checking that no personnel are exposed, then verify the isolation of the equipment by operating the push button or other normal operating control(s) or by testing to make certain the equip- ment will not operate.
-
Page 18: Setup
The electrical installation must also meet local codes. Your MP260 should be placed in a dry work area on a firm, level surface. Ensure proper lighting is available, with attention to extra lighting directly over the planer moulder. -
Page 19: Chip Collection
Chip collection The MP260 has 4 chip collection ports--one 5” and three 4” ports--sized to fit flexible hose, one located at each cutter head. A strong vacuum or chip collection system rate approximately 2500 CFM is recommended for use on standard materials less than 4”... -
Page 20: Feed Tables (Optional)
Setup Feed tables (optional) Locate the chip collector controls near the planer moulder controls. Collection systems are loud; use ear protection. If you are operating this machine in a climate-controlled building and blowing the chips outside, the vacuum created by the chip collector can quickly empty your building of its heated or cooled air. - Page 21 Setup Feed tables (optional) 12. Lift up the table support so that its rounded support surface comes on a level with the machine table. NOTE: If you are mounting the feed tables single-handed: prop up the table support in a reliable way, e.g. with boards. Place the feed table on the table support and fold up the struts so that they reach the feed table angle iron on the inner side of the feed table.
-
Page 22: Electrical
Failure to follow this may result in serious injury or death. The electric supply is routed into the electrical breaker box on the back of the MP260. This box has a protective cover, and inside there are four 3-pole 16-amp circuit breakers, one for each motor. - Page 23 Setup Electrical SINGLE PHASE SCHEMATIC ELECTRICAL SCHEMATIC MP260, 230 VOLT 1-PHASE, UL GROUND ELECTRICAL MAIN BOX MANOUVER BOX FUSE 1 A WHITE LAMP FUSE 1 A VOLTAGE ON TOP DOOR SWITCH WHITE LAMP K1 18 HORIZONTAL UNDER CUTTER MOTOR CONT.
- Page 24 Setup Electrical 3 PHASE SCHEMATIC ELECTRICAL DRAWING PH260, 230 VOLT 3-PHASE Ground ELECTRICAL MAIN BOX MANOUVER BOX FUSE 1 A WHITE LAMP VOLTAGE ON FUSE 1 A TOP DOOR SWITCH WHITE LAMP K1 18 HORIZONTAL UNDER CUTTER FUSE 16 A (x3) MOTOR CONT.
-
Page 25: Checking Rotation Direction
Failure to follow this may result in serious injury or death. The MP260 Planer is designed to run on 230V 3-phase AC power. If you need a 3-phase converter for your installation, size it for 60 Amp, 220 Volt, with a 20 HP motor The planer draws between 10 and 32 amps when a board is passing through it, depend- ing operating conditions. - Page 26 Setup Checking rotation direction See Figure 3-2. Power Availability Indicator Shown “On” (lighted) Feed Motor Start Shown “Off” (not lighted) FIG. 3-2 Start the feed motor (button 5) on the planer and check for correct rotation direction. CAUTION! Do not start cutter motors before rotation direction is checked! doc072519 Setup...
-
Page 27: Setup Of Upper And Lower Cutter Heads
Setup Setup of upper and lower cutter heads See Figure 3-3. Board feed FIG. 3-3 Check the rotation of the rollers; if the direction is wrong, turn off the feed motor (red stop button), switch off the supply breaker, and reverse two of the three supply voltage leads. Turn power back on and check rotation direction again. - Page 28 Setup Setup of upper and lower cutter heads See Figure 3-4. Lower Cutter Upper cutter TOP VIEW FIG. 3-4 UPPER/LOWER CUTTER DESIGN The cutter heads have the following specs: Lower Cutter Upper cutter Diameter: 2 13/16" (72mm) Diameter: 2 13/16" (72mm) Width: 11 13/16"...
-
Page 29: Leveling Lower Cutter Straight Planer Knives
Setup Leveling lower cutter straight planer knives See Figure 3-5. Knife height 10 mm open end adjusting screw wrench (supplied) Gib for NOTE: This item often goes by moulding knife many names - wedge, chip breaker, block, knife lock bar, clamp, or gib. - Page 30 Setup Leveling lower cutter straight planer knives 1. Place the straight edge across the corner of the cast iron table bed 2. Rotate the head so that the edge of the planer knife is directly under the straight wood block. If the knife is adjusted too high within the cutter head, the straight edge will be pushed out of position.
- Page 31 Setup Leveling lower cutter straight planer knives See Figure 3-7. NOTE: The adjust- ment screw is removed for illustration pur- Planer knife poses. It remains in the Adjustment screw cutter head for normal adjustments. Recess in knife for adjustment screw head FIG.
-
Page 32: Initial Setup Of Upper Cutter
Setup Initial setup of upper cutter WARNING! Ensure that ALL of the gib lock bolts are very tight, and that all of the knives are secure in the cutter head and before using the machine! Rotate the cutter head completely to ensure it does not impact with anything when rotating. -
Page 33: Leveling The Upper Cutter Straight Planer Knives
Setup Leveling the upper cutter straight planer knives 3. Turn the cutter head so that the block will not press against the knives or the knife slots. 4. Turn the crank that adjusts the machine table height (front, right corner of machine), so that the block slightly lifts the cutter head. -
Page 34: Replacing Cutter Straight Planer Knives
Setup Replacing cutter straight planer knives 3. Adjust the knife up or down with the hex key until it just barely touches the underside of the setting block. 4. Securely tighten the gib lock bolts once the knife is adjusted correctly. NOTE: Tighten all the bolts simultaneously, at the same rate, moving back and forth between both bolts. - Page 35 Setup Adjusting cutting depth of the lower cutter 1 mm thick with beveled holes 1 mm thick with flat holes IMPORTANT! The 1mm plate with the flat holes should not be used alone. When used, it should be place on the bottom or sandwiched between plates.
-
Page 36: Adjusting Upper Cutter Depth
Setup Adjusting upper cutter depth 0 mm, use the 1 mm takeoff adjustment plate with beveled holes, the 1 mm takeoff adjustment plate with flat holes (sandwiched), and the 2 mm takeoff adjustment plate. Adjusting upper cutter depth The cutting depth of the upper cutter is adjusted by turning the adjustment crank handle that raises and lowers the cast iron table in the planer. -
Page 37: Moulding Knives In Upper And Lower Cutters
Setup Moulding knives in upper and lower cutters Examples: Imperial Metric Rough lumber thickness 1-1/16 " Rough lumber thickness 26 mm Takeoff of lower cutter 1/16" Takeoff of lower cutter 2 mm Upper cutter head removes 1/8" Upper cutter head removes 3 mm Resulting thickness 7/8"... -
Page 38: Side Cutter Setup
Setup Side cutter setup IMPORTANT! The lock screw must be fixed in the narrow part of the slot. I must not be fixed in the wide end of the slot. 4. Measure the lateral position of the knife, and fit an identical knife in exactly the same posi- tion on the opposite side of the cutter head. - Page 39 Setup Side cutter setup TOOLS NEEDED: 12 mm open-end wrench. 30 mm open-end wrench (supplied). 4 mm hex key (supplied). Gloves. SIDE CUTTER DESIGN The side cutters have the following specifications: Spindle Axle: Diameter 30 mm ...
- Page 40 Setup Side cutter setup See Figure 3-14. Locking nut Spacers Head Spacers (if needed) FIG. 3-14 REMOVING RIGHT OR LEFT SIDE CUTTER WARNING! Wear gloves when working with knives in the machine. Failure to follow this may result in serious injury or death. See Figure 3-15.
- Page 41 Setup Side cutter setup See Figure 3-16. Use the 30 mm and 12 mm open-end wrench in combination to loosen the nut on the top of the shaft. NOTE: The lock nut and the spindle of the movable side cutter have left-hand threads. FIG.
- Page 42 Setup Side cutter setup See Figure 3-17. Rotation direction Lock screw Dowel pins FIG. 3-17 Ensure that the chip deflector in front of the movable cutter does not get bent by the unplaned edge of the work piece coming in contact with the cutter. Be cautious process- ing work pieces of various widths.
- Page 43 Setup Side cutter setup See Figure 3-18. 40 mm Spacer 20 mm Spacer 10 mm Spacer 5 mm Spacer Set of Spacers (0.1 - 2.0mm) FIG. 3-18 Side cutter shims are used to raise the cutter head up and down on the cutter shaft. Using shims allows the precise setting of the cutter head, and when locked in place, your setting will not change.
-
Page 44: Setting The Movable Side Cutter Head
Setup Setting the movable side cutter head The top nut should then be replaced on the top of the shaft using two open-end wrenches – one to hold the shaft, and one to tighten the nut. (See figure 3-16.) Setting the movable side cutter head The movable side cutter head has a locking bolt under the table, on the output side and a locking screw accessed on the top of the table. - Page 45 Setup Setting the movable side cutter head This initial setting will only be an approximation; for now, we are mainly setting the second right side fence. Once this second right side fence is set, you will be able to accurately measure the desired width.
-
Page 46: Feed Rollers
FIG. 3-22 Feed rollers The MP260 has five feed rollers, which feed the work pieces through the machine. Four of these rollers are of ribbed metal and the last one has a rubber coating so that the sur- face of the work piece will not be marked when it exits the machine. -
Page 47: Adjusting The Feeding Speed
Setup Adjusting the feeding speed The rubber roller should also be adjusted so that it applies just the right pressure to the work piece. Remember that this feed roller should be set by the thickness the work piece has when leaving the cutters. IMPORTANT! Wood debris can accumulate under the feed roller spring mounted bearings. - Page 48 Setup Leveling the machine table LEVELING THE MACHINE 1. Set the both bearing housings of the upper cutter in their lowest position. (See Initial setup of upper cutter.) 2. Place an absolutely level block on the machine table directly head (not against the knives or the knife slots).
-
Page 49: Running The First Test Board
Setup Running the first test board Running the first test board WARNING! Check for tools used in the operation and remove from the machine before closing the lid. Failure to follow this may result in seri- ous injury or death. IMPORTANT! Check for free rotation of cutter heads before closing the lid. -
Page 50: Side Cutter Fence Setup
Setup Side cutter fence setup 3. Start the feed motor last. A light above the start buttons should illuminate as the motors are started. CAUTION! Do not adjust the feeding speed if the motor of the feed rollers is not running. Equipment damage may occur. 4. - Page 51 Setup Side cutter fence setup See Figure 3-24. Here are their locations in the machine: Second side cutter fence First side cutter fence FIG. 3-24 SETTING THE SECOND SIDE CUTTER FENCE The second side cutter fence is located on the far side of the stationary cutter (see figure 3-24).
- Page 52 Setup Side cutter fence setup See Figure 3-25. Second side cutter fence Adjustment bolts FIG. 3-25 When your test boards are complete, and you are satisfied with your setup, you can begin running material through the machine. FEEDING THE MACHINE Ensure you have adequate room for the material that you will be putting in to and taking out of your planer.
-
Page 53: Operation
NOTE: None of the motors will start if the planer’s observation/protec- tive lid is not securely closed, or if the Emergency Stop Button is depressed. The MP260 is equipped with a lid switch that must be engaged before the machine can be started by the control panel buttons. Operation... - Page 54 Check that all tools used in the setup of the machine are removed from the machine before starting any of the motors. The lid must be securely fastened down before the MP260 can be operated. doc072519 Operation...
-
Page 55: Planing Tips
Operation Planing tips The Emergency Stop Button must be pulled out to allow motors to be started. NOTE: The best way to ensure that it is in the correct position is to depress the Emergency Stop Button in and then pull it out until you here a click. -
Page 56: Sizing Stock
Operation Sizing stock each other and set so that the board is fed slightly diagonally (totally about 5 mm towards the left) through the machine. By this the feed rollers will press the board against the fences. If you are going to produce a large amount of a moulding there is an additional lock- ... -
Page 57: Planing Narrow Stock
Planing narrow stock The MP260 can process very narrow stock. However, a motion-limiting block is posi- tioned in the machine between the two tubes that the left side vertical cutter head moves on. This limiting block is held in place by two bolts that are accessible underneath the block. -
Page 58: Tongue And Groove
Operation Tongue and groove 4. Write down on the board the setting of the height scale of the table and the rotating scale on the height adjusting crank, i.e. exactly note to what height the machine table is set. Also measure the machined moulding. Measure and note the spacers and the position of profile blades on the board. -
Page 59: Maintenance
Maintenance Overview SECTION 5 MAINTENANCE DANGER! Remove power before clearing debris or any other mainte- nance activity. Failure to follow this will result in serious injury or death. Follow the OSHA lockout procedures reprinted in the safety section. (See LOCKOUT PROCEDURE in Safety.) Overview Your planer is a precision machine, and will provide you with professional results if kept in... -
Page 60: After Each Use
Maintenance After each use Ensure that all feed rollers can move. The machine table should regularly be cleaned and treated with a lubricant, for example low-viscosity oil, silicon lubricants, or wax (3-1 oil, ChuteLube, silicon sprays, etc.). After each use 1. - Page 61 Maintenance Lubrication points 1. The bearing holders and springs of the feed rollers. See Figure 5-1. Total of 10 - four steel rollers and one rubber FIG. 5-1 2. Lubricate the trapezoidal threaded bars. See Figure 5-2. Located at all four corners FIG.
- Page 62 Maintenance Lubrication points 3. Lubricate the chain and sprockets for height adjusting the table. Check the tension of the chain.) See Figure 5-3. View from bottom, looking up; outfeed side; cover panel removed. FIG. 5-3 The carriage of the movable cutter. See Figure 5-4.
-
Page 63: Cleaning The Metal Feed Rollers
Maintenance Cleaning the metal feed rollers The chain transmission of the feed rollers. See Figure 5-5. Cover removed. FIG. 5-5 Knives, spacers, pressure rollers and side rollers. See Figure 5-6. FIG. 5-6 Cleaning the metal feed rollers Pitch may build up on the metal feed rollers if you are planing wood that has high resin content. -
Page 64: Table Lift Assist Chain Adjustments
Maintenance Table lift assist chain adjustments 1. Clean pitch buildup from the feed rollers with a soft wire brush (i.e. a brush with brass bristles) and some cleaning solvent to assist in loosening the pitch. CAUTION! Do not spray/pour cleaning fluid directly on to the feed roll- ers. - Page 65 Maintenance Table lift assist chain adjustments See Figure 5-7. Outfeed view, chain adjustment sprocket lock nut - use 17mm wrench FIG. 5-7 See Figure 5-8. View from bottom, looking up; outfeed side; cover panel removed. FIG. 5-8 1. Remove the cover panel by using a 5 mm hex key. 2.
-
Page 66: Replacing Feed Chain Gear Sprocket Set Screw
Replacing feed chain gear sprocket set screw The feed roller sprockets in the MP260 are equipped with set screws that are designed to shear off their heads if your planer gets in a bind. For example, if the size of the material being fed into the machine is more than the machine can handle, the feed roller sprocket set screw will break off to protect the feed motor and drive train of the machine. -
Page 67: Removing And Replacing Feed Chains
Maintenance Removing and replacing feed chains During the assembly process, a rust preventing varnish was applied to the feed sprocket and the feed roller shaft. Before replacing the feed sprocket, it is recommended that this varnish be removed to assist reassembly. -
Page 68: 5.10 Replacing Belts
Replacing stationary vertical cutter belt 1. Remove the collection hose and cover plate on the front of the MP260. 2. Loosen (do not remove) 4 cap head mounting screws holding the pulley of the stationary vertical cutter. - Page 69 Maintenance Replacing stationary vertical cutter belt See Figure 5-12. Viewed from infeed side Belt tension adjustment bolt locking nut Belt tension adjustment bolt Motor mount FIG. 5-12 5. Back out the tension adjusting bolt until the front of the bolt is flush with the front of the belt tension bolt bracket, but do not remove the bolt from the bracket.
-
Page 70: Replacing Movable Vertical Cutter Belt
Maintenance Replacing movable vertical cutter belt 13. Replace the cover plate and collection hose. Replacing movable vertical cutter belt This process is very similar to removing and replacing the stationary vertical cutter belt, but with a few minor differences related to the exterior parts of the machine you need to remove to gain access to the belt. - Page 71 Maintenance Replacing movable vertical cutter belt See Figure 5-14. Use a 6 mm hex key to loosen mounting screws one turn Mounting screws Cutter pulley Belt Motor pulley FIG. 5-14 4. Loosen (do not remove) 4 cap head mounting screws holding the pulley of the stationary vertical cutter.
-
Page 72: 5.11 Sharpening Knives
Maintenance Sharpening Knives 6. Use a 13mm open-end wrench to loosen the locking nut that secures the tension adjust- ing bolt in place. 7. Back out the tension adjusting bolt until the front of the bolt is flush with the front of the belt tension bolt bracket, but do not remove the bolt from the bracket. - Page 73 Maintenance Sharpening Knives If a raised ridge occurs the entire length of the plank that you are processing, then the knife/knives have been nicked. Sharpened the knife/knives to remove the nick. Knives that are not sufficiently sharp will heat up when cutting. If you see blackened edges on moulding knives, this is an indication that the knives are not sharp.
-
Page 74: Troubleshooting
Troubleshooting Operation problems SECTION 6 TROUBLESHOOTING DANGER! Remove power before clearing debris or any other mainte- nance activity. Failure to follow this will result in serious injury or death. Follow the OSHA lockout procedures reprinted in the safety section. (See LOCKOUT PROCEDURE in Safety.) DANGER! - Page 75 Troubleshooting Operation problems Problem Possible Cause Remedy The entire surface is fuzzy. 1. The workpiece has high moisture 1. Dry the timber before machining it. content. 2. Grind the knives. It is especially 2. The knives have lost their important that the knives are sharp sharpness.
- Page 76 Troubleshooting Operation problems Problem Possible Cause Remedy The width of the machined 1. The workpiece moves away from 1. The right-side fences are set incor- board differs. the side fences. rectly. Adjust them according to the instructions. 2. The locking handle of the mov- able cutter has not been tightened.
-
Page 77: Mechanical Or Electrical Problems
Troubleshooting Mechanical or electrical problems Mechanical or electrical problems Problem Possible Cause Remedy None of the motors can be 1. The cover is not entirely closed. 1. Firmly tighten the locking knob on the started. 2. The emergency stop button is cover. - Page 78 Troubleshooting Mechanical or electrical problems Problem Possible Cause Remedy The workpiece is fed poorly or 1. The shear pin in the out-feed 1. Remove the planetary gear and not at all through the machine. roller is broken. replace the broken shear pin. 2.
- Page 79 Troubleshooting Mechanical or electrical problems Problem Possible Cause Remedy The workpiece is fed jerkily 1. The machine table is covered 1. Clean and lubricate the table. through the machine. with resin or rust. 2. Replace the bent feed roller. 2. One of the feed rollers has been bent.
- Page 80 Troubleshooting Mechanical or electrical problems Problem Possible Cause Remedy Vibration or rumble in the side 1. The moulding knives are incor- 1. Demount the cutter head, and clean cutter. rectly mounted. and mount the knives and the chip breakers correctly. Identical knives 2.
-
Page 81: Parts
From the continental US, call 1-800-525-8100 to order parts. Have your customer number, machine serial number, and part reference numbers ready when you call. From other international locations, contact the Wood-Mizer distributor in your area for parts. Sample Assembly... -
Page 82: Part Location
Parts Part Location Part Location 9 3 10 11 12 3 13 MMP005 doc072519 Parts... - Page 83 Parts Part Location 43 44 45 46 47 48 57 42 MMP0006 DESCRIPTION CRANK FOR MACHINE TABLE, COMPLETE ASSEMBLY PROTECTIVE PLATE, IN-FEED Feed roller, grooved, 2 long pieces, 2 short pieces Bearing seat, complete BEARING HOLDER SWITCH INFEED SECURITY SWITCH, COVER COVER Window Handle...
- Page 84 Parts Part Location DESCRIPTION Set of spacers Universal cutter Upper track bearing Lower track bearing Track ring, sga 30 LOCKING HANDLE CHIP DEFLECTOR, CUTTER, LEFT AND RIGHT CARRIAGE, CUTTER CUTTER Vertical cutter spindle, left thread Spindle nut, right thread Set of spacers Universal cutter Upper track bearing Lower track bearing...
- Page 85 Parts Part Location DESCRIPTION CHAIN WHEEL FOR THREAD BAR CHAIN FOR THREAD BAR, TABLE ELECTRIC MOTOR, UPPER HORIZ. CUTTER MOTOR SUPPORT CONTROL PANEL Control box Control box cover lid Emergency stop Control button, ON, white Lamp holder with cap CONTROL BOX BRACKET TRAPEZOIDAL THREAD BAR WITH CRANK BEARING BRACKET LOWER CUTTER LOWER HORIZONTAL CUTTER, 300...
- Page 86 Parts Part Location DESCRIPTION COVER FOR FEED ROLLER CHAIN CHIP CHANNEL, CUTTER 2 FEED CHAIN 2 CHIP DEFLECTOR, CUTTER 2 FEED CHAIN 1 FENCE 1 POINTER, HEIGHT ADJUSTMENT SCALE Scale L BRACKET FLEXI HOSE, CUTTER 3 BRACKET ELECTRIC BOX SIDE ROLLER ADJUSTING PLATE 1 MM, TOP Adjusting plate 1 mm Adjusting plate 2 mm...
Need help?
Do you have a question about the MP260 and is the answer not in the manual?
Questions and answers