Table of Contents
Advertisement
Available languages
Available languages
Quick Links
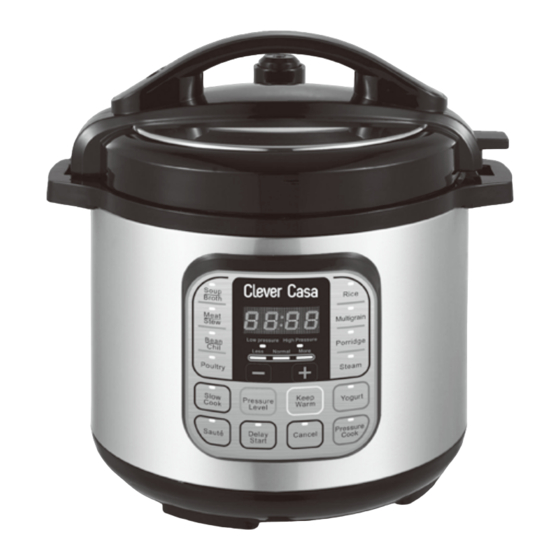
CLEVER CASA PENTOLA A PRESSIONE ELETTRICA DA 6L - 1000W
CLEVER CASA MULTIFUNCTION PRESSURE COOKER 6L - 1000W
MANUALE DI ISTRUZIONI / INSTRUCTION MANUAL
Leggere attentamente le istruzioni contenute nel seguente manuale
di istruzioni prima di utilizzare il prodotto.
Please read carefully this instruction manual
before using this product.
Importato e distribuito da: /
Imported and distributed by: HSE24 S.p.A.
Via delle Arti 171 - 00054
Fiumicino - RM - italia
http://www.hse24.it/
MADE IN CHINA
Assistenza Clienti : 840 724 724 ( Lun - Sab 8.00 - 21.00 )
Codice n / Item No.:
135321
Advertisement
Table of Contents

Summary of Contents for Clever Casa 135321
- Page 1 CLEVER CASA PENTOLA A PRESSIONE ELETTRICA DA 6L - 1000W CLEVER CASA MULTIFUNCTION PRESSURE COOKER 6L - 1000W MANUALE DI ISTRUZIONI / INSTRUCTION MANUAL Leggere attentamente le istruzioni contenute nel seguente manuale di istruzioni prima di utilizzare il prodotto. Please read carefully this instruction manual before using this product.
-
Page 2: Avvertenze Di Sicurezza
AVVERTENZE DI SICUREZZA 1. Questo prodotto è destinato solo all’uso domestico. Non utilizzarlo all’aperto. 2. Collocare la pentola a pressione lontano dalla portata dei bambini. INDICE 3. Questo prodotto non è inteso per essere usato da persone (inclusi i bambini) con capacità siche, sensoriali o mentali ridotte, o con scarsa esperienza e preparazione, a meno che siano a ancate da una persona pag.1-3 AVVERTENZE DI SICUREZZA... -
Page 3: Specifiche Tecniche
12. Quando non è in uso o per pulirla, scollegare la pentola dalla presa. 26. Non riempire la pentola oltre i 2/3 della sua capacità. Nel cucinare Lasciarla ra reddare prima di montare o smontare dei componenti e alimenti che si dilatano con la cottura, come il riso o le verdure prima di pulirla. -
Page 4: Operazioni Preliminari
3. Prodotto sicuro - Dispositivo di pressione: se il contatto tra il coperchio e il recipente interno non avviene correttamente, il contenitore interno non aumenterà la pressione. Nel caso di alta pressione il coperchio non si apre. - Regolatore di pressione: se si veri ca corto circuito e la pressione nella pentola supera il valore massimo consentito, la valvola di sicurezza si avvierà... - Page 5 PROVA INIZIALE È possibile cuocere a vapore il riso. La quantità di riso massima è di 12 tazze. Per acquisire dimestichezza con il prodotto e al contempo veri carne il corretto funzionamento, eseguire quanto 4. Dopo aver e ettuato la pulizia della pentola interna, eliminare eventuali residui o gocce di acqua. Collocare la segue: pentola interna alla relativa struttura, ruotandola leggermente in modo tale che sia ben a contatto con l’elemento 1.
-
Page 6: Pannello Di Comando
TASTI OPERATIVI DECOMPRESSIONE I tasti operativi sono: “+,-,PRESSURE LEVEL, CANCEL”. I tasti “+,-“ servono a regolare il valore del tempo. Tasto “ PRESSURE LEVEL” - Decompressione rapida Il tasto “ PRESSURE LEVEL” permette di selezionare le impostazioni di “High pressure (alta pressione)” e “low pressure (bassa pressione)”. - Page 7 Tasto “KEEP WARM” Tasto di Funzioni Tempo di Cottura Tempo Pressione Pressione regolabile Avvio postitcipato Premendo una sola volta il tasto “KEEP WARM” si annulla il programma in corso e la pentola va in standby attivando il riferimento default standard regolabile di default (Settabile premendo...
-
Page 8: Problemi E Soluzioni
Tasto di Funzioni Tempo di Cottura Tempo Pressione Pressione regolabile Avvio postitcipato PROBLEMI E SOLUZIONI riferimento default standard regolabile di default (Settabile premendo (minuti) il tasto” Delay start” 20-30-40 DESCRIZIONI POSSIBILE CAUSA SOLUZIONE Opzione selezionabile Yogurt Di coltà nel La guarnizione non è inserita bene. Posizionarla correttamente. premendo il chiudere il coperchio. - Page 9 PREPARAZIONE: 1.Tagliare la pelle della salsiccia in lunghezza, rimuovere la parte interna e romperla in 4-5 pezzi per salsiccia. RICETTE 2.Collegare ed accendere la pentola a pressione. Selezionare la modalità “SAUTÉ” ed aggiungere l’olio d’oliva 3.Aggiungere la carne e lasciarla rosolare. Rosolata, aggiungere il vino e deglassare. 4.Aggiungere la crème fraiche, la senape e il peperoncino.
- Page 10 3 cucchiai di burro ZUPPE 1 cucchiaio di olio di oliva Sale e pepe quanto basta ZUPPA DI PATATE DOLCI E POLLO ALLA THAILANDESE PREPARAZIONE: INGREDIENTI: 1.Collegare ed accendere la pentola a pressione. Selezionare la modalità “SAUTÉ” ed aggiungere 2 cucchiai di 25g di coriandolo tagliato burro e olio di oliva.
- Page 11 2.Aggiungere la cipolla, l’aglio e lasciare ammorbidire. Mescolare il contenuto con peperoncino e le PREPARAZIONE: patate dolci e continuare la cottura “SAUTÉ” per qualche minuto. 1.Collegare ed accendere la pentola a pressione. Selezionare la modalità “SAUTÉ” e cuocere la cipolla, l’aglio e 3.Aggiungere la carne e continuare per qualche minuto.
- Page 12 PREPARAZIONE: 6.Collegare all’alimentazione elettrica e accendere la pentola a pressione. Seleziona la funzione 'SAUTÉ' e 1.Portare l’agnello alla temperatura ambiente. aggiungere l'olio d'oliva. 2.Collegare ed accendere la pentola a pressione. Selezionare la modalità “SAUTÉ” ed aggiungere olio d’oliva. 7. Aggiungere il maiale e rosolarlo su tutti i lati. Una volta rosolato, rimuovere il maiale dalla pentola 3.Aggiungere l’agnello e farlo cucoere su tutti i lati.
- Page 13 POLLO 5. Selezionare la funzione "RICE" e modi care manualmente l'impostazione del timer 10 minuti. Controllare che INGREDIENTI: la valvola di rilascio della pressione sia chiusa e ssare il coperchio. 1 Pollo intero di medie dimensioni 6. Una volta trascorso il tempo impostato, aprire con attenzione la valvola di rilascio della pressione e rimuovere 1 limone il coperchio.
-
Page 14: Garanzia
GARANZIA L’apparecchio è garantito per un periodo di due anni dalla data di acquisto. Fa fede la data riportata sullo scontrino/fattura. In caso di difetto preesistente all’acquisto, viene garantita la sostituzione. Non sono coperte da garanzie tutte le parti che dovessero risultare difettose a causa della negligenza o dalla trascuratezza nell’uso. -
Page 15: Warranty
WARNINGS 1. This product is intended for domestic use only. Do not use it outdoor. 2. Place the pressure cooker out of reach of children. 3. This product is not intended to be used by people (including children) INDEX with reduced physical, sensory or mental capabilities, or with poor experience and preparation, unless they are supported by a person responsible for their safety. - Page 16 13. To disconnect the cooker from the main power, put all the controls in 27. To reduce the risk of re or electric shock, repairs should only be carried the "o " position and then remove the plug from the wall socket. out by authorized people.
-
Page 17: Preliminary Operations
3. Safe product -Pressure device: if the contact between the lid and the inner container does not take place correctly, the internal container will not increase the pressure. In the case of high pressure, the cover does not open. -Pressure regulator: if a short circuit occurs and the pressure in the pan exceeds the maximum allowed value, the safety valve will start automatically to guarantee the safety of the device. -
Page 18: How To Cook
FIRST TEST When steaming rice, the amount of rice loading should not exceed 12 cups of rice. To become familiar with the product and at the same time verify its correct operation, perform the following: Under normal conditions, when steaming rice, one cup of rice should be matched with one cup of water. The ratio can 1. -
Page 19: Control Panel
OPERATING BUTTON DECOMPRESSION Operating button are: “+,-“, PRESSURE LEVEL, CANCEL The buttons ”+-“ allow to time setting. PRESSURE LEVEL - Fast decompression The Pressure level button allow to choose between: High pressure and low pressure. CANCEL Whenever you want, you can press “CANCEL” button to stop the current program and return back. FUNCTION BUTTON PRESSURE COOKER Select the "PRESSURE COOKER"... - Page 20 "KEEP WARM" button Number Function Default Cooking Adjustable Default Adjustable pressure Postpone switch on Pressing the “KEEP WARM” button once only cancels the program in progress and the pot goes into standby time (min) standard time pressure (you can set pushing activating keep warm program (the time cannot be adjusted when using the “keep warm”...
- Page 21 Number Function Default Cooking Adjustable Default Adjustable pressure Postpone switch on PRODUCT FAULTS AND ELIMINATION METHODS time (min) standard time pressure (you can set pushing “delay start”) 20-30-40 You can DESCRIPTION CAUSE SOLUTION adjust the Yogurt Unable to close lid. The installation of gasket is not Calibrate the position of the time keep...
- Page 22 METHOD: STEP 1: Slice the skin of the sausages lengthways, remove the meat and break it up into 4-5 small pieces per RECIPES sausage. Dispose of the sausage skin. STEP 2: Plug in and switch on the pressure cooker at the mains power supply. Select the 'SAUTÉ' function and add the olive oil.
- Page 23 3 tbsp salted butter SOUP 1 tbsp olive oil Salt and pepper, to taste THAI CHICKEN AND SWEET POTATO SOUP INGREDIENTS: METHOD: 25 g coriander, chopped STEP 1: Plug in and switch on the pressure cooker at the mains power supply. Select the 'SAUTÉ' function and 3 medium sweet potatoes, peeled and chopped add 2 tbsp salted butter and the olive oil.
- Page 24 STEP 2: Add the onion and garlic and soften. Stir in the peppers and sweet potato and continue to sauté tor a METHOD: further minute. STEP 1: Plug in and switch on the pressure cooker at the mains power supply. Select the 'SAUTÉ' function and STEP 3: Add the beef and sauté...
- Page 25 METHOD: STEP 5: Alter approx. 24 hours, remove the pork and BBQ sauce from the fridge, and bring to room temperature. STEP 1: Bring the lamb to room temperature. STEP 6: Plug in and switch on the Rapid Multicooker at the mains power supply. Select the 'SAUTÉ' function STEP 2: Plug in and switch on the pressure cooker at the mains power supply.
- Page 26 WHOLE CHICKEN STEP 5: Select the 'Rice' function and manually change the timer setting lo 10 minutes. Check that the pressure INGREDIENTS: release valve is closed and secure the lid. 1 medium whole chicken STEP 6: Once the prese! time has elapsed, carefully open the pressure release valve and remove the lid. Add the 1 lemon chorizo and continue to cook on the 'Rice' function for a further 4 minutes until the stock has fully evaporated 1 celery stick, chopped...
- Page 27 WARRANTY The appliance is guaranteed for a period of two years from the date of purchase. The date shown on the receipt / invoice is valid. In case of pre-existing defect at the purchase, replacement is guaranteed. All parts that are found to be defective due to negligence or negligence in use are not covered by warranty. The warranty is also excluded in all cases of improper use of the appliance and in the case of a professional use.
Need help?
Do you have a question about the 135321 and is the answer not in the manual?
Questions and answers