Table of Contents
Advertisement
Quick Links
Declaration of Conformity—Mercury Diesel Inboard (VW)
This inboard engine when installed in accordance to Mercury Marine's instructions complies with the requirements of the
following directives by meeting the associated standards, as amended:
Recreational Craft Propulsion Engines with the Requirements of Directive 94/25/EC as amended by 2003/44/EC
Name of engine manufacturer: Volkswagen Antriebssysteme
Address: HMA‑E/1, PO 7962, Industriestraße Nord
Town: Salzgitter
Name of Authorized Representative: Brunswick Marine in EMEA Inc.
Address: Parc Industriel de Petit‑Rechain
Town: Verviers
Name of Notified Body for exhaust emission assessment: International Marine Certification Institute (IMCI)
Address: Rue Abbé Cuypers 3
Town: Bruxelles
Conformity assessment module used for exhaust emissions:
Other Community Directives applied: Electromagnetic Compatibility Directive 2004/108/EC
Description of Engines and Essential Requirements
Engine Type:
☒
Inboard engine
Identification of Engines Covered by this Declaration of Conformity
Name of engine model or engine family:
SDI 1.9L 40/50/60
SDI 2.5L 75
TDI 2.5L 100/120
TDI 2.5L 140/150/165
R4 TD; TDI 1.9L 75
TDI 3.0L 225/230/265
TDI 4.2L 285/350
Essential requirements
Annex I.B – Exhaust Emissions
B.1 engine identification
B.2 exhaust emission
requirements
B.3 durability
B.4 owner's manual
Annex I.C – Noise Emissions
Post Code: 38231
Post Code: 4800
Post Code: B‑1040
Fuel Type:
☒
Diesel
Unique engine identification number(s) or engine
family code(s)
SDI 40‑4/SDI 50‑4/SDI 60‑4
SDI 75‑5
TDI 100‑5/TDI 100‑5 SE
TDI 150‑5/TDI 150‑5 D/TDI 165‑5
TDI 75‑4
TDI 225‑6/TDI 230‑6/TDI 265‑6
TDI 285‑8/TDI 350‑8
normative
Standards
document/
☐
☒*
☐
☒
see Declaration of Conformity of the craft in which the engine(s) has (have) been
Country: Germany
Country: Belgium
Country: Belgium
☒ B+C
☐ B+D
Combustion Cycle:
☒
4 stroke
Other
Technical
file
method
☐
☒
☐
☐
☐
☒
☐
☐
installed
ID Number: 0609
☐ B+E
☐ B+F
☐ G ☐ H
EC Type–examination
certificate or type‑approval
certificate number
EXVWM001
EXVWM002
EXVWM003
EXVWM004
EXVWM006
EXVWM007
EXVWM008
Please specify in more detail
(* = mandatory standard)
*EN ISO 8178‑1:1996
ISO 8665:1995
Advertisement
Table of Contents
Troubleshooting

Related Manuals for Volkswagen SDI 1.9L Series


Summary of Contents for Volkswagen SDI 1.9L Series
- Page 1 This inboard engine when installed in accordance to Mercury Marine’s instructions complies with the requirements of the following directives by meeting the associated standards, as amended: Recreational Craft Propulsion Engines with the Requirements of Directive 94/25/EC as amended by 2003/44/EC Name of engine manufacturer: Volkswagen Antriebssysteme Address: HMA‑E/1, PO 7962, Industriestraße Nord Town: Salzgitter...
- Page 2 This declaration of conformity is issued under the sole responsibility of the manufacturer. I declare on behalf of the engine manufacturer that the engine(s) will meet the exhaust emission requirements of Directive 94/25/EC as amended by Directive 2003/44/EC when installed in a recreational craft, in accordance with the engine manufacturer’s supplied instructions and that this (these) engine(s) must not be put into service until the recreational craft into which it is (they are) to be installed has been declared in conformity with the relevant provisions of the above mentioned Directives.
- Page 3 The Operation, Maintenance, and Warranty Manual contains specific instructions for using and maintaining your product. We suggest that this manual remain with the product for ready reference whenever you are on the water. Thank you for purchasing one of our Mercury Diesel products. We sincerely hope your boating will be pleasant! Mercury Marine Warranty Message The product you have purchased comes with a limited warranty from Mercury Marine;...
-
Page 5: Table Of Contents
TABLE OF CONTENTS Section 1 - Warranty Warranty Information..............2 What Is Covered............. 6 Warranty Registration United States and Canada....2 Duration of Coverage............. 6 Warranty Registration—Outside the United States and Conditions That Must Be Met to Obtain Warranty Canada................2 Coverage................ - Page 6 Duty Cycle................27 Passenger Safety In Pontoon Boats And Deck Boats.... 32 Basic Boat Operation............27 Boats Having An Open Front Deck........32 Duty Cycle Rating............28 Boats With Front‑Mounted, Raised Pedestal Fishing Seats Pleasure Duty Rating..........28 ..................32 Basic Boat Operation..............
- Page 7 Battery Precautions for Multiple Engines......... 64 Battery Switches..............64 Alternators................64 Battery Isolators..............65 Engine Control Unit (ECU)..........64 Generators................. 65 Batteries................64 Section 6 - Storage Cold Weather or Extended Storage......... 68 Battery Storage................ 68 Preparing Your Power Package for Seasonal or Extended Recommissioning the Power Package........
- Page 8 Page iv 90-8M0070920 AUGUST 2012...
-
Page 9: Section 1 - Warranty
Section 1 - Warranty Section 1 - Warranty Table of Contents Warranty Information.............. 2 What Is Covered ............6 Warranty Registration United States and Canada... 2 Duration of Coverage ..........6 Warranty Registration—Outside the United States and Conditions That Must Be Met to Obtain Warranty Canada................ -
Page 10: Warranty Information
Section 1 - Warranty Warranty Information Warranty Registration United States and Canada To be eligible for warranty coverage, the product must be registered with Mercury Marine. At the time of sale, the dealer should complete the warranty registration and immediately submit it to Mercury Marine via MercNET, E‑mail, or mail. Upon receipt of this warranty registration, Mercury Marine will record the registration. -
Page 11: High-Output Rating
Section 1 - Warranty High-Output Rating A High‑Output Rating applies to variable load applications where full power is limited to one (1) hour out of every eight (8) hours of operation. Reduced power operation (the 7 hours out of 8 hours in which the engine is not operated at full power) must be at or below cruise speed. -
Page 12: Light-Duty Commercial Use Worldwide Limited Warranty
Section 1 - Warranty • Use of an accessory or part that was not manufactured or sold by Mercury Marine and that damages the Mercury product • Jet pump impellers and liners • Operation with fuels, oils, or lubricants that are not suitable for use with the product (see the Operation, Maintenance & Warranty manual) •... -
Page 13: Conditions That Must Be Met To Obtain Warranty Coverage
Section 1 - Warranty Conditions That Must Be Met to Obtain Warranty Coverage Warranty coverage is available only to retail customers that purchase from a Dealer authorized by Mercury Marine to distribute the product in the country in which the sale occurred, and then only after the Mercury Marine specified pre‑delivery inspection process is completed and documented. -
Page 14: 3-Year Limited Warranty Against Corrosion-Diesel Models (Recreational Use Only)
Section 1 - Warranty Use of the product for racing or other competitive activity, or operating with a racing‑type lower unit at any point, even by a previous owner of the product, voids the warranty. Expenses related to haul‑out, launch, towing, storage, telephone, rental, inconvenience, slip fees, insurance coverage, loan payments, loss of time, loss of income, or any other type of incidental or consequential damages are not covered by this warranty. -
Page 15: What Is Not Covered
Section 1 - Warranty What Is Not Covered This limited warranty does not cover electrical system corrosion; corrosion resulting from damage, corrosion which causes purely cosmetic damage, abuse or improper service; corrosion to accessories, instruments, steering systems; damage due to marine growth;... -
Page 16: Guarantees Under Australian Consumer Law
Section 1 - Warranty Guarantees Under Australian Consumer Law Our goods come with guarantees that cannot be excluded under the Australian Consumer Law. You are entitled to a replacement or refund for a major failure and compensation for any other reasonably foreseeable loss or damage. You are also entitled to have the goods repaired or replaced if the goods fail to be of acceptable quality and the failure does not amount to a major failure. -
Page 17: Conditions That Must Be Met To Obtain Warranty Coverage
Section 1 - Warranty Conditions That Must Be Met to Obtain Warranty Coverage Warranty coverage under this Limited Warranty is available only to retail customers that purchase from a dealer authorized by Mercury Marine to distribute the product in the country in which the sale occurred, and then only after the predelivery inspection process specified by Mercury Marine is completed and documented. -
Page 18: Expense Of Claiming This Limited Warranty
Section 1 - Warranty Use of the product for racing or other competitive activity, or operating with a racing‑type lower unit at any point, even by a previous owner of the product, voids this limited warranty. Expenses related to haul‑out, launch, towing, storage, telephone, rental, inconvenience, slip fees, insurance coverage, loan payments, loss of time, loss of income, or any other type of incidental or consequential damages are not covered by this limited warranty. -
Page 19: Section 2 - Getting To Know Your Power Package
Section 2 - Getting to Know Your Power Package Section 2 - Getting to Know Your Power Package Table of Contents TDI 4.2L Engine Description..........12 Emergency Stop (E‑stop) Switch ........18 Identification................. 12 Remote Controls..............18 ZF Marine Transmissions............. 12 Single Engine, Single Helm Remote Control .... -
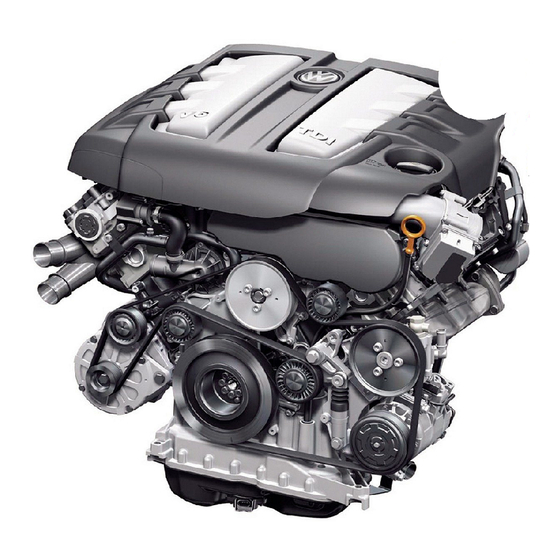
Page 20: Tdi 4.2L Engine Description
Section 2 - Getting to Know Your Power Package TDI 4.2L Engine Description 50614 The Mercury Diesel TDI 4.2L engine has the following features: • Four‑stroke diesel engine • Common‑rail direct injection • V8 cylinder arrangement • 4.2 liter displacement (252 cid) •... -
Page 21: Lanyard Stop Switch
Section 2 - Getting to Know Your Power Package Lanyard Stop Switch The purpose of a lanyard stop switch is to turn off the engine when the operator moves outside the operator's position (as in accidental ejection from the operator's position). Stop switch Lanyard Clips to the operator... -
Page 22: Testing The Audio Warning System
Section 2 - Getting to Know Your Power Package • The coolant temperature is too hot. • There is water in the fuel. • There is an engine sensor error. • The engine coolant level is low. NOTICE A continuous horn indicates a critical fault. Operating the engine during a critical fault can damage components. If the warning horn emits a continuous beep, do not operate the engine unless avoiding a hazardous situation. -
Page 23: Information Panel
Section 2 - Getting to Know Your Power Package Information Panel 50621 Reference Indicator Lamp Function Information panel Used in conjunction with the tachometer to display engine operating conditions. Control indicator lamp Not used. Instrument lighting button Adjusts the brightness of the instrument lighting. Confirmation button Used to acknowledge the audible warning of a fault message. -
Page 24: Voltmeter
Section 2 - Getting to Know Your Power Package • The impeller of the seawater pump is functional. Refer to Seawater Pump Impeller Inspection. Voltmeter The voltmeter indicates the voltage in the electrical onboard supply. Normal voltage is between 12 and 16 volts. If the indicated voltage drops below 12 volts with the engine running, the battery and alternator system should be checked by a Mercury Diesel authorized repair facility. -
Page 25: Engine Oil Pressure Monitoring
Section 2 - Getting to Know Your Power Package Engine Oil Pressure Monitoring Engine oil pressure is monitored by the engine control unit. If the oil pressure system should experience a fault, the tachometer display window will show an oil pressure warning icon. Tachometer Display window Oil pressure warning icon... -
Page 26: Switches
Section 2 - Getting to Know Your Power Package Switches Ignition Lock Switch The ignition lock switch has three positions. • In the "OFF" position, all electrical circuits are off and the engine cannot be started. The engine is stopped when the key switch is turned to the "OFF"... -
Page 27: Single Engine, Single Helm Remote Control
Section 2 - Getting to Know Your Power Package Single Engine, Single Helm Remote Control The following starting procedure is for single engine, single helm remote control applications. Single engine remote control Full forward Neutral into forward detent Neutral Neutral into reverse detent Full reverse Neutral position indicator Throttle lever control button... -
Page 28: Dual Engine, Dual Helm Control
Section 2 - Getting to Know Your Power Package Return the throttle lever to neutral to terminate this function (the throttle lever control light will remain illuminated). Dual Engine, Dual Helm Control The following starting procedure is for dual engine, dual helm control applications. Dual engine remote control Full forward Neutral into forward detent... -
Page 29: Central Electrical Fuse Replacement
Section 2 - Getting to Know Your Power Package CAUTION Failure to protect wiring with an appropriate fuse can damage the wiring and start a fire. When installing any accessories, we recommend using a Mercury accessory kit. Always use the appropriate fuse to protect wiring. Fuses (except for the terminal 30 main fuse) are located in the central electrical unit (refer to your boat owner's manual for location) behind the cover and on the rear side of the control unit of the individual instrumentation. -
Page 30: Optional Instrument Panel Fuse Replacement
Section 2 - Getting to Know Your Power Package Replace the blown fuse with a new fuse of the same rating. Secure the cover of the central electrical unit with eight screws. Unlock the emergency stop switch. NOTE: Dual engine installations have two sets of fuses on two boards, mounted side‑by‑side within the central electrical unit, as shown below. -
Page 31: Emissions Information
Section 2 - Getting to Know Your Power Package Determine which fuse belongs to the failed circuit using the illustration below. Instrument panel circuit card Ignition circuit fuse, 2 amp Constant positive circuit fuse, 2 amp 50432 Replace the blown fuse with a new fuse of the same rating. Secure the cover of the instrument panel with six screws. - Page 32 Section 2 - Getting to Know Your Power Package Notes: Page 24 90-8M0070920 AUGUST 2012...
-
Page 33: Section 3 - On The Water
Section 3 - On The Water Section 3 - On The Water Table of Contents Safe Boating Suggestions............ 26 While the Boat is Stationary ......... 31 Be Alert to Carbon Monoxide Poisoning....... 27 High‑Speed and High‑Performance........31 Good Ventilation ............27 Passenger Safety In Pontoon Boats And Deck Boats.. -
Page 34: Safe Boating Suggestions
Section 3 - On The Water Safe Boating Suggestions In order to safely enjoy the waterways, familiarize yourself with local and all other governmental boating regulations and restrictions, and also consider the following suggestions. Mercury Marine strongly recommends that all powerboat operators complete a boating safety course. Courses are offered in the U.S.A. -
Page 35: Be Alert To Carbon Monoxide Poisoning
Section 3 - On The Water • Report accidents. Boat operators are required by law to file a boating accident report with their state boating law enforcement agency when their boat is involved in certain boating accidents. A boating accident must be reported if 1) there is loss of life or probable loss of life, 2) there is personal injury requiring medical treatment beyond first aid, 3) there is damage to boats or other property where the damage value exceeds US $500.00 or 4) there is complete loss of the boat. -
Page 36: Duty Cycle Rating
Section 3 - On The Water Duty Cycle Rating It is the responsibility of the boat manufacturer or the installing dealer to ensure that the power package is properly applied. In all cases, the power package must be equipped with the gear ratio that allows the engine to operate at wide‑open throttle (WOT) at the rated engine RPM. -
Page 37: Basic Boat Operation
Section 3 - On The Water Basic Boat Operation Operation Chart Starting Procedure After Starting While Underway Stopping and Shut Down Observe all instrumentation to Frequently review all Open the engine hatch. Air monitor the condition of the Shift the remote control lever instrumentation to monitor out the bilge completely. -
Page 38: Drain Plug And Bilge Pump
Section 3 - On The Water • If operating in arctic temperatures of –29 °C (–20 °F) or lower, consult your Mercury Diesel authorized repair facility for information about special cold weather equipment and precautions. Refer to Section 6 for cold weather or extended storage related information. Drain Plug and Bilge Pump The engine compartment in your boat is a natural place for water to collect. -
Page 39: Shifting
Section 3 - On The Water Shifting NOTICE Shifting into gear at engine speeds above idle will damage the transmission. Shift into gear only when the engine is operating at idle. NOTICE Failure to rotate the propeller shaft when shifting gears or forcing the shift mechanism while the engine is not operating can result in product damage. -
Page 40: Passenger Safety In Pontoon Boats And Deck Boats
Section 3 - On The Water Passenger Safety In Pontoon Boats And Deck Boats Whenever the boat is in motion, observe the location of all passengers. Do not allow any passengers to stand or use seats other than those designated for traveling faster than idle speed. A sudden reduction in boat speed, such as plunging into a large wave or wake, a sudden throttle reduction, or a sharp change of boat direction, could throw them over the front of boat. -
Page 41: Impact With Underwater Hazards
Section 3 - On The Water There is another less common hazardous result from allowing your boat to launch off of a wave or wake. If the bow of your boat pitches down far enough while airborne, upon water contact it may penetrate under the water surface and submarine for an instant. -
Page 42: Bottom Of Boat
Section 3 - On The Water Bottom of Boat To maintain maximum speed, ensure that the boat bottom is: • Clean, free of barnacles and marine growth. • Free of distortion, nearly flat where it contacts water. • Straight and smooth, fore and aft. Marine vegetation may accumulate when the boat is docked. -
Page 43: Engine Break-In
Section 3 - On The Water Operate the engine in gear for three minutes at each of the following: 1800 RPM, 3000 RPM, and maximum rated full throttle RPM. Engine Break‑In 20-Hour Break-In Period IMPORTANT: The first 20 hours of operation are considered to be the engine break‑in period. Correct break‑in is essential to obtain minimum oil consumption and maximum engine performance. - Page 44 Section 3 - On The Water Notes: Page 36 90-8M0070920 AUGUST 2012...
-
Page 45: Section 4 - Specifications
Section 4 - Specifications Section 4 - Specifications Table of Contents Fuel Requirements............... 38 Engine Specifications............39 Nonferrous Metals and the Fuel System ...... 38 Fluid Specifications............... 40 Winter Operation and Biodiesel ........38 Engine................40 Diesel Fuel in Cold Weather..........38 Transmission.............. -
Page 46: Fuel Requirements
Section 4 - Specifications Fuel Requirements WARNING Failure to comply with regulations can result in injury from fire or explosion. Electrical system components on this engine are not rated as external ignition–protected (EIP). Do not store or use gasoline on boats equipped with these engines, unless provisions have been made to exclude gasoline vapors from the engine compartment (REF: 33 CFR). -
Page 47: Engine Oil
Section 4 - Specifications The coolant, if not premixed, should be mixed before being added to the closed‑cooling system. Additives and inhibitors introduced into acceptable coolant solutions will form a protective film on the internal passages and provide protection against internal cooling system erosion. -
Page 48: Fluid Specifications
Section 4 - Specifications Description Specification Electrical system 12‑volt negative (–) ground Battery 12 vdc, 520 CCA Alternator 120 A Fluid Specifications IMPORTANT: All capacities are approximate fluid measures. Engine IMPORTANT: It may be necessary to adjust oil levels depending on installation angle and cooling systems (heat exchanger and fluid lines). - Page 49 Section 5 - Maintenance Section 5 - Maintenance Table of Contents Owner and Operator Responsibilities........42 Air Filter................53 Dealer Responsibilities............42 Removal ............... 53 Maintenance................. 42 Inspection and Cleaning ..........54 Replacement Parts Warning..........43 Installation ..............54 Engine Components............. 43 Water‑Separating Fine Element Fuel Filter......
-
Page 50: Owner And Operator Responsibilities
Section 5 - Maintenance Owner and Operator Responsibilities It is the operator's responsibility to perform all safety checks, to ensure that all lubrication and maintenance instructions are complied with for safe operation, and to return the unit to a Mercury Diesel authorized repair facility for a periodic checkup. Normal maintenance service and replacement parts are the responsibility of the owner or operator and, as such, are not considered defects in workmanship or material within the terms of the warranty. -
Page 51: Replacement Parts Warning
Section 5 - Maintenance Replacement Parts Warning WARNING Avoid fire or explosion hazard. Electrical, ignition, and fuel system components on Mercury Marine products comply with federal and international standards to minimize risk of fire or explosion. Do not use replacement electrical or fuel system components that do not comply with these standards. -
Page 52: Inspection
Section 5 - Maintenance 50709 Oil extraction pump button Emergency stop switch Engine oil dipstick Coolant reservoir cap Ribbed V‑belt (hidden) Alternator Engine oil filler cap Oil filter (hidden) Air filter Fuel injection pump drive belt (hidden) NOTE: The fuel injection pump drive belt is located at the rear of the engine and is protected by a cover. Refer to your Mercury Diesel authorized repair facility for servicing. -
Page 53: Each Day Start
Section 5 - Maintenance • Verify charge, connections, and condition of the battery. Charge or replace the battery as necessary. • Verify all fluid and lubricant levels and adjust them as necessary. • Inspect the anodes and replace them if they are 50% eroded. Each Day Start •... -
Page 54: Every 500 Hours Or 5 Years (Whichever Occurs First)
Section 5 - Maintenance • Inspect the seawater pump and change the impeller as necessary. • Inspect the anodes and replace them if they are 50% eroded. • Verify the gauges and the wiring connections are secure. Every 500 Hours or 5 Years (Whichever Occurs First) The following item is to be completed at this interval, in addition to the Once a Year or Every 200 Operating Hours interval. - Page 55 Section 5 - Maintenance Date Maintenance Performed Engine Hours 90-8M0070920 AUGUST 2012 Page 47...
-
Page 56: Engine Oil
Section 5 - Maintenance Engine Oil NOTICE Discharge of oil, coolant, or other engine/drive fluids into the environment is restricted by law. Use caution not to spill oil, coolant, or other fluids into the environment when using or servicing your boat. Be aware of the local restrictions governing the disposal or recycling of waste, and contain and dispose of fluids as required. -
Page 57: Changing Oil And Filter
Section 5 - Maintenance Changing Oil and Filter Refer to the Maintenance Schedule for the change interval. You should change the engine oil before placing the boat in storage. IMPORTANT: Change the engine oil when the engine is warm from operation. Warm oil flows more freely, carrying away more impurities. -
Page 58: Zf Marine Transmission Fluid
Section 5 - Maintenance Place a suitable container under the oil filter housing to contain any oil leakage that may occur. Use an appropriate socket to loosen the oil filter protective cap. 10. Remove the protective cap and filter element. Oil filter and housing Protective cap O‑ring (large) -
Page 59: Add Fluid
Section 5 - Maintenance IMPORTANT: To accurately check the fluid level, operate the engine at 1500 RPM for two minutes immediately before checking the level. Start the engine and operate at 1500 RPM for two minutes to fill all the hydraulic circuits. Stop the engine and quickly check the fluid level with the dipstick resting on the top of the threaded hole. - Page 60 Section 5 - Maintenance Pump the fluid from the housing into a suitable container. Dispose of the fluid properly. Suction pipe Suction pump 13165 Remove and discard the filter element and the O‑rings. Coat the new O‑rings with transmission fluid. Install the new O‑rings and filter element.
-
Page 61: Engine Coolant
Section 5 - Maintenance Engine Coolant CAUTION A sudden loss of pressure can cause hot coolant to boil and discharge violently resulting in serious injury from burns. Allow the engine to cool down before removing the coolant pressure cap. Coolant minimum level ("min" mark) Coolant maximum level 50698 For proper engine operation, the coolant must always be maintained at the correct level within the closed‑cooling system. -
Page 62: Inspection And Cleaning
Section 5 - Maintenance Remove the rubber side covers from the air filter element. Air filter mounting Crankcase ventilation hoses Small clamps Large clamps Tension springs Rubber side covers 50470 Inspection and Cleaning NOTICE Do not use fuel, thinner, or other cleaning agents for cleaning the air filter element. Use only the recommended products in the cleaning kit. -
Page 63: Draining
Section 5 - Maintenance The engine mounted water‑separating fine element fuel filter is equipped with a water‑in‑fuel sensor to alert the operator when water is present in the filter. This filter needs to be replaced at specified intervals or whenever water is detected in the fuel, whichever occurs first. -
Page 64: Filling
Section 5 - Maintenance Disconnect the water‑in‑fuel sensor from the wiring harness. Water-in-fuel sensor and O-ring O‑ring Water‑in‑fuel sensor 50546 Remove the water‑in‑fuel sensor and O‑ring from the filter. Drain the fuel from the filter into an appropriate container. Remove the water‑separating fine element fuel filter. Clean the sealing surface of the fuel filter bracket. Remove the shipping plug or drain plug from the bottom of the new fuel filter, if equipped. -
Page 65: Fuel Prefilter
Section 5 - Maintenance Loosen the bleed screw on top of the fuel filter bracket. 50555 Bleed screw location IMPORTANT: The fuel delivery pump is equipped with a primer lever to assist in filling the fuel filter or fuel system. The primer lever of the fuel delivery pump can be moved up and down repeatedly in the event that the hand pump and primer plunger on the fuel filter bracket is not used to fill the system. -
Page 66: Replacing
Section 5 - Maintenance Open the drain valve on the bottom of the filter. Spring cassette Filter cover Screw (4) Washer (4) Bleed screw Filter element Filter base Drain valve 50566 Drain the filter until empty. Close the drain valve by turning it clockwise and hand‑tighten. Fill the new fuel filter with clean diesel fuel. -
Page 67: Purging The Fuel System
Section 5 - Maintenance Purging the Fuel System WARNING The fuel injection pump generates pressure in excess of 13790 kPa (2000 psi), which is high enough to penetrate or cut the skin. Do not use your fingers to feel for fuel leaks and wear personal protective equipment when servicing the fuel system. NOTE: It is possible that the engine will not start if the fuel system has not been completely purged of air. -
Page 68: Flushing And Draining The Seawater System
Section 5 - Maintenance Description lb‑in. lb‑ft Seawater pump cover screws 35.4 – 10. Open the seacock. 11. Start the engine and check the cooling system for leaks. Flushing and Draining the Seawater System Close the seacock. Open and clean the seawater filter. Fill the seawater filter with fresh water and operate the engine at idle. -
Page 69: Cleaning The Seawater Strainer, If Equipped
Section 5 - Maintenance Cleaning the Seawater Strainer, if Equipped NOTICE An open seawater strainer or seacock during some service or maintenance procedures can introduce water into the boat, causing damage or sinking the boat. Always close the water supply from the seawater pump, water inlet, or seacock when performing service or maintenance on the cooling system. -
Page 70: Sacrificial Anode
Section 5 - Maintenance Sacrificial Anode The sacrificial anode in the cooling system must be checked as specified by the maintenance schedule. The anode is located at the back of the intercooler. Sacrificial anode Length of a new anode = 20 mm (0.79 in.) Back of the intercooler 50723... -
Page 71: Drive Belt Failure Identification
Section 5 - Maintenance Drive Belt Failure Identification Appearance Description Cause Solution Replace the belt and The belt is in contact with an Abrasion inspect its route for Each side of the belt appears object. This can be caused by contact with another shiny or glazed. -
Page 72: Battery
Section 5 - Maintenance Appearance Description Cause Solution Uneven rib wear Replace the belt and The belt shows damage to the A foreign object in the pulley can inspect all pulleys for side with the possibility of cause uneven wear and cut into foreign objects or breaks in the tensile cord or the belt. -
Page 73: Battery Isolators
Section 5 - Maintenance Battery Isolators Isolators can be used to charge an auxiliary battery used for powering accessories in the boat. They should not be used to charge the battery of another engine in the boat unless the type of isolator is specifically designed for this purpose. Generators The generator's battery should be considered another engine's battery. - Page 74 Section 5 - Maintenance Notes: Page 66 90-8M0070920 AUGUST 2012...
-
Page 75: Section 6 - Storage
Section 6 - Storage Section 6 - Storage Table of Contents Cold Weather or Extended Storage........68 Battery Storage..............68 Preparing Your Power Package for Seasonal or Recommissioning the Power Package......... 68 Extended Storage............68 90-8M0070920 AUGUST 2012 Page 67... -
Page 76: Cold Weather Or Extended Storage
Section 6 - Storage Cold Weather or Extended Storage IMPORTANT: Mercury Diesel strongly recommends that this service should be performed by an authorized Mercury Diesel dealer. Damage caused by freezing temperatures is not covered by the Mercury Diesel Limited Warranty. NOTICE Water trapped in the seawater section of the cooling system can cause corrosion or freeze damage. -
Page 77: Section 7 - Troubleshooting
Section 7 - Troubleshooting Section 7 - Troubleshooting Table of Contents Troubleshooting..............70 No Fuel or Faulty Fuel Supply........70 Troubleshooting Charts............70 Excessive Engine Temperature........70 Engine Will Not Start, Starter Does Not Turn....70 90-8M0070920 AUGUST 2012 Page 69... -
Page 78: Troubleshooting
Section 7 - Troubleshooting Troubleshooting The broad network of Mercury Diesel service partners with trained professionals, modern equipment, and all of the required special tools is available to you for the care and service of your Mercury Diesel engine. If repairs must be made, the engine should be brought to an authorized Mercury Diesel repair facility. -
Page 79: Section 8 - Customer Assistance Information
Section 8 - Customer Assistance Information Section 8 - Customer Assistance Information Table of Contents Owner Service Assistance............ 72 Muut kielet ..............73 Local Repair Service ............ 72 Autres langues .............. 73 Service Away From Home ..........72 Andere Sprachen ............73 Stolen Power Package .......... -
Page 80: Owner Service Assistance
Section 8 - Customer Assistance Information Owner Service Assistance Local Repair Service Always return your Mercury Diesel powered boat to your authorized dealer for service. The dealer has factory–trained mechanics, special tools, equipment, and the factory authorized parts and accessories to properly service the engine. If you need further assistance, contact us at 920‑929‑5040. -
Page 81: Customer Service Literature
Section 8 - Customer Assistance Information Customer Service Literature English Language English language publications are available from: Mercury Marine Attn: Publications Department W6250 West Pioneer Road P.O. Box 1939 Fond du Lac, WI 54935-1939 Outside the United States and Canada, contact the nearest Mercury Marine or Marine Power International Service Center for further information. -
Page 82: Otros Idiomas
Section 8 - Customer Assistance Information Otros idiomas Para obtener un Manual de operación y mantenimiento en otro idioma, póngase en contacto con el centro de servicio más cercano de Mercury Marine o Marine Power International para recibir información. Con su conjunto motriz se entrega una lista de los números de pieza para los otros idiomas. - Page 83 Section 8 - Customer Assistance Information Quantity Item Stock Number Price Total Total Due 90-8M0070920 AUGUST 2012 Page 75...
Need help?
Do you have a question about the SDI 1.9L Series and is the answer not in the manual?
Questions and answers