Advertisement
Advertisement
Table of Contents

Related Manuals for TRONXY D01


Summary of Contents for TRONXY D01
- Page 2 Attention Note: Please make sure the voltage is consistent with the local voltage before printing.If not, please adjust it (110V- 220V) Please check if the all the items are included in the packing list before installing the printer . If you have any questions, please contact customer service.
- Page 3 2. Packing list ………………………………… 3 3. Machine details ……………………………… 4 4. Installation ………………………………… 5 5. Wiring connection …………………………… 7 6. Structure debug ……………………………… 8 7. Operation & Print ………………………… 9 8. Failure cause analysis ………………………15 Service email :Support@tronxy.com Tronxy Support FaceBook...
-
Page 4: Print Parameters
PLA、ABS Temp parameters: Print environment : 8-40℃ : Nozzle temp 275℃(MAX) Power supply: AC 110/220V 50/60Hz DC 24V/360W Software: : Slicer Tronxy、Cura、Simplify3D : Input format .stl、.obj : Output format .gcode : Connection SD card、USB cable Machine parameters: : Machine size 380*400*405mm :... -
Page 5: Package List
2、package list Above frame Base Aluminum Polished rod Screw Flange linear Hotbed Lattice glass TITAN Extruder Filament kits holder bearing module Filament tube Filament Power line USB cable Shovel Aluminum Reader Quick Clips Print head (with SD Card) cover connector Screws Tools Notes:Please check the package list after receiving the... -
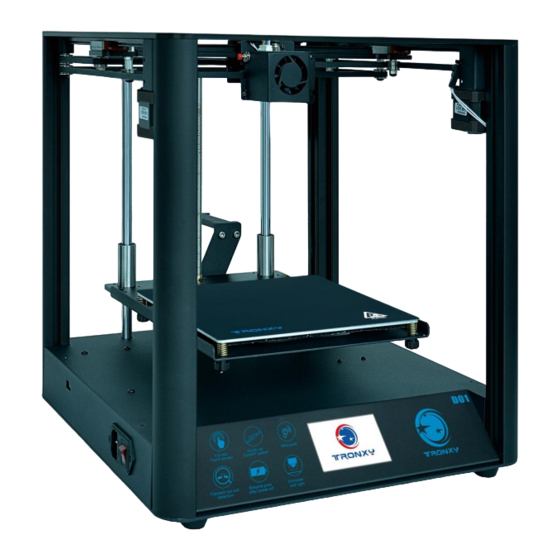
Page 6: Machine Structure
3、Machine Structure Name Name Name Number Number Number Flange linear Above aluminum Pint head bearing X axis motor Y axis motor Coupling 3030R aluminum Hotbed Filament holder Filament Base Hand screw nut sensor 110V-220V 3.5 inches touch screen TITAN Extruder Module Trasfer switch Power switch polished rod... -
Page 7: Installation Steps
4、Installation steps Install base . aluminum 、 Install flange linear bearing polished rod 、screws 1、Firm the base and Aluminum using the 1、Using four HM4*8 screws to install the four HM8*10 screws Flange bearing into the hotbed module 2、Firm the base and polished rod using two KM4*12 screws 3、Please loose the coupling screws then insert the screws ,finally, close the... - Page 8 Install TITAN Extruder Install filament module holder 1、Install the TITAN extruder module into 1、Firm the filament holder into the base the above frame using the two using the two HM4*8 screws KM3*8 screws Install the filament pipe 1、Connect the filament guide tube into the filament pipe of the print head and connect the other side of it into the Titan extruder Then we finished the installation.
-
Page 9: Wiring Diagram
5、 Wiring diagram Z axis limit switch E motor cable Filament sensor Hotbed lines and thermistor wire 16P Transfer cable Y axis limit switch Y axis motor wores X axis motor cable Note:The X and Y axis wires are inserted into aluminum and sealed them using the profile cover . - Page 10 6、Structure adjustment Slide the print heat to check if the movement is smooth 。Check if the belt is loose , if yes , tighten it and locking the screws . If the whole frame is loose we can tighten the screws directly . Make sure the printer is in a stable situation when beginning printing.
- Page 11 7. Operation & Print...
- Page 12 Manual leveling: Click the four points of ABCD (see the picture ), the print head will move to the corresponding position, and then adjust the leveling nut M, to ensure the space between the nozzle and the platform is a piece of A4 paper.
- Page 13 Load and unload filaments: 23/0 Click 23/199 After waiting for temperature up to 180 ℃, filament go through from the filament detection, extruder and feed pipe to the nozzle until the filaments are squeezed , as the following picture shows : Feed pipe Straighten Filament...
- Page 14 1. Installation Find out slice software in SD card“TronxyInstall.exe ”click twice , Then follow these steps to complete the installation.
- Page 15 2. How to use slice software ① Type setting: follow the steps below to complete the setting. ① ③ ② ④ ⑤ ⑥...
- Page 16 ② Parameter setting:(The following figure gives the reference value, according to their own needs can be modified) Some parameters are set for reference: Layer thickness : 0.1-0.3mm : PLA - 200 ℃ ABS - 240 ℃ Print temp ABS - 80 ℃ Heatbed temp :...
- Page 17 8. Failure cause analysis 1. Machine cannot start 1)Check the power line and other wires are connected well or not . 2)Check whether the supply voltage suits the local standard. 3)Check whether the screen or power supply is damaged and replace it in time.
- Page 18 5. The model is not easy to take off 1)Try to heat the hot bed to 50-70 ℃ take off it by the shovel . 2) It is recommended to buy TRONXY magnetic stickers. 6. Can‘t heat it up 1)Check the heating rod and thermistor for poor contact or damage.
- Page 19 9. Model dislocation and fault 1)Nozzle feeding not smoothly, please clean the nozzle or replace the nozzle 2)Check that if the printing speed is too fast 3)The quality of filaments is poor, please replace with new filaments 10. Abnormal sound and vibration of filaments feeding motor 1)Please check whether the nozzle is blocked 2)The nozzle feeding is not smooth, please clean the nozzle...
Need help?
Do you have a question about the D01 and is the answer not in the manual?
Questions and answers