Table of Contents
Advertisement
Quick Links
Owner's Manual
NetDirector
Rack-Mount HDMI/USB
KVM Switch with Audio
and Peripheral Sharing
Models: B024-HU08, B024-HU16
WARRANTY REGISTRATION
Register your product today and be
automatically entered to win an ISOBAR
surge protector in our monthly drawing!
tripplite.com/warranty
1111 W. 35th Street, Chicago, IL 60609 USA • tripplite.com/support
8/16-Port 1U
®
Copyright © 2019 Tripp Lite. All rights reserved.
1
Advertisement
Table of Contents

Related Manuals for Tripp Lite NetDirector B024-HU08


Summary of Contents for Tripp Lite NetDirector B024-HU08
- Page 1 Owner’s Manual NetDirector 8/16-Port 1U ® Rack-Mount HDMI/USB KVM Switch with Audio and Peripheral Sharing Models: B024-HU08, B024-HU16 WARRANTY REGISTRATION Register your product today and be automatically entered to win an ISOBAR surge protector in our monthly drawing! tripplite.com/warranty 1111 W. 35th Street, Chicago, IL 60609 USA • tripplite.com/support Copyright ©...
-
Page 2: Table Of Contents
Table of Contents 1. Product Features 11. Hot Key Operation 11.1 Hot Key Commands 2. Package Includes 11.2 Hot Key Setting Mode 3. Safety Instructions 11.2.1 Invoking HSM 11.3 Select the Active Port 4. System Requirements 11.4 Auto Scan Mode 4.1 Console 11.4.1 Invoking Auto Scan 4.2 Computers... -
Page 3: Product Features
1. Product Features • Control up to eight (B024-HU08) or 16 (B024-HU16) HDMI computers and two USB 2.0 peripheral devices using one centralized monitor, keyboard and mouse. • Cascade up to three levels with the B024-HU08 (control up to 512 computers) or two levels with the B024-HU16 (control up to 256 computers). -
Page 4: Safety Instructions
3. Safety Instructions • Read all instructions and save for future reference. • Follow all warnings and instructions marked on the device. • Do not place the device on any unstable surface (cart, stand, table, etc.); if the device falls, serious damage will result. •... -
Page 5: System Requirements
4. System Requirements 4.1 Console • HDMI-compliant monitor • USB Mouse/Keyboard • Speakers (Optional) 4.2 Computers • Source with an HDMI port • USB Type-A port • Speaker ports (Optional) 4.3 Supported Operating Systems: Operating System Version Windows 2000 and higher OS 9.0 and higher Linux Kernal... -
Page 6: Introduction
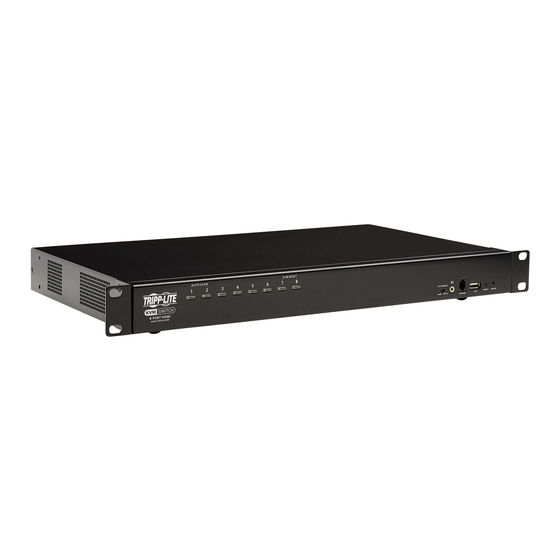
5. Introduction 5.1 Front Panel Model B024-HU08 Model B024-HU16 Component Description Port Selection Pushbuttons For manual port selection (for details, see section 9.2 Port Selection): • Press a port selection pushbutton for less than two seconds to bring the KVM, USB hub, and audio focus to the computer attached to its corresponding port. -
Page 7: Rear Panel
5. Introduction 5.2 Rear Panel (Model B024-HU08 shown) Component Description Power Jack The power adapter cable connects here. Console Port Selection The cables from the console HDMI monitor, USB keyboard, USB mouse and speakers connect here. Each connector is marked with an appropriate icon to indicate the connector type. Grounding Terminal Connect a grounding wire to ground the switch (optional). -
Page 8: Rack-Mount Installation
6. Rack-Mount Installation 6.1 Rack Mounting – Front 1. Remove screws, one each from the left and right sides near the front of the switch. 2. Use the M3 x 8 Phillips hex head screws supplied with the rack mounting kit to screw the rack mounting brackets into the sides near the front of the unit. - Page 9 6. Rack-Mount Installation 3. Place the KVM switch in the rack. Position it so that the holes in the mounting brackets line up with the holes in the rack. Secure the mounting brackets to the front of the rack.
-
Page 10: Rack Mounting - Rear
6. Rack-Mount Installation 6.2 Rack Mounting - Rear 1. Remove the screws, one each from the left and right sides near the rear of the switch. 2. Use the M3 x 8 Phillips hex head screws supplied with the rack-mounting kit to screw the brackets into the sides near the rear of the unit. - Page 11 6. Rack-Mount Installation 3. Place the KVM switch in the rack. Position it so the holes in the mounting brackets line up with the holes in the rack. Secure the mounting brackets to the rear of the rack. Note – Before beginning installation: •...
-
Page 12: Installation
7. Installation 7.1 Single-Level Installation To set up single-level installation, refer to the installation diagram on the following page (the numbers in the diagram correspond to the steps below) and perform the following: 1. Plug a USB keyboard and a USB mouse in the USB console ports located on the unit’s rear panel. 2. - Page 13 7. Installation USB HDMI KVM Cable Set H D M USB HDMI KVM Cable Set...
-
Page 14: Cascading
7. Installation 7.2 Cascading 7.2.1 Two-Level Installation To control even more computers, additional B024-HU08 or B024-HU16 units can be cascaded from the KVM ports of the first-level unit. The cascaded B024-HUXX KVMs that connect back to the first-level unit are considered second-level units. As many as 64 (B024-HU08) or 256 (B024-HU16) computers can be controlled in a complete two-level installation. - Page 15 7. Installation Two-Level Installation Diagram USB HDMI KVM Cable Set...
-
Page 16: Three-Level Installation
7. Installation 7.2.2 Three-Level Installation – B024-HU08 Only The procedures for setting up a three-level installation are the same as for a two-level installation. Using the B024-HU08 in a three-level setup, as many as 512 computers can be controlled. Notes: •... - Page 17 7. Installation Three-Level Installation Diagram USB HDMI KVM Cable Set USB HDMI KVM Cable Set...
-
Page 18: Multi-Display Installation
8. Multi-Display Installation The B024-HU08 / B024-HU16 include a multi-display feature to support two, three, four or up to eight units in a dual/triple/quad-display/multi- display installation to control up to seven (B024-HU08) or fifteen (B024-HU16) computers at once. This installation requires slightly different cabling than the standard cascade and offers an extra level of switching flexibility for multiple-monitor installations where each computer is fitted with multiple video cards. - Page 19 8. Multi-Display Installation Multi-Display Installation Diagram Computers with 2/3/4 video inputs First Switch HDMI cables USB Type B to Type A cable Second Switch Third / Fourth Stage Units...
-
Page 20: Grouping Ports Into "Vertical" Channels
8. Multi-Display Installation 8.2 Grouping Ports into “Vertical” Channels Once the cables have been connected and multi-display mode has been selected in the on-screen display, the B024-HU08 / B024-HU16 auto- detects the channels and displaying modes. Users can then assign channel numbers as port names (the channels are represented by the vertical columns in the diagram below). -
Page 21: Operation
9. Operation 9.1 Hot Plugging The B024-HU08 / B024-HU16 supports hot plugging – components can be removed and added back into the installation by unplugging their cables from the ports without the need to shut the unit down. In order for hot plugging to work properly, the procedures described below must be followed: 9.1.1 Hot Plugging KVM Ports In order for the OSD menus to correspond to KVM port changes, you must manually reconfigure the OSD to reflect the new port information. -
Page 22: On-Screen Display (Osd) Operation
10. On-Screen Display (OSD) Operation 10.1 OSD Overview The on-screen display (OSD) is a mouse- and keyboard-enabled, menu driven method to handle computer control and switching operations. All procedures start from the OSD main screen. 10.1.1 Manufacturing Number The “MFG Number” (Manufacturing Number) is an internal serial number used by Tripp Lite’s technical support staff to identify products. This number does not affect a product’s warranty. -
Page 23: Osd Main Screen Headings
10. On-Screen Display (OSD) Operation 10.1.5 OSD Main Screen Headings Table 10-1 Header Description This column lists the port ID numbers for all the KVM ports on the installation. The simplest method to access a particular computer is move the highlight bar to it, then press [Enter]. If a port has been selected for quick view scanning (see Table 10-4 SET QUICK VIEW PORTS), an arrowhead displays in this column. -
Page 24: F2: List
10. On-Screen Display (OSD) Operation 10.2.2 F2: LIST This function lets you broaden or narrow the scope of which ports the OSD displays on the main screen. The submenu choices and their meanings are given in table 10-2. Table 10-2 Selection Function Lists all of the ports on the installation that have been set accessible by the administrator for the current... -
Page 25: F3: Set
10. On-Screen Display (OSD) Operation 10.2.3 F3: SET This function allows the administrator and each user to set up his own working environment. A separate profile for each is stored by the OSD and is activated according to the username that was provided during login. To change a setting: 1. -
Page 26: F4: Adm
10. On-Screen Display (OSD) Operation 10.2.4 F4: ADM F4 is an administrator-only function. It allows the administrator to configure and control the overall operation of the OSD. To change a setting, double-click it or use the up and down arrow keys to move the highlight bar to it, then press [Enter]. When an item is selected, a submenu with further choices to select from appears. - Page 27 10. On-Screen Display (OSD) Operation SET QUICK VIEW PORTS This function lets the administrator select which ports to include as quick view ports. • To select/deselect a port as a quick view port, double-click the port, or use the navigation keys to move the highlight bar to it, then press [Spacebar].
-
Page 28: F5: Skp
10. On-Screen Display (OSD) Operation 10.2.5 F5: SKP Clicking the F5 field or pressing [F5] invokes Skip (SKP) mode. This function enables you to easily skip backward or forward – switching the console focus from the currently active computer port to the previous or next accessible one. Enable mouse emulation for Skip mode to work (see section 11.11.3 Mouse Emulation Control). -
Page 29: F8: Lout
10. On-Screen Display (OSD) Operation 10.2.8 F8: LOUT Clicking the F8 field, or pressing [F8] logs you out of OSD control of the computers, and blanks the console screen. This is different from simply pressing [Esc] when you are at the main screen to deactivate the OSD. With this function, you must log in all over again to regain access to the OSD, whereas with [Esc], simply tap the OSD hot key to reenter the OSD. -
Page 30: Hot Key Operation
11. Hot Key Operation 11.1 Hot Key Commands Hot key commands enable switching between KVM ports directly from the keyboard. The B024-HU08 / B024-HU16 provides the following hot key command features: • Selecting the Active Port • Auto Scan Mode Switching •... -
Page 31: Auto Scan Mode
11. Hot Key Operation 11.4 Auto Scan Mode Auto Scan automatically switches, at regular intervals, among all the KVM ports that have been set as accessible under Scan–Skip Mode, so that their activity can be monitored automatically. See Table 10-3 Scan–Skip Mode for more information. 11.4.1 Invoking Auto Scan To start Auto Scan, key in the following hot key combination: 1. -
Page 32: Keyboard/Mouse Reset
11. Hot Key Operation 11.6 Keyboard/Mouse Reset If the keyboard or mouse cease to function on the computer connected to the currently selected port, you can perform a keyboard/mouse reset on the computer. This function is essentially the same as unplugging and replugging they keyboard and mouse on the target computer. To perform a computer keyboard/mouse reset, key in the following hot key combination: 1. -
Page 33: Restore Default Values
11. Hot Key Operation 11.11 Restore Default Values This administrator-only hot key restores the KVM switch’s default values. To restore default values, key in the following hot key combination: 1. Invoke HSM with the [Num Lock] + [-] or [Ctrl] + [F12] combination. 2. -
Page 34: Hsm Summary Table
11. Hot Key Operation 11.12 HSM Summary Table Invoke HSM with the [Num Lock] + [-] or [Ctrl] + [F12] combination, then key in one of the following keys to perform the corresponding function: Function [PN] [Enter] Switches KVM, Audio, and USB focus directly to the computer that corresponds to that port ID. (PN = port number) [PN]* [K] [Enter] Switches KVM focus only directly to the computer that corresponds to that port ID. -
Page 35: Keyboard Emulation
12. Keyboard Emulation 12.1 Mac Keyboard A PC-compatible (101/104 key) keyboard can emulate the functions of a Mac keyboard. The emulation mappings are shown in the table below: PC Keyboard Mac Keyboard [Shift] Shift [Ctrl] Ctrl [Ctrl] [1] [Ctrl] [2] [Ctrl] [3] [Ctrl] [4] [Alt]... -
Page 36: Sun Keyboard
12. Keyboard Emulation 12.2 Sun Keyboard A PC-compatible (101/104 key) keyboard can emulate the functions of a Sun keyboard when the Control key (Ctrl) is used in conjunction with other keys. The corresponding functions are shown in the table below: PC Keyboard Sun Keyboard [Ctrl] [T]... -
Page 37: Firmware Management Utility
13. Firmware Management Utility 13.1 Introduction The purpose of the Windows-based Firmware Management Utility is to provide an automated process for upgrading all B024-HU08 / B024-HU16 switches in an installation. The program comes as part of a Firmware Upgrade Package that is specific for each device. As new firmware versions become available, new firmware upgrade packages are posted on our website. -
Page 38: Starting The Upgrade
13. Firmware Management Utility 13.3 Starting the Upgrade To upgrade the firmware: 1. Run the downloaded firmware upgrade package file either by double-clicking the file icon, or by opening a command line and entering the full path to it. The Firmware Upgrade Utility welcome screen appears: Note: The screens shown in this section are for reference only. -
Page 39: Upgrade Succeeded
13. Firmware Management Utility 4. Click [Next] to perform the upgrade. If you enabled Check Firmware Version, the Utility compares the device’s firmware level with that of the upgrade files. If it finds that the device’s version is higher than the upgrade version, it brings up a dialog box informing you of the situation and gives you the option to continue or cancel. If you did not enable Check Firmware Version, the Utility installs the upgrade files without checking whether they are a higher level, or not. -
Page 40: Firmware Upgrade Recovery
13. Firmware Management Utility 13.6 Firmware Upgrade Recovery There are three conditions that call for firmware upgrade recovery: • A firmware upgrade is manually aborted • The mainboard firmware upgrade fails • The I/O firmware upgrade fails To perform a firmware upgrade recovery, perform the following: 1. -
Page 41: Restore
13. Firmware Management Utility 13.7.2 Restore Follow these steps to restore a backup file from a local computer: 1. Perform steps 1 to 3 of section 13.7.1 Backup. 2. Click Restore to recover an OSD configuration stored in the local computer. If you have previously set a password for this feature, enter the password in the provided field before clicking Restore. -
Page 42: Appendix
14. Appendix 14.1 Factory Default Hot Keys and Settings Setting Hot Key Default OSD Hot Key (Default / Alternate) [Scroll Lock] [Scroll Lock] Invoking HSM [Num Lock] [-] Auto Scan Interval [A] [Enter] 5 seconds Mouse Emulation Enabled Port Switching Keys (on / Off) [X] [Enter] Enabled Beeper... -
Page 43: Warranty & Product Registration
15. Warranty & Product Registration 2-YEAR LIMITED WARRANTY TRIPP LITE warrants its products to be free from defects in materials and workmanship for a period of two (2) years from the date of initial purchase. TRIPP LITE’s obligation under this warranty is limited to repairing or replacing (at its sole option) any such defective products. To obtain service under this warranty, you must obtain a Returned Material Authorization (RMA) number from TRIPP LITE or an authorized TRIPP LITE service center. - Page 44 1111 W. 35th Street, Chicago, IL 60609 USA • tripplite.com/support 20-01-047 93-3B7A_RevB...
Need help?
Do you have a question about the NetDirector B024-HU08 and is the answer not in the manual?
Questions and answers