Advertisement
Quick Links
ENGLISH
Introduction
IIIIIIIIIIIIIIIIIIIIIIIIIIIIIIIIIIIIIIIIIIIIIIIIIIIIIIIIIIIIIIIIIIIIIIIIIIIIIIIIIIIIIIIIIIIIIIIIIIIIIIIIIIIIIIIIIIIIIIIIIIIIIIIIIIIIIIIIIIIIIIIIIIIIIIIIIIIIIIIIIIIIIIIIIIIIIIIIIIIIIIIIIIIIIIIIIIIIIIIIII
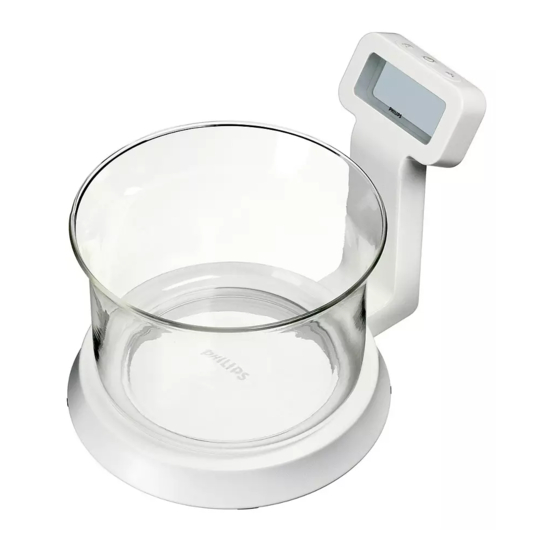
Dear customer, congratulations on acquiring your new Philips Kitchen scales.
Your new Philips kitchen scales feature a glass bowl and a fascinating transparent
glass display, which makes the text displayed seem to float in mid-air.
Important
IIIIIIIIIIIIIIIIIIIIIIIIIIIIIIIIIIIIIIIIIIIIIIIIIIIIIIIIIIIIIIIIIIIIIIIIIIIIIIIIIIIIIIIIIIIIIIIIIIIIIIIIIIIIIIIIIIIIIIIIIIIIIIIIIIIIIIIIIIIIIIIIIIIIIIIIIIIIIIIIIIIIIIIIIIIIIIIIIIIIIIIIIIIIIIIIIIIIIIIIIIIIIIIIIII
Please read these instructions for use carefully before using the scales and save
them for future reference.
◗
Make sure that not more than the weight of the glass bowl is stored on the
weighing plate when the scales are not in use.
◗
Do not allow water (or any other liquid) to enter the base of the scales.
◗
Always place the scales on a solid, smooth and horizontal surface when you use it.
◗
A microwave oven or a mobile phone may cause interference, which can lead
to unreliable weighing results.
◗
Use the kitchen scales at a safe distance of at least 1.5 metres from a working
microwave oven, or switch the microwave oven off (fig. 2).
◗
A mobile phone that is switched on must be kept at a safe distance of at least
2 metres from the scales, or it must be switched off (fig. 3).
General Description (fig. 1)
IIIIIIIIIIIIIIIIIIIIIIIIIIIIIIIIIIIIIIIIIIIIIIIIIIIIIIIIIIIIIIIIIIIIIIIIIIIIIIIIIIIIIIIIIIIIIIIIIIIIIIIIIIIIIIIIIIIIIIIIIIIIIIIIIIIIIIIIIIII
A
E
Bowl
g/oz measurement button
B
F
Weighing plate
On/Off button
C
G
Battery compartment
Reset button
D
Display
Performance
IIIIIIIIIIIIIIIIIIIIIIIIIIIIIIIIIIIIIIIIIIIIIIIIIIIIIIIIIIIIIIIIIIIIIIIIIIIIIIIIIIIIIIIIIIIIIIIIIIIIIIIIIIIIIIIIIIIIIIIIIIIIIIIIIIIIIIIIIIIIIIIIIIIIIIIIIIIIIIIIIIIIIIIIIIIIIIIIIIIIIIIIIIIIIIIIIIIIIIII
These high-performing kitchen scales can weigh up to 5kg (11 lb) in 1-gram
(1/8 oz) graduations.
Before first use
IIIIIIIIIIIIIIIIIIIIIIIIIIIIIIIIIIIIIIIIIIIIIIIIIIIIIIIIIIIIIIIIIIIIIIIIIIIIIIIIIIIIIIIIIIIIIIIIIIIIIIIIIIIIIIIIIIIIIIIIIIIIIIIIIIIIIIIIIIIIIIIIIIIIIIIIIIIIIIIIIIIIIIIIIIIIIIIIIIIIIIIIIIIIII
1
Remove the sticker from the display.
2
Please remove the plastic foil under the battery which can be found in the
battery compartment
Battery
IIIIIIIIIIIIIIIIIIIIIIIIIIIIIIIIIIIIIIIIIIIIIIIIIIIIIIIIIIIIIIIIIIIIIIIIIIIIIIIIIIIIIIIIIIIIIIIIIIIIIIIIIIIIIIIIIIIIIIIIIIIIIIIIIIIIIIIIIIIIIIIIIIIIIIIIIIIIIIIIIIIIIIIIIIIIIIIIIIIIIIIIIIIIIIIIIIIIIIIIIIIIIIIIIIIIIIIIIIIIII
The scales work on two 3V Lithium batteries on account of its long life and
environmental friendliness.
Fitting the batteries
1
Open the battery compartment (fig. 4).
2
Fit the batteries in the battery holder and close the battery compartment
(fig. 5).
Battery replacement
◗
Replace the batteries as soon as the battery symbol indication appears on the
display (fig. 6 ).
Batteries contain substances which may pollute the environment. Keep the old
batteries separate from normal household waste and dispose of it at an officially
assigned collection point.
Weighing
IIIIIIIIIIIIIIIIIIIIIIIIIIIIIIIIIIIIIIIIIIIIIIIIIIIIIIIIIIIIIIIIIIIIIIIIIIIIIIIIIIIIIIIIIIIIIIIIIIIIIIIIIIIIIIIIIIIIIIIIIIIIIIIIIIIIIIIIIIIIIIIIIIIIIIIIIIIIIIIIIIIIIIIIIIIIIIIIIIIIIIIIIIIIIIIIIIIIIIIIIIIIIIIIIIIIIII
Choose measurement system
In some countries, weights are measured in grams (g).This is known as the metric
system. In others, such as the UK and the US, ounces (oz) are used.This is called
the imperial system. By being able to select which measure is used, you can easily
follow any international recipe without having to convert weights yourself.
Using the metric system the scales indicate weight in 1 gram graduations from
2 gram onwards (d = 1 g). Using the imperial system the scales indicate weight in
1/8 oz graduations (d = 1/8 oz).
Buttons
The kitchen scales have three buttons:
∞
-
On/off button (
)
-
Conversion button (metric/imperial) (g/oz)
3
-
Reset button (setting the scales to "0") (
)
1
To turn the scales on, push the on/off button. After 2 seconds, the display will
read '0' . Pressing again the on/off button will switch the appliance off (fig. 7).
2
When the scales are turned on, push the conversion button to select
whether you want to weigh in grams or ounces (fig. 8).The scales are now
ready for use.
3
To weigh a number of different ingredients in the same bowl, use the reset
button every time you add another ingredient (fig. 9).
Weighing directly on the weighing plate.
1
Place the ingredient(s) to be weighed directly on the weighing plate (fig. 10).
The weight will be displayed immediately.
Weighing in the glass bowl
1
Put the empty bowl on the weighing plate (fig. 11).The display will show the
weight of the bowl.
3
2
Press reset button
.The display will read 0 again (fig. 12).
3
If the bowl is removed now from the weighing plate, the display shows the
minus weight of the bowl (fig. 13).
◗
The scales will automatically subtract the weight off the bowl from each
ingredient that is put in the bowl (fig. 14).
◗
The scales will keep on doing so until you set the display back to 0 by pressing
3
reset button
while the weighing plate is empty (fig. 15).
The bowl is microwave and oven proof.
NB: do not pour cold water into the bowl immediately after removing the bowl
from the oven.
Adding ingredients
◗
If you wish to add ingredients (e.g. 48 g) to a known quantity (e.g. 174 g), you
3
can save yourself some calculating by first pressing reset button
adding a new ingredient.This will set the display back to '0' again and the display
will then show how much of the new ingredient you are adding (fig. 16).
◗
Please note: If the weighing plate has been overloaded (more than 5 kilograms)
Err will become visible on the display (fig. 17).
Auto switch-off
In order to save battery power, the scales will automatically switch off after
3 minutes of non-use (fig. 18).
Full memory backup
◗
These scales have a memory function. If you have left the ingredients you have
just weighed on the weighing plate, but the auto-shut off took place, the
previously shown weight will be displayed again when you press the on/off
∞
button
(fig.19). Every time the scales are turned on, the latest selected
measurement system is displayed.
Cleaning
IIIIIIIIIIIIIIIIIIIIIIIIIIIIIIIIIIIIIIIIIIIIIIIIIIIIIIIIIIIIIIIIIIIIIIIIIIIIIIIIIIIIIIIIIIIIIIIIIIIIIIIIIIIIIIIIIIIIIIIIIIIIIIIIIIIIIIIIIIIIIIIIIIIIIIIIIIIIIIIIIIIIIIIIIIIIIIIIIIIIIIIIIIIIIIIIIIIIIIIIIIIIIIIIIIIIIIIIII
◗
You can clean the scales with a damp cloth and, if necessary, some detergent.
The bowl can be cleaned in the dishwasher.
Do not use abrasives, scourers, alcohol, etc. Never immerse the scales in water or
rinse them under the tap.
Replacement
IIIIIIIIIIIIIIIIIIIIIIIIIIIIIIIIIIIIIIIIIIIIIIIIIIIIIIIIIIIIIIIIIIIIIIIIIIIIIIIIIIIIIIIIIIIIIIIIIIIIIIIIIIIIIIIIIIIIIIIIIIIIIIIIIIIIIIIIIIIIIIIIIIIIIIIIIIIIIIIIIIIIIIIIIIIIIIIIIIIIIIIIIIIIIIIIIIIIIII
You can order an extra or replacement bowl from your dealer or Philips service
centre: typenumber HR3903.
Storage
IIIIIIIIIIIIIIIIIIIIIIIIIIIIIIIIIIIIIIIIIIIIIIIIIIIIIIIIIIIIIIIIIIIIIIIIIIIIIIIIIIIIIIIIIIIIIIIIIIIIIIIIIIIIIIIIIIIIIIIIIIIIIIIIIIIIIIIIIIIIIIIIIIIIIIIIIIIIIIIIIIIIIIIIIIIIIIIIIIIIIIIIIIIIIIIIIIIIIIIIIIIIIIIIIIIIIIIIIIIIII
Make sure that not more than the weight of the glass bowl is stored on the
weighing plate when the scales are not in use.
Environment
IIIIIIIIIIIIIIIIIIIIIIIIIIIIIIIIIIIIIIIIIIIIIIIIIIIIIIIIIIIIIIIIIIIIIIIIIIIIIIIIIIIIIIIIIIIIIIIIIIIIIIIIIIIIIIIIIIIIIIIIIIIIIIIIIIIIIIIIIIIIIIIIIIIIIIIIIIIIIIIIIIIIIIIIIIIIIIIIIIIIIIIIIIIIIIIIIIIIIIII
If you discard the appliance in due course, dispose of it in accordance with the
instructions given by your local authority.
Remove the batteries when you discard the appliance. Do not throw the batteries
away with the normal household waste, but hand them in at an official collection
point.You can also take the batteries to a Philips Service Centre, which will
dispose of them in an environmentally safe way.
Information & service
IIIIIIIIIIIIIIIIIIIIIIIIIIIIIIIIIIIIIIIIIIIIIIIIIIIIIIIIIIIIIIIIIIIIIIIIIIIIIIIIIIIIIIIIIIIIIIIIIIIIIIIIIIIIIIIIIIIIIIIIIIIIIIIIIIIIIIIIIIIIIIIIIIIIIIIIIIIIIIIIII
If you need information or if you have a problem, please visit the Philips Web site
at www.philips.com or contact the Philips Customer Care Centre in your
country (you will find its phone number in the worldwide guarantee leaflet). If
there is no Customer Care Centre in your country, turn to your local Philips
dealer or contact the Service Department of Philips Domestic Appliances and
Personal Care BV.
DEUTSH
Einleitung
IIIIIIIIIIIIIIIIIIIIIIIIIIIIIIIIIIIIIIIIIIIIIIIIIIIIIIIIIIIIIIIIIIIIIIIIIIIIIIIIIIIIIIIIIIIIIIIIIIIIIIIIIIIIIIIIIIIIIIIIIIIIIIIIIIIIIIIIIIIIIIIIIIIIIIIIIIIIIIIIIIIIIIIIIIIIIIIIIIIIIIIIIIIIIIIIIIIIIIIIIIIIIIIIIIII
Herzlichen Glückwunsch zu Ihrer neuen Philips Küchenwaage!
Ihre neue Philips Küchenwaage verfügt über eine Glasschüssel und ein
faszinierendes, transparentes Glas-Display; der angezeigte Text scheint in der Luft
zu schweben.
Wichtig
IIIIIIIIIIIIIIIIIIIIIIIIIIIIIIIIIIIIIIIIIIIIIIIIIIIIIIIIIIIIIIIIIIIIIIIIIIIIIIIIIIIIIIIIIIIIIIIIIIIIIIIIIIIIIIIIIIIIIIIIIIIIIIIIIIIIIIIIIIIIIIIIIIIIIIIIIIIIIIIIIIIIIIIIIIIIIIIIIIIIIIIIIIIIIIIIIIIIIIIIIIIIIIIIIIIIIIIIIIIII
Lesen Sie vor dem Gebrauch die Gebrauchsanleitung gründlich durch, und heben
Sie diese sorgfältig auf.
◗
Stellen Sie nichts Schwereres als die Glasschüssel auf der Waagschale ab, wenn
das Gerät nicht in Gebrauch ist.
◗
Achten Sie darauf, dass kein Wasser oder andere Flüssigkeiten in das Gerät
eindringen können.
◗
Stellen Sie das Gerät beim Gebrauch immer auf eine feste, ebene und
waagerechte Fläche.
◗
Mikrowellenherde und Mobiltelefone (Handys) können elektronische Störungen
und dadurch ungenaue Messergebnisse verursachen.
◗
Halten Sie das Gerät stets in mindestens 1,5 Meter Entfernung von einem
eingeschalteten Mikrowellenherd, oder schalten Sie den Mikrowellenherd aus
(Abb. 2).
◗
Halten Sie ein eingeschaltetes Mobiltelefon auf mindestens 2 Meter Abstand zur
Waage, oder schalten Sie es aus (Abb. 3).
Beschreibung (Abb. 1)
IIIIIIIIIIIIIIIIIIIIIIIIIIIIIIIIIIIIIIIIIIIIIIIIIIIIIIIIIIIIIIIIIIIIIIIIIIIIIIIIIIIIIIIIIIIIIIIIIIIIIIIIIIIIIIIIIIIIIIIIIIIIIIIIIIIIIIIIIIIIIIIIIIIIIIIIIIIIIIIIII
A
C
Schüssel
Batteriefach
B
D
Waagschale
Display
E
G
Umrechnungsschalter (g/oz.)
Reset-Schalter
F
Ein-/Aus-Schalter
Belastung
IIIIIIIIIIIIIIIIIIIIIIIIIIIIIIIIIIIIIIIIIIIIIIIIIIIIIIIIIIIIIIIIIIIIIIIIIIIIIIIIIIIIIIIIIIIIIIIIIIIIIIIIIIIIIIIIIIIIIIIIIIIIIIIIIIIIIIIIIIIIIIIIIIIIIIIIIIIIIIIIIIIIIIIIIIIIIIIIIIIIIIIIIIIIIIIIIIIIIIIIIIIIIIIIIII
Diese Hochleistungs-Waage kann bis 5 kg (11 lb) in 1-Gramm(1/8 oz.)-
Abstufungen wiegen.
Vor dem Gebrauch
IIIIIIIIIIIIIIIIIIIIIIIIIIIIIIIIIIIIIIIIIIIIIIIIIIIIIIIIIIIIIIIIIIIIIIIIIIIIIIIIIIIIIIIIIIIIIIIIIIIIIIIIIIIIIIIIIIIIIIIIIIIIIIIIIIIIIIIIIIIIIIIIIIIIIIIIIIIIIIIIIIIIIIIIIIIIII
1
Entfernen Sie den Sticker vom Display.
2
Entfernen Sie die Plastikfolie unter der Batterie im Batteriefach.
Batterie
IIIIIIIIIIIIIIIIIIIIIIIIIIIIIIIIIIIIIIIIIIIIIIIIIIIIIIIIIIIIIIIIIIIIIIIIIIIIIIIIIIIIIIIIIIIIIIIIIIIIIIIIIIIIIIIIIIIIIIIIIIIIIIIIIIIIIIIIIIIIIIIIIIIIIIIIIIIIIIIIIIIIIIIIIIIIIIIIIIIIIIIIIIIIIIIIIIIIIIIIIIIIIIIIIIIIIIIIIIII
Die Waage arbeitet mit zwei 3-Volt Batterien; sie sind langlebig und
umweltverträglich.
Einsetzen der Batterien
1
Öffnen Sie das Batteriefach (Abb. 4).
2
Drücken Sie die Batterien in den Batteriehalter, und schließen Sie das
Batteriefach (Abb. 5)
Ersatz der Batterie
◗
Ersetzen Sie die Batterien, sobald das Batteriesymbol auf dem Display erscheint
(Abb. 6).
Batterien enthalten Substanzen, welche die Umwelt gefährden können. Batterien
gehören nicht zum Hausmüll! Sie sind als Verbraucher gesetztlich verpflichtet,
gebrauchte Batterien der Wiederverwertung zuzuführen. Geben Sie sie bei den
örtlichen Sammelstellen Ihrer Gemeinde oder an Verkaufsstellen für entprechende
Geräte ab.
Wiegen
IIIIIIIIIIIIIIIIIIIIIIIIIIIIIIIIIIIIIIIIIIIIIIIIIIIIIIIIIIIIIIIIIIIIIIIIIIIIIIIIIIIIIIIIIIIIIIIIIIIIIIIIIIIIIIIIIIIIIIIIIIIIIIIIIIIIIIIIIIIIIIIIIIIIIIIIIIIIIIIIIIIIIIIIIIIIIIIIIIIIIIIIIIIIIIIIIIIIIIIIIIIIIIIIIIIIIIIIIIIIII
Wählen Sie das gewünschte Maßsystem
In vielen Ländern wird Gewicht in Gramm (g) gemessen (metrisches System). In
anderen Länder, wie z.B. Großbritannien und USA, wird in Unzen (oz.) gemessen
(englisches System). Durch die Möglichkeit, das Maßsystem auszuwählen, können
Sie jedes internationale Rezept verwenden, ohne die Gewichtsangaben umrechnen
zu müssen.
Nach dem metrischen System zeigt die Waage ab einem Mindestgewicht von 2
Gramm das Gewicht mit einer Genauigkeit von 1 Gramm an (d = 1 g). Nach dem
englischen Maßsystem kann die Waage auch Messungen in Unzen (oz.) mit einer
Genauigkeit von 1/8 oz (d = 1/8 oz.) anzeigen.
Schalter
Die Waage hat drei Schalter:
∞
-
Ein-/Ausschalter (
)
-
Umrechnungsschalter (metrisches/englisches System) (g/oz.)
-
Reset-Schalter (setzt die Anzeige zurück auf '0') (
1
Zum Einschalten der Waage drücken Sie den Ein-/Aus-Schalter. Nach 2 Sekunden
erscheint '0' auf dem Display. Durch nochmaliges Drücken des Ein-/Ausschalters
schalten Sie die Waage aus (Abb. 7).
2
Wenn die Waage eingeschaltet ist, wählen Sie durch Drücken der
Umrechnungsschalter, ob Sie in Gramm oder Unze wiegen möchten (Abb. 8).
Die Waage ist jetzt betriebsbereit.
3
Wenn Sie mehrere verschiedene Zutaten in derselben Schüssel wiegen
möchten, drücken Sie den Reset-Schalter jedesmal, wenn Sie eine neue
Substanz hinzufügen (Abb. 9).
Wiegen unmittelbar auf der Waagschale
1
Geben Sie die Zutaten direkt in die Waagschale (Abb. 10). Das Gewicht wird
sofort angezeigt.
Wiegen in der Glasschüssel
1
Stellen Sie die leere Schüssel auf die Waagschale (Abb. 11). Das Display zeigt
das Gewicht der Schüssel an.
2
Drücken Sie den Reset-Schalter 3. Das Display zeigt wieder '0' an. (Abb. 12)
3
Wenn Sie jetzt die Schüssel wieder von der Waagschale nehmen, erscheint auf
dem Display das Gewicht der Schüssel mit einem negativen Vorzeichen (Abb. 13).
◗
Die Waage zieht automatisch das Gewicht der Schüssel von jeder Substanz ab,
die Sie in die Schüssel geben (Abb. 14).
◗
Dieser Vorgang setzt sich fort, bis Sie durch Drücken des Reset-Schalters
das Display auf '0' zurück stellen; dabei darf sich nichts auf der Waagschale
befinden (Abb. 15).
Die Schüssel ist Mikrowellen- und Backofen-fest.
HINWEIS: Gießen Sie auf keinen Fall kaltes Wasser in die Schüssel, wenn Sie sie
gerade aus dem heißen Backofen genommen haben.
Zutaten hinzugeben
◗
Wenn Sie zu einer bekannten Menge (z.B. 174 g) weitere Zutaten hinzugeben
möchten (z.B. 48 g), sparen Sie sich die Rechenarbeit, indem Sie den Reset-
3
Schalter
drücken, bevor Sie neue Zutaten hinzufügen. Dadurch stellt sich
das Display auf '0' zurück und zeigt an, wieviel der neuen Substanz Sie
hinzugeben (Abb. 16).
◗
HINWEIS: Wenn die Buchstaben 'Err' auf dem Display erscheinen, ist die Waage
überladen. (Abb. 17).
Abschaltautomatik
Wenn die Waage 3 Minuten lang nicht benutzt worden ist, wird sie automatisch
ausgeschaltet, um die Batterien zu schonen (Abb. 18).
Datenspeicherung
◗
Diese Waage ist mit einer Memory-Funktion ausgestattet. Wenn Sie die gerade
gewogenen Zutaten auf der Waagschale gelassen haben und sich das Gerät
automatisch ausgeschaltet hat, drücken Sie den Ein-/Aus-Schalter
das zuletzt angezeigte Gewicht erscheint wieder auf dem Display. Beim jedem
Wiedereinschalten zeigt die Waage das vorher benutzte Maßsystem an.
Reinigung
IIIIIIIIIIIIIIIIIIIIIIIIIIIIIIIIIIIIIIIIIIIIIIIIIIIIIIIIIIIIIIIIIIIIIIIIIIIIIIIIIIIIIIIIIIIIIIIIIIIIIIIIIIIIIIIIIIIIIIIIIIIIIIIIIIIIIIIIIIIIIIIIIIIIIIIIIIIIIIIIIIIIIIIIIIIIIIIIIIIIIIIIIIIIIIIIIIIIIIIIIIIIIIIIIIIII
Das Gerät lässt sich mit einem feuchten Tuch reinigen, auf das Sie bei Bedarf ein
wenig Spülmittel auftragen können.
before
Verwenden Sie zum Reinigen keine Scheuermittel
Scheuerschwämme und keine Lösungsmittel wie Alkohol, Benzinu. dgl.Tauchen Sie
das Gerät niemals in Wasser; spülen Sie es auchnie unter fließendem Wasser ab.
Ersatzteile
IIIIIIIIIIIIIIIIIIIIIIIIIIIIIIIIIIIIIIIIIIIIIIIIIIIIIIIIIIIIIIIIIIIIIIIIIIIIIIIIIIIIIIIIIIIIIIIIIIIIIIIIIIIIIIIIIIIIIIIIIIIIIIIIIIIIIIIIIIIIIIIIIIIIIIIIIIIIIIIIIIIIIIIIIIIIIIIIIIIIIIIIIIIIIIIIIIIIIIIIIIIIIIIII
Sie können eine Ersatz-Schüssel bei Ihrem Händler oder einem Philips Service
Centre unter der Typennr. HR 3903 bestellen.
Aufbewahrung
IIIIIIIIIIIIIIIIIIIIIIIIIIIIIIIIIIIIIIIIIIIIIIIIIIIIIIIIIIIIIIIIIIIIIIIIIIIIIIIIIIIIIIIIIIIIIIIIIIIIIIIIIIIIIIIIIIIIIIIIIIIIIIIIIIIIIIIIIIIIIIIIIIIIIIIIIIIIIIIIIIIIIIIIIIIIIIIIIIIIIIIIIIIIIIIII
Stellen Sie nichts Schwereres als die Glasschüssel auf der Waagschale ab, wenn das
Gerät nicht in Gebrauch ist.
Umweltschutz
IIIIIIIIIIIIIIIIIIIIIIIIIIIIIIIIIIIIIIIIIIIIIIIIIIIIIIIIIIIIIIIIIIIIIIIIIIIIIIIIIIIIIIIIIIIIIIIIIIIIIIIIIIIIIIIIIIIIIIIIIIIIIIIIIIIIIIIIIIIIIIIIIIIIIIIIIIIIIIIIIIIIIIIIIIIIIIIIIIIIIIIIIIIIIIIIII
Wenn Sie nach Ablauf der Zeit das Gerät außer Gebrauch nehmen, so entsorgen
Sie es bitte nach den geltenden Vorschriften in Ihrem Kande.
Entnehmen Sie die Batterie, bevor Sie das Gerät entsorgen. Sie sind als
Verbraucher gesetzlich verpflichtet, verbrauchte Batterien und Akkus der
Wiederverwertung zuzuführen. Geben Sie sie bitte bei der öffentlichen
Sammelstelle Ihrer Gemeinde oder bei Verkaufsstellen für entsprechede Geräte
oder Batterien und Akkus ab
Information und Service
IIIIIIIIIIIIIIIIIIIIIIIIIIIIIIIIIIIIIIIIIIIIIIIIIIIIIIIIIIIIIIIIIIIIIIIIIIIIIIIIIIIIIIIIIIIIIIIIIIIIIIIIIIIIIIIIIIIIIIIIIIIIIIIIIIIIIIIIIIIIIIIIIIIIIIII
Informationen zu Ihren Fragen,Wünschen und Problemen erhalten Sie auf unserer
Homepage www.philips.com oder beim Philips Service Center in Ihrem Lande.
Sollte sich in Ihrem Lande kein solches Center befinden, so wenden Sie sich bitte
an das Service Department von Philips Domestic Appliances and Personal Care
BV. Die Telefonnummern entnehmen Sie bitte der beigefügten Garantieschrift.
FRANÇAIS
IIIIIIIIIIIIIIIIIIIIIIIIIIIIIIIIIIIIIIIIIIIIIIIIIIIIIIIIIIIIIIIIIIIIIIIIIIIIIIIIIIIIIIIIIIIIIIIIIIIIIIIIIIIIIIIIIIIIIIIIIIIIIIIIIIIIIIIIIIIIIIIIIIIIIIIIIIIIIIIIIIIIIIIIIIIIIIIIIIIIIIIIIIIIIIIIIIIIIIIIII
IIIIIIIIIIIIIIIIIIIIIIIIIIIIIIIIIIIIIIIIIIIIIIIIIIIIIIIIIIIIIIIIIIIIIIIIIIIIIIIIIIIIIIIIIIIIIIIIIIIIIIIIIIIIIIIIIIIIIIIIIIIIIIIIIIIIIIIIIIIIIIIIIIIIIIIIIIIIIIIIIIIIIIIIIIIIIIIIIIIIIIIIIIIIIIIIIIIIIIIIIIIIIIIIIII
◗
Quand vous rangez la balance de cuisine, assurez-vous qu'il n'y a rien sur la
plaque, sauf le bol.
◗
N'immergez pas la base de la balance dans de l'eau (ou tout autre liquide).
◗
Placez toujours la balance sur une surface stable et horizontale.
◗
Un four à micro-ondes ou un téléphone mobile à proximité peut provoquer
des interférences et occasionner des résultats erronés.
◗
Utilisez la balance de cuisine à une distance de 1,5 m minimum d'un four à
micro-ondes qui fonctionne ou arrêtez le four (fig. 2).
◗
Un téléphone mobile qui est mis en marche doit être tenu à une distance
minimum de 2 m de la balance de cuisine, ou doit être arrêté (fig. 3).
IIIIIIIIIIIIIIIIIIIIIIIIIIIIIIIIIIIIIIIIIIIIIIIIIIIIIIIIIIIIIIIIIIIIIIIIIIIIIIIIIIIIIIIIIIIIIIIIIIIIIIIIIIIIIIIIIIIIIIIIIIIIIIIIIIIIIIIIII
A
E
B
F
C
G
D
IIIIIIIIIIIIIIIIIIIIIIIIIIIIIIIIIIIIIIIIIIIIIIIIIIIIIIIIIIIIIIIIIIIIIIIIIIIIIIIIIIIIIIIIIIIIIIIIIIIIIIIIIIIIIIIIIIIIIIIIIIIIIIIIIIIIIIIIIIIIIIIIIIIIIIIIIIIIIIIIIIIIIIIIIIIIIIIIIIIIIIIIIIIIIIIIIIIIIIII
IIIIIIIIIIIIIIIIIIIIIIIIIIIIIIIIIIIIIIIIIIIIIIIIIIIIIIIIIIIIIIIIIIIIIIIIIIIIIIIIIIIIIIIIIIIIIIIIIIIIIIIIIIIIIIIIIIIIIIIIIIIIIIIIIIIIII
1
Décollez l'autocollant de l'écran.
2
Retirez la feuille en plastique au-dessous des piles à l'intérieur du
compartiment à piles.
IIIIIIIIIIIIIIIIIIIIIIIIIIIIIIIIIIIIIIIIIIIIIIIIIIIIIIIIIIIIIIIIIIIIIIIIIIIIIIIIIIIIIIIIIIIIIIIIIIIIIIIIIIIIIIIIIIIIIIIIIIIIIIIIIIIIIIIIIIIIIIIIIIIIIIIIIIIIIIIIIIIIIIIIIIIIIIIIIIIIIIIIIIIIIIIIIIIIIIIIIIIIIIIIIIIIIIIIIIIIIIIIIIIIIIIIIII
Placer les piles
1
Ouvrez le compartiment à piles (fig. 4).
2
Placez les piles dans le compartiment à piles et fermez-le (fig. 5).
Remplacement des piles
◗
Remplacez les piles quand le symbole de la pile est affiché à l'écran (fig. 6 ).
1
IIIIIIIIIIIIIIIIIIIIIIIIIIIIIIIIIIIIIIIIIIIIIIIIIIIIIIIIIIIIIIIIIIIIIIIIIIIIIIIIIIIIIIIIIIIIIIIIIIIIIIIIIIIIIIIIIIIIIIIIIIIIIIIIIIIIIIIIIIIIIIIIIIIIIIIIIIIIIIIIIIIIIIIIIIIIIIIIIIIIIIIIIIIIIIIIIIIIIIIIIIIIIIIIIIIIIIIIIIIIIIIIIIIIIII
Choisissez le système de mesure
Boutons
∞
1
Appuyez sur le bouton marche/arrêt pour mettre l'appareil en marche. Après
2 secondes le chiffre "0" sera affiché à l'écran. Si vous appuyez à nouveau sur
le bouton, l'appareil s'arrête (fig. 7).
2
Lorsque la balance est mise en marche, appuyez sur le bouton de conversion
3
).
pour choisir si vous voulez peser en grammes ou en onces (fig. 8). La balance
est prête à l'emploi.
3
Pour peser plusieurs ingrédients différents dans le même bol, appuyez sur le
bouton reset chaque fois que vous ajoutez un nouveau ingrédient (fig. 9).
Peser directement sur la plaque de pesée.
1
Placez les ingrédients à peser directement sur la plaque de pesée (fig. 10). Le
poids sera immédiatement affiché.
Peser les aliments dans le bol en verre.
1
Placez le bol vide sur la plaque de pesée (fig. 11). Le poids du bol sera affiché
à l'écran.
2
Appuyez sur le bouton reset 3. Le chiffre '0' sera à nouveau affiché (fig. 12).
3
Si vous enlevez le bol de la plaque de pesée, l'écran affichera le poids du bol
avec moins (-) devant (fig. 13).
◗
La balance affichera maintenant le poids de chaque ingrédient qui est ajouté
dans le bol, séparément (fig. 14).
◗
L'appareil continue à afficher de cette manière tant que vous réglez l'écran à 0
en appuyant sur le bouton reset 3 pendant que la plaque de pesée est vide
(fig. 15).
NB: Ne mettez pas de l'eau froide dans le bol immédiatement après l'avoir retiré du
four.
Ajouter les ingrédients
◗
Si vous voulez ajouter des ingrédients (par ex. 48 g) à une certaine quantité (par
3
ex. 174 g), il n'est plus nécessaire de calculer vous-même, mais vous pouvez
appuyer sur le bouton reset 3 avant d'ajouter un nouveau ingrédient. Ainsi
l'écran sera remis à 0 et ensuite il affichera la quantité ajoutée du nouveau
ingrédient (fig. 16).
◗
Note: En cas de surcharge (plus de 5 kg), ERR sera affiché sur l'écran (fig. 17).
Arrêt automatique
Mémoire
◗
L'appareil est doté d'une mémoire. Si vous avez laissé les ingrédients que vous
avez pesés antérieurement sur la plaque, mais l'appareil s'est arrêté
automatiquement, la dernière quantité pesée sera affichée sur l'écran si vous
appuyez sur le bouton ∞ (fig. 19). Chaque fois que vous mettez la balance en
marche, le dernier système de mesure sera affiché.
IIIIIIIIIIIIIIIIIIIIIIIIIIIIIIIIIIIIIIIIIIIIIIIIIIIIIIIIIIIIIIIIIIIIIIIIIIIIIIIIIIIIIIIIIIIIIIIIIIIIIIIIIIIIIIIIIIIIIIIIIIIIIIIIIIIIIIIIIIIIIIIIIIIIIIIIIIIIIIIIIIIIIIIIIIIIIIIIIIIIIIIIIIIIIIIIIIIIIIIIIIIIIIIIIII
N'utilisez pas de produits abrasifs, de tampons à récurer, de l'alcool, etc.
N'introduisez jamais la balance dans de l'eau ni la rincez non plus à l'eau du robinet.
∞
(Abb. 19);
IIIIIIIIIIIIIIIIIIIIIIIIIIIIIIIIIIIIIIIIIIIIIIIIIIIIIIIIIIIIIIIIIIIIIIIIIIIIIIIIIIIIIIIIIIIIIIIIIIIIIIIIIIIIIIIIIIIIIIIIIIIIIIIIIIIIIIIIIIIIIIIIIIIIIIIIIIIIIIIIIIIIIIIIIIIIIIIIIIIIIIIIIIIIIII
IIIIIIIIIIIIIIIIIIIIIIIIIIIIIIIIIIIIIIIIIIIIIIIIIIIIIIIIIIIIIIIIIIIIIIIIIIIIIIIIIIIIIIIIIIIIIIIIIIIIIIIIIIIIIIIIIIIIIIIIIIIIIIIIIIIIIIIIIIIIIIIIIIIIIIIIIIIIIIIIIIIIIIIIIIIIIIIIIIIIIIIIIIIIIIIIIIIIIIIIIIIIII
IIIIIIIIIIIIIIIIIIIIIIIIIIIIIIIIIIIIIIIIIIIIIIIIIIIIIIIIIIIIIIIIIIIIIIIIIIIIIIIIIIIIIIIIIIIIIIIIIIIIIIIIIIIIIIIIIIIIIIIIIIIIIIIIIIIIIIIIIIIIIIIIIIIIIIIIIIIIIIIIIIIIIIIIIIIIIIIIIIIIIIIIIIIIII
Lorsque vous vous séparerez de votre appareil en fin de vie, veillez à respecter les
consignes en vigueur et mises en place par les autorités locales.
Enlevez les piles lorsque vous mettez l'appareil au rebut. Ne jetez pas les piles
avec les ordures ménagères, mais déposez-les à un endroit prévu à cet effet par
les autorités.Vous pouvez également les déposer dans un Centre Service Agréé
Philips où elles y seront traitées dans le respect de l'environnement.
www.philips.com
NEDERLANDS
IIIIIIIIIIIIIIIIIIIIIIIIIIIIIIIIIIIIIIIIIIIIIIIIIIIIIIIIIIIIIIIIIIIIIIIIIIIIIIIIIIIIIIIIIIIIIIIIIIIIIIIIIIIIIIIIIIIIIIIIIIIIIIIIIIIIIIIIIIIIIIIIIIIIIIIIIIIIIIIIIIIIIIIIIIIIIIIIIIIIIIIIIIIIIIIIIIIIIIIIIIIIIIIIIIIIIIIIIII
IIIIIIIIIIIIIIIIIIIIIIIIIIIIIIIIIIIIIIIIIIIIIIIIIIIIIIIIIIIIIIIIIIIIIIIIIIIIIIIIIIIIIIIIIIIIIIIIIIIIIIIIIIIIIIIIIIIIIIIIIIIIIIIIIIIIIIIIIIIIIIIIIIIIIIIIIIIIIIIIIIIIIIIIIIIIIIIIIIIIIIIIIIIIIIIIIIIIIIIIIIIIIIIIIIII
◗
Zorg ervoor dat er niet meer dan het gewicht van de glazen kom op de
weegplaat aanwezig is wanneer de weegschaal niet in gebruik is.
◗
Zorg ervoor dat er geen water (of andere vloeistof) in het apparaat komt.
◗
Plaats het apparaat altijd op een stevige, vlakke en horizontale ondergrond
wanneer u het gebruikt.
◗
Een ingeschakelde magnetron of mobiele telefoon kan storing veroorzaken, wat
kan leiden tot onbetrouwbare weegresultaten.
◗
Gebruik de keukenweegschaal op een veilige afstand van ten minste 1,5 meter
van een ingeschakelde magnetron, of schakel de magnetron uit (fig. 2).
◗
Houd een ingeschakelde mobiele telefoon op een veilige afstand van ten minste
2 meter van de weegschaal, of schakel de mobiele telefoon uit (fig. 3).
A
B
C
D
IIIIIIIIIIIIIIIIIIIIIIIIIIIIIIIIIIIIIIIIIIIIIIIIIIIIIIIIIIIIIIIIIIIIIIIIIIIIIIIIIIIIIIIIIIIIIIIIIIIIIIIIIIIIIIIIIIIIIIIIIIIIIIIIIIIIIIIIIIIIIIIIIIIIIIIIIIIIIIIIIIIIIIIIIIIIIIIIIIIIIIIIIIII
1
Verwijder de sticker van het display.
2
Verwijder het plastic folie onder de batterijen in het batterijvak.
IIIIIIIIIIIIIIIIIIIIIIIIIIIIIIIIIIIIIIIIIIIIIIIIIIIIIIIIIIIIIIIIIIIIIIIIIIIIIIIIIIIIIIIIIIIIIIIIIIIIIIIIIIIIIIIIIIIIIIIIIIIIIIIIIIIIIIIIIIIIIIIIIIIIIIIIIIIIIIIIIIIIIIIIIIIIIIIIIIIIIIIIIIIIIIIIIIIIIIIIIIIIIIIIIIII
Batterijen plaatsen
1
Open het batterijvak (fig. 4).
2
Plaats de batterijen in het batterijvak en sluit het batterijvak (fig. 5).
Batterijen vervangen
◗
Vervang de batterijen zodra het batterijsymbool op het display verschijnt (fig. 6).
IIIIIIIIIIIIIIIIIIIIIIIIIIIIIIIIIIIIIIIIIIIIIIIIIIIIIIIIIIIIIIIIIIIIIIIIIIIIIIIIIIIIIIIIIIIIIIIIIIIIIIIIIIIIIIIIIIIIIIIIIIIIIIIIIIIIIIIIIIIIIIIIIIIIIIIIIIIIIIIIIIIIIIIIIIIIIIIIIIIIIIIIIIIIIIIIIIIIIIIIIIIIIIIIIIIIIIIIIIIIIIIII
Het maatstelsel kiezen
Essence
HR3003
3
u
Knoppen
1
Druk op de aan/uitknop om het apparaat in te schakelen. Na 2 seconden
verschijnt '0' op het display. U schakelt het apparaat uit door opnieuw op de
aan/uitknop te drukken (fig. 7).
2
Wanneer u het apparaat ingeschakeld heeft, kunt u het maatstelsel dat u wilt
gebruiken (grammen of ounces) selecteren door op de conversieknop te
drukken (fig. 8). De weegschaal is nu klaar voor gebruik.
3
Door na het toevoegen van een ingrediënt op de resetknop te drukken, zet u
het display op 0. Hierdoor kunt u makkelijk ingrediënten toevoegen aan de
ingrediënten die reeds in de kom zitten (fig. 9).
Wegen op de weegplaat
1
Plaats het/de te wegen ingrediënt(en) rechtstreeks op de weegplaat (fig. 10).
Het gewicht verschijnt op het display.
Wegen in de glazen kom
1
Plaats de lege kom op de weegplaat (fig. 11). Het gewicht van de kom
verschijnt op het display.
IIIIIIIIIIIIIIIIIIIIIIIIIIIIIIIIIIIIIIIIIIIIIIIIIIIIIIIIIIIIIIIIIIIIIIIIIIIIIIIIIIIIIIIIIIIIIIIIIIIIIIIIIIIIIIIIIIIIIIIIIIIIIIIIIIIIIIIIIIIIIIIIIIIIIIIIIIIII
Druk op de resetknop 3. Het display springt nu weer op 0 (fig. 12).
2
3
Als u nu de kom van de weegplaat neemt, verschijnt het negatieve gewicht
van de kom (het gewicht met een minteken ervoor) op het display (fig. 13).
◗
Vervolgens zal de weegschaal bij elke weging enkel het gewicht van het
gewogen ingrediënt laten zien, d.w.z. zonder daar het gewicht van de kom bij op
te tellen (fig. 14).
◗
Het apparaat zal dit blijven doen totdat u het display terugzet op 0 door op de
resetknop 3 te drukken terwijl de weegplaat leeg is (fig. 15).
De glazen kom is magnetron- en vaatwasmachinebestendig.
NB: Giet geen koud water in de kom direct nadat u de kom uit de oven heeft gehaald.
Toevoegen van ingrediënten
◗
Telkens als u op de resetknop drukt, wordt het display weer op 0 gezet,
onafhankelijk van de ingrediënten die al in de kom zitten. Als u bijvoorbeeld 174
gram van een bepaald ingrediënt in de kom op de weegschaal doet en dan op
de resetknop drukt, wordt het display op 0 gezet en kunt u heel makkelijk een
bepaalde hoeveelheid, bijvoorbeeld 48 gram, van een ander ingrediënt
toevoegen zonder te hoeven rekenen (fig. 16).
◗
Als ´Err´ op het display verschijnt, is de weegplaat te zwaar belast. Dit gebeurt
wanneer er meer dan 5 kilogram op de weegplaat is geplaatst (fig. 17).
Automatische uitschakeling
Geheugenfunctie
◗
Dit apparaat is uitgerust met een geheugenfunctie. Wanneer het ingeschakelde
apparaat langer dan 3 minuten niet gebruikt is, schakelt het zichzelf automatisch
uit. Als u het/de laatst gewogen ingrediënt(en) nog op de weegplaat heeft laten
staan, zal het laatst geregistreerde gewicht opnieuw op het display verschijnen
wanneer u op de aan/uitknop ∞ drukt (fig. 19).Telkens wanneer u de weegschaal
weer inschakelt, toont deze de hoeveelheden in het laatst gekozen maatstelsel.
IIIIIIIIIIIIIIIIIIIIIIIIIIIIIIIIIIIIIIIIIIIIIIIIIIIIIIIIIIIIIIIIIIIIIIIIIIIIIIIIIIIIIIIIIIIIIIIIIIIIIIIIIIIIIIIIIIIIIIIIIIIIIIIIII
E
F
G
Gebruik geen schurende schoonmaakmiddelen, schuursponzenalcohol enz. om het
apparaat schoon te maken. Dompel het apparaat nooit in water en spoel het ook
niet af onder de kraan.
IIIIIIIIIIIIIIIIIIIIIIIIIIIIIIIIIIIIIIIIIIIIIIIIIIIIIIIIIIIIIIIIIIIIIIIIIIIIIIIIIIIIIIIIII
Als u het apparaat te zijner tijd afdankt, volg dan de regels voor de
inzameling van huishoudelijke apparaten van de lokale overheid.
Verwijder de batterij als u het apparaat afdankt. Gooi de batterij niet
met het normale huisvuil weg, maar breng hem naar een officieel daartoe
aangewezen verzamelpunt. U kunt de batterij ook naar een Philips servicecentrum
brengen, waar men de batterij op milieuvriendelijke wijze zal laten verwerken.
www.philips.com
4222 002 27813
∞
3
IIIIIIIIIIIIIIIIIIIIIIIIIIIIIIIIIIIIIIIIIIIIIIIIIIIIIIIIIIIIIIIIIIIIIIIIIIIIIIIIIIIIIIIIIIIIIIIIIIIIIIIIIIIIIIIIIIIIIIIIIIIIIIIIIIIIIIIIIIIIIIIIIIIIIIIIIIIIIIIIIIIIIIIIIIIIIIIIIIIIIIIIIIIIIIIIIII
IIIIIIIIIIIIIIIIIIIIIIIIIIIIIIIIIIIIIIIIIIIIIIIIIIIIIIIIIIIIIIIIIIIIIIIIIIIIIIIIIIIIIIIIIIIIIIIIIIIIIIIIIIIIIIIIIIIIIIIIIIIIIIIIIIIIIIIIIIIIIIIIIIIIIIIIIIIIIIIIIIIIIIIIIIIIIIIIIIIIIIIIIIIIIIIIIIIIIIIIIIIIIIII
IIIIIIIIIIIIIIIIIIIIIIIIIIIIIIIIIIIIIIIIIIIIIIIIIIIIIIIIIIIIIIIIIIIIIIIIIIIIIIIIIIIIIIIIIIIIIIIIIIIIIIIIIIIIIIIIIIIIIIIIIIIIIIIIIIIIIIIIIIIIIIIIIIIIIIIIIIIIIIIIIIIIIIIIIIIIIIIIIIIIIIIIIIIIIIIIIIIIIIIIIIIIIIIIIIII
IIIIIIIIIIIIIIIIIIIIIIIIIIIIIIIIIIIIIIIIIIIIIIIIIIIIIIIIIIIIIIIIIIIIIIIIIIIIIIIIIIIIIIIIIIIIIIIIIIIIIIIIIIIIIIIIIIIIIIIIIIIIIIIIIIIIIIIIIIIIIIIIIIIIIIIIIIIIIIIIIIIIIIIIIIIIIIIIIIIIIIIIIIIIIIIIIIIIIIIIIIIIIIIIIIIIIIIIIIIIIIIIIIIII
IIIIIIIIIIIIIIIIIIIIIIIIIIIIIIIIIIIIIIIIIIIIIIIIIIIIIIIIIIIIIIIIIIIIIIIIIIIIIIIIIIIIIIIIIIIIIIIIIIIIIIIIIIIIIIIIIIIIIIIIIIIIIIIIIIIIIIIIIIIIIIIIIIIIIIIII
www.philips.com
Advertisement

Related Manuals for Philips HR3003/00


Summary of Contents for Philips HR3003/00
- Page 1 ◗ Quand vous rangez la balance de cuisine, assurez-vous qu'il n'y a rien sur la If you need information or if you have a problem, please visit the Philips Web site plaque, sauf le bol. at www.philips.com or contact the Philips Customer Care Centre in your ◗...
- Page 2 Fjern batteriene før du kaster apparatet. Ikke kast batteriene i det vanlige husholdningsavfallet, men lever dem på et offentlig innsamlingssted. Du kan også levere batteriene til et Philips servicesenter, som vil kvitte seg med dem på en inden tilsætning af flere ingredienser. Derved nulstilles ('0') miljøvennlig måte.