
Related Manuals for Sveba Dahlen AB Classic Pizza Series

Summary of Contents for Sveba Dahlen AB Classic Pizza Series
- Page 1 860005-02 Rev.5 Classic Pizza Pizza oven Typ: DC-1P DC-2P DC-2EP DC-3P Operating Maintenance Installation...
-
Page 2: Operating Maintenance Installation Classic Pizza
Data plate. Model designation Serial number DC-22P 149613-01/9318 3x380+0 Positioning of data plate. 15,8 Connected voltage Data plate for Classic Pizza oven To obtain assistance with installation or service of the oven the oven serial number and model desig-nation must be given. Note the serial number, model designation and voltage so that they are readily available when contacting us. -
Page 3: Table Of Contents
TABLE OF CONTENTS TABLE OF CONTENTS ..... . . 3 TECHNICAL DATA ......4 DESCRIPTION . -
Page 4: Technical Data
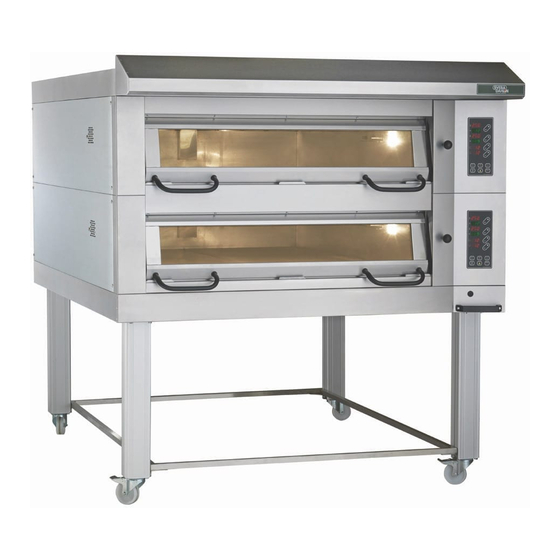
TECHNICAL DATA Technical data The oven chamber is available in four widths (Fig. 2). Fig. 1 shows an oven with 2 oven chambers. The oven can be combined to form 3 decks of oven chambers. The leg length L can vary from 0 to 1100 mm. Standard leg length is 100, 200 and 300 mm, etc. -
Page 5: Description
DESCRIPTION Design principle The deckoven is CE-approved according to EMC, LVD The deck oven is manufactured in detachable sections. The advantage of this is that the sections can be com- bined to suit special purposes or areas. This makes the oven easy to install. -
Page 6: D-Pizza Panel
D-PIZZA PANEL General description Increase/decrease button for temperature / effect distribution Temperature actual value Temperature desired value Heat control buttons On/off button for panel Alarm button Operating Maintenance Installation CLASSIC PIZZA 860005-02... - Page 7 Oven turned off The panel displays OFF and all of its functions are off. Start of oven Start oven by pressing ON/OFF button. The displays illuminate. The oven light illuminates. The oven section is heated to the set value. Operating Maintenance Installation CLASSIC PIZZA 860005-02...
- Page 8 Baking 1. Enter the desired temperature, baking time and steam time. 2. To divide the power between front, top and bottom heat, enter the desired value by pressing the respective button. Settings 0-10 correspond to 0-100% power. The display "Temperature set value" is used to show the set temperature.
- Page 9 Weekly Timer In the event of a power cut, the time must be reset. In order for the weekly timer must be activated first in the service menu, parameter P02. The settings are made with the panel in the Off position. 1.
- Page 10 Setting the real time clock, rtc. 1. Change to "rtc". 2, Change between day, hours and minutes, by holding the bottom heat bottom pressed in and change with +/-. 3. Set the weekday (day 1 = Monday) with +/-. See fig. 1 4.
- Page 11 Setting the start and stop times, set. 1. Change to "SEt". 2. When the +/- button is pressed, the top display changes from SEt to show the start day and hour, the lower display shows the stop day and hour. 3.
- Page 12 Alarm management When an alarm signal is launched the alarm symbol is turned on. Read the alarm message on the lower display by pushing the alarm symbol. The alarm symbol is on as long as the alarm remains activated. INDICATION FIELD TYPE ACTION Fault in temperature sensor, top heat...
- Page 13 Turbo start The oven is fitted with automatic turbo function. If the difference between the desired and actual temperatures exceeds a value set in the service menu, all temperature outputs are switched to 100% for fast heating. The turbo function is deactivated when a baking program is started or if the difference between the desired and actual temperatures is less than the set value.
-
Page 14: Instrument Panel (Option)
INSTRUMENT PANEL (Option) Heat indicator, yellow Turbo knob The lamp lights when the temperature falls Max. load on top- and bottom elements below set temperature. The lamp goes until the thermostat breaks the first off when the set temperature is reached. time. -
Page 15: Baking
BAKING Heat controls The Classic Pizza oven is fitted with three groups of ele- ments which can be regulated separately. These groups are called TOP HEATING, BOTTOM HEATING, and FRONT HEATING. Top and bottom heating are used to influence the properties of the baked product. -
Page 16: Baking Tips
Baking tips The oven is fitted with strong heating elements positioned over and under the stone soles. The position of these elements is thoroughly tested to give a perfect baking, irrespective of where the pizzas are being put in the oven. Abundant heat from the upper heating elements is a must to get a well baked pizza. -
Page 17: Recipe
RECIPE Recipe and cooking method for Pizza Recipe: 1850g Flour Salt Yeast (fresh) Olive oil 1000g Water Dough temperature should be 25° C (in order to make the bread extra tasty add 100 g of rye flour to the above recipe). The recipe is calculated to approximate 12 pizzas. -
Page 18: Care And Maintenance
CARE AND MAINTENANCE Stainless Steel Can Rust! It is a common misapprehension that stainless steel cannot rust. Stainless steel is called ”passive steel” because it contains metals such as chromium, or both chromium and nickel, which protect the metal against corrosion. However, stainless steel also contains 70-80% iron which can rust. -
Page 19: Trouble Shooting
TROUBLE SHOOTING Trouble shooting In the event of a problem you should first look through the trouble shooting list below to see if you can correct the fault yourself. If this does not help contact Sveba-Dahlen’s service department. NOTE! Work on electrical components must be carried out by an authorized electrician. Fault Reason Procedure... - Page 20 DISTRIBUTION BOX Fig. 11 Distribution box 1 Overheating protection 3 Automatic fuse To get a complete disconnection, the fuse F1 of the The 3-pole fuse protects the oven elements. On the elements will also trip (see point 3 too). lower section there is also a 1-pole fuse. This is the If the overheating protection has triggered this can be oven control fuse and is common to all sections in the reset by pressing the reset button with a pen.
-
Page 21: Unpacking
UNPACKING Read carefully through this manual before unpacking the oven. Incorrect handling can damage the oven during transport and installation. Open the packing materials carefully so that the oven is not damaged. Inside the oven chamber there are several parts which must be used during assembly. Take these out and check with the enclosed packing list. They should include the adjustable feet or castors, distance bumper, consoles for unloading shelf, screws, nuts, mounting manual and washers for cable inlet. - Page 22 • When the oven sections are separated from each other they can be carefully lifted down and moved to the place of assembly. • Use the planks from the loading pallet and place these on the forks of the truck as spacers to protect the oven door (Fig.
-
Page 23: Assembly
ASSEMBLY RXS B10x32 RXS B10x13 B10x13 M6S 6x16 + M6M 6 RXS B10x13 RXS B10x13 M6S 8x20 + M6M 8 M6S 8x20 + BRB 8.4x17 M6S 8x20 Fig. 17 Assembly of dismantled oven. + BRB 8.4x17 Electrical work, the connection of ventilation, must be executed by an authorized technician. -
Page 24: Installation
INSTALLATION Positioning. Connection to oven Electrical connection exhaust duct. Leave a 500 mm free space on the right-hand side of the oven. This space is needed for access to the oven distribution box during installation and service. Connection to canopy Ø125mm Fig. - Page 25 First start of the oven. Check that the overheating protection has not triggered. If necessary, reset according to section "Distribution box" point 1. Before the oven is first used it must be burned out • Increase the temperature to approx. 200C°. Let the so that residual protective oil in the oven chamber oven stay like this for about 15 minutes after disappears.
- Page 26 DOCUMENT EU-Declaration of conformity Sveba-Dahlen AB Manufacturer Company Industrivägen 8 SE-513 82 FRISTAD Address Declare under sole responsibility that the pizza oven Classic DC-1P, DC-2P, DC-2EP, DC-3P: , are in conformity with following standards or other normative documents following the provisions in the COUNCIL’S DIRECTIVES: -of December 15 2004 ”relating to electromagnetic compatibility”...
Need help?
Do you have a question about the Classic Pizza Series and is the answer not in the manual?
Questions and answers