
Related Manuals for Wohler iAM-12G-SDI


Summary of Contents for Wohler iAM-12G-SDI
-
Page 1: User Guide
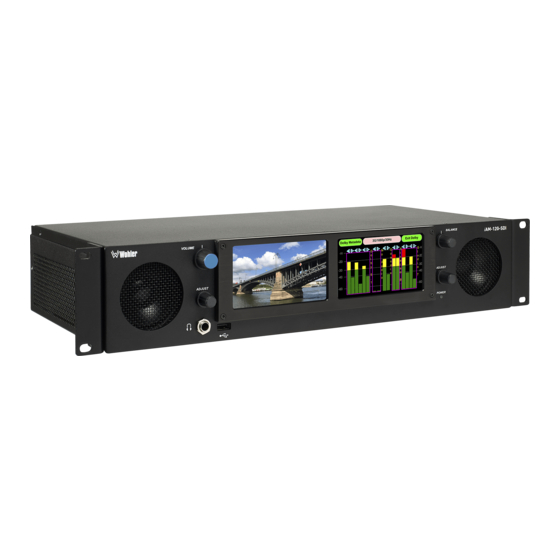
2RU, 4K/12G Multi Channel, Touch Screen Audio/Video Monitor User Guide Part Number 821827, Revision A... - Page 2 In no event will Wohler Technologies, Inc. be liable for direct, indirect, special, incidental, or consequential damages resulting from any defect in the hardware, software, or its documentation, even if advised of the possibility of such damages.
-
Page 3: Table Of Contents
TABLE OF CONTENTS Table of Contents User Guide ..................1 TABLE OF CONTENTS................3 Table of Contents .....................3 CHAPTER 1: Installation ................5 Introduction ....................5 Overview....................5 Safety......................5 Instructions ...................5 Safety Symbols..................6 Mounting....................6 Heat Dissipation..................6 Sympathetic Vibration................7 Mechanical Bracing .................7 Electrical Interference ................7 Power ....................7 Compliance .....................7 FCC ......................7 ICES-003 ....................8... - Page 4 Output Configuration ................36 System Information................37 CHAPTER 3: Technical Info ..............39 CHAPTER 4: The iAM-12G-SDI Web GUI..........43 Web Browser / Control Device ................. 43 First Time IP Assignments ................43 Peer-to-Peer Connection ............... 43 Network Connection ................44 Dashboard.....................
-
Page 5: Chapter 1: Installation
The iAM-12G-SDI has options for VoIP formats including SMPTE 2022-6, 3G/HD/SD-SDI, and a growing range of additional I/O options via SFP interfaces. Refer to the Specifications section of this manual or contact Wohler Sales for more information. The iAM-12G-SDI is compact and simple to operate. It has touch screen LCD displays providing high resolution meters, menus and basic monitoring controls. -
Page 6: Safety Symbols
Important: By design, this monitor will only plug into a three-prong outlet for your safety. If the plug does not fit into the outlet, contact an electrician to replace the obsolete outlet. 7. Protect the power cord from being walked on or pinched, particularly at plug connection on the equipment and at the socket. -
Page 7: Sympathetic Vibration
proximity to the unit if this temperature is not exceeded. Otherwise, allow a 1RU (1.75”/44.45mm) space above and below the unit for air circulation. Important Heat generated by the class D power amplifiers, power supplies, and other components is vented by slots in the sides and back of the unit. -
Page 8: Ices-003
Operation of this equipment in a residential area is likely to cause harmful interference, in which case the user will be required to correct the interference at their own expense. ICES-003 This Class A digital apparatus complies with Canadian ICES-003. Cet appareil numérique de la classe A est conforme à... -
Page 9: Chapter 2: Local Operation
CHAPTER 2: Local Operation Startup The iAM-12G-SDI unit will begin its startup process when it is connected to power. There is no power switch. It is normal for the product to require just over a minute to start up and be ready to use. - Page 10 8. USB 2.0 Port: This USB Type A connector allows you to use a flash drive (not supplied) to perform software updates and copy system configurations to another iAM-12G-SDI or to a PC. Software updates are accomplished from the Web GUI. 9. Level Meters: High resolution bar graph meters appear here showing the levels of up to 16 channels selected for monitoring.
-
Page 11: Rear Panel
Figure 2-3. Figure 2-3: Backup Power Connector Pinout 3. Network Port: The MGMT Ethernet port can connect to either a LAN or to a PC to let you customize the iAM-12G-SDI configuration remotely. The Page 11... - Page 12 SFP modules are hot swappable for convenience. An optional license key must be purchased to enable each module. A software license must be installed for an SFP port to function. Contact Wohler Technical Service to install software licenses. The following SFP modules are offered: a.
- Page 13 1 - 16. Tascam cables may be used, and can be purchased by contacting Wohler Sales. Refer to Figure 2-4 for the pinout of this pair of connectors. The Balanced Analog DB-25 Outputs are standard on the iAM-12G-SDI.
- Page 14 Left and Right. The source of these signals is the mix of audio as monitored by the internal speakers. The Balanced Analog Output Pair is standard on the iAM-12G-SDI. Figure 2-5: Analog XLR Output Connections 10. AES Inputs: This HD-15 connector is used to connect up to four AES inputs.
-
Page 15: Sfp-2022-6 / Sfp-2110 Address Setup
Figure 2-7: SFP-2022-6 and SFP2110 Network Diagram The optional SFP-2022-6 or SFP-2110 module furnished by Wohler Technologies is manufactured by Embrionix and comes from the factory with a default IP address. To integrate it into your digital network, you need to set its address to the source to be monitored. -
Page 16: Channel Meters And Touch Operations
Audio meters are displayed on the touchscreen display in labeled clusters, as shown in Figure 2-8. The clusters of channels and other options relating to this are defined using the iAM-12G-SDI Web GUI software as described in Chapter 4. Figure 2-8: Audio Level Meter Screen 1. - Page 17 If these symbols appear on a channel pair, they indicate that this channel pair is a Dolby bitstream, but that the Dolby Decoder within the iAM-12G-SDI is still booting up and that you may not yet select the Dolby Zoom function on them. Refer to the Dolby Zoom section of this chapter.
- Page 18 the channel. While the channel is soloed, the Monitor Info display will show the Channel Routing, for example: d. Channel Routing: After soloing a channel, rotating the Left Adjust knob will allow you to reassign the Channel Routing for the soloed channel.
-
Page 19: Dolby Monitoring Screens
Figure 2-8. The Dolby 5.1 Zoom Screen is shown in Figure 2-9. Dolby D, DD+, and E decoding is an optional feature requiring either the OPT- DOLBY the OPT-DOLBY ATMOS module. Contact Wohler Technical Service to install software licenses. Figure 2-9: Dolby 5.1 Zoom Screen When the Dolby Zoom screen appears, the speakers will automatically begin monitoring the Downmix audio. -
Page 20: Dolby ® Atmos Screen
ATMOS creates an amazing experience over speakers and over headphones, with breathtaking, moving audio that flows above and around you. Wohler’s Dolby ATMOS option allows broadcasters to confidence monitor the Dolby ATMOS signal on the speakers and headphone output, view meters, access Wohler’s proprietary Dolby Zoom functionality, review related... - Page 21 Figure 2-11: Dolby 10.2 Screen Page 21...
-
Page 22: Menu / Option Touchscreen
By far, most of the option settings are performed using the Web-based GUI software. However, there are a few commonly used setting and information screens that are available locally in the iAM-12G-SDI using the Main Menu which appears on the left screen. Figure 2-12 is a diagram of the menu arrangement, a tree showing how to reach any menu from the Main Menu. -
Page 23: Main Menu
Main Menu To access the submenus, touch one of the selector buttons presented on the screen, as shown in Figure 2-13. To return to the Audio Meters display, touch the Audio Meter selector button. Figure 2-13: Main Menu The function of each of these selector buttons is described in the following sections. Audio Meters Touch the Audio Meters button in the Main Menu to switch to the main audio metering screen. -
Page 24: Source Select
1. The most recently selected source is shown in light blue. 2. Sources that the iAM-12G-SDI is equipped to monitor are shown in blue. 3. Sources that the iAM-12G-SDI is capable of monitoring, but are not licensed for monitoring are shown in gray. If you would like to license additional signals, contact Wohler to purchase the source module and/or license. -
Page 25: Preset Favorites
Preset Favorites Touch the Preset Favorites button to display the Preset Favorites screen. This shows the Presets that you have designated as Favorites. Refer to the Dashboard section of Chapter 4. Generally, these are frequently used Presets that you want to separate out from the possibly many other Presets in the system. -
Page 26: All Presets
All Presets Touch the All Presets button to display the All Presets Group Selection screen as shown in Figure 2-17. If no Presets have been created, the screen in Figure 2-19 appears instead. Figure 2-17: All Presets Screen - Group Selection The Presets are normally arranged into Groups. - Page 27 Figure 2-19: All Presets Screen - No Presets To return to the Main Menu from this screen, touch the Menu button. Page 27...
-
Page 28: System Options
System Options Touch the System Options button in the Main Menu to display the five choices for setting some system options locally. The System Options Menu is shown in Figure 2-20. Figure 2-20: System Options Menu The options are: 1. Network Settings 2. -
Page 29: Network Settings
Network Settings Touch the Network Settings button in the System Options Menu to display the Network Settings menu as shown in Figure 2-21. This screen lets you view or change the product IP, the Net Mask, and the Gateway. It also lets you switch between a static (fixed) or a dynamic (DHCP) network address. - Page 30 3. When the address is typed, touch the Enter button. This will return to the Network Settings screen and the changed address can be seen. To change from a static (fixed) to a dynamic (DHCP) network address, touch the DHCP button. The screen will change, as shown in Figure 2-23. To change back to a static (fixed) network address, touch the DHCP button again.
-
Page 31: Speaker Options
Touching the Speaker Options button on the System Options Menu displays the Speaker Options screen as shown in Figure 2-24. The controls on this screen affect various characteristics of the monitored audio as heard on the iAM-12G-SDI. Figure 2-24: Speaker Options The controls function as follows: 1. -
Page 32: Factory Reset
Mac address 28.) If you have any doubt as to whether you should press Yes, press Back or No instead, and contact Wohler Technical Service for advice. Pressing Back or No will return you to the System Options menu. -
Page 33: System Reboot
Figure 2-26: System Reboot If you have any doubt as to whether you should press Yes, press Back or No instead, and contact Wohler Technical Service for advice. Pressing Back or No will return you to the System Options menu. -
Page 34: System Software Update
Figure 2-27: Software Update If you have any doubt as to whether you should press Yes, press Back instead, and contact Wohler Technical Service for advice. Pressing Back will return you to the System Options menu. Page 34... -
Page 35: App Settings
There is one setting: 1. Enable Logs On USB: When this setting is turned On, records of internal actions and events within the iAM-12G-SDI are recorded onto a flash drive inserted into the USB connection on the front panel. This feature would generally be used under advice from Wohler Technical Service. -
Page 36: Output Configuration
Output Configuration Touching the Output Configuration button in the System Options Menu displays the Output Configuration screen as shown in Figure 2-29. Figure 2-29: Output Configuration There are two settings: 1. DB25: When this setting is set to Prefade, the output levels from the DB25 connectors on the back panel will be fixed. -
Page 37: System Information
System Information Touching the System Information button in the Main Menu displays the System Information screen as shown in Figure 2-30. This is a tabbed screen that will let you view various system data, as well as data for any options that are part of the system. - Page 38 Figure 2-32: System Information Screen - Tabs Page 38...
-
Page 39: Chapter 3: Technical Info
CHAPTER 3: Technical Info Table 3–1: iAM-12G-SDI Specifications Specification Values/Domains Power Requirements 100 VAC to 240 V AC ± 10%, 50/60Hz Power Consumption 40 Watts Dimensions (2RU) 3.5” x 19” x 9.5” (88mm x 483mm x 242mm), (H x W x D) standard 19”... - Page 40 Specification Values/Domains AES Inputs 8 AES channel pairs on HD-15 1080p : 60/59.94/50/29.97/30/25/24/ 23.96 fps 1080i : 30/29.97/25 fps 720p : Video Codecs 60/59.94/50/30/29.97/25/24/23.96 fps SD : NTSC, PAL, VGA, QVGA, CIF, SIF, QCIF, QSIF Dolby ATMOS / E / D / DD+ (E-AC3), MPEG-1 Audio Codecs Layer 2, AAC-LC (requires OPT-DOLBY ATMOS) Up to 48 kHz audio...
- Page 41 Table 3–2: iAM-12G-SDI Processing Options Option Part # Description Allows decoding and monitoring of Dolby® OPT-DOLBY D, DD+, E, and ATMOS from SDI, SMPTE 829163 ATMOS 2110, SMPTE 2022-6, and AES streams. Hardware card with software activation key. Allows decoding and monitoring of Dolby®...
- Page 42 **emSET is configuration software that is necessary so that you can set up this module. It is available at no cost either from its manufacturer, Embrionix, or by contacting Wohler Technologies Technical Service. Figure 3–1: iAM-12G-SDI Block Diagram Touchscreens for Video / Audio Meters / Control Main Menu...
-
Page 43: Chapter 4: The Iam-12G-Sdi Web Gui
IP address would be 169.254.1.40 (40 is the decimal equivalent for the last octet of Mac address 28.) There two basic types of connections that may be used to connect the iAM-12G-SDI to a web browser, a Peer-to-Peer Connection or a Network Connection. -
Page 44: Network Connection
GUI. Network Connection When connected to a network, the iAM-12G-SDI address will need to be changed to another address in order to be compatible with the address assignments for that particular network. Immediately after the host setup is complete, change the iAM- 12G-SDI's address. -
Page 45: Dashboard
Throughout the Web GUI, pages are a click or two away using the list of selections on the left side. The Dashboard page shows all of the available Preset configurations at a glance. The iAM-12G-SDI allows you to assign Presets to particular groups. In Figure 4-2, two groups, Operator-1 and Operator-2 are shown. - Page 46 In Figure 4-3, it can be seen that there are three Presets in the Operator-1 group and only one Preset in the Operator-2 group. The currently selected active Preset for local operation is shown in red. In Figure 4-3, this is the Preset named TestG / TestP.
- Page 47 Figure 4–4: Dashboard Preset Edit The Edit options for a Preset are: 1. Delete: Remove the Preset from the system. Do Not delete the currently active Preset. 2. Rename: Rename the Preset, but keep all of its other characteristics. 3. Make Favorite: Make this Preset a favorite. This can be done for frequently used Presets.
-
Page 48: Management Ip Address
Management IP Address Make network IP Address changes for Management (MGMT) Port of the local iAM-12G-SDI on the screen shown in Figure 4-6. This screen allows you to configure the management port IP address for the device. Note that after changing the IP address, the web interface should be loaded with the new IP address. -
Page 49: System Setup
It consists of three tabs, each of which is explained in the sections which follow: System Information The System Setup | System Information tab provides basic information for this iAM-12G-SDI. It is shown in Figure 4-7. Figure 4–7: System Setup: System Information Page 49... -
Page 50: Sfp Information
SFP Information For certain I/O modules, the System Setup page will also display the Hardware/Vitals status for each module. The examples in Figures 4-8 and 4-9, show the status of the module in SFP Slot 1. The actual information listed in each of these tabs depends upon the module itself, but these figures show some of the types of information and details available. - Page 51 Figure 4–9: System Setup: SFP Information Page 51...
-
Page 52: Licenses
The System Setup | Licenses tab shows the license keys for each of the optional features installed in this iAM-12G-SDI. You may also use this tab to enter new license keys, or enable some license keys. This tab is shown in Figure 4-10. -
Page 53: Factory Reset
If you have any doubt as to whether you should perform a Factory Reset, do not click the Reset button. Contact Wohler Technical Service for advice. Note: Factory Reset will reset your IP address to the default one (Static IP: 192.168.1.162/Gateway: 192.168.1.1/Netmask: 255.255.255.0) and clear the... -
Page 54: Configuration - Preset Setup
Configuration - Preset Setup Presets are monitoring configurations that can be composed of channels from multiple sources and displayed on the meters in any order. Presets should be set up to allow operators to quickly shift between setups for monitoring. The Configuration - Preset Setup screen contains selections of all of the details for a Preset, and is largely arranged in a matrix format connecting input channels to monitoring channels. - Page 55 Figure 4–13: Select Preset 2. Input Selection: Audio from any of the input sources may be applied to the monitoring scheme in any way. For example, you may have 6 channels from an SDI stream, along with 2 AES channels, and along with 2 analog channels assigned your choice of meters.
- Page 56 Figure 4–14: Cluster Assignment Operator-1 SDI-1 In the Cluster box, you can select the type of Cluster from a pull down selection. The available Cluster Type selections are: Mono 1.0: The channel will appear within a single-channel cluster. • Stereo 2.0: The channels will appear within a two-channel cluster. •...
- Page 57 Figure 4–15: Speaker Assignment Operator-1 SDI-1 6. Mute/Unmute: A Mute/Unmute control is provided for each channel, although the adjustment will affect all channels in the Cluster. This allows the operator to just see the meters for certain channels and not hear the audio. This is an alternate action control.
-
Page 58: Reboot System
Figure 4–16: Reboot System If you have any doubt as to whether you should reboot the remote iAM-12G-SDI, do not click the Reboot System button. Contact Wohler Technical Service for advice. -
Page 59: Appendix A: Software Upgrades
Introduction This chapter describes how to download a software update file to your computer, transfer it to a USB flash drive and install the updated into an iAM-12G-SDI. Download the Software The iAM-12G-SDI software update can be found at http://www.wohler.com, under Product Downloads on the Products >... - Page 60 Figure A-1 - System Options Screen 3. Insert the flash drive containing the system update into the USB socket on the front panel. 4. In the System Options menu, touch System Update. The Software Upgrade screen will appear, as shown in Figure A-2. Figure A-2 - Software Upgrade Screen 5.
- Page 61 Note: If you attempt a software upgrade fairly soon after you have powered up the iAM-12G-SDI, and it contains a Dolby Decoder module, it can happen that the Dolby Decoder module hasn't yet had enough time to boot up. In this case, the screen shown in Figure A-5 will appear.
- Page 62 7. After the software update starts, the text on the left screen will change periodically to indicate the progression of the upgrade. The upgrade will take several minutes, after which the iAM-12G-SDI will restart. After the system has completed its restart cycle and is once again operational, you may then remove the flash drive.
Need help?
Do you have a question about the iAM-12G-SDI and is the answer not in the manual?
Questions and answers