Table of Contents
Advertisement
Advertisement
Table of Contents

Related Manuals for Convaid Cruiser 12


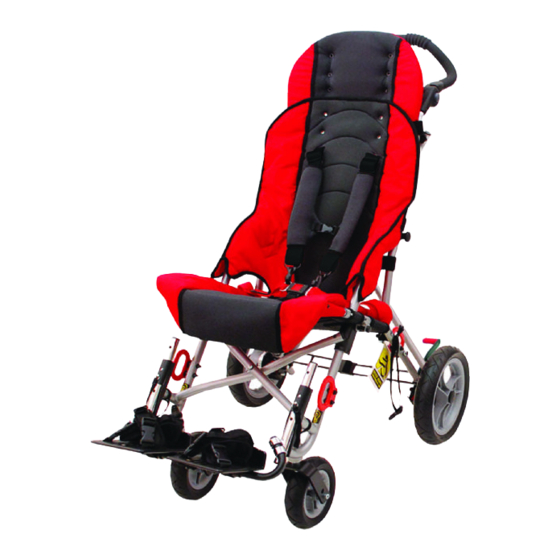
Summary of Contents for Convaid Cruiser 12
- Page 1 Cruiser 12 Convaid Replacement Parts & Accessories Manual...
-
Page 2: Table Of Contents
TABLE OF CONTENT Cruiser 12 REPLACEMENT PARTS FRAME Part# 991688 One Piece Height Adjustable Push Handle ·················································································· 2 996014 One Piece Height Adjustable Push Handle with Attendant Handbrake ············································· 4 FOOTPLATES Part# 992658 Standard Footplate - Left ········································································································ 6 992659 Standard Footplate - Right ·······································································································... - Page 3 Cruiser 12 HEAD SUPPORT Part# 996027 Headrest Extension - Curved Cordura ······················································································· 70 996028 Headrest Extension - Rectangular Textilene ··············································································· 70 995932 Occi Headwings ···················································································································· 72 996033 Padded Headwing ·················································································································· 72 TRUNK POSITIONING Part# 996610 H-Harness with Padded Cover ································································································ 74 996025 Full Torso Support Vest for Cordura Upholstery ·········································································...
- Page 4 Convaid meets the assisted mobility needs of thousands of special needs families every year by manufacturing pediatric push wheelchairs in a variety of sizes and models, and backs its products with one of the best warranties in the industry and a highly responsive customer service department.
- Page 5 Warranty 888-Convaid (266-8243)
-
Page 6: One Piece Height Adjustable Push Handle
FRAME FRAME Cruiser 12 One Piece Height Adjustable Push Handle r 10 One Piece Push Handle 991688 Kit Includes Item Description CX12 Single Pc Handle Assembly Locknut #10-24 Jam Flexlock Cruiser Back Tub Screw #10-24 x 1-1/4" Phil Pan 991388... - Page 7 INSTRUCTIONS Cruiser 12 One Piece Height Adjustable Push Handle 1. Using a phillips screwdriver and a 3/8” wrench, remove the screw attaching the handle tube assembly from the Cruiser Back Tubes. 2. Slide existing handle assembly off. 3. Slide new handle assembly onto the back tube. Item 1 4.
-
Page 8: One Piece Height Adjustable Push Handle With Attendant Handbrake
FRAME Cruiser 12 One Piece Height Adjustable Push Handle with Attendant Handbrake 996014 Kit Includes Item Description CX-12 Attendant Brake Handle Assembly Locknut #10-24 Jam Flexlock Screw #10-24 x 1-1/4" Phil Pan Assembled Cruiser Back Tube Cruiser Back Tube Close-up... - Page 9 INSTRUCTIONS Cruiser 12 One Piece Height Adjustable Push Handle with Attendant Handbrake 1. Remove Cable from Lever by pulling the cable away from the lever & routing the inner cable off the level 2. Using a phillips screwdriver and a 3/8” wrench, remove the screw attaching the handle tube assembly from the Cruiser Back Tubes.
-
Page 10: Standard Footplate - Left
FOOTPLATE Cruiser 12 ITEM PART NUMBE Standard Footplate - Left 504987 2 Small Footplate Assembly LH 992658 Kit Includes Item Description CX-10 Footrest Assembly, LH 992658 Assembled Assembled ITEM PART NUMBER DESCRIPTION 504987 CX-10 Footrest Assembly, LH Exploded Close-up www.convaid.com... - Page 11 INSTRUCTIONS Cruiser 12 Standard Footplate - Left 1. Remove the exsiting footplate assembly by pressing the detent button then pulling the footplate off. 2. Insert the new footplate assembly into the footplate adjustment tube then press the detent button to allow the footplate assembly to slide in and lock in place.
-
Page 12: Standard Footplate - Right
Cruiser 10-12 Small Footp FOOTPLATE Cruiser 12 Standard Footplate - Right 992659 ITEM 0-12 Small Footplate Assembly RH Kit Includes Item Description CX-10 Footrest Assembly, RH Assembled 992659 Assembled ITEM PART NUMBER DESCRIPTION 504988 CX-10 Footrest Assembly, RH Exploded Close-up... - Page 13 INSTRUCTIONS Cruiser 12 Standard Footplate - Right 1. Remove the exsiting footplate assembly by pressing the detent button then pulling the footplate off. 2. Insert the new footplate assembly into the footplate adjustment tube then press the detent button to allow the footplate assembly to slide in and lock in place.
-
Page 14: Angle Adjustable Footplate - Left
FOOTPLATE Cruiser 12 ITEM PART NUMB 504885 Angle Adjustable Footplate - Left gle Adjustable Footplate Assembly LH 994757 Kit Includes Item Description Small Footplate Assembly RH CX-10 Pivot Footplate Assembly, LH Assembled Assembled 994757 ITEM PART NUMBER DESCRIPTION 504885 CX-10 Pivot Footplate Assy LH... - Page 15 INSTRUCTIONS Cruiser 12 Angle Adjustable Footplate - Left 1. Remove the exsiting footplate assembly by pressing the detent button then pulling the footplate off. 2. Insert the new footplate assembly into the footplate adjustment tube then press the detent button to allow the footplate assembly to slide in and lock in place.
-
Page 16: Angle Adjustable Footplate - Right
Cruiser 10-12 Small Angle Adjustable FOOTPLATE Cruiser 12 Angle Adjustable Footplate - Right 994758 ITEM PART NU 50448 Angle Adjustable Footplate Assembly LH Kit Includes Item Description CX-10 Pivot Footplate Assembly, RH 994758 Assembled Assembled ITEM PART NUMBER DESCRIPTION 504486... - Page 17 INSTRUCTIONS Cruiser 12 Angle Adjustable Footplate - Right 1. Remove the exsiting footplate assembly by pressing the detent button then pulling the footplate off. 2. Insert the new footplate assembly into the footplate adjustment tube then press the detent button to allow the footplate assembly to slide in and lock in place.
-
Page 18: Standard Footplate Assy Kit - Left
FOOTPLATE Cruiser 12 Standard Footplate Assy Kit - Left 996010 10-12 Small Footplate Assembly Kit LH Kit Includes Item Description CX-10 Footrest Assembly, LH Footplate Adjustment Tube, LH 996010 Footrest Extension Housing Assembly ITEM PART NUMBER DESCRIPTION Tube Connector 7/8" Heavy Duty Screw 1/4"-20 x 1-1/2"... - Page 19 INSTRUCTIONS Cruiser 12 Standard Footplate Assy Kit - Left 1. Pull out metal pin and remove the existing footplate extension tube. Item 2 2. Using a 5/32" allen wrench, remove both bolts from the housing bracket on the frame and remove existing footplate assembly components.
-
Page 20: Standard Footplate Assy Kit - Right
FOOTPLATE Cruiser 12 Standard Footplate Assy Kit - Right 996011 Kit Includes 0-12 Small Footplate Assembly Kit RH Item Description CX-10 Footrest Assembly, RH Footplate Adjustment Tube, RH Footrest Extension Housing Assembly Tube Connector 7/8" Heavy Duty Screw 1/4"-20 x 1-1/2" Flat Skt... - Page 21 INSTRUCTIONS Cruiser 12 Standard Footplate Assy Kit - Right 1. Pull out metal pin and remove the existing footplate extension tube Item 2 . 2. Using a 5/32" allen wrench, remove both bolts from the housing bracket on the frame and remove existing footplate assembly components.
-
Page 22: Angle Adjustable Swing Away Footplate Assy Kit - Left
FOOTPLATE Cruiser 12 Angle Adjustable Swing Away Footplate Assy Kit - Left 996012 mall Angle Adjustable Footplate Assembly Kit LH Kit Includes Item Description CX-10 Pivot Footplate Assembly, LH Footplate Adjustment Tube, LH 996012 Footrest Extension Housing Assembly ITEM PART NUMBER DESCRIPTION Tube Connector 7/8"... - Page 23 INSTRUCTIONS Cruiser 12 Angle Adjustable Swing Away Footplate Assy Kit - Left 1. Pull out metal pin and remove the existing footplate extension tube Item 2 . 2. Using a 5/32" allen wrench, remove both bolts from the housing bracket on the frame and remove existing footplate assembly components.
-
Page 24: Angle Adjustable Swing Away Footplate Assy Kit - Right
FOOTPLATE Cruiser 12 Angle Adjustable Swing Away Footplate Assy Kit - Right 996013 Angle Adjustable Footplate Assembly Kit RH Kit Includes Item Description CX-10 Pivot Footplate Assembly, RH Footplate Adjustment Tube, RH Footrest Extension Housing Assembly 996013 Tube Connector 7/8" Heavy Duty... - Page 25 INSTRUCTIONS Cruiser 12 Angle Adjustable Swing Away Footplate Assy Kit - Right 1. Pull out metal pin and remove the existing footplate extension tube Item 2 . 2. Using a 5/32" allen wrench, remove both bolts from the housing bracket on the frame and remove existing footplate assembly components.
-
Page 26: Wheels
WHEELS Cruiser 12 7.5" x 2" Front Solid Wheel Assy - Each 994749 7.5" x 2" Wheel Assembly Front (each) Kit Includes Item Description 7.5" x 2" Front Solid Tire on Gray Rim (ea) Bolt M8-1.25mm x 90mm Socket Cap Screw Washer 5/16"... - Page 27 INSTRUCTIONS Cruiser 12 7.5" x 2" Front Solid Wheel Assy - Each 1. Use a 6mm allen wrench and a 1/2" wrench ro remove existing front wheel. 2. Be sure to follow schematic to place washers in the proper order when installing new wheel.
-
Page 28: 7.5" X 2" Front Pneumatic Wheel Assy - Each
WHEELS Cruiser 12 7.5" x 2" Front Pneumatic Wheel Assy - Each 994750 2" Wheel Assembly Front Pneumatic (each) Kit Includes Item Description Pneu Front Wheel w/3-Spokes 190mmx50mm Rolko Bolt M8-1.25mm x 90mm Socket Cap Screw Washer 5/16" x 9/16"... - Page 29 INSTRUCTIONS Cruiser 12 7.5" x 2" Front Pneumatic Wheel Assy - Each 1. Use a 6mm allen wench and a 1/2" wrench ro remove existing front wheel. 2. Be sure to follow schematic to place washers in the proper order when installing new wheel.
-
Page 30: 996009 Caster Fork Assy For 7.5" X 2" Front Rolko Tire - Each
WHEELS Cruiser 12 Caster Fork Assy for 7.5" x 2" Front Rolko Wheel - Each 996009 -14 Caster Fork Assy (Rolko Tire) Kit Includes Item Description Locknut 1/2"-20 Capped Nylon 996009 "O" Ring Beuna-Nitrial ITEM PART NUMBER DESCRIPTION Balloon Caster Fork Assembly 100405 Locknut 1/2"-20 Capped Nylon... - Page 31 INSTRUCTIONS Cruiser 12 Caster Fork Assy for 7.5" x 2" Front Rolko Wheel - Each 1. Use a 6mm allen wrench and a 1/2" wrench ro remove existing from wheel. 2. Use a 3/4" wrench to remove top nut Item1 of the caster fork assembly.
-
Page 32: 995690 Caster Fork Assy With Caster Lock For 7.5" X 2" Front Rolko Tire - Pair
WHEELS Cruiser 12 Caster Fork Assy with Caster Lock for 7.5" x 2" Front Rolko Wheel - Pair 995690 aster Fork Assy For Caster Lock (Rolko Tire) Kit Includes Item Description 995690 Locknut 1/2"-20 Capped Nylon ITEM PART NUMBER DESCRIPTION "O"... - Page 33 INSTRUCTIONS Cruiser 12 Caster Fork Assy with Caster Lock for 7.5" x 2" Front Rolko Wheel - Pair 1. Use a 6mm allen wrench and a 1/2" wrench to remove existing front wheel. 2. Use a 3/4" wrench to remove top nut Item1 of the caster fork assembly.
-
Page 34: 11.5" X 2.5" Rear Solid Wheel Assy - Each
WHEELS Cruiser 12 11.5" x 2.5" Rear Solid Wheel Assy - Each 994746 Kit Includes Item Description Rear Wheel 290mm x 60mm (Rolko) 5" x 2.5" Wheel Assy Rear Solid (each) Assembled Assembled 994746 ITEM PART NUMBER DESCRIPTION 506842 Rear Wheel 290mm x 60mm (Rolko) - Page 35 INSTRUCTIONS Cruiser 12 11.5" x 2.5" Rear Solid Wheel Assy - Each 1. To remove, press down and hold the Rear Wheel Locking Pin. Grasp wheel and pull. 2. No tools are required to remove wheel. Wheel Installation Caution: Ensure the wheels are installed properly. You will hear a "click" when wheel locks into place.
-
Page 36: 12.5" X 2" Rear Solid Knobby Wheel Assy - Each
WHEELS Cruiser 12 12.5" x 2" Rear Solid Knobby Wheel Assy - Each 994747 Kit Includes x 2" Wheel Assy Rear Solid Knobby (each) Item Description 12.5" Knobby Solid Rear Wheel (Gray Hub) Assembled Assembled 994747 ITEM PART NUMBER DESCRIPTION 506865 12.5"... - Page 37 INSTRUCTIONS Cruiser 12 12.5" x 2" Rear Solid Knobby Wheel Assy - Each 1. To remove, press down and hold the Rear Wheel Locking Pin. Grasp wheel and pull. 2. No tools are required to remove wheel. Wheel Installation Caution: Ensure the wheels are installed properly. You will hear a "click" when wheel locks into place.
-
Page 38: 12.5" X 2" Rear Pneumatic Knobby Wheel Assy - Each
WHEELS Cruiser 12 12.5" x 2" Rear Pneumatic Knobby Wheel Assy - Each 994748 Kit Includes Item Description 12.5" x 2" Wheel Assy Rear Pneu Knobby (each) 12.5" Knobby Pneu Rear Wheel (Gray Hub) Assembled Assembled 994748 ITEM PART NUMBER... - Page 39 INSTRUCTIONS Cruiser 12 12.5" x 2" Rear Pneumatic Knobby Wheel Assy - Each 1. To remove, press down and hold the Rear Wheel Locking Pin. Grasp wheel and pull. 2. No tools are required to remove wheel. Wheel Installation Caution: Ensure the wheels are installed properly. You will hear a "click" when wheel locks into place.
-
Page 40: Brake Assy For Rolko Wheel - Left
Cruis WHEELS Cruiser 12 Brake Assy for Rolko Wheels - Left 996005 Cruiser 10-12 Brakes LH Kit Includes Item Description 996005 CX/ME/CB/EZ/SFT Parking Brake Assembly, LH ITEM PART NUMBER DESCRIPTION Rolko Foot Brake Lever Assembly, LH Bolt 1/4"-28 x 1-3/4" Socket Button Hd Alloy Steel... - Page 41 INSTRUCTIONS Cruiser 12 Brake Assy for Rolko Wheels - Left 1. Remove rear wheel from the frame. 2. Using two 5/8” wrenches, remove the axle nut and axle. 3. Use a 7/16” wrench and a 5/32” allen wrench to remove existing brake assembly from the frame.
-
Page 42: Brake Assy For Rolko Wheel - Right
WHEELS Cruiser 12 Brake Assy for Rolko Wheel - Right 996006 Kit Includes Item Description CX/ME/CB/EZ/SFT Parking Brake Assembly, RH Rolko Foot Brake Lever Assembly, RH Bolt 1/4"-28 x 1-3/4" Socket Button Hd Alloy Steel Locknut 1/4"-20 Jam Flexlock Nylon Washer 1/4" x 3/4" x 1/8"... - Page 43 INSTRUCTIONS Cruiser 12 Brake Assy for Rolko Wheel - Right 1. Remove rear wheel from the frame. 2. Using two 5/8” wrenches, remove the axle nut and axle. 3. Use a 7/16” wrench and a 5/32” allen wrench to remove existing brake assembly from the frame.
-
Page 44: Brake Assy For Rolko Attendant Brake - Left
WHEELS Cruiser 12 Brake Assy For Rolko Attendant Brake - Left 996007 ser 10-12 Brakes w/Attendant Brakes LH Kit Includes Item Description 996007 CX Parking Brake Assembly (For Attendant Brakes), LH ITEM PART NUMBER DESCRIPTION Rolko Foot Brake Lever Assembly, LH 508234 Bolt 1/4"-28 x 1-3/4"... - Page 45 INSTRUCTIONS Cruiser 12 Brake Assy For Rolko Attendant Brake - Left 1. Remove rear wheel from the frame. 2. Using two 5/8” wrenches, remove the axle nut and axle. 3. Use a phillips screw driver to remove the Rolko Attendant Brakes from the existing brake assembly.
-
Page 46: Brake Assy For Rolko Attendant Brake - Right
WHEELS Cruiser 12 Brake Assy with Attendant Brakes - Right 4 " 4 " 996008 6 " 4 " 4 " 4 " Kit Includes 4 " Item Description 4 " CX Parking Brake Assembly (For Attendant Brakes), RH Rolko Foot Brake Lever Assembly, RH Bolt 1/4"-28 x 1-3/4"... - Page 47 INSTRUCTIONS Cruiser 12 Brake Assy with Attendant Brakes - Right 1. Remove rear wheel from the frame. 2. Using two 5/8” wrenches, remove the axle nut and axle. 3. Use a phillips screw driver to remove the Rolko Attendant Brakes from the existing brake assembly.
-
Page 48: Scout - Brake Assy W/Pneumatic Knobby Wheel - Left
WHEELS Cruiser 12 Scout - Brake Assy w/Pneumatic Knobby Wheel - Left 996611 Brake Assembly w/Pneumatic Knobby Wheel LH Kit Includes Item Description Scout 12" Wheel Assembly Brake Caliper Assembly QUAD QMD-5 with Screws & Washer SC Rear Brake Caliper Bracket... - Page 49 INSTRUCTIONS Cruiser 12 888-Convaid (266-8243)
-
Page 50: Scout - Brake Assy W/Pneumatic Knobby Wheel - Right
WHEELS Cruiser 12 Scout - Brake Assy w/Pneumatic Knobby Wheel - Right 996612 Brake Assembly w/Pneumatic Knobby Wheel RH Kit Includes Item Description Scout 12" Wheel Assembly Brake Caliper Assembly QUAD QMD-5 with Screws & Washer SC Rear Brake Caliper Bracket... - Page 51 INSTRUCTIONS Cruiser 12 888-Convaid (266-8243)
-
Page 52: Scout - Brake Assy W/Solid Knobby Wheel - Left
WHEELS Cruiser 12 Scout - Brake Assy w/Solid Knobby Wheel - Left 996613 Brake Assembly w/Solid Knobby Wheel LH Kit Includes Item Description Scout 12" Solid Wheel Assy Brake Caliper Assembly QUAD QMD-5 with Screws & Washer 996613 SC Rear Brake Caliper Bracket... - Page 53 INSTRUCTIONS Cruiser 12 888-Convaid (266-8243)
-
Page 54: Scout - Brake Assy W/Solid Knobby Wheel - Right
WHEELS Cruiser 12 Scout - Brake Assy w/Solid Knobby Wheel - Right 996614 Brake Assembly w/Solid Knobby Wheel RH Kit Includes Item Description Scout 12" Solid Wheel Assy Brake Caliper Assembly QUAD QMD-5 with Screws & Washer SC Rear Brake Caliper Bracket... - Page 55 INSTRUCTIONS Cruiser 12 888-Convaid (266-8243)
-
Page 56: Upholstery Colors
COLOR OPTIONS Cruiser 12 Cordura Textilene Apple Green Navy Blue Aqua Blue Teal Green Cherry Red Violet Purple Chocolate Brown Wild Raspberry Forest Green Panther Black Princess Pink Royal Blue Sassy Purple Tangerine Orange NOTE: Not all options and accessories are available in all colors. -
Page 57: Upholstery
Parents want a product that looks stylish and contemporary (does not look like a wheelchair). Cleanable ● Cordura is washable for good hygiene. Upholstery Convaid uses 2 types of upholstery: Cordura ● Know around the world for its durability, abrasion resistance and high performance. ● Great tactile feel. -
Page 58: Part# 991619 Cordura Seat Bottom Upholstery
991621 990221 990321 Heavy Duty Cordura Back Upholstery 991397 991697 990297 990397 UPHOLSTERY Cruiser 12 Cordura Seat Bottom Upholstery 991619 Back Upholstery Item Description CX-12 Cordura Seat Bottom Upholstery Seat Bottom Upholstery Cruiser 10-16 Cordura Seat Upholstery PART NUMBERS DESCRIPTION... - Page 59 INSTRUCTIONS Cruiser 12 Fabric Removal Instructions 1. Partially fold the chair to relieve fabric tension (see fold instruction on page 4). the lower seat panel is attached to the back panel with velcro. Remove Velcro ® from the top of the seat bottom. Press grey detent pin at the end of the seat extension, and take off upholstery.
-
Page 60: Heavy Duty Cordura Seat Bottom Upholstery
UPHOLSTERY Cruiser 12 PART NUMBERS DESCRIPTION CX10 CX12 CX14 CX16 Heavy Duty Cordura Seat Bottom Upholstery Cordura Seat Bottom Upholstery 991316 991619 990219 990319 Cordura Back Upholstery 991396 991696 990296 990396 Heavy Duty Cordura Seat Bottom Upholstery 991318 991621 990221... - Page 61 INSTRUCTIONS Cruiser 12 Fabric Removal Instructions 1. Partially fold the chair to relieve fabric tension (see fold instruction on page 4). the lower seat panel is attached to the back panel with velcro. Remove Velcro from the ® top of the seat bottom. Press grey detent pin at the end of the seat extension, and take off upholstery.
-
Page 62: Textilene Seat Bottom Upholstery
PART NUMBERS UPHOLSTERY Cruiser 12 DESCRIPTION CX10 CX12 CX14 CX16 Textilene Seat Bottom Upholstery 991394 991694 990294 990394 Textilene Back Upholstery Textilene Seat Bottom Upholstery 991398 991698 990298 990398 Heavy Duty Textilene Bottom Seat Upholstery 991395 991695 990295 990395 Heavy Duty Back Upholstery... - Page 63 INSTRUCTIONS Cruiser 12 Fabric Removal Instructions 1. Partially fold the chair to relieve fabric tension (see fold instruction on page 4). the lower seat panel is attached to the back panel with velcro. Remove Velcro from the ® top of the seat bottom. Press grey detent pin at the end of the seat extension, and take off upholstery.
-
Page 64: Heavy Duty Textilene Seat Bottom Upholstery
PART NUMBERS DESCRIPTION CX10 CX12 CX14 Cruiser 12 CX16 UPHOLSTERY Textilene Seat Bottom Upholstery 991394 991694 990294 990394 Textilene Back Upholstery 991398 991698 990298 990398 Heavy Duty Textilene Seat Bottom Upholstery Heavy Duty Textilene Bottom Seat Upholstery 991395 991695 990295... - Page 65 INSTRUCTIONS Cruiser 12 Fabric Removal Instructions 1. Partially fold the chair to relieve fabric tension (see fold instruction on page 4). the lower seat panel is attached to the back panel with velcro. Remove Velcro from the ® top of the seat bottom. Press grey detent pin at the end of the seat extension, and take off upholstery.
-
Page 66: Cordura Upholstery With +3" Seat Depth Extension
Cruiser 10 Cordura Seat w/3 Cruiser 12 UPHOLSTERY Cordura Upholstery with +3" Seat Depth Extension 996015 ra Seat w/3" Seat Depth Extension Kit Kit Includes Item Description CX-10/12 Seat Extension Tube Assembly +3" CX-10 Standard Seat Assembly 3" Extension (Cordura) - Page 67 INSTRUCTIONS Cruiser 12 Cordura Upholstery with +3" Seat Depth Extension 1. Remove upholstery and seat tube extensions from frame. 2. Partially fold the frame. 3. Using a 7/16” wrench and a 5/32” allen wrench, remove the bolt connecting the seat tube to the black slide housing from the left side of the frame.
-
Page 68: Heavy Duty Cordura Upholstery With +3" Seat Depth Extension
Cruiser 10 Cordura Seat w/3 Cruiser 12 UPHOLSTERY Heavy Duty Cordura Upholstery with +3" Seat Depth Extension 996016 ra Seat w/3" Seat Depth Extension Kit Kit Includes Item Description CX-10/12 Seat Extension Tube Assembly +3" CX-10 Heavy Duty Seat Assembly 3" Extension (Cordura) - Page 69 INSTRUCTIONS Cruiser 12 Heavy Duty Cordura Upholstery with +3" Seat Depth Extension 1. Remove upholstery and seat tube extensions from frame. 2. Partially fold the frame. 3. Using a 7/16” wrench and a 5/32” allen wrench, remove the bolt connecting the seat tube to the black slide housing from the left side of the frame.
-
Page 70: Textilene Upholstery With +3" Seat Depth Extension
Cruiser 12 UPHOLSTERY Textilene Upholstery with +3" Seat Depth Extension 996017 Kit Includes Item Description ilene Seat w/3" Seat Depth Extension Kit CX-10/12 Seat Extension Tube Assembly +3" CX-10 Standard Seat Assembly 3" Extension (Textilene) Velcro 1-1/2" Back To Back Black 34" Long ®... - Page 71 INSTRUCTIONS Cruiser 12 Textilene Upholstery with +3" Seat Depth Extension 1. Remove upholstery and seat tube extensions from frame. 2. Partially fold the frame. 3. Using a 7/16” wrench and a 5/32” allen wrench, remove the bolt connecting the seat tube to the black slide housing from the left side of the frame.
-
Page 72: Heavy Duty Textilene Upholstery With +3" Seat Depth Extension
Cruiser 12 UPHOLSTERY Heavy Duty Textilene Upholstery with +3" Seat Depth Extension 996018 Kit Includes ilene Seat w/3" Seat Depth Extension Kit Item Description CX-10/12 Seat Extension Tube Assembly +3" CX-10 Heavy Duty Seat Assembly 3" Extension (Textilene) Velcro 1-1/2" Back To Back Black 34" Long ®... - Page 73 INSTRUCTIONS Cruiser 12 Heavy Duty Textilene Upholstery with +3" Seat Depth Extension 1. Remove upholstery and seat tube extensions from frame. 2. Partially fold the frame. 3. Using a 7/16” wrench and a 5/32” allen wrench, remove the bolt connecting the seat tube to the black slide housing from the left side of the frame.
-
Page 74: Head Support
HEAD SUPPORT Cruiser 12 DESCRIPTION Headrest Extension - Curved - Cordura Headrest Extension - Curved Cordura Headrest Extension - Rectangular - Textilene 996027 Item Description Headrest Extension - Curved Cordura Back Back Upholstery Upholstery (Cordura) (Cordura) ension - Curved - Cordura... - Page 75 INSTRUCTIONS Cruiser 12 Headrest Extension 1. Insert Headrest Extension on Tubes into the Headrest Holding Brackets and push down. 888-Convaid (266-8243)
-
Page 76: Occi Headwings
DESCRIPTION HEAD SUPPORT Cruiser 12 Occi Headwings Occi Headwings Padded Headwings 995932 Item Description Occi Headwings Back Upholstery Back Upholstery wings adwings PART NUMBERS DESCRIPTION CX10 CX12 CX14 CX16 CX18 Occi Headwings 995932 995932 996132 996132 996332 Padded Headwings 995933... - Page 77 INSTRUCTIONS Cruiser 12 Occi Headwings 1. Occi Headwings supports and positions the head at the occipital area. This headrest provides added comfort, allows side to side head movement without obstruction, and does not block the individual's ears and line of vision.
-
Page 78: Trunk Positioning
TRUNK POSITIONING Cruiser 12 H-Harness with Padded Covers 996610 6 H-Harness w/Padded Cover Kit Includes Item Description Padded Strap Cover 9" H-Harness 1-1/2" Assembly 996610 ITEM PART NUMBER DESCRIPTION 100173 Padded Strap Cover 9" Assembled 500713 H-Harness 1-1/2" Assembly Assembled... - Page 79 INSTRUCTIONS Cruiser 12 H-Harness with Padded Covers 1. H-harness shoulder straps help the user retain upright trunk position. To adjust, insert the bolt at the end of the strap through the grommet hole in the seat back. Grommet choice should be level with or higher than the top of the shoulders.
-
Page 80: Full Torso Support Vest For Cordura Upholstery
TRUNK POSITIONING Cruiser 12 Full Torso Support Vest 996025 Item Description Full Torso Support Vest for Cordura Upholstery 996026 Item Description Full Torso Support Vest for Textilene Upholstery 1 Reducer Seat Insert 996636 Item Description Reducer Seat Insert www.convaid.com... - Page 81 INSTRUCTIONS Cruiser 12 Full Torso Support Vest ● An Adjustable support vest keeps the user in place comfortably and securely. It helps to maintain midline seating position and attached to the chair with straps that wrap around the seat back and connect with Velcro , and shoulder straps ®...
-
Page 82: Soft Adjustable Lateral Support - Single Flap
TRUNK POSITIONING Cruiser 12 Soft Adjustable Lateral Support - Single Flap 996035 Item Description Soft Adjustable Lateral Single Flap Soft Adjustable Lateral Support - Double Flap 996036 Item Description Soft Adjustable Lateral Double Flap www.convaid.com... - Page 83 INSTRUCTIONS Cruiser 12 Soft Adjustable Lateral Support - Single Flap 1. Attach the Lateral Trunk Support to the chair by wrapping the two rear straps around the back of the chair and securing with Velcro ® 2. Attach the single flap, by wrapping the strap on the left flap around the side tubing of...
-
Page 84: Upper Extremity Support Surface Tray (Hardware Included)
TRUNK POSITIONING Cruiser 12 Upper Extremity Support Surface Tray 995938 Kit Includes Item Description Upper Extremity Support Surface Tray Hardware Close-up www.convaid.com... - Page 85 INSTRUCTIONS Cruiser 12 Upper Extremity Support Surface Tray ATTACHING THE TRAY 1. Raise front of the tray with the tray supports completely unfolded. NOTE: For Scout option, raise armrest before engaging knobs. 2. Engage knobs on side of chair with tray hooks underneath.
-
Page 86: Pelvic Positioning
Cruiser 12 PELVIC POSITIONING 3 Point Belt with Depth Adjustable Crotch Strap 995683 Item Description 3 Point Belt With Depth Adjustable Crotch Strap Adjustable Crotch Strap for 3 Point Belt 994716 Item Description Crotch Pad Assembly www.convaid.com... - Page 87 INSTRUCTIONS Cruiser 12 3 Point Belt with Depth Adjustable Crotch Strap 1. The crotch strap can be adjusted by threading the strap through the desired slot. 888-Convaid (266-8243)
-
Page 88: Support Seat Cushion Assy
PELVIC POSITIONING Cruiser 12 Support Seat Cushion Assy 996019 Kit Includes Item Description CX-12 Sensiform Support Cover CX-12 Sensiform Support Cushion Solid Seat Insert Assembled Assembled Support Close-up www.convaid.com... - Page 89 INSTRUCTIONS Cruiser 12 Support Seat Cushion Assy 1. Use a 5/32" allen wrench to remove the hardware attached on the existing cushion. 2. Reattach hardware to the new cushion. Be sure to follow the schematic to place the washers in the proper order.
-
Page 90: Align Seat Cushion Assy
PELVIC POSITIONING Cruiser 12 Align Seat Cushion Assy 996020 Kit Includes Item Description CX-12 Sensiform Align Cover CX-12 Sensiform Align Cushion Solid Seat Insert Assembled Assembled Align Close-up www.convaid.com... - Page 91 INSTRUCTIONS Cruiser 12 Align Seat Cushion Assy 1. Use a 5/32" allen wrench to remove the hardware attached on the existing cushion. 2. Reattach hardware to the new cushion. Be sure to follow the schematic to place the washers in the proper order.
-
Page 92: Position Seat Cushion Assy
PELVIC POSITIONING Cruiser 12 Position Seat Cushion Assy 996021 Kit Includes Item Description CX-12 Sensiform Position Cover CX-12 Sensiform Position Cushion Solid Seat Insert Assembled Assembled Position Close-up www.convaid.com... - Page 93 INSTRUCTIONS Cruiser 12 Position Seat Cushion Assy 1. Use a 5/32" allen wrench to remove the hardware attached on the existing cushion. 2. Reattach hardware to the new cushion. Be sure to follow the schematic to place the uiser 10 Support Seat Cushion & Cover washers in the proper order.
-
Page 94: Lateral Thigh Support - Adductor
PELVIC POSITIONING Cruiser 12 Lateral Thigh Support - Adductor 996029 Item Description Lateral Thigh Support - Adductor Medical Thigh Support - Abductor 996030 Item Description Medical Thigh Support - Abductor www.convaid.com... - Page 95 INSTRUCTIONS Cruiser 12 Lateral Thigh Support - Adductor 1. Pulls thighs together, improving hip alignment and stabi li zing seating position. 2. The degree of adduction can be varied and can favor one side. Fold the adductor flaps over the thighs, wrap the straps under and around the armrest tube and attach with buckle.
-
Page 96: Q'straint Transit Lap Belt
PELVIC POSITIONING Cruiser 12 Q’Straint Transit Lap Belt 996638 Item Description Q' Straint Transit Lap Belt - Short Sure-Lok Transit lap belt 996639 Item Description Sure-Lok Transit Lap Belt - Short www.convaid.com... - Page 97 INSTRUCTIONS Cruiser 12 888-Convaid (266-8243)
-
Page 98: Foot & Leg Positioning
Foot Securement Strap 996619 996619 996619 996619 996619 3 Foot Securement Strap 1 Calf Panel FOOT & LEG POSITIONING Cruiser 12 Calf Panel 2 Foot Positioners 996615 3 Foot Securement Strap DESCRIPTION Item Description Calf Panel PART NUMBERS Calf Panel... - Page 99 INSTRUCTIONS Cruiser 12 Calf Panel 1. Lay Calf Panel flat and unfasten the Velcro straps. ® 2. Attach Velcro straps around Footrest Extension Tube. 3. Position Calf Panel across chair and attach Velrco Straps around opposite Footrest ® Extension Tube.
-
Page 100: Accessories
ACCESSORIES Cruiser 12 DESCRIPTION Headrest Cover (Canopy) Headrest Cover (Canopy) Extended Headrest Cover - no Window Extended Headrest Cover - with Wind 996022 Item Description Headrest Cover (Canopy) 1 Headrest Cover (Canopy) 2 Extended Headrest Cover - No Windows (Canopy) - Page 101 INSTRUCTIONS Cruiser 12 Attach Canopy 1. Remove Canopy from box. 2. Align plastic Canopy Retaining Clips with upper tubing on back of the chair. Push on clips with the ball of your hand unti l they snap into place. Caution: Keep fingers away from moving parts.
-
Page 102: Mosquito Net
Cruiser 12 ACCESSORIES Mosquito Net 996623 Item Description Mosquito Net Rain Cover 996625 Item Description Rain Cover www.convaid.com... - Page 103 INSTRUCTIONS Cruiser 12 Mosquito Net 1. Take the top of the mosquito net and wrap it around the top of the canopy. You can identify the top of the mosquito net by the two black ties. 2. Arrange the mosquito net around the wheelchair and pull the bottom of the mosquito net to wrap around the footplate.
-
Page 104: Saddle Bag - Pair
ACCESSORIES Cruiser 12 Saddle Bags 996620 Kit Includes Item Description Saddle Bag Close-up www.convaid.com... - Page 105 INSTRUCTIONS Cruiser 12 Saddle Bags 1. To install, insert Front Button Strap into opening in Mesh Seat Bottom and over Seat Tube. 2. Verify the strap is in front of the Seat Tube Retaining Bolt, then snap button shut. 3. Wrap Rear Button Strap around Seat Tube and snap shut.
-
Page 106: Wheelchair Travel Bag
3 Extended Headrest C ACCESSORIES Cruiser 12 Wheelchair Travel Bag Headrest Cover (Canopy 996621 Extended Headrest Cove Extended Headrest Cove Item Description Wheelchair Travel Bag 1 Headrest Cover (Can 2 Extended Headrest C 3 Extended Headrest C Under Seat Storage Basket... - Page 107 INSTRUCTIONS Cruiser 12 Wheelchair Travel Bag ● This wheeled travel bag is great for transporting your chair on planes, trains or buses. Constructed of heavy duty Cordura fabric, it comes with two-way zippers, pull handles at both ends and an adjustable carrying strap. One size fits most chairs.
-
Page 108: Frame Armrest Cover - Pair
ACCESSORIES Cruiser 12 Frame Armrest Cover - Pair 994764 Kit Includes Item Description CX Frame Armrest Cover w/Zipper 5” Lg Assembled Close-up www.convaid.com... - Page 109 INSTRUCTIONS Cruiser 12 Frame Armrest Cover - Pair 1. Using a blade, remove the existing foam cover. 2. Unzip the new armrest cover and wrap around the front leg tube. 3. The zipper of the armrest cover should be facing downward.
-
Page 110: 995688 Rear Anti-Tip Tube - Pair
ACCESSORIES Cruiser 12 Anti-Tip Tube - Pair 995688 Kit Includes Item Description CX-10 Anti-Tip Assembly, LH CX-10 Anti-Tip Assembly, RH Assembled Close-up www.convaid.com... - Page 111 INSTRUCTIONS Cruiser 12 Anti-Tip Tube - Pair 1. To install the Anti-Tip Tubes, align the tube with the end of the round frame tubing located next to the rear wheel. 2. Push the detent pin while positioning the Anti-Tip Tube onto the round frame tubing and push until the “release button”...
- Page 112 2830 California Street, Torrance, CA 90503 USA 888.266.8243 | 310.618.0111 | Fax 310.618.2166 sales@convaid.com | international@convaid.com www.convaid.com PBCX12-ENG-11162015 Printed in U.S.A.
Need help?
Do you have a question about the Cruiser 12 and is the answer not in the manual?
Questions and answers
I need frame parts, where I can get it, cruiser 12 wheel chair
Frame parts for the Convaid Cruiser 12 wheelchair can be found in the replacement parts section of the manual. Specifically, the following frame parts are listed:
- Part# 991688: One Piece Height Adjustable Push Handle
- Part# 996014: One Piece Height Adjustable Push Handle with Attendant Handbrake
These are listed at the beginning of the replacement parts section.
This answer is automatically generated