Table of Contents
Advertisement
Instruction for installation,
operation and maintenance
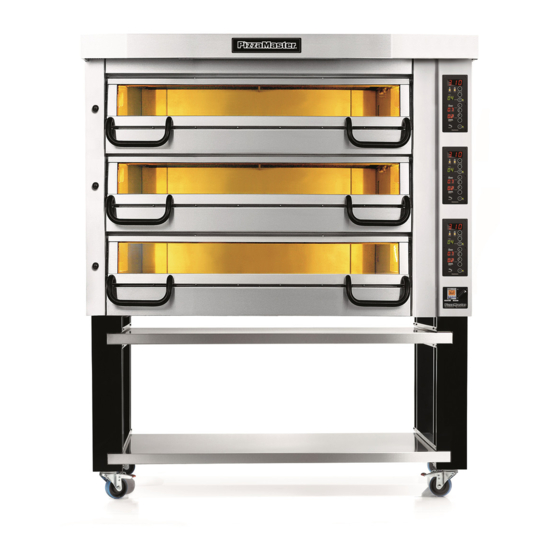
Series 700
PM 721 - PM 722 - PM 723 - PM 724 - PM 725
PM 731 - PM 732 - PM 733 - PM 724 - PM 725
PM 741 - PM 742 - PM 743 - PM 744 - PM 745
Series 800
PM 821 - PM 822 - PM 823 - PM 824 - PM 825
PM 831 - PM 832 - PM 833 - PM 834 - PM 835
PM 841 - PM 842 - PM 843 - PM 844 - PM 845
Series 900
PM 921 - PM 922 - PM 923 - PM 924 - PM 925
PM 931 - PM 932 - PM 933 - PM 934 - PM 935
PM 941 - PM 942 - PM 943 - PM 944 - PM 945
9006-0101 R1A
Advertisement
Table of Contents

Related Manuals for PizzaMaster 700 Series


Summary of Contents for PizzaMaster 700 Series
-
Page 1: Serial No / Oven Rating Plate
Instruction for installation, operation and maintenance Series 700 PM 721 – PM 722 – PM 723 – PM 724 – PM 725 PM 731 – PM 732 – PM 733 – PM 724 – PM 725 PM 741 – PM 742 – PM 743 – PM 744 – PM 745 Series 800 PM 821 –... -
Page 2: Warranty And Service
Svenska BakePartner AB We thank you for your trust and congratulate you on the purchase of your new PizzaMaster® oven. Our goal has always been to build the best pizza ovens in the world. Right from the start, we knew this could be achieved only by specializing in the pizza industry and making bake-quality our top priority. -
Page 3: Table Of Contents
EU-Declaration of conformity ........... 27 Quality assurance and delivery certificate ......28-29 Attachment : Electrical diagram Parts list – Electrical components BakePartner has a policy of continuous product develop- ment and reserves the right to change specifications and designs without prior notice. PizzaMaster®... -
Page 4: Capacities And Technical Data
Capacities and technical data PizzaMaster 700-series (optimized for pizzas up to 355 mm / 14 in) ® Dimensions in millimetres Dimensions in inches No. of Power Capacity (pizzas per oven) Width x Depth x Height *b) Width x Depth x Height *b) -
Page 5: Positioning The Oven
• The oven can also be installed without its legs. In this case, however, it is important to position the oven so that the underneath of the oven is ventilated. See page 8 “Assembly for ovens with spacers” PizzaMaster®... -
Page 6: Packing List
19. Semi-automatic door opening 27. Royal Gold model ..........lower deck ............deck 2 ..............Other deck 3 ..............28 ..............pcs deck 4 ..............29 ..............pcs 30..............pcs 30..............pcs 31..............pcs Packed by : ..................PizzaMaster®... -
Page 7: Installation - Assembly Oven
6. Fit the Top side panel (2pcs), using self-tapping below. screws (wafer head) (4pcs) The appliance must be installed with a flexible 7. Remove the wooden supports that hold the hearth- conduit. stones in place. 8. Remove all protective plastic film from the oven. PizzaMaster®... - Page 8 5 opposite. stones in place. 6. Remove all protective plastic film from the oven. Do not use the oven-door handles or the oven- vent knobs to lift the oven, for it can damage the oven. PizzaMaster®...
-
Page 9: Installation - Assembly Accessories
Installation – Assembly accessories Assembly – accessories All PizzaMaster® accessories can be mounted on either the left- or right-hand side of the oven. Peel holder 1. Fit the lower bracket, using the self-tapping screws (hexagonal) provided (3 pcs). 2. Peel off the backing from the soft pad and stick the pad to the lower bracket, as shown in the illustration. -
Page 10: Installation - Electrical Connection Oven
Ampere Ampere Ampere 4. Make sure all connections are tight, then replace the right-hand side panel. The earth potential equalizer screw has to be installed. The earth potential screw is located on the backside next to the connecting cable. PizzaMaster®... -
Page 11: Installation - Evacuation Connection
If a extractor hood is placed above the oven, it is not necessary to connect the exhaust outlets. The hood should be approx. 0,5 m (20 inch) larger than the outer edge of the oven to effectively cope with steam, smoke and fumes from the oven. PizzaMaster®... -
Page 12: Installation - Assembly Ubc
Factory settings Temperature: 38 degree C Humidity: 78% Available temperature settings: room temperature - 50 degree C Tip! for best fermentation result should the factory set- tings not be changed. If slower fermentation is required lower the temperature slightly. PizzaMaster®... - Page 13 3. Place the water container as per fig. 3. (UBC-P only) 4. Fit the glass-doors to the cabinet. Picture 1 Picture 2 Picture 3 PizzaMaster®...
-
Page 14: Installation - Automatic Door Opener
Installation – Automatic door opener Decription Important! All oven doors in the PizzaMaster 700, 800 and 900 For reasons of safety and the validity of the war- series can be equipped with an automatic door opener ranty, all electrical work must be carried out by a as an optional extra. -
Page 15: Oven Operation - Guide Of Usage
The top of the oven is not considered as a food storage or as an food preparation area General information Our product range consists of PizzaMaster (pizza ovens) and is the largest electric deck oven series in the world with 80 different sizes. -
Page 16: Oven Operation - Display Ed
Main Switch Main switch 7-day clock timer Auto 02 04 03 0 = Off (option) 1 = On 18:24 For automatic start 1 2 3 4 5 6 7 and stop MENU See page 24-25 Made in Sweden PizzaMaster®... - Page 17 (Auto mode) Activating Auto mode: Keep pressed until green Auto light is turned on. Deactivating Auto mode: Keep pressed until green Auto light is switched off. For programming of clock timer see page 22 and 23. PizzaMaster®...
-
Page 18: Oven Operation - Display E
1 = On 7-day clock timer A = Automatic 1 2 3 4 5 6 7 (option) MENU start and stop with For automatic start optional and stop. Made in Sweden 7-day clock timer. See page 24-25 Made in Sweden PizzaMaster®... - Page 19 0 = Off 10 = Maximum output Top Back - Adjusts and distributes power to overhead heat 0 = Off 10 = Maximum output Bottom - Adjusts and distributes power to bottom heat 0 = Off 10 = Maximum output PizzaMaster®...
-
Page 20: Oven Settings And Baking Tips
Placement of pizzas Important! To minimize the incidence of uneven baking, all PizzaMaster® ovens are optimized for a certain size • When the oven is fully loaded, the vent should be opened fully in order to avoid soft pizza and of pizza. -
Page 21: First-Time Start-Up / Changing Of Oven Lamps / Maintenance
6. Switch on the oven by turning the main switch into and the stainless steel parts. Make sure the gasket is position 1. left out with 8mm/0.3in as shown in the image. Fasten gasket and stainless steel parts by attaching all screws. PizzaMaster®... -
Page 22: Maintenance And Preventative Maintenances
PizzaMaster representative or PizzaMaster directly if maintenance or repairs are necessary It is possible to use conventional non toxic oven cleaners but for the best possible cleaning result we... - Page 23 Maintenance and Preventative Maintenance 1 week cleaning • Clean the ovens stainless steel front exterior with a PizzaMaster cleaning cloth. Always clean with the grain of the metal. If oven is equipped with UBC • Remove all interior removable parts (glass doors, water container, shelf supports, dividers, bottom and top brackets) there is no tool necessary for removing these parts.
-
Page 24: 7-Day Clock Timer
When using the clock timer, the oven’s main switch must be in position A. All PizzaMaster® ovens can be equipped with a 7-day clock that switches the oven on and off automatically. Info! This ensures that the oven is always hot at the start of •... - Page 25 11:00 – 12:00 – 12:00 – 21:00 21:00 21:00 21:00 22:00 22:00 21:00 Recommended start 10:15 – 10:15 – 10:15 – 10:15 – 10:15 – 11:15 – 11:15 – and stop times 21:15 21:15 21:15 21:15 22:15 22:15 21:15 PizzaMaster®...
-
Page 26: Throubleshooting
The table below will help to make baking easier, sim- plify adjustments of the oven and help in the event of problem. If solution is not found please contact your nearest PizzaMaster® distributor or contact our service department on: Tel: +46(0)33-230 025 E-mail service@bakepartner.com... -
Page 27: Eu-Declaration Of Conformity
EU-Declaration of conformity EU-Declaration of conformity Svenska BakePartner AB declare under sole responsibility that the PizzaMaster oven is approved and in conformity with, Electromagnetic compatibility Directive 2004/108/EC, and applicable supplements Low voltage Directive 2006/95/ECC, and applicable supplements Modular ovens PM 721... -
Page 28: Quality Assurance And Delivery Certificate
Finally, prior to delivery, all functions below are tested thoroughly. Only then is the oven issued with a delivery certificate. Info! PizzaMaster® ovens can be supplied with 1, 2, 3 or 4 decks. Deck 1 is always the lower deck. Main switch –... - Page 29 208V 3ph 50/60Hz 220-240V 3ph 50/60Hz Deck 3 L1 ..A L2 ..A L3 ..A 380-415 3N 50/60Hz. Deck 4 L1 ..A L2 ..A L3 ..A 440-480 3N 50/60Hz. Checked and approved by Date .................................... PizzaMaster®...
- Page 30 +46(0)33-248 140 company has developed a series of multi-purpose countertop ovens with exceptional qualities. Internet: www.pizzamaster.com PizzaMaster® multi-purpose ovens are intended to www.bakepartner.com set new standards of capacity, versatility, safety and E-mail: info@bakepartner.com style in countertop baking and roasting applications.
Need help?
Do you have a question about the 700 Series and is the answer not in the manual?
Questions and answers