Table of Contents
Advertisement
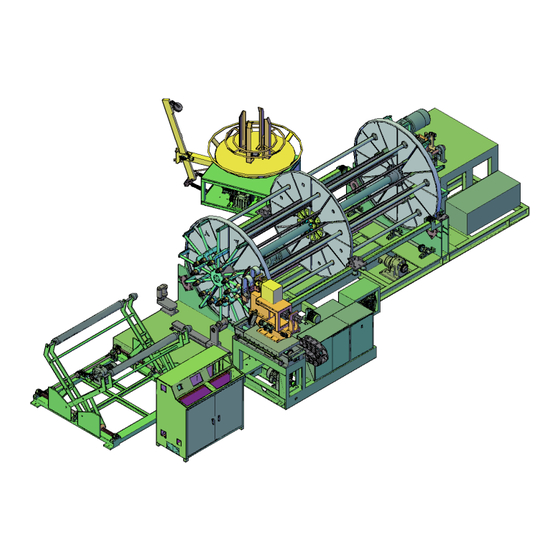
MANUAL OF CAGE WELDING MACHINE
MODEL: KN-1248-G3
MAKER:
135 SEONGJU-RI,WONGOG-MYEON
ANSEONG-CITY,KYUNGGI-DO,KOREA
TEL.:82-31-656-5385 FAX.:82-31-656-5386
E-mail:knhslee@hanmail.net
EXPORTER:
BM TRADING COMPANY
R00M#3304.KOREA WORLD TRADE CENTER
159 SAMSUNG-DONG,KANGNAM-KU
SEOUL135-729,KOREA
TEL.:82-2-551-2716
FAX.:82-31-272-2470
E-mail:bmtrading@hanmail.net
or bmtrading3304@yahoo.co.kr
Advertisement
Chapters
Table of Contents

Summary of Contents for Kyungnam Machine Company KN-1248-G3
- Page 1 MANUAL OF CAGE WELDING MACHINE MODEL: KN-1248-G3 MAKER: 135 SEONGJU-RI,WONGOG-MYEON ANSEONG-CITY,KYUNGGI-DO,KOREA TEL.:82-31-656-5385 FAX.:82-31-656-5386 E-mail:knhslee@hanmail.net EXPORTER: BM TRADING COMPANY R00M#3304.KOREA WORLD TRADE CENTER 159 SAMSUNG-DONG,KANGNAM-KU SEOUL135-729,KOREA TEL.:82-2-551-2716 FAX.:82-31-272-2470 E-mail:bmtrading@hanmail.net or bmtrading3304@yahoo.co.kr...
-
Page 2: Table Of Contents
CONTENTS 1.OPERATION PANEL DIAGRAM 2.ELECTRIC COMPONENTS DIAGRAM 3.PANEL DIAGRAM 4.FUNCTION OF CONTROL PANEL SWITCH 5.TOUCH PANEL FUNCTION 6.CHECK POINTS BEFORE PRODUCTION 7.CHANGE PRODUCT SPECIFICATION 8.HOW TO MAKE CAGES 9.PROXIMITY SWITCH FUNCTION 10.ERROR DISPLAY 11.REPLACE SPARE PARTS MACHINE SPECIFICATION 13.WEARING PARTS 14.ELECTRIC SEQUENCE 15.TOUCH PANEL MANUAL - www.lsis.biz 17.TZ4ML(TEMPERATURE CONTROLLER MANUAL) -www.autonics.com... -
Page 7: Function Of Control Panel Switch
4. FUNCTION OF CONTROL PANEL SWITCH 1.Main Power ON/OFF : Press bottom of wheel to be locked, and locking with a key for repair or inspection. 2.TOUCH PANEL: Touch Panel must be turned on before operating the machine to check or entry various datas. - Page 8 6. WELDING CURRENT: Display digit number for welding current. - Setting digit shows when adjust SLOW or FAST welding current. During AUTO operation, display SLOW current for slow welding area (Spigot + Bell) and display FAST current for fast welding area (Barrel). Note: Setting is 0~40, Max.
- Page 9 - TRANSFER F/W , B/W ; For moving center drum forward or backward. It works as long as the button is pushed. During AUTO operation, it does not works. - TRANSFER forwarding is stop at position 2 and backward is stop at position 3. - If TRANSFER touch position 1 or 4, TRANSFER stop moving and TRANSFER/BELL POSITION ERROR (on EMERGENCY STOP INFORMATION)is lit in red, then push "POSITION ERROR MOVE"...
- Page 10 POSITION ERROR MOVE : In case of TRANSFER/BELL POSITION ERROR, push this button. - TRANSFER or BELL is positioned out of Max./Min. position. Push POSITION ERROR MOVE button together with TRANSFER F/W, B/W, BELL EXPAND or BELL REDUCE to move it inside. ※...
- Page 11 - This operator buttons have same function as panel button. - This button is not working during the AUTO operation - This button is working when a operator stands on the Pressure Pad. - During a operator are standing on Pressure Pad, main panel is not works at all, except EMERGENCY STOP button.
-
Page 12: Touch Panel Function
5. TOUCH PANEL FUNCTION - When the power “ON”, following screen is displayed. - Power "ON" by pressing POWER ON button on the panel or taps POWER ON display, then ground color change to green color and display READY. - If error was not solved, EMERGENCY is display. - Select menu to move to each screen. - Page 13 Following screen shows dimension for A or B pipe. A Pipe Product Screen B Pipe Product Screen Following screen shows dimension for C or D pipe. C Pipe Product Screen D Pipe Product Screen...
- Page 14 A-Pipe Product Screen Max 6000 1234 1234 - Green color buttons from above screen can be insert digit to produce. - Other color buttons shows present status. Each buttons digit will be changed high or low during the operation. - Start Ring : After push AUTO button, weld point as much as set points from 0 to 12 at same position and TRANSFER moves forward automatically.
- Page 15 - Pole Position : Set up POLE position value. Be sure to check digit correctly. ※ When the Electric Rings or Copper Sheet are worn out, this value should be smaller than new one, so move POLE position little bit forward, and set up value same as actual value showing on right side bar (dark green) ※...
- Page 16 B Pipe Product Screen - Green color buttons from above screen can be insert digit to produce. - Other color buttons shows present status. Each buttons digit will be changed high or low during the operation. - Start Ring : After push AUTO button, weld point as much as set points from 0 to 12 at same position and TRANSFER moves forward automatically.
- Page 17 - Barrel Size : Diameter of barrel can be set up. ※ Digit set up one time will be saved and call same digit when it will be selected. Therefore, barrel size to be set up one time only for each size, so be sure to check correct digit before start.
- Page 18 C Pipe Product Screen - Green color buttons from above screen can be insert digit to produce. - Other color buttons shows present status. Each buttons digit will be changed high or low during the operation. - Start Ring : After push AUTO button, weld point as much as set points from 0 to 12 at same position and TRANSFER moves forward automatically.
- Page 19 - Barrel Size : Diameter of barrel can be set up. ※ Digit set up one time will be saved and call same digit when it will be selected. Therefore, barrel size to be set up one time only for each size, so be sure to check correct digit before start.
- Page 20 D Pipe Product Screen - Green color buttons from above screen can be insert digit to produce. - Other color buttons shows present status. Each buttons digit will be changed high or low during the operation. - Start Ring : After push AUTO button, weld point as much as set points from 0 to 12 at same position and TRANSFER moves forward automatically.
- Page 21 - Barrel Pitch : DRUM and TRANSFER are moving fast speed with set pitch set up. - Barrel Size : Diameter of barrel can be set up. ※ Digit set up one time will be saved and call same digit when it will be selected. Therefore, barrel size to be set up one time only for each size, so be sure to check correct digit before start.
- Page 22 MANUAL DRIVE SCREEN Above screen for MANUAL DRIVE. During AUTO operation, MANUAL DRIVE screen can not be opened. - WELDING COUNT : Total number of welded points for making one cage completely. - DRUM COUNT : Total number of DRUM r.p.m. for making one cage completely. - TRANSFER ENCODER : Present value of TRANSFER ENCODER..
- Page 23 - Transfer and Pole is driven by Encoder value. ※ Transfer Encorder value became "0" when Transfer F/W Stop Proximity switch is touched. ※ Pole Encoder value became "0" when Pole F/W Stop Proximity switch is touched. - Encoder value became "0" in any time at Proximity Switch is touched, and stop to move. Then touch bar to POP-UP showing following message.
- Page 24 PRODUCTS COUNTER SCREEN - All products quantity are saved. - Products for each pipe type A, B, C, D are recorded. - Touch RESET bar for each type pipe to delete quantity and shows "0". If touch digit beside of A, B, C, D, the digit became "0". - If touch individual bar of digit, it became "0"...
- Page 25 Emergency stop information - EMERGENCY STOP ON bar display POP-UP and machine is stopped if EMERGENCY STOP button is pressed or concerned it. 1. EMERGENCY STOP ON : In case of EMERGENCY STOP button is pressed. 2. MAGNETIC OCR TRIP : Over current in the panel is tripped. ※...
- Page 26 7. DRUM, BELL, TRANSFER, POLE FREQUENCY DRIVER ERROR : - Any trouble of each Frequency Driver makes ERROR and display on each bar. - If trouble is not released by touch RESET bar, push RESET button on control panel. - If trouble is not released by push RESET button on control panel, Frequency Driver should be replaced.
-
Page 27: Check Points Before Production
6. CHECK POINTS BEFORE PRODUCTION 1. Power "ON" by main Breaker and Welder Breaker. 2. Power "ON" by main Power Switch on Control Panel and Power on PLC Control 3. Push POWER ON button, and check Water Pump Motor is turning on. - If water pump motor is out of order, cooling water can not circulate through welding transformer, welding controller, electrode plate which will occur high temperature to damage parts. - Page 28 11. Cage receiver should be adjusted little bit lower than cage diameter, after then raise up to be touched cage outcoming. 12. Check oil level for gear boxes (1/2 oil window) proper tension of all chains. 13. Check welding parts such as copper rings, copper sheet (deep groove caused bad welding) wire dies, shield wires etc.
-
Page 29: Change Product Specification
7. CHANGE PRODUCT SPECIFICATION 1. Select Pipe Type from PIPE SELECT screen. 2. Select Size from SIZE SELECT screen. 3. Inserts 2 longitudinal wire in opposite wire die hole, and adjust BELL EXPAND and BELL REDUCE to fix Proximity Switch. 4. - Page 30 Make A-Pipe 1. Input Total Length. - Touch green bar to Pop-UP Key Pad to input digit. - Input length should be - 50mm from actual longitudinal wire (Copper Ring+Welding Gap) ※ Max. length is 2,600mm. - If you put in digit more than 2600, it shows 2600 as Max. ※...
- Page 31 6. Input Barrel Pitch. - Input digit more than 30. - Drum r.p.m. is fixed between Barrel Length and Transfer is moving as per pitch. 7. Input Barrel Size. - Insert 2 longitudinal wire in wire die with enough length to measure diameter. - Measures distance between outside and outside of wire by a tap, and input digit.
- Page 32 Recommended slower r.p.m. than above digit. But, Faster r.p.m. is dangerous. - Drum r.p.m. effect to Wire Drum speed. Fast Drum r.p.m. makes WIRE DRUM ERROR. 17. Push MANUAL WELDING button. 18. Push AUTO button to run machine in automatic operation. - After Welding Start Ring points set up, Drum and Transfer is moving slow for Start Slow Length area, and Drum, Transfer and Welding is fast for Barrel area and slow moving for Last Slow area.
- Page 33 Make B-Pipe 1. Input Total Length. - Touch green bar to Pop-Up key pad to put in digit. - Input length should be -50mm from the actual longitudinal wire (Copper Ring+Welding Gap) ※ Max. length is 2,600mm. - If you put in digit more than 2,600mm, it show 2600 as Max. ※...
- Page 34 6. Input Barrel Pitch. - Input digit more than 30. - Drum r.p.m. is fixed between Barrel Length and Transfer is moving as per pitch. 7. Input Barrel Size. - Insert 2 longitudinal wire in wire die with enough length to measure diameter. - Measures distance between outside and outside of wire by a tap, and input digit.
- Page 35 18. Adjust air pressure of #7 and #8. - Air pressure should be adjusted according to longitudinal and spiral wire diameter. Example: 5mm Longitudinal wire x 6mm Spiral wire #7 Air pressure = 5 bar #8 Air pressure = 3 bar 19.
- Page 36 Make C-Pipe Last ring 1. Input Total Length. - Touch green bar to Pop-Up key pad to put in digit. - Input length should be -50mm from the actual longitudinal wire (Copper Ring+Welding Gap) ※ Max. length is 2,600mm. - If you put in digit more than 2,600mm, it show 2600 as Max. ※...
- Page 37 7. Input Spigot Size. - Insert 2 longitudinal wire in wire die with enough length to measure diameter. - Reduce Bell at desired diameter, and move P/X Switch#3 and fix screw tight. 8. As per above drawing, moves POLE F/W, B/W to makes gap(A) 4~5mm. - Input digit on Pole Position green bar(Left) same digit as dark green(Right) ※...
- Page 38 and slowly longer time after checking out welding condition. 19. Set up Drum r.p.m. - Drum r.p.m. should be adjust according to Pipe diameter. - Set up 6000 for 12"~33" Pipe, 5000 = 36~42" 4000 = 48" Recommended slower r.p.m. than above digit. But, Faster r.p.m. is dangerous. - Drum r.p.m.
- Page 39 Make D-Pipe 1. Input Total Length. - Touch green bar to Pop-Up key pad to put in digit. - Input length should be -50mm from the actual longitudinal wire (Copper Ring+Welding Gap) ※ Max. length is 2,600mm. - If you put in digit more than 2,600mm, it show 2600 as Max. ※...
- Page 40 - Input digit more than 30. - Drum r.p.m. is fixed between Barrel Length and Transfer is moving as per pitch. 7. Input Spigot Size. - Insert 2 longitudinal wire in wire die with enough length to measure diameter. - Measures distance between outside and outside of wire by a tap, and input digit. 8.
- Page 41 - 6.0 means 6.0 m/s welding time of 1 point which should be changed as per Drum r.p.m. - Welding Time is 0~65m Second. Longer welding time is helpful for good welding, but jump up one welding point which makes no welding for next point. Set up short time and slowly longer time after checking out welding condition.
-
Page 42: Proximity Switch Function
9. PROXIMITY SWITCH FUNCTION Bell Part Proximity switch BELL REDUCE STOP SPIGOT STOP BELL EXPAND STOP - BELL REDUCE STOP ; Before AUTO production, this P/X switch should be lit on. - This switch effect to make Barrel size for A or B Pipe. - This switch effect to make bent spigot for C or D Pipe. - Page 43 Transfer Proximity Switch - P/X switch #1 and #4 is Transfer emergency stop proximity switch for safety. Either one is energized, Magnetic switch (MSBE) connected with Transfer AC Frequency drive is tripped and stop machine operation. - If Transfer emergency stop switch is energized, TRANSFER/BELL POSITION ERROR (EMERGENCY STOP INFORMATION) is lit on Touch Screen.
- Page 44 Pole Proximity switch - P/X switch #1 is for Pole forward stop proximity switch. - P/X switch #2 is for Pole back ward stop proximity switch. - If Encoder NO USE is selected from MANUAL SCREEN, P/X #1 is not energized. If Encoder USE is selected from MANUAL SCREEN, P/X #1 is energized, so it should be moved according to cage diameter.
- Page 45 Cage Receiver Proximity Switch - P/X switch #1 is for Cage Receiver Up Stop Limit Proximity Switch for safety. - P/X switch #2 is for Cage Receiver Down Stop Limit Proximity Switch for safety.
- Page 46 Poor Electrical Phenomenon Power is "ON", but not working # 1. Check encoder value is "0" on Manual operation of the touch panel screen. - Transfer and Pole Encoder is a " 0 " or more than 48,000, Transfer and Pole is not work.
- Page 47 Trouble Shooting MECHANICAL PROBLEMS - WELDING IS NOT CARRIED OUT: - Welderisoutoforderinthefunction. - Welding controller is defected. - Proximity sensor is not working. - Relays of welder is defected. - WELDING POINT IS WEAK : - Unaccept able steel wire is used. - Toomuchcarboncontentisnotgoodforwelding - Dirty, rusted or greased wire - Worn-out, copper sheet, copper rings,...
- Page 48 Welding Point Control - Proximity switch should be matched on jagged position of steel plate. Welding Proximity switch A : Correct welding point B : Faster welding point - Move proximity switch down position. C : Later welding point - Move Proximity switch up position.
- Page 49 Wire Drawer & Drawer Case Replacement - Short longitudinal wire inserted in Drawer Case(#1) damage Wing of Drawer Rod(#2), or Drawer Case Holder(#5) or Drawer Case(#1) - Replace damaged part. - If Drawer Rod(#2) is damaged, take off Bolt(#6) and Nut(#7) and take off it backward. - If Drawer Case Holder(#5) is damaged, take off Snap Ring(#3), Roller(#4) and Shaft(#6), and replace it.
- Page 50 Pole Screw Nut Replacement If pole slide assembly is shaking too much and backlash, change pole screw nut and adjus tpole body slider. 1- Take off 8 bolts(#1) 2- Lift up Pole assembly frame(#2) ※ Be careful for cable and cable chain. 3- Take off 2bolts of Pole screw nut holder(#3) 4- Push out POLE SLIDE BODY to look at Pole screw nut holder.
- Page 51 Changing Guide Shaft Bushing - If the bushing of center drum is worn out, cage will be twisted due to different pushing to drawer rods and cases. - Noise during drum rotation, or shaking center drum during forward / backward, guide bushings should be replaced by new bushing.
- Page 52 Changing Drum Roller and Bearing - Due to unleveled machine and impaction by heavy drums, drum roller or bearing should be damaged easily. - Damaged roller or bearing are making lousy noise and bad affect to the drum. - Changing Bearing 1- Lift up both Drum-Lifter(#1) to be free from rollers(free turning) 2- Take off sprocket(#2) and Bearing cover(#3).
- Page 53 Changing Plastic Slider - Take out all bolts and replace worn out slider by new one. - Note : Do not lubricant to this slider moving line. But, dry graphite lubricant is recommended.
-
Page 56: Machine Specification
KN-1248-G3 Machine Specification LENGTH - 9,650 mm(379.9") MACHINE DIMENSION WIDTH - 3,660 mm(144.0") HEIGHT - 2,900 mm(114.2") PIPE DIA - 12" - 48" I.D BELL PIPE MANUFACTURING SIZE (300mm - 1,200mm I.D. BELL PIPE) LENGTH - 2,600mm PIPE LENGTH(8 FEET PIPE) MACHINE TOTAL WEIGHT APPROX. - Page 58 ELECTRIC PARTS LIST PART NAME SPECIFICATION QT'Y MAKER REMARK 1 P.L.C(CPU) XGK-CPUS 2 P.L.C(POWER) XGP-ACF2 3 P.L.C(IN CARD) XGI-24A 4 P.L.C(OUT CARD) XGQ-TR4B 5 P.L.C(BASE) XGB-M06A 6 P.L.C(HI-SPEED CARD) XGF-H08A 7 P.L.C(INTERFACE CARD) XGL-CH2A 8 P.L.C(DUMMY) XGT-DMMA C40HF-13PB(130 Cm) INPUT 9 P.L.C CABLE C40HF-20PB-1(200 Cm) INPUT...
- Page 59 PART NAME SPECIFICATION QT'Y MAKER REMARK 125V-15A for NOTE PC 20 OUTLET ILSIN 220V-15A COOLER 50/5 MAIN AMP 21 C.T. SUH KWANG 100/5 WELDING SC-0 POWER SC-N1 WIRE DRUM 22 MAGNETIC SWITCH SC-N6 MAIN POWER SC-4 FUJI TRANSFER/POLE TR-ON(2.6A) PUMP, COOLER 23 OVER LOAD SWITCH TR-ON(5A) CAGE RECEIVER...
- Page 60 PART NAME SPECIFICATION QT'Y MAKER REMARK 47 CABLE CHAIN KJSR1000-B100-R150 1 KUKJE POLE WIRE MOVING 480V -> 220V(20KVA) MAIN POWER 48 TRANSFORMER WOONYOUNG 220V -> 220/110V(200W) CONTROL POWER 49 WELDING TRANSFORMER ITR-200 50 WELDING CONTROLLER IP500 DEWELCO WELDING 51 WELDING DISPLAY BOARD IP500S 52 COOLING FAN 300W...
- Page 70 Parameter Setting DRUM AC FREQUENCY DRIVE(SV055iG5A-2) CODE DESCRIPTION SETTING RANGE FACTORY DEFAULT DRIVE GROUP Acceleration time Deceleration time Drive mode Frequency Mode(Freq.Setting Method) FUNCTION GROUP 2 H 30 Motor type select H 33 Motor rated current 13.8 26.3 H 36 Motor efficiency H 41 Auto tuning...
- Page 72 Parameter Setting BELL AC FREQUENCY DRIVE(SV075iG5A-2) CODE DESCRIPTION SETTING RANGE FACTORY DEFAULT DRIVE GROUP Acceleration time Deceleration time Drive mode Frequency Mode(Freq.Setting Method) FUNCTION GROUP 1 F 21 Max frequency F 24 Frequency high/low limit select F 25 Frequency high limit FUNCTION GROUP 2 H 30 Motor type select...
- Page 74 Parameter Setting TRANSFER AC FREQUENCY DRIVE(SV022iG5A-2) CODE DESCRIPTION SETTING RANGE FACTORY DEFAULT DRIVE GROUP Acceleration time Deceleration time Drive mode Frequency Mode(Freq.Setting Method) FUNCTION GROUP 1 F 21 Max frequency F 24 Frequency high/low limit select F 25 Frequency high limit FUNCTION GROUP 2 H 30 Motor type select...
- Page 76 Parameter Setting POLE AC FREQUENCY DRIVE(SV022iG5A-2) CODE DESCRIPTION SETTING RANGE FACTORY DEFAULT DRIVE GROUP Acceleration time Deceleration time Drive mode Frequency Mode(Freq.Setting Method) FUNCTION GROUP 1 F 21 Max frequency F 24 Frequency high/low limit select F 25 Frequency high limit FUNCTION GROUP 2 H 30 Motor type select...
- Page 83 < < < < < < < < < < < < < < < < < < < < < < < < < < < < < < <...
- Page 84 < < < < < < < < < < < < < < < < < < < < < < < < < < < < < < < < < < < < < < < < <...
- Page 85 <...
- Page 86 < @> 7 /8 4 87 5 22 < < < < < < < < <...
- Page 87 PART NUMBER PART NAME REMARK 1 KN-AS-19 WIRE ROLLER BRAKET 2 KN-AS-17 TABLE RACK GUIDE 3 KN-AS-07 BEARING UCFL205 4 KN-AS-02 LIMIT SWITCH(KH-8010-C) 5 KN-AS-23 TENSION SPRING 6 KN-AS-09 BELT(B-55") 7 KN-AS-08 BELT FULLY(B2-5"-Ø24) 8 KN-AS-10 HYDROSTATIC VALRIATOR 9 KN-AS-12B BELT FULLY(B2-5"-Ø25) 10 KN-AS-11 BELT(B-38")
- Page 88 PART NUMBER PART NAME REMARK 1 KN-AS-24 LOAD END(PHS14R) 2 KN-AS-21 SPEED CONTROL ROD 3 KN-AS-24 LOAD END(PHS14L) 4 KN-AS-12A BELT PULLEY(B-5"-Ø28) BEARING(6304) 6 KN-AS-18 BEARING(E32018J) 7 KN-AS-28 POWER SWITCH(KG20B) 8 KN-AS-30 PUSH BUTTON S/W(KBL-30MP-L2A) 9 KN-AS-29 EMERGENCY STOP S/W(KPB30-ER)
- Page 89 PART NUMBER PART NAME REMARK WIRE RACK 2 KN-AS-16 TABLE PLATE TABLE PLATE LOCKER 4 KN-AS-04 BEARING(UCF218) UCF218 BEARING COVER 6 KN-AS-05 CHAIN GEAR(RS100-24T-Ø98) SHAFT BEARING COVER 9 KN-AS-18 BEARING(E32018J) 10 KN-AS-15 SHAFT HOUSING...
- Page 90 MANUAL OF WIRE CUTTING MACHINE MODEL : KN-2CT...
- Page 91 CONTENTS 1. ARRANGEMENT OF RULER AND HOLDER 2. STOPPER ADJUSTMENT 3. SPRING TENSIONING 4. CUTTING LENGTH SET-UP 5. CUTTING TABLE ADJUSTMENT 6. PRECONDITION FOR OPERATION 7. BALANCE ROTORS ADJUSTMENT 8. CUTTING P.X SWITCH ADJUSTMENT 9. SAFETY P.X FOR COVER 10. WIRE CUT OFF INSIDE BALANCE ROTORS 11.
-
Page 92: Arrangement Of Ruler And Holder
1. ARRANGEMENT OF RULER AND HOLDER RULER RULER HOLDER UP/DOWN ADJUST STOPPER BOLT(A) RULER ASSEMBLY HOLDER(B) LEFT/RIGHT ADJUST NUT(C) - WHEN THE TIME OF ASSEMBLING CUTTING TABLE, A RULER SHOULD BE CENTERED AGAINST HOLE OF RULER HOLDER. - HEIGHT ADJUSTMENT : LOOSEN BOTH BOLTS(A) FOR UP/DOWN BY A HAMMER - LEFT/RIGHT ADJSTMENT : MOVE CUTTING TABLE LEFT OR RIGHT BY NUTS(C) - RULER SHOULD BE CENTERED ON HOLE OF RULER HOLDER SMOOTHLY AFTER THEN TIGHTEN FIXING BOLT OF RULER HOLDER. -
Page 93: Stopper Adjustment
2. STOPPER ADJUSTMENT HAMMER CUTTING BLADE - TURNS CUTTING WHEEL TO BE POSITIONED HAMMER LOWER THAN CUTTING BLADE. - AT THE TIME OF HAMMER DOWNED, PUSH A RULER TOWARD MOVING DIRECTION UNTIL TOUCH CUTTING BLADE. STOPPER A STOPPER B MOVING DIRECTION - FIX STOPPER(A) 2mm GAP WITH A CALIBRATOR FOR RULER BACKWARD. -
Page 94: Spring Tensioning
3. SPRING TENSIONING - APPROX. 300mm SPRING TENSIONING IS RECOMMENDED. - IF SPRING TENSION IS TOO MUCH CUTTING IS NOT PERFECT AND CUTTING LENGTH IS DIFFERENT. - IF SPRING TENSION TOO WEAK, A RULER RETURNS SLOWLY, SO WIRE IS CUT TWICE. 300mm ※... -
Page 95: Cutting Length Set-Up
4. CUTTING LENGTH SET-UP FIG-B FIG-A CUTTING LENGTH - FIX CUTTING STOPPER AS DESIRED CUTTING LENGTH. MEASURES FROM END OF CUTTING HAMMER(FIG-A) TO FRONT OF CUTTING STOPPER(FIG-B) -
Page 96: Cutting Table Adjustment
5. CUTTING TABLE ADJUSTMENT - CUTTING TABLE GAP SHOULD BE 1~1.5mm BIGGER THAN WIRE DIAMETER TO BE CUT. - FOR SETTING TABLE GAP, LOOSE BOLTS OF A AND C FIRST, AND LOOSE BOLT B AND ADJUST GAP BY TURNING NUT(E) TABLE GAP WIDER !.5mm THAN WIRE DIAMETER TO BE CUT AND TIGHTEN BOLTS AGAIN. -
Page 97: Precondition For Operation
6. PRECONDITION FOR OPERATION - MAIN POWER "0N" AND PANEL SWITCH "0N" - OPERATION SWITCH "MANUAL" MODE - CUT MOTOR "ON" AND TRANSFER F/W "ON" - PUSH A WIRE INSIDE FEEDING ROLLERS BY A FOOT SWITCH - CHECK THE WIRE CUT STRAIGHT OR NOT. IF WIRE IS CURVED, ADJST BALANCE ROTORS MORE ZIG-ZAG (REFER TO CONTENT 13) - MEASURE CUT LENGTH AND ADJUST CUTTING STOPPER(#1) EXACTLY - IF CUT WIRE TWICE, ADJUST CUTTING STOPPER(#2) FRONT 2mm BACK SIDE 5mm. - Page 98 - IN CASE OF STOPPING, CUT WIRES 3~4 PCS. MANUALLY AND TURN AUTO FOR SMOOTH TURNING WIRE SPOOL. - EVERY DAY, LUBRICANT TO ALL OIL CAPS OF MOVING PARTS - IF OPEN THE COVER, TRANSFER MOTOR AND BALANCE ROTORS SHOULD BE STOPPED AUTOMATICALLY FOR SAFETY.
- Page 99 CYLINDER & CUTTING PROXIMITY ADJUSTMENT Return cylinder 3~4mm Cutting sensor Cutting blade 1. Push doun cutting hammer, draw cutting blade to touch cutting hammer, and push in cylinder to be 3~4mm gap, and tighten bolts. --- loose spring tin backside. Return cylinder Cylinder stopper Cutting sensor...
- Page 100 Ax. stopper 2 Ax. stopper1 cylinder 2~3mm During cylinder moving, sensor is not working. 4. Ax. Stopper 2 should be fixed up on 2~3mm gap against sylinder.
-
Page 101: Balance Rotors Adjustment
7. BALANCE ROTORS ADJUSTMENT - PLACE CENTER POSITION FOR ROTOR #1 - MAKE ZIG-ZAG POSITION FOR REST 4 ROTORS - IN CASE OF CURVED WIRE. GIVE MORE ZIG-ZAG BY BOLT 2 AND 3 - IN CASE OF STRAIGHT WIRE SCRATCHED OR CUT OFF INSIDE ROTORS, GIVE LESS ZIG-ZAG BY BOLT 2 AND 3 - ROTORS WING SHOULD BE POSITIONED FRONT AGAINST OF WIRE FEEDING ※... -
Page 102: Cutting P.x Switch Adjustment
8. CUTTING P/X ADJUSTMENT SENSING BAR SENSING PROXIMITY SWITCH (PSN30-15AO) - TURNS CUTTING WHEEL TO BE POSITIONED HAMMER HIGHER THAN CUTTING BLADE - PUSH A SENSING BAR TO PASS SENSING P/X SWITCH TO LIGHT "ON" IN RED - EVERY CUTTING TIME, THIS P/X SWITCH SHOULD BE RED LAMP "ON" - IF THIS ELAPSED 8 SECONDS, CUTTING MACHINE SHUT OFF AUTOMATICALLY - CASES OF STOPPING : 1- WIRE CUT OFF INSIDE OF ROTORS... -
Page 103: Safety P.x For Cover
9. SAFETY P/X SWITCH FOR COVER ※ IF OPEN THE COVER DURING THE OPERATION, MACHINE SHUT OFF AUTOMATICALLY FOR SAFETY, IF COVER IS OPENED, ALL FUNCTION ARE NOT WORKING - IF MACHINE IS NOT SHUT OFF IN THE TIME OF OPEN THE COVER, P/X SWITCH SHOULD BE DEFECTED TO REPLACE NEW ONE. -
Page 104: Wire Cut Off Inside Balance Rotors
10. WIRE CUT OFF INSIDE BALANCE ROTORS ※ WIRE CUT OFF INSIDE OF BALANCE ROTORS DUE TO FOLLOWING CASES - WIRE IS BENT TO PASS WIRE GUIDE OR TURN TABLE HAS TIGHT BRAKE PAD - BALANCE ROTORS ARE ADJUSTED TOO MUCH ZIG-ZAG - SPRINGS OF FEED ROLLERS IS WEAK NOT FEEDING WIRE PROPERLY... -
Page 105: Lubricant
11. LUBRICANT - LUBRICANT EVERY DAY TO FILL ALL OIL CAP AS PER PICTURE OPEN OIL CAP AND FILL MOVING PARTS ※ TOO MUCH OIL DROP DOWN TO THE CUT WIRE WHICH CAUSE BAD WELDING OR SPATTER TOO MUCH AND SMOKED. -
Page 106: Turn Table Adjustment
12. TURN TABLE ADJUSTMENT BRAKE PAD AIR CYLINDER BRAKE CONTROL KNOB - IN THE TIME OF STOPPING, TURN TABLE IS KEEPING TURNING BY INERTIAL FORCE THEN WIRE BECAME LOOSE TOO MUCH, SO WE ATTACHED AUTOMATIC BRAKE SYSTEM. - BRAKE IS WORKING BY AIR CYLINDER AUTOMATICALLY - BRAKE 2 SECONDS AND RELEASED AUTOMATICALLY, IN CASE OF 1) TURN ON/OFF 2) EMERGENCY STOP... - Page 114 PART NUMBER PART NAME QT'Y 1 CT-02-24 BALANCE ROTOR COVERS CT-02-23 BALANCE ROTORS ---- SMALL CT-02-29 BALANCE ROTORS ---- LARGE 3 CT-02-22 BALANCE SHAFT 4 CT-04-01 BEARING (UKPH209) - 1 -...
- Page 115 PART PART NAME NUMBER 1 CT-02-24 BALANCE ROTOR COVERS CT-02-23 BALANCE ROTORS ---- SMALL CT-02-29 BALANCE ROTORS ---- LARGE 3 CT-02-22 BALANCE SHAFT 4 CT-04-01 BEARING (UKPH209) - 2 -...
- Page 116 PART PART NAME NUMBER 1A CT-03-13A CHAIN GEAR(RS60-24T-Ø30) 1B CT-03-13B CHAIN GEAR(RS60-24T-Ø30) 2 CT-03-15 CHAIN-RS60 3 CT-03-06 BELT(B-45") 4 CT-03-09 BELT PULLEY(B2-18"-Ø40) 5 CT-03-04 BELT(B-78") 6 CT-04-03 BEARING (UCPH207) 7 CT-02-27 CUTTING WHEEL 8 CT-03-05 BELT(B-71") 10 CT-03-07 BELT PULLEY(B1-3"-Ø28) 11 CT-03-08 BELT PULLEY(B2-3"-Ø28) - 3 -...
- Page 117 PART PART NAME NUMBER 1 CT-03-01 CUTTING MOTOR(2HP-6P) 2 CT-03-02 TRANSFER MOTOR(3HP-6P) 3 CT-03-08 BELT PULLEY(B2-3"-Ø28) 4 CT-02-31 WIRE GUIDE 5 CT-03-10 BELT PULLEY(B2-5"-Ø28) 6 CT-02-02 TRANSFER SHAFT(Ø45-L410) 7 CT-04-04 BEARING(UCP208) JOINT BOX - 4 -...
- Page 118 PART PART NAME NUMBER 1 CT-02-36 RULER HOLDER 2 CT-02-10 CUTTING BLADE(SK-11) 3 CT-02-14 CUTTING SPRING 4 CT-02-52 SPRING PIN 5 CT-O2-54 WIRE CUTTING DIE HOLDER 6 CT-02-12A WIRE CUTTING DIE 5mm 7 CT-02- WIRE CUTTING DIE NUT - 5 -...
- Page 119 PART PART NAME NUMBER 1 CT-02-27 CUTTING WHEEL 2 CT-04-02 BEARING(UCF208) 3 CT-02-41R CAM BUSHING(R)-Ø70-L72 4 CT-02-07 5 CT-02-37,38 HAMMER CONTROL RING,BUSHING 6 CT-02-08 CAM COVER RULER HOLDER CUTTING BLADE SLIDER 9 CT-02-39 HAMMER CASE 10 CT-02-13 CUTTING HAMMER(SKD-11-20200) 11 CT-02-01 CUTTING HEAD BODY 12 CT-O2-41L CAM BUSHING(L)-Ø70-L42...
- Page 120 PART PART NAME NUMBER 1 CT-02-51 CUTTING STOPPER 2 CT-02-44 RULER TENSION SPRING 3 CT-02-52 WIRE COVER PLATES 4 CT-02-32 STOPPERS 5 CT-02- RETURN CYLINDER(ACP-B16-10) 6 CT-02-34 PROXIMITY SENSING BAR 7 CT-05-12B PROXIMITY SWITCH(PSN30-15AO) 8 CT-02-47 TENSION CONTROL BAR 9 CT-06-01 SOLENOID VALVE 10 CT-02-50 RULER...
- Page 121 PART PART NAME NUMBER 1 CT-02- WIRE ADJ. SET 2 CT-02-51 CUTTING STOPPER 3 CT-02-50 RULER 4 CT-02-32 STOPPERS 5 CT-02- RETURN CYLINDER(ACP-B16-10) 6 CT-02-34 PROXIMITY SENSING BAR 7 CT-05-52 WIRE COVER PLATES 8 CT-02- WIRE TENSION BOLT 9 CT-06- RULER BODY 10 CT-06-01 SOLENOID VALVE...
- Page 122 PART PART NAME NUMBER WIRE COVER WIRE GUIDE RACK 3 CT-06-08 TABLE PLATE 4 CT-06-09 BEARING(#6212) 5 CT-06-07 SHAFT HOUSING 6 CT-06-06 BEARING((#32212) BRAKED RUM 8 CT-06-05 BRAKE PAD 9 CT-06-01 CYLINDER(50X50) 10 CT-06-01 SOLENOID VALVE - 9 -...
- Page 123 PART PART NAME NUMBER WIRE COVER WIRE GUIDE RACK 3 CT-06-08 TABLE PLATE 4 CT-06-09 BEARING(#6212) - 10 -...
Need help?
Do you have a question about the KN-1248-G3 and is the answer not in the manual?
Questions and answers