CALIENT S320 Getting Started Manual
Optical circuit switch ocs
Hide thumbs
Also See for S320:
- Hardware user's manual (46 pages) ,
- Getting started manual (29 pages) ,
- Repair and diagnostics field manual (22 pages)
Table of Contents
Advertisement
Advertisement
Table of Contents

Related Manuals for CALIENT S320


Summary of Contents for CALIENT S320
- Page 1 S320 Optical Circuit Switch (OCS) Getting Started Guide...
- Page 2 This document contains information regarding technology that is protected under one or more pending or issued United States and foreign patents. This manual may not be copied wholly or in part without prior written permission from CALIENT Technologies, Inc. Please contact our corporate office at the address, phone number or URL below.
-
Page 3: Table Of Contents
Overview ..........................9 3.1.1 General Requirements ....................9 3.1.2 Required Tools ......................10 3.1.3 Installing the S320 OCS in a Rack .................. 10 Connecting Communication Interfaces ................11 3.2.1 Connecting the Serial Cable ..................11 3.2.2 Connecting Ethernet ..................... 13 Power Connections ...................... - Page 4 Figure 8 – S320 OCS Serial and LAN Ports (Close Up) ..............17 Figure 9 – S320 OCS Ethernet Interfaces Block Diagram .............. 18 Figure 10 – Input and Output Ports on S320 OCS Fiber Interface ..........37 Figure 11 – Fiber Direction ......................38 List of Tables Table 1 –...
-
Page 5: Getting Started
Doc. Part No. 460166-00 June 29, 2015 Rev. D10 1 GETTING STARTED This document outlines the steps required to install and configure the CALIENT S320 Optical Circuit Switch (OCS): Unpacking the S320 OCS hardware Verifying package contents Installing the S320 OCS hardware ... -
Page 6: Unpacking The S320 Ocs
The S320 OCS is sensitive to electrostatic discharge (ESD). Be sure to wear either a wrist or ankle ESD grounding strap when handling switch components. The proper method for unpacking the S320 OCS includes the following steps: 1. -
Page 7: Contents Inventory
Getting Started Guide, TL1 Reference Guide, Troubleshooting and Alarm Reference Guide and Release Notes—is available online at http://support.calient.net. Every S320 OCS ordered from CALIENT is loaded with the most current release of product software available at the time the switch is shipped. -
Page 8: Unlocking The S320 Ocs
As noted in section 2.2, be sure to retain the shipping lockdown baseplate, anti-ESD bag and other materials included in the container for future shipment. The S320 OCS can only be shipped using the original shipping lockdown baseplate and container. -
Page 9: Hardware Installation
In case you are unable to access the Internet, every S320 OCS shipped comes loaded with the most current version of product software available at the time of shipping, and a copy of the S320/160 OCS Quick Start Guide. -
Page 10: Required Tools
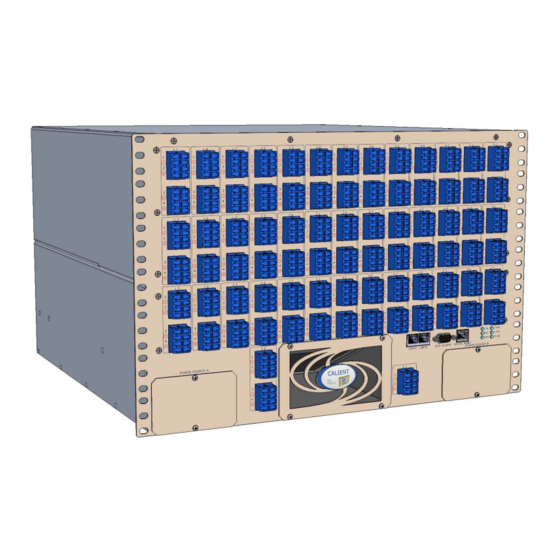
3.1.3 Installing the S320 OCS in a Rack The S320 OCS is a 7RU chassis that is installed in a rack by inserting screws through the mounting holes in the flange extending from each side of the switch’s faceplate, and screwing them into the appropriate holes on the rack uprights. -
Page 11: Connecting Communication Interfaces
This section explains how to connect the communication interfaces of the S320 OCS. 3.2.1 Connecting the Serial Cable The serial cable provided with your S320 OCS is used to connect to the serial interface located on the front of the switch chassis. The serial cable connection enables you to retrieve (or set) the S320 OCS IP address and perform TL1 operations. -
Page 12: Figure 3 - Usb-To-Db9 Cable (L) And Rj45-To-Db9 Adapter Cable (R)
Figure 3 – USB-to-DB9 Cable (L) and RJ45-to-DB9 Adapter Cable (R) 2. Connect the RJ45 end of the assembled serial cable (Figure 4) to the serial connector located on the lower-right front of the S320 OCS (Figure 5 and Figure 8). DB9 connector... -
Page 13: Connecting Ethernet
Figure 5 – S320 OCS Serial and LAN Ports 3.2.2 Connecting Ethernet The S320 OCS has two Gigabit Ethernet (GbE) RJ45 connectors—labeled LAN A and LAN B—on the front of the switch, as shown in Figure 5 and Figure 8. The Ethernet connection enables you to control the switch using TL1 via a Telnet session, or using the browser-based graphical user interface (GUI). -
Page 14: Power Connections
(CBN). 3.3 Power Connections The power module for the S320 OCS is a -48 VDC terminal strip. For detailed information about the module, contact CALIENT at http://support.calient.net. 3.3.1 Connecting an External Power Supply External power is connected to the S320 OCS through two -48 VDC Power Modules (Power Source A and Power Source B) located on the rear of the chassis (Figure 6). -
Page 15: Figure 7 - S320 Ocs Power Supply Connector
Figure 7 – S320 OCS Power Supply Connector 3. Secure each wire by tightening the screw beside each receptacle with a screwdriver. Give each wire a light tug after securing it to ensure that it is firmly attached to the S320 OCS chassis. -
Page 16: Booting Up
If power is applied to the Power Source A input, but not the Power Source B input (or vice versa), the S320 OCS will boot up and function; however, the B PWR LED will not be illuminated and a major alarm will be generated and communicated to the user via the switch’s management interfaces. -
Page 17: Figure 8 - S320 Ocs Serial And Lan Ports (Close Up)
Rev. D10 Time Zone The S320 OCS has two IP interfaces—eth0 and eth2—each with its own identity. Mapping of the interfaces in the hardware is as follows: eth0 maps to the LAN B interface on the front of the switch ... -
Page 18: Accessing The Network Configuration Script
Figure 9 – S320 OCS Ethernet Interfaces Block Diagram 3.4.1 Accessing the Network Configuration Script A configuration script is included with the software that comes loaded on the S320 OCS. The following procedure describes how to access and run the network configuration script in order to modify the system settings: 1. -
Page 19: Sample Configuration Script
S320 OCS Getting Started Guide Doc. Part No. 460166-00 June 29, 2015 Rev. D10 When run with the autoconf option, the gxc-config-network script reads all the input values from the config file and applies the settings to the system. It will abort the operation if any of the configuration values are not valid. - Page 20 S320 OCS Getting Started Guide Doc. Part No. 460166-00 June 29, 2015 Rev. D10 CONTINENT=2 COUNTRY=48 TIME_ZONE=30 #End of configuration file [15:16:35 root@TestNetwork:~]$gxc-config-network --autoconf /etc/gxcnetwork.conf --------------------------Existing Configuration--------------------------- -------------------------- CONFIGURATION SUMMARY -------------------------- Hostname: TestNetwork IP Interfaces: Device IP Address Network Mask...
- Page 21 Press Enter to leave the current path unchanged, or specify a new search path, with spaces separating each entry. DNS Search Path : [ calient.local ] calient.local -------------------- Configuring Network Time Protocol -------------------- Enter NTP servers one at a time. When done, enter a blank value or 0.0.0.0.
- Page 22 S320 OCS Getting Started Guide Doc. Part No. 460166-00 June 29, 2015 Rev. D10 6. Atlantic Ocean 7. Australia 8. Europe 9. Indian Ocean 10. Pacific Ocean Enter continent [2] : 2 Please select a country or region from the following list: 1.
- Page 23 S320 OCS Getting Started Guide Doc. Part No. 460166-00 June 29, 2015 Rev. D10 2. Alaska Time - Alaska panhandle 3. Alaska Time - Alaska panhandle neck 4. Alaska Time - southeast Alaska panhandle 5. Alaska Time - west Alaska 6.
- Page 24 S320 OCS Getting Started Guide Doc. Part No. 460166-00 June 29, 2015 Rev. D10 30. Pacific Time Enter zone [30] : 30 Selected Time Zone: America/Los_Angeles -------------------------New Network Configuration------------------------- -------------------------- CONFIGURATION SUMMARY -------------------------- Hostname: TestNetwork IP Interfaces: Device IP Address...
-
Page 25: Configuring Bonding Manually
S320 OCS Getting Started Guide Doc. Part No. 460166-00 June 29, 2015 Rev. D10 Starting ntpd: [ OK ] [15:19:01 root@TestNetwork:~]$ 3.4.2 Configuring Bonding Manually gxc-config-network command enables users to modify system settings (e.g., IP address) on the switch. The preceding example showed how this can be done automatically. - Page 26 S320 OCS Getting Started Guide Doc. Part No. 460166-00 June 29, 2015 Rev. D10 ----------------------- Configuring DNS Search Path ----------------------- Press Enter to leave the current path unchanged, or specify a new search path, with spaces separating each entry. DNS Search Path : calient.net -------------------- Configuring Network Time Protocol -------------------- Enter NTP servers one at a time.
- Page 27 S320 OCS Getting Started Guide Doc. Part No. 460166-00 June 29, 2015 Rev. D10 ……. Enter country [48] : 48 Please select a time zone from the following list: 1. Alaska Time 2. Alaska Time - Alaska panhandle 3. Alaska Time - Alaska panhandle neck …….
-
Page 28: Configuring Non-Bonding Manually
S320 OCS Getting Started Guide Doc. Part No. 460166-00 June 29, 2015 Rev. D10 Shutting down interface eth0: [ OK ] Stopping Switch-ctrl: [ OK ] Shutting down loopback interface: [ OK ] Bringing up loopback interface: [ OK ]... - Page 29 S320 OCS Getting Started Guide Doc. Part No. 460166-00 June 29, 2015 Rev. D10 (*) indicates default option if none is specified gxc-config-network> setup Bonding, also called Link Aggregation, allows multiple Ethernet interfaces to be combined into a single logical link. Various modes are available, all of which provide redundancy;...
- Page 30 S320 OCS Getting Started Guide Doc. Part No. 460166-00 June 29, 2015 Rev. D10 Primary NTP Server : 192.168.101.108 Secondary NTP Server : 0.north-america.pool.ntp.org Tertiary NTP Server : 1.north-america.pool.ntp.org Additional NTP Server : 2.north-america.pool.ntp.org Additional NTP Server : 3.north-america.pool.ntp.org Additional NTP Server : ntp.ubuntu.com...
- Page 31 S320 OCS Getting Started Guide Doc. Part No. 460166-00 June 29, 2015 Rev. D10 4. Alaska Time - southeast Alaska panhandle 5. Alaska Time - west Alaska 6. Aleutian Islands 7. Central Time ……. 30. Pacific Time Enter zone [30] : 30...
-
Page 32: Stopping And Starting Services
3.4.4.1 Accessing the Stop-Start Service Script The following procedure describes how to access the stop-start service script in order to activate system changes: 1. Connect your computing device to the S320 OCS’s serial interface (Figure 8). 2. Log in to the system as: root 3. - Page 33 S320 OCS Getting Started Guide Doc. Part No. 460166-00 June 29, 2015 Rev. D10 SwitchMatrix [STOPPED] NodeServices [STOPPED] Authentication [STOPPED] DeviceManager [STOPPED] AlarmServices [STOPPED] CfgReg [STOPPED] EventServices [STOPPED] EventConsumer [STOPPED] NamingService [STOPPED] DspServices [STOPPED] GxcMonitor [STOPPED] 3.4.4.1.2 Starting Services Following is a sample screen display of the start utility of the stop-start script, showing the start...
-
Page 34: Logging In
Doc. Part No. 460166-00 June 29, 2015 Rev. D10 3.4.5 Logging In As mentioned in section 3.4, the S320 OCS supports two Ethernet ports (eth0 and eth2). The default IP addresses for these ports are: eth0 : 169.254.100.11 eth2 : Unassigned The IP address of the eth1 port should not be changed at any time. - Page 35 If you do lose or forget your password, contact CALIENT Customer Service at http://support.calient.net. 3.4.5.1.2 Web/TL1 Access The S320 can also be accessed via a WebGUI (http://<switchip>) or TL1 by performing the following steps: 1. Type the default username...
-
Page 36: Retrieving The Default Ip Address
3.4.5.2 Retrieving the Default IP Address If the IP address has been changed from the default or is otherwise unknown, it can be retrieved using the serial interface on the S320 OCS. The following procedure describes how to retrieve the current IP address: 1. -
Page 37: Fiber Connections
Once the IP address is known, the user must configure the client IP network interface to be on the same subnet as the S320 OCS. After this is done, the user can log in to the GUI or telnet to the TL1 agent using the switch’s management interface. -
Page 38: Figure 11 - Fiber Direction
3. Gently press the LC male connector into LC-UPC bulkhead female connector until it locks in place. As Figure 11 illustrates, because of the directionality of the S320 OCS monitoring taps, the switch operates with light transmitted from the input fiber terminations to the output fiber terminations. -
Page 39: Managing The S320 Ocs Using Tl1
June 29, 2015 Rev. D10 4 MANAGING THE S320 OCS USING TL1 This section describes how to manage the CALIENT S320 OCS via the TL1 command line interface using a Telnet or serial port connection. 4.1 TL1 Agent Connection 4.1.1 Connecting Using Telnet The TL1 Agent supports up to eight (8) simultaneous sessions. -
Page 40: Requirements
Your SSH login credentials The IP address of the switch 4.1.2.2 Connecting Using PuTTY The following procedure describes how to connect to the S320 OCS using the PuTTY terminal emulation program: 1. Open PuTTY. The PuTTY Configuration window will appear. -
Page 41: Connecting Using The Serial Port
Unlike the Telnet connection, TL1 service over the serial port is always enabled. To use the serial port on the S320 OCS, you will need to connect a serial cable to it; section 3.2.1 provides step-by-step instructions on how to do this. -
Page 42: Table 3 - Terminal Emulation Settings For The S320 Ocs
Data rate 115200 baud Bits Parity None Stop bit Set local echo Flow control None Terminal setting VT100 or ASCII Echo Line wrap Auto For more information on using TL1, refer to the CALIENT OCS TL1 Reference Guide. 42 of 42...
Need help?
Do you have a question about the S320 and is the answer not in the manual?
Questions and answers