
Related Manuals for ShelterLogic 62693


Summary of Contents for ShelterLogic 62693
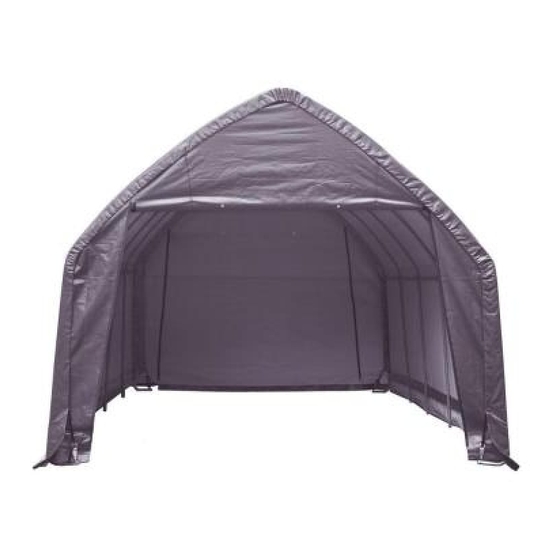
- Page 1 Garage-in-a-Box SUV/Truck ® 4,0 x 6,1 x 3,7 m #62693 TEMPORARY STRUCTURE = helpful information - 45 cm 11mm 05_62693_A0 24.12.2013...
- Page 2 ATTENTION: This shelter product is manufactured with quality materials. It is designed to fit the ShelterLogic custom fabric cover included. ® , LLC ShelterLogic Shelters offer storage and protection from damage caused by sun, light rain, tree sap, animal - bird excrement ®...
- Page 3 10014 10016 10015 802793 802794 10040 10112 10111 802795 802796 802797 802781 802780 10114 10115 01010 802845 802337 05_62693_A0...
- Page 4 & 802860 802861 05_62693_A0...
- Page 5 802793 802840 802840 #10114 802841 #10115 802841 802796 #10114 802840 802795 10114 01010 802841 802778 802841 802345 01010 01010 01010 10115 802793 802796 802778 10114 10114 05_62693_A0...
- Page 6 802794 802840 802840 #10114 802841 #10115 802841 802797 #10114 802840 802795 10114 01010 802841 802841 802778 802345 01010 01010 01010 10115 802778 01010 802797 10114 10114 10114 05_62693_A0...
- Page 7 10115 01010 10110 10115 10115 01010 01010 10115 10115 10115 01010 01010 01010 05_62693_A0...
- Page 8 10114 802844 01010 10114 802844 802842 05_62693_A0...
- Page 9 10114 01010 802844 05_62693_A0...
- Page 10 802844 10114 10114 01010 802843 01010 802844 802845 10114 05_62693_A0...
- Page 11 802844 10114 10114 01010 802843 01010 802845 10114 802844 05_62693_A0...
- Page 12 802844 10114 10114 01010 802843 01010 802844 802845 10114 05_62693_A0...
- Page 13 4,0 m 4,0 m 2,5 cm 05_62693_A0...
- Page 14 45 cm 10114 10114 10114 10114 10114 10114 05_62693_A0...
- Page 15 802780 802781 05_62693_A0...
- Page 16 05_62693_A0...
- Page 17 05_62693_A0...
- Page 18 05_62693_A0...
- Page 19 10240 05_62693_A0...
- Page 20 802337 05_62693_A0...
- Page 21 10110 10110 10110 05_62693_A0...
- Page 22 802337 10110 10110 05_62693_A0...
- Page 23 10110 05_62693_A0...
- Page 24 10110 05_62693_A0...
- Page 25 05_62693_A0...
- Page 26 10112 10110 10111 10115 10115 10110 10110 01010 01010 01010 05_62693_A0...
- Page 27 Check and tighten the cap every month to ensure long life. 20 cm Tighten ratchets 1 & 2, then ratchets 3 and 4 BACK FRONT 05_62693_A0...
- Page 28 05_62693_A0...
- Page 29 Roll-Up Door Kit Quantity Description of Parts: “S” Hooks Plugs for Poles Butterfly Cleat Screws for Cleat Philips Head Screwdriver Bit Pipe, Plain End Pipes, Swedged End 30,5 m Rope NOTE: Review all parts included in the kit. 05_62693_A0...
- Page 30 1. ASSEMBLE PIPES FOR BOTTOM POCKET OF DOOR. A. Measure width of door between the zippers to determine size. B. Slide pipes into one another to assemble. NOTE: Fill pipe with sand for added weight and insert plugs. C. Slide pipe into pocket at bottom of door. Width Between Zippers...
- Page 31 4. ATTACH "S" HOOKS AND ROPE TO THE INSIDE OF THE DOOR PANEL A. Cut 2 more slits inside the shelter on door above the webbing. Hang each pulley here. Door Panel Interior B. Pass the rope from the knot down under the door and back up to the first pulley. Hook each rope on each pulley.
Need help?
Do you have a question about the 62693 and is the answer not in the manual?
Questions and answers