Table of Contents
Advertisement
Available languages
Available languages
Quick Links
Advertisement
Table of Contents

Summary of Contents for InTouch ROSSMONT Waver Master WR-2CH
- Page 1 OWNER'S MANUAL Waver Master WR-2CH Waver TAKE CONTROL...
- Page 2 ENGLISH INTRODUCTION Dear Customer, thank you for choosing this highend product, designed, assembled and tested in Italy. Waver is the new wireless controller for Rossmont aquarium equipment with the unique capability to adjust in speed synchronous motors powered at Mains voltage. With the new app Rossmont inTouch (free download on Google Play / Apple Store) reefers can live a real reef simulation experience.
- Page 3 PRODUCT SAFETY GUIDE • IMPORTANT: Prior to any operation you must verify the integrity of all parts of the product, especially the cords and plug/sockets. • To prevent any accidental electric shock, make sure the product is positioned in a safe and dry place, protected from water, humidity, calcium and/or salt deposits.
-
Page 4: Parts Description
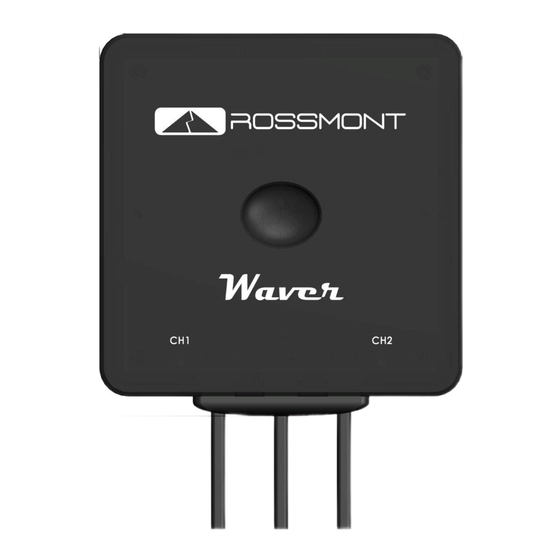
PARTS DESCRIPTION REAR FRONT F. 4x Service screws A. Capacitive touch button (Warning: DO NOT try to open or B. White LED it voids warranty!) C. Channels Blue LEDs G. Device data label D. Power supply cable H. 4x holes for mounting screw E. - Page 5 FIRST SETUP – Create new aquarium Plug the Waver power cord into wall socket Initially white LED rests fixed for 5 sec and after the system does an auto-checkup and the 3 LEDs will pulse. Wait until the white central LED is stable. Download “Rossmont inTouch”...
- Page 6 NOTE: In case of migration from the previous WEB APP to the new application firmware, the old software will no longer be reachable. All data in the Waver will be reset. You need to CREATE A NEW AQUARIUM. Click on ACCESS EXISTING AQUARIUM only if: - you have already created an aquarium and you want access to the Waver with a different or multiple tablet/ smartphone - app has been deleted...
-
Page 7: Add A New Device
ADD A NEW DEVICE To add a new Rossmont device: Select WAVER MENU in the bottom bar Click on “SETUP” and click on CH1 channel icon Choose the proper icon and model of device plugged into Waver’s corresponding channel. IMPORTANT: don’t select a different model than the one actually connected. Assign a description and customize the graph colour (optional) which will help you to recognize the product in case of multiple devices connected. - Page 8 NOTE: when adding a new device, that works at maximum power for 5 seconds, then the speed is automatically set at 20% stable power. To schedule your pumps during the day click on “GRAPH” (in the bottom bar). The vertical axis shows the relative % of the speed of the pumps while the horizontal axis shows the time of the day.
- Page 9 To add a point “double tap” the chart. To edit a point hold it down and drag it. To delete the point “double tap” on it. You can add maxiumum 20 points per device. Once completed operations on the graph, click on “SAVE” (top left) to apply the program.
- Page 10 PRESET DESCRIPTION ADJUSTABLE PARAMETERS FIXED The pump is operated at a stable POWER: pump speed % speed FISH MODE Speed is set to minimum power. Mover: 1% Riser: minimum power is set by calibration. The channel is totally switched off. At the end of preset the pump will be operated at maximum power for a few seconds then it follows the...
-
Page 11: Add A Preset
ADD A PRESET Click on “CHART” (in the bottom bar) then click on “PRESET” (top right) Choose preset type. Setup the start time and the end time Adjust parameter (accordingly to the chosen preset) Select the device NOTE: Presets can be assigned to more than one pump simultaneously by flagging the box of the corresponding name. - Page 12 EXAMPLE Add a CYCLE preset to create different wave effect. • Click on CHART -> PRESET • Select CYCLE preset • Set start time: 12:00 end time: 15:30 Min: 1% Max: 100% set value between 1/100 sec Tmin (0,06 sec) Tmax (0,06 sec) Trise (0,25 sec) Tfall (0,25 sec)
-
Page 13: Quick Commands
Main screen with chart and quick commands. QUICK COMMANDS In the main screen you can find 6 icons which allow you to quickly access to some features This mode lets you check whether the pumps have been set as you desired. By clicking this button the whole 24h program will be TEST MODE reproduced in 5 minutes. -
Page 14: Voice Commands
VOICE COMMANDS IMPORTANT: to activate this function you must authorize app to access to smartphone/ tablet microphone. NOTE for Android devices: you must previously enable Google voice search and language must be available offline to be used in direct mode. Click on VOICE COMMANDS icon Wait for the recording pop-up and say one of the following commands: MAX POWER... -
Page 15: Firmware Update
FIRMWARE UPDATE This updates the internal flash memory of device. The firmware contains all the hardware instructions and it’s important to keep this updated with the latest version approved by Rossmont. New firmware versions could contain improvements for existing products, bug fixes, and/ or the required informations to drive new Rossmont devices. - Page 16 FIRMWARE WIFI UPDATE This updates the WiFi module of the device. NOTE: with Apple devices you have to include Waver in infrastructure mode or it won’t be possible to update. NOTA: the update takes approx 3-4 min With this update custom settings are maintained. DEVICE CONNECTED IN INFRASTRUCTURE DEVICE CONNECTED IN DIRECT MODE MODE...
- Page 17 It lets access to Waver settings. DIRECT ACCESS/INFRASTRUCTURE MODE It allows to choose the Waver connection mode. DIRECT ACCESS It’s a direct WiFi connection between the Waver unit and Smartphone/Tablet . To access to the Waver you have to connect to the Waver’s WiFi network. (Rossmont10###..) INFRASTRUCTURE MODE The Waver unit isa included into home network (WiFi router required)
-
Page 18: Automatic Mode
SET UP WAVER IN INFRASTRUCTURE MODE AUTOMATIC MODE MANUAL MODE Check the CLASS ID of your home Click on SETUP (on the bottom) and network (usually 0,1 or 2) on the click on direct access/ infrastructure. advanced settings of the network. Choose infrastructure mode E.g. - Page 19 IMPORT/EXPORT THE GRAPH It allows to save a copy of your settings, import them on another device or sharing them with anyone NOTE: with Android devices backup will be stored into your Google Drive account, while with Apple devices into iCloud account To export the graph: Select SETUP (on the bottom) Select IMPORT/EXPORT...
-
Page 20: Touch Button
TOUCH BUTTON The Waver unit has a buit-in safe touch button for some operations. By tapping and holding it, the white LED on the center of the unit flashes every second. NOTE: It’s important to keep the area of the button clean from dust or humidity which could compromise the correct button responsiveness. -
Page 21: Limited Warranty
LIMITED WARRANTY This product is granted against defects in material and workmanship for a period of 24 months from the date of purchase. Any claim due to an incorrect installation or operation, improper use or alteration by the buyer, lack of maintenance, improper repair attempt or the action of the frost are excluded. - Page 22 ITALIANO INTRODUZIONE GENERALE Gentile Cliente, grazie per aver scelto questo prodotto di eccellenza, progettato, assemblato e collaudato in Italia. Waver è il controller senza fili per dispositivi Rossmont con la capacità unica di controllare in velocità motori sincroni alimentati a tensione di rete. La nuova applicazione Rossmont inTouch (gratuitamente scaricabile da Google Play o Apple Store) permette all’acquariofilo di vivere una vera e propria esperienza di...
-
Page 23: Norme Di Sicurezza
NORME DI SICUREZZA • IMPORTANTE: Prima di ogni operazione verificare l’integrità di tutte le parti del prodotto, specialmente i cavi e le spine/prese. • Per prevenire qualsiasi rischio di shock elettrico accidentale, assicurarsi che il prodotto sia posizionato in un luogo sicuro ed asciutto, protetto da acqua, umidità, calcare e/o depositi salini •... -
Page 24: Descrizione Delle Parti
DESCRIZIONE DELLE PARTI RETRO FRONTE F. 4x viti di servizio A. Tasto capacitivo (ATTENZIONE: NON provare ad apri- B. LED bianco re o la garanzia decade!) C. LED blu dei canali G. Etichetta dati del dispositivo D. Cavo alimentazione H. 4x fori per viti di montaggio E. - Page 25 PRIMA CONFIGURAZIONE – Creare un nuovo acquario Inserire il cavo di alimentazione di Waver nella presa a muro Il sistema dopo 5 sec. esegue un veloce check-up e i 3 LED lampeggeranno. Attendere che il LED bianco centrale sia stabile Scaricare gratuitamente l’applicazione “Rossmont inTouch”...
- Page 26 NOTA: In caso di migrazione dalla precedente WEB APP alla nuova applicazione il software precedente non sarà più raggiungibile. Tutti i dati presenti nel Waver verranno resettati. É necessario quindi CREARE UN NUOVO ACQUARIO. Cliccare su ACCEDI AD ACQUARIO ESISTENTE se: - è...
- Page 27 AGGIUNGERE UN NUOVO DISPOSITIVO Per installare un nuovo dispositivo Rossmont: Scegliere WAVER MENU nella barra in basso Selezionare SETUP e cliccare sopra l’icona del canale CH1 Scegliere l’icona del dispositivo precedentemente collegato al Waver nel rispettivo canale. IMPORTANTE: Non selezionare un modello diverso da quello effettivamente collegato Assegnare una descrizione e personalizzare il colore (facoltativo) per riconoscere velocemente il prodotto in caso di più...
- Page 28 NOTA: Dopo l’aggiunta, ogni dispositivo lavora alla massima potenza per alcuni secondi dopodichè viene portato automaticamente ad una potenza costante del 20%. Per programmare le pompe nell’arco della giornata cliccare su GRAFICO (nella barra in basso). Il grafico mostra la percentuale di potenza delle pompe nell’asse verticale e l’orario del giorno nell’asse orizzontale.
- Page 29 Per aggiungere un punto fare un “doppio tap” nel grafico. Per modificare un punto tenerlo premuto e trascinarlo mentre per eliminarlo fare un “doppio tap” sopra di esso. Si possono aggiungere massimo 20 punti per ciascuna pompa. Una volta completata la curva di ogni singolo canale cliccare su SALVA (in alto a sinistra) per applicare il programma.
- Page 30 PRESET DESCRIZIONE PARAMETRI REGOLABILI FISSO La pompa è azionata a velocità POWER: indica la velocità % costante. ALIMENTAZIONE La velocità è settata al minimo. Mover: 1% Riser: la potenza minima sarà quella impostata con la calibrazione. Il canale è completamente SPENTO disattivato.
- Page 31 INSERIRE UN PRESET Cliccare su GRAFICO (nella barra in basso) quindi cliccare su PRESET (in alto a destra) Selezionare il preset desiderato dalla lista dei preset. Impostare l’orario di inizio e fine del preset Regolare i parametri (in base al preset scelto) Selezionare il dispositivo sul quale si vuole applicare il preset.
- Page 32 ESEMPIO Aggiungere un preset CICLI per creare effetti diversi d’onda. • Cliccare su GRAFICO -> PRESET • Selezionare preset CICLI • Inserire l’ora di inizio: 12:00 ora di fine: 15:30 Min: 1% Max: 100% impostare valori tra 1/100 sec Tmin (0,06 sec) Tmax (0,06 sec) Trise (0,25 sec) Tfall (0,25 sec)
- Page 33 Schermata principale con grafico e comandi rapidi. COMANDI RAPIDI Nella schermata principale sono presenti 6 icone che permettono di accedere velocemente ad alcune funzioni. Consente di verificare come sono state impostate le pompe. Attivando questa funzione l’intero programma di 24h MODO TEST sarà...
- Page 34 COMANDI VOCALI IMPORTANTE: per attivare questa funzione è necessario dare il consenso all’applicazione di accedere al microfono dello smartphone/tablet. NOTA per dispositivi Android: deve essere attivata la ricerca vocale Google ed essere disponibile offline la lingua di riferimento per l’utilizzo in connessione diretta. Cliccare sull’icona COMANDI VOCALI Attendere l’apertura del pop-up di registazione e pronunciare uno dei seguenti comandi:...
-
Page 35: Aggiornamento Firmware
AGGIORNAMENTO FIRMWARE Aggiorna la memoria interna flash del dispositivo. Il firmware contiene tutte le istruzioni hardware ed è importante mantenerlo aggiornato con l’ultima versione approvata da Rossmont. Le nuove versioni del firmware potrebbero contenere miglioramenti per i prodotti esistenti, correzioni di bug e/o le informazioni necessarie per pilotare nuovi dispositivi Rossmont. - Page 36 AGGIORNAMENTO FIRMWARE WIFI Aggiorna il modulo WiFi del dispositivo NOTA: Con dispositivi Apple per aggiornare il modulo WiFi è necessario inserire il Waver in modalità infrastruttura. NOTA: Il tempo di aggiornamento è circa 2-3 min. Con l’aggiornamento le impostazioni personalizzate non andranno cancellate. DISPOSITIVI COLLEGATI IN MODALITÁ...
- Page 37 Accesso alle varie impostazioni generali del Waver ACCESSO DIRETTO/INFRASTRUTTURA Permette di scegliere la modalità di accesso al Waver: ACCESSO DIRETTO Connessione WiFi diretta tra Smartphone/tablet e Waver. Per accedere al Waver è necessario connettersi al WiFi di Waver. (Rossmont10###..) MODALITÁ INFRASTRUTTURA Il Waver può...
-
Page 38: Modalità Automatica
INSERIRE IL WAVER IN MODALITÁ INFRASTRUTTURA MODALITÀ AUTOMATICA MODALITÀ MANUALE Verificare la CLASSE ID della propria Selezionare IMPOSTAZIONI (nella rete di casa (solitamente 0, 1 o 2) barra in basso) e cliccare su dalle impostazioni avanzate della ACCESSO DIRETTO/INFRASTRUTTURA rete Es. Modem IP = 192.168.0.1, Scegliere MODALITÁ... - Page 39 IMPORTA/ESPORTA GRAFICO Permette di salvare una copia delle proprie impostazioni, importarle in un altro dispositivo o condividerle con chiunque. NOTA: Con dispositivi Android l’archiviazione avverrà tramite Google Drive, con i dispositivi Apple tramite iCloud. Per esportare un grafico: Selezionare IMPOSTAZIONI (nella barra in basso) Selezionare IMPORTA/ESPORTA Con dispositivi Android, alla prima esportazione, scegliere l’account nel quale si desidera salvare i dati.
- Page 40 PULSANTE CAPACITIVO L’unità Waver è dotata di un tasto capacitivo per svolgere alcune importanti operazioni. Toccandolo e tenendolo premuto il LED bianco centrale lampeggerà ogni secondo. NOTA: È importante mantenere l’area del pulsante pulita da polvere o umidità che potrebbe compromettere la corretta funzionalità IMPORTANTE: non azionare il bottone capacitivo se la superficie è...
-
Page 41: Garanzia Limitata
GARANZIA LIMITATA Questo prodotto è garantito contro i difetti nei materiali e nella lavorazione per un periodo di 24 mesi dalla data di acquisto. Sono esclusi reclami dovuti a mancanza di manutenzione, a tentativi impropri di riparazione, all’azione del gelo, ad una errata installazione o azionamento, all’uso improprio o ad alterazione da parte dell’acquirente.
Need help?
Do you have a question about the Waver Master WR-2CH and is the answer not in the manual?
Questions and answers