
Related Manuals for Modena WP 600


Summary of Contents for Modena WP 600
- Page 1 WP Series BUKU PETUNJUK PENGGUNAAN MESIN PENCUCI PIRING DAN KARTU GARANSI DISHWASHER MANUAL WARRANTY CARD 04/17 www.modena.co.id...
- Page 2 Buku ini sangat disarankan untuk mudah mesin pencuci piring dijangkau oleh siapapun yang akan menggunakan Tersedia pula fasilitas layanan customer care bagi pengguna MODENA yang setia dan juga informasi- www.modena.co.id informasi penunjang lainnya di situs resmi .
- Page 3 NOMOR : 20/DJ-ILMEA/MG/V/2000 728/ILMEA/IX/2003 DAFTAR ISI HLM. • Kata Pengantar • Bagian 1 : Nama-nama Bagian • Bagian 2 : Instalasi • Bagian 3 : Cara Penggunaan • Bagian 4 : Pemeliharaan • Bagian 5 : Tindakan Pencegahan • Bagian 6 : Masalah &...
- Page 4 Penempatan dan pengencangan (leveling) 1. Periksa unit anda akan adanya kerusakan karena pengangkutan. Jangan pernah menyambungkan mesin yang rusak. Jika unit rusak, hubungi sentra service Modena. 2. Periksa bahwa unit dipasang sehingga sisi-sisinya atau bagian panel belakang menempel pada lemari yang berdekatan atau bahkan dengan dinding. Alat ini juga bisa dipasang pada bagian bawah meja dapur tunggal.
- Page 5 Menghubungkan sumber air dan listrik Menghubungkan dengan sumber air dan sumber listrik harus dilakukan oleh teknisi yang memenuhi syarat. Pastikan unit tidak dipasang diatas selang air atau kabel listrik. Unit harus dihubungkan dengan sumber air menggunakan pipa baru. Jangan menggunakan pipa bekas.
- Page 6 Saran pada saat pemakian pertama kali Sebelum mengoperasikan unit untuk pertamakalinya, isi tempat garam dengan garam khusus mesin pencuci piring sebanyak 2 Kg (lihat cara pengisian garam dan rinse aid). Adalah hal yang normal jika terjadi sedikit luapan air dan lampu indicator garam terus menyala untuk beberapa siklus setelah pengisian garam.
- Page 7 Bagian 3 : Cara Penggunaan Panel Kontrol Tombol Power : Untuk menyalakan atau Lampu Indikator Tempat Garam mematikan mesin. Menyala ketika pelembut/garam butuh diisi ulang. Delay time: Tekan tombol delay time sekali Child Lock : Untuk mengunci fungsi maka waktu tunggu akan aktif selama 3 mesin pencuci piring/dishwasher yang jam, tekan dua kali untuk mengaktifkan telah dipilih, tekan dan tahan tombol...
- Page 8 1. Lepaskan tutup dari tempat garam 2. Pada tempat garam terdapat lingkaran dengan tanda panah (lihat pada gambar sebelah), jika diperlukan putar tanda panah berlawanan arah jarum jam dengan tanda ” – ” sebagai acuan, untuk penyetingan kearah tanda ” + ”, berdasarkan tingkat kekerasam air yang akan digunakan.
- Page 9 A. Lepaskan keranjang bagian bawah kemudian lepaskan penutup tempat garam dengan cara memutarnya berlawanan arah jarum jam. (1) B. Jika Anda mengisi tempat garam untuk yang pertama kalinya, isi 2/3 volume dengan air (sekitar 500ml). (2) C. Pasang corong (ada dalam packing) ke tempat garam dan isikan sekitar 2kg garam. Jika ada sedikit air yang keluar dari tempat garam, hal ini adalah normal.
- Page 10 1. Untuk membuka tempat rinse aid, putar sumbat/tutup searah tanda panah “open” (kiri) 2. Tuangkan rinse aid kedalam wadah, hati-hati jangan sampai berlebih. 3. Pasang kembali penyumbat/tutup dengan cara menyejajarkan tanda panah “open” dan putar kearah tanda panah “closed” (kanan). Mesin pencuci piring ini didesain untuk dengan menggunakan rinse aid jenis cairan.
- Page 11 dibandingkan dengan mesin pencuci piring konvensional. Pada umumnya, cukup dengan satu sendok makan deterjen yang dibutuhkan untuk load kapasiats pencucian normal. Untuk tingkat kekotoran yang lebih berat maka dibutuhkan lebih banyak deterjen. Selalu tambahkan deterjen sebelum memulai pencucian, jika tidak akan berakibat hasil tidak bersih dan basah. Jumlah Deterjen yang Digunakan CATATAN: 1.
- Page 12 Deterjen tanpa klorin hanya dapat sedikit memutihkan, bercak kuat dan berwarna tidak sepenuhnya hilang, pada kasus seperti ini pilih program dengan temperature yang lebih tinggi. E. MENGISI KERANJANG MESIN PENCUCI PIRING Untuk mendapatkan performa terbaik dari mesin pencuci piring ini, ikuti petunjuk pengisian keranjang berikut.
- Page 13 Mengisi Keranjang Bawah Keranjang Bawah Keranjang Bawah Rak bawah dirancang untuk Tipe Item panci bergagang, tutup, piring, mangkuk salad, alat makan, dan Piring Sup lain-lain. Piring dan tutup besar Mangkuk harus diletakkan sisi keranjang untuk memastikan Piring Nasi tidak menghalangi tangan Piring Kue semprot bagian atas.
- Page 14 Sendok Kuah Untuk mencuci alat makan/piring berikut ini dengan mesin pencuci piring Tidak cocok Alat makan dari tangkai kayu, tanduk, PERINGATAN !!! tembikar, atau indung mutiara. Jangan sampai peralatan yang dicuci keluar Benda-benda plastik yang tidak tahan panas. sampai ke bagaian bawah. Alat makan dengan bagian-bagian yang Sedikit cocok tidak...
- Page 15 Jenis kaca atau proses pabrikasi. Komposisi kimia yang terdapat pada deterjen. Temperatur air dan durasi program yang dipilih. Anjuran : Gunakan peralatan gelas atau peralatan makan yang telah ditandai oleh pabrik bahwa produk aman dicuci dengan mesin pencuci piring. Gunakan deterjen lembut untuk peralatan makan. Jika perlu lihat informasi penggunaan yang diberikan oleh pabrik deterjen.
- Page 16 keringkan. Pre-Rinse Untuk peralatan Pre-wash makan yang akan 0.01 dicuci/dibersihkan kemudian * Program ini adalah pada saat pengetesan, informasi untuk pengujian komparatif sesuai dengan program sebagai berikut: - Kapasitas: 12 pengaturan. - Posisi keranjang atas pada posisi rendah. - pengaturan Rinse aid pada level 5. Memulai siklus pencucian Tarik keluar keranjang bagian bawah dan atas, kemudian tempatkan piring dan peralatan makan lainnya pada keranjang dan masukan kembali keranjang ke dalam mesin.
- Page 17 Sebelum piring dan peralatan makan dikeluarkan dari mesin pencuci piring, buka pintu mesin dan biarkan terbuka sedikit dan tunggu beberapa menit agar piring menjadi dingin dan lebih kering, kemudian keluarkan. Mengosongkan mesin pencuci piring Normal jika bagian dalam mesin basah. Kosongkan keranjang bagian bawah terlebih dahulu dan baru kemudian keranjang bagian atas.
- Page 18 Secara keseluruhan penyaring harus dibersihkan setidaknya seminggu sekali. Gunakan sikat yang bersih untuk membersihkan filter kasar dan filter mikro. Kemudian pasang kembali seluruh bagian penyaring seperti gambar diatas pada mesin, taruh penyaring pada tempatnya dan tekan kebawah. Jangan menggunkaan mesin pencuci piring tanpa penyaring. Kesalahan pemasangan penyaring dapat mengakibatkan kurang maksimalnya hasil pencucian yang didapat, serta dapat berakibat kerusakan pada peralatan makan yang dicuci.
- Page 19 Jangan menggunakan pembersih yang Ketika berlibur bersifat abrasive atau cairan pelarut. Ketika berlibur, disarankan untuk Untuk membersihkan bagian luar dan menjalankan proses cuci dengan kondisi bagian karet dari mesin, jangan mesin kosong dan kemudian lepaskan menggunakan pelarut atau pembersih kabel daya dari stopkontak, tutup sumber yang bersifat abrasive.
- Page 20 Jangan mencuci peralatan dari bahan plastic kecuali ada tanda bahwa peralatan tersebut dapat dicuci menggunakan mesin pencuci piring atau sejenisnya. Untuk peralatan plastic yang tidak memiliki tanda cek rekomendasi pabrik. Hanya gunakan deterejen dan rinse aid khusus untuk mesin pencuci piring otomatis. Jangan pernah menggunakan sabun/deterjen pakaian, Jauhkan anak-anak dari deterjen dan rinse aid, jauhkan anak-anak dari pintu mesin.
- Page 21 Bagian 6 : Masalah & Solusinya Masalah Kemungkinan Penyebab Solusi Ganti sekering atau seting ulang pemutus Sekering putus, atau aliran. Lepaskan semua peralatan yang pemutus aliran aktif menggunakan sirkuit yang sama dengan mesin ini. Pastikan bahwa mesin telah diaktifkan Mesin tidak bekerja Sumber listrik tidak...
- Page 22 Masalah Kemungkinan Penyebab Solusi Untuk menghilangkan bercak dari peralatan dari kaca. 1. Kesadahan/kekerasan air 1. Keluarkan peralatan metal dari mesin. terlalu tinggi 2. Jangan masukan deterjen. 2. Temperatur saluran 3. Pilih siklus pencucian yang lebih masuk rendah panjang 3. Pengisian mesin pencuci 4.
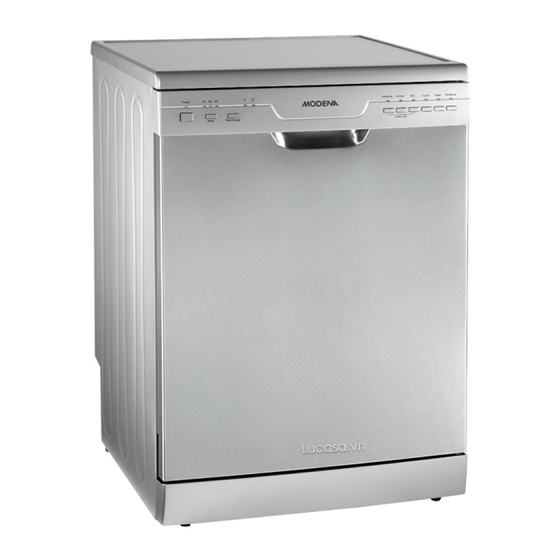
- Page 23 Pastikan mesin telah diatur ketinggiannya Leveling mesin belum diatur dan dalam posisi yang stabil dan rata. Bagian 7 : Spesifikasi MESIN PENCUCI PIRING/DISHWASHER WP 600 Jenis Freestanding Kapasitas mencuci 12 Pengaturan Tempat Warna Stainless (S) Bahan dari kabinet luar...
- Page 25 INSTRUCTION AND GUIDE TO USING MODENA DISWASHER Thank you for your trust and decision to buy MODENA product and make it a part of your modern family's needs and lifestyle. The stylish and advanced design in each product is an elegant combination for your daily household activities.
- Page 26 CONTENTS PAGE. • Introduction • Part 1 : Name of Part • Part 2 : Installation • Part 3 : How to Use • Part 4 : Maintenance • Part 5 : Precaution Action • Part 6 : Problem & Solution •...
- Page 27 Placement and tightening (leveling) 1. Check your units whether have any damage due to transport. Never connect a damaged machine. If the unit is damaged, contact the service center of Modena. 2. Check whether the unit is installed properly so the sides or rear panel attached to adjacent cabinets or even with the wall.
- Page 28 Connecting the water and electricity sources Connecting to the water source and the power source must be performed by a qualified technician. Make sure the unit is installed above the water hose or power cord. The unit must be connected to a water source using a new pipe. Do not use old pipe. Connecting the water inlet hose Connect the cold water hose with a threaded connector to (3/4 inch) and make sure it is properly installed and tight.
- Page 29 Suggestion for the first time use Before you operate the unit for the first time, fill in the salt container with the special salt for the dishwasher as much as 2 Kg (see how to fill the salt and rinse aid). It is normal if there is a little flood water and salt indicator lights remain lit for a few cycles after filling the salt.
- Page 30 Part 3: How to Use Control Panel Power Button: To turn on or turn off the The Salt Indicator Light: Turns on when engine. softener salt needs recharged. Delay time: Press the delay time once the Child Lock: To lock the function of waiting time will be active for 3 hours, dishwasher that has been selected, press twice to activate the waiting time of...
- Page 31 1. Remove the lid from the salt container. 2. In the salt container there is a circle with an arrow (see the next figure), if necessary turn the arrows anticlockwise with the sign "-" as a reference, to setup towards the "+" sign, based on the water hardness level to be used.
- Page 32 Note: 1. The salt container should be filled when the salt container warning light is on. Although the salt container is fully filled, the indicator light may not be off before the salt is completely dissolved. If there is no salt container indicator light on the panel control (for selected models), you can estimate when to fill in the salt / softener based on the number of rounds that the process has been started (see the previous scheme of salt consumption).
- Page 33 Wipe the rinse aid spilled with a damp cloth. Do not forget to put the lid back before closing the door of rinse aid dishwasher. Attention!!! Clean rinse aid spilled during the filling using vacuum cloth to prevent excessive foam on the next wash.
- Page 34 NOTE: 1. If the lid is not already open: press the release button. Lid opens. 2. Always put the detergent before starting each washing cycle. Only use branded detergent for dishwashers. WARNING! Dishwasher detergent is corrosive! Keep away from children. Only use detergents specifically for dishwasher.
- Page 35 The things to note before or after Fill in the Dishwasher Machine Basket 1. Dispose the food waste, soften the crust remnants of food in the pan. When laying plates and cutlery in the dishwasher, follow the following: A. Dishes and cutlery must not impede spray arm. B.
- Page 36 Bottom basket bottom basket Fill in the bottom basket Type Item Bottom basket is designed for Soup plate saucepan, cover, plates, salad Rice plate bowls, cutlery, and others. Plate and lid should be placed on the Cake plate side of the basket to make sure Oval plate.
- Page 37 Not suitable for washing the utensils / plates of the following with the dishwash WARNING !!! Cutlery made of wood handle, horn, pottery, or Do not let the equipment washed out to the pearls. bottom part. Plastic objects that can not resist the heat. Little fit.
- Page 38 At the end of the washing program When the wash cycle has stopped, buzzer / alarm will sound 6 times, then stopped. Turn off the unit by pressing the On / Off button, turn off the water supply and open the door of the machine. Wait for a few minutes before removing tableware, so that the tableware will be cold and the dryer would be better.
- Page 39 Note: The sound "click" will be heard indicating the door has completely closed. When the wash cycle has ended, you can turn off the unit by pressing the ON / OFF. Changing the program Reason: the washing cycle that may be changed is the wash cycle that has been running for a while. If the detergent has been given and the wash water has been cleared, if the cases like this then the detergent must be refilled (see the "fill in detergent").
- Page 40 Part 4 : Maintenance Filtering System Filters are used to prevent the leftovers and the objects that can enter into the pump. Sometimes the leftovers can clog the filter. Filter consists of a coarse filter, a flat filter (main filter) and micro filter (fine filter) 4.
- Page 41 Cleaning the spray arms It is important to periodically clean the spray arms from the chemical constituents of hard water that will clog the spray arm. To release the spray arm, turn the nut clockwise to release the washers on the top of the spray arm and remove the spray arm.
- Page 42 Part 5 : Precaution Action SAFETY INFORMATION WARNING ! Hydrogen gas explosion. On certain conditions: hydrogen gas can arise in hot water system that is not used for two weeks or more. HYDROGEN GAS is a gas that can explode. If the hot water system is not used for two weeks or more, before using the dishwasher, open all channels of closed hot water tap and let the water flow for several minutes.
- Page 43 ERROR CODE When there is a malfunction that is not appropriate, then the screen monitor of the unit will display error code as a warning. Code Description Possible Causes Door open when the machine LED1, LED2 blinking Door open operate Incoming water line is not LED1, LED4 blinking The water channel enter...
- Page 44 Part 6 : Problem & Solution Problem Possible Cause Solution Replace fuse or reset the breaker settings. Blown fuse, or the circuit Disconnect all devices that use the same breaker active circuit breaker to this machine or the circuit breaker that active. The machine is not Make sure that the machine has been working...
- Page 45 Problem Possible Cause Solution To eliminate the spot from glass equipment. 1. Remove the metal equipment from the machine. 1. The water hardness is too 2. Do not enter the detergent high 3. Choose longer washing cycle. 2. The inlet temperature low 4.
- Page 46 Leveling of the machine has Make sure the machine has adjustable the not been set. height and in a stable position and flat. Part 7 : Specification DISHWASHER WP 600 Types Freestanding Washing capacity 12 place settings. Color Stainless (S)
Need help?
Do you have a question about the WP 600 and is the answer not in the manual?
Questions and answers
1. ve 4. isiklar beraber yanip sonuyor makine yikamaya gecmiyor. neden?
The 1st and 4th lights flashing together on the Modena WP 600 indicate an issue with the incoming water supply. The possible cause is that the water channel is not allowing water to enter properly, preventing the machine from starting the wash cycle.
This answer is automatically generated
1. ve 4. ışıklar yanıp sönüyor ve makine yıkamaya geçmiyor. neden?
The 1st and 4th lights blinking on the Modena WP 600 indicate an issue with the incoming water line. The machine is not starting the wash cycle because the water channel is not allowing water to enter properly.
This answer is automatically generated