
Related Manuals for Philips SPH8528/10


Summary of Contents for Philips SPH8528/10
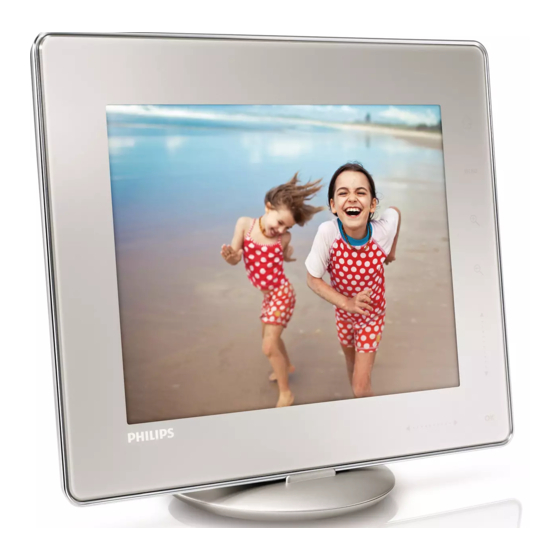
- Page 1 Register your product and get support at User manual PhotoAlbum SPH8408 SPH8428 SPH8528...
-
Page 2: Table Of Contents
Contents 1 Important Safety Safety precautions and maintenance Notice Respect copyrights Recycling North Europe Information (Nordic Countries) Class II statement 2 Your PhotoAlbum Introduction What’s in the box Overview of your PhotoAlbum 3 Get started Charge the built-in battery Overview of the battery/status display icons Turn on the PhotoAlbum Turn off the PhotoAlbum... - Page 3 11 Frequently asked questions 12 Glossary Need help? Please visit www.philips.com/welcome where you can access a full set of supporting materials such as user manual, the latest software updates and answers to frequently asked questions.
-
Page 4: Important
1 Important Safety Safety precautions and maintenance • Never touch, push, rub or strike the screen with hard objects as this may damage the screen permanently. • When the product is not used for long periods, unplug it. • Before you clean the screen, turn off and unplug the power cord. -
Page 5: North Europe Information (Nordic Countries)
To safeguard the functionality and safety of your product, take your product to an official collection point or service center where a professional can remove or replace the battery. Please inform yourself about the local rules on separate collection of batteries. The correct disposal of batteries helps prevent potentially negative consequences on the environment and human health. -
Page 6: Your Photoalbum
2 Your PhotoAlbum Congratulations on your purchase, and welcome to Philips! To fully benefit from the support that Philips offers, register your product at www.philips.com/welcome. Introduction This is a Philips Digital PhotoAlbum with built-in rechargeable battery. With Philips Digital PhotoAlbum SPH8408/ SPH8428, you can use the PhotoAlbum to: •... -
Page 7: Overview Of Your Photoalbum
Overview of your PhotoAlbum • Hold to go to the home screen • Tap to return to the upper-level menu b MENU • Tap to access/exit the option menu c Zoom buttons • • Tap to zoom in • Tap to switch modes (wave mode - >... -
Page 8: Get Started
Always follow the instructions in this chapter in sequence. If you contact Philips, you will be asked for the model and serial number of this apparatus. The model number and serial number are on the back of the apparatus. Write the numbers here: Model No. -
Page 9: Overview Of The Battery/Status Display Icons
» If the PhotoAlbum is powered off, the LED indicators under the left-right slider and the OK button blink during the charging process. When the built- in battery is fully charged, the LED indicators stop blinking. • The lifespan of the battery varies with use. •... -
Page 10: Turn Off The Photoalbum
• The screen prompts you to set time and date. • / / / to set time and date, and then tap OK to confirm. » The home screen is displayed. If the demo function is activated: » When the power cable is connected to the power socket, the PhotoAlbum on the charging dock turns on automatically. - Page 11 Open the cover on the side of the PhotoAlbum. Insert a storage device into the PhotoAlbum. SPH8408/SPH8428 SPH8528 » An option menu is displayed. • [Play Photos] (SPH8408/SPH8428) • [Play Inserted Content] (SPH8528): Select it to play media on the device •...
-
Page 12: Transfer Your Media With Pc
To select all media: Select [Yes], and then tap OK. Select an album on the PhotoAlbum to store the media, and then tap OK. To select a specific medium: Select [No], and then tap OK. Select a folder, and then tap . and then OK to select/ deselect a medium. -
Page 13: Know These Keypad Icons
Select an option, and then tap OK. Follow the on screen instructions to adjust the brightness or view the status of the PhotoAlbum. • To exit the quick menu, tap MENU again. Know these keypad icons Input in English Input in supported European languages Input in Simplified Chinese Input in Russian... -
Page 14: Play
4 Play Display photos Note • You can display JPEG photos in slideshow mode on the PhotoAlbum. In the home screen, select [Play] and then tap OK. » (SPH8408/SPH8428) Photos are displayed in slideshow mode. » (SPH8528) Photos/video clips are displayed in slideshow mode. -
Page 15: Zoom And Crop A Photo
• [Background Color]: Select the background color • [Rotate]: Select an orientation to rotate the photo • [Copy]: Copy the photo to another album • [Delete]: Delete the photo • [Select Background Music] (SPH8528): Turn on/off the background music for photo slideshow •... -
Page 16: Play Videos (Sph8528)
• To switch between uppercase and lowercase, select aA on the displayed keypad and then tap OK. When the name is complete, select and then tap OK. Tap OK to start the saving process. Play videos (SPH8528) Note • SPH8528 plays most video clips of a digital still camera in M-JPEG (*.avi/*.mov), MPEG-1 (*.mpg/*.dat/*.avi/*.mov), and MPEG-4 (*.avi/*. -
Page 17: Play Background Music (Sph8528)
Play background music (SPH8528) Note • Only MP3 or WAV music files can be played on the PhotoAlbum. During photo display, tap MENU. » An option menu is displayed. repeatedly to select [Select Background Music], and then tap OK. Select [Select Music], and then tap OK. Select a folder. -
Page 18: Browse
5 Browse Browse and manage albums and media You can browse and manage albums and media in wave mode or album mode. • Wave mode: • Album mode: Browse albums: In the home screen, select [Browse] and then tap OK. »... -
Page 19: Add Media To The Favorite Album
Album menu: • [Add to Favorites]: Add media in the album to the [Favorites] album • [Create New Album]: Create an album • [Copy]: Copy media in the album to another album • [Move]: Move media in the album to another album •... -
Page 20: Copy Media
Copy media Select [Copy], and then tap OK. Select a destination album, and then tap OK to start copy. Move media Select [Move], and then tap OK. Select a destination album, and then tap OK to start move. Delete media Select [Delete], and then tap OK. -
Page 21: Clock
6 Clock Display the clock In the home screen, select [Clock] and then tap OK. » A clock/calendar is displayed. Clock menu When a clock/calendar is displayed, tap MENU to enter the clock menu. • [Select Clock]: Select another clock or calendar template to be displayed. -
Page 22: Event Reminder
7 Event reminder Create an event reminder In the home screen, select [Event Reminder] and then tap OK. Select [Create Event Reminder], and then tap OK. Tap / to select a template of event reminder, and then tap OK. » An option list is displayed. -
Page 23: Enter The Name Of Event Reminder
Schedule the message. • [Event Name]: Enter the name. For details, see “Enter the name of an event reminder”. • [Repeat]: Select a repeat frequency • [Set Date]: Set the date or day • [Set Time]: Set the time After you complete the event reminder, select [Done] and tap OK. - Page 24 Select [Create Event Reminder], and then tap OK. Tap / to select a template of event reminder, and then tap OK. Select one of the following options to edit an event reminder. • [Add Music] (SPH8528): Add music to the event reminder •...
- Page 25 To edit the text of event reminder: Select [Edit Text], and then tap OK. Select a preset template, and then tap » The keypad is displayed. twice to access the keypad. To enter the text, select an alphabet/ number and then tap OK. •...
-
Page 26: View An Event Reminder
View an event reminder In the home screen, select [Event Reminder] and then tap OK. Select [View Event Reminder], and then tap OK. Select an event reminder, and then tap » An event reminder is displayed. • MENU, and then select one of the following options to continue. -
Page 27: Settings
8 Settings Select an on-screen language In the home screen, select [Settings] and then tap OK. Select [Language], and then tap OK. Select a language, and then tap OK. Adjust brightness You can adjust the brightness of the PhotoAlbum to achieve the best view. In the home screen, select [Settings] and then tap OK. -
Page 28: Set Time/Date Format
Set time/date In the home screen, select [Settings] and then tap OK. Select [Time and Date], and then tap Select [Set Time] / [Set Date], and then tap OK. Tap / / / to adjust minute/hour/day/ month/year, and then tap OK. Set time/date format In the home screen, select [Settings] and then tap OK. -
Page 29: Set Smartpower Timer
Set SmartPower timer With the SmartPower timer, you can configure the time for the display of the PhotoAlbum to turn on or turn off automatically. When the display automatically turns off, the PhotoAlbum goes to standby (sleep) mode. Note • Ensure that the current time of the PhotoAlbum is set correctly. -
Page 30: Set Auto Orientation
Select an option, and then tap OK. » After the selected period, the PhotoAlbum hibernates. • To disable the hibernation function, select [Never] and then tap OK. • To get the PhotoAlbum out of hibernation, press . Set auto orientation With the auto orientation function, you can play photos in the correct orientation depending on the horizontal/vertical orientation of the... -
Page 31: Protect/Unprotect Content On A Storage Device
Select [Set Beep], and then tap OK. Select [On] to turn on the button sound. • To turn off the button sound, select [Off]. Tap OK. Protect/Unprotect content on a storage device With the PhotoAlbum, you can delete content on a storage device available on the PhotoAlbum. -
Page 32: Slideshow Setting
Select [Demo], and then tap OK. Select [On], and then tap OK. » The demo function is activated. » When Demo mode is ON, the photo frame will play the DEMO slideshow automatically once the power cable is connected. • During demo show, tap •... -
Page 33: Select View Mode For Slideshow
Select view mode for slideshow In the home screen, select [Settings] and then tap OK. Select [Slideshow], and then tap OK. Select [View Mode], and then tap OK. Select a view mode for slideshow, and then tap OK. Select file type for slideshow display (SPH8528) You can select type of file to be displayed in slideshow mode. -
Page 34: Select A Transition Effect
Select a transition effect In the home screen, select [Settings] and then tap OK. Select [Slideshow], and then tap OK. Select [Transition Effect], and then tap Select a transition effect, and then tap Select background color You can select a background border color for photos that are smaller than the PhotoAlbum display. -
Page 35: Power Meter
» If you select [RadiantColor], the PhotoAlbum extends the color on the edges of a photo that is smaller than the full screen to fill the screen without black bars or aspect ratio distortion. » If you select a background color, the PhotoAlbum displays a photo with a background color. -
Page 36: Unlock The Touch Panel
Select [Power Meter], and then tap OK. To show the power meter, select [On] and then tap OK. • To hide the power meter, select [Off] and then tap OK. Unlock the touch panel In the home screen, select [Settings] and then tap OK. -
Page 37: View Information Of The Photoalbum
View information of the PhotoAlbum You can find the model name, the firmware version of the PhotoAlbum, and the memory status of the PhotoAlbum and other storage device available on the PhotoAlbum. In the home screen, select [Settings] and then tap OK. Select [Info]. -
Page 38: Upgrade The Photoalbum
• Do not power off the PhotoAlbum during software upgrade. If there is a software update, you can download the latest software from www.philips.com/ support to upgrade your PhotoAlbum. The earlier software is unavailable on line. Visit www.philips.com/support. Search for your PhotoAlbum and go to the software section. -
Page 39: Product Information
10 Product information Note • Product information is subject to change without prior notice. Picture/Display • Viewing angle: @ C/R > 10, 130° (H)/110° (V) • Lifetime, to 50% brightness: 20000 hr • Aspect ratio: 4:3 • Panel resolution: 800 x 600 •... - Page 40 Set on - 2.5 hours (SPH8408/ SPH8428) - 4 hours (SPH8528) Set off 2.5 hours Accessories • AC-DC adaptor • Charging dock • Carrying pouch (for SPH8528 only) • CD-ROM with User manual • Quick start guide Convenience • Card Reader: Built-in •...
- Page 41 11 Frequently asked questions Is the LCD screen touch-enabled? The LCD screen is not touch-enabled. After you turn on the PhotoAlbum, you can use the touch panel to control the PhotoAlbum. Can I use the PhotoAlbum to delete photos on a memory card? Yes, it supports operations to delete photos on an external device, such as a memory card.
- Page 42 • If the PhotoAlbum is taken away from the charging dock and no control button is activated for about 10 minutes, the LCD screen turns off. Press to wake up the PhotoAlbum.
- Page 43 12 Glossary Aspect ratio Aspect ratio refers to the length to height ratio of TV screens. The ratio of a standard TV is 4:3, while the ratio of a high-definition or wide TV is 16:9. The letter box allows you to enjoy a picture with a wider perspective on a standard 4:3 screen.
- Page 44 Thumbnail A thumbnail is reduced-size versions of a picture that is used to make it easier to recognize an them. Thumbnails serve the same role for images as a normal text index does for words. xD Card EXtreme Digital Picture Card. A flash memory card used in digital cameras.
- Page 45 © 2010 Koninklijke Philips Electronics N.V. All rights reserved. UM_V1.1...