Table of Contents
Advertisement
Quick Links
Advertisement
Table of Contents

Related Manuals for TEQSAS LAP-TEQ PLUS


Summary of Contents for TEQSAS LAP-TEQ PLUS
- Page 1 Operating Manual...
-
Page 2: Table Of Contents
Table of contents Table of contents Before you get started… ..............4 Intended use ..................4 What do the symbols used here mean? ..........4 For your safety .................. 6 General safety information ..............6 About laser beams ................7 Workplace safety ................ - Page 3 Service centre ................... 23 Observe ambient conditions ............. 23 Calibration ..................24 Storage .................... 29 Disposal ................... 30 10.1 Disposal of batteries/rechargeable batteries ........30 10.2 Removing the battery ............... 31 Technical data ................. 32 Declaration of Conformity ............. 34 LAP-TEQ PLUS...
-
Page 4: Before You Get Started
Before you get started… Before you get started… Intended use With LAP-TEQ PLUS you can measure the inclination of speaker systems. LAP-TEQ PLUS measures the horizontal angle between its longitudinal axis and the earth’s surface. This provides information on the horizontal orientation of the speaker element. - Page 5 Before you get started… Caution! Potential danger of injury! Dangerous situation that can result in injuries. Attention! Danger of damage to device! Situation that can result in material damage. Notice Information provided for better understanding of the processes. LAP-TEQ PLUS...
-
Page 6: For Your Safety
For your safety For your safety Warning! Failure to comply with the safety information and instructions can cause electric shock, fire and/or severe injuries. ► Read all safety information and instructions. General safety information Store all safety information and instructions for future reference. The term device used in the safety information refers to mains-powered devices (with a mains cable) and to battery-powered devices (without a mains cable). -
Page 7: About Laser Beams
If you use the device outdoors, use only extension cables that are suitable for outdoor use. The use of an extension cable that is suitable for outdoor use reduces the risk of damage to the device. LAP-TEQ PLUS... -
Page 8: Human Safety
For your safety Human safety Be attentive, pay attention to what you are doing, and use common sense while working. Do not use the device if you are tired or under the influence of drugs, alcohol or medications. One moment of carelessness during use of the device can result in serious injuries. -
Page 9: Service
Do not allow the device to fall or expose it to shocks. The device or parts of it can become damaged from falling, bending or deformation. Magnetic fields can cause the device to malfunction or the battery to discharge. LAP-TEQ PLUS... - Page 10 For your safety The device features safeguards to limit the emitted laser beam: Do not make any modifications to the optical system. This device is classified as a class 3R laser product in accordance with the international standard IEC 60825. It operates with a visible laser beam, which is not dangerous in normal operation.
-
Page 11: Description Of Product
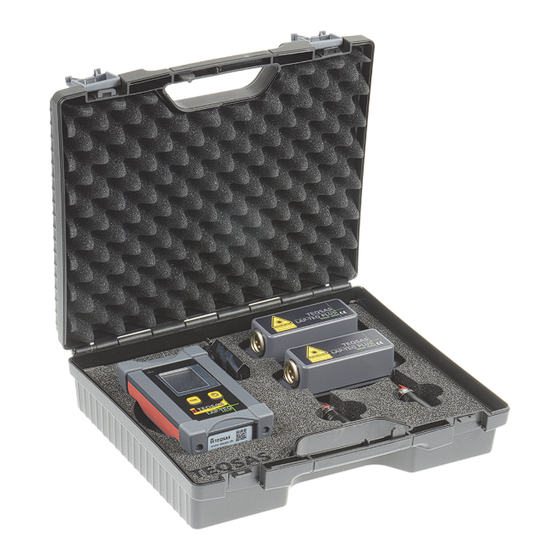
Scope of delivery 1x: LAP-TEQ Display PLUS (display unit) 2x: LAP-TEQ Sensor PLUS (sensor unit) 1x: Mains USB charger 1x: USB charge cable 1x: Calibration cable 1x: Safety information 1x: Transport case LAP-TEQ PLUS... -
Page 12: Your Device At A Glance
Description of product Your device at a glance 1. LAP-TEQ Display PLUS 2. Display 3. Power button 4. Calibration button 5. Charge state indicator 6. USB charge socket 7. Socket for XLR cable 8. LAP-TEQ Sensor PLUS 9. Opening in pressure compensation membrane 10. - Page 13 Description of product A complete LAP-TEQ PLUS angle measuring system consists of a display unit and at least one sensor unit. The sensor unit is designed for mounting on the topmost element of a line array or of the bumper and measures the horizontal angle between its longitudinal axis and the earth’s surface.
-
Page 14: First Operation
First operation First operation Charging the battery The battery must be charged before using the device for the first time. If no charger is connected, the display will show the charge state of the battery when the device is switched on. Attention! Danger of damage to device ►... - Page 15 Red LED = charging Green LED = fully charged ► Terminate the charging process when the battery is charged. ► Disconnect the mains USB charger from the power supply as long as you are not using it. LAP-TEQ PLUS...
-
Page 16: Connection
First operation Connection Attention! Danger of damage to device! Moisture and liquids can damage the components or electronic circuits in the device. ► Do not switch the device on if it is damp. ► If the device is already switched on, switch it off. ►... - Page 17 However, the measuring function will not be affected. For a distance greater than 75 m, you must use an XLR cable with a larger cross section than 0.22 mm². This will reduce the voltage drop along the cable route. LAP-TEQ PLUS...
-
Page 18: First Operation
For secure mounting on a bumper without a special LAP-TEQ holder, you can use the optional TEQSAS LAP-TEQ magnetic holder. The sensor must be bolted firmly to the flying frame or secured by suitable means against falling. First operation The sensor units are calibrated at the factory so that the base plate has to be oriented downward. -
Page 19: Operation
Instead, a short guide to calibration is displayed. The display automatically switches back to the angle measurement after a few seconds. ► Power off: Press the “Power” button again. LAP-TEQ PLUS... -
Page 20: Display Texts
Operation Display texts If no cable or sensor unit or a defective cable is connected to the display unit, the warning “no sensor” appears on the display when the display unit is switched on: Establish a correct connection between the display unit and the sensor unit. -
Page 21: Cleaning And Care
► Avoid scouring movements on the display and the glass pane that closes the laser beam exit opening. ► Never use chemicals, cleaning agents or solvents. This can cause discolouration and corrosion on the outside of the device or can result in electric shock or fire. LAP-TEQ PLUS... -
Page 22: Malfunctions And Troubleshooting
Malfunctions and troubleshooting Malfunctions and troubleshooting Caution! Danger of injury! Unauthorised repairs can have the result that your device no longer functions safely. That endangers yourself and your environment. Malfunctions are often caused by minor errors. Usually you can remedy them yourself. -
Page 23: Service Centre
Measurements through glass or plastic panes Dirty laser beam exit opening High temperature deviations: Before using in a very hot or cold environment, allow the device to adjust to the ambient temperature while in the transport case. LAP-TEQ PLUS... -
Page 24: Calibration
Calibration Calibration Notice The sensor unit is calibrated at the factory for operation with the base plate oriented downward. To operate the sensor with a different orientation of the base plate (upward, or to the left or right), it must be calibrated in the desired position. - Page 25 If “Sens pos incorrect” appears on the display, please check the orientation of the base plate. If the procedure is correct, “don’t move” appears on the display, followed by a numerical value for “A” and the question “calibrte 0.0° B?” LAP-TEQ PLUS...
- Page 26 Calibration Step 4 ► Turn the sensor unit so that the laser beam exit points to the right. ► Press the “CAL” button again to start calibration in direction “B”. Again, “don’t move” appears on the display, followed by a numerical value for “B”...
- Page 27 8! To exit calibration mode, power off the display unit by pressing the “Power” button. When it is switched on again – without pressing the “CAL” button – the device is again in normal operating mode. LAP-TEQ PLUS...
- Page 28 Calibration Step 8 If you wish to operate the sensor unit with the base plate in a different position, the calibration process must be continued. The sequence of the four possible positions is defined as follows (when viewing the XLR plug from the sensor unit): Orientation Display text Base plate down (factory calibration)
-
Page 29: Storage
High temperatures can cause malfunctioning of the display, damage to the device or explosion of the battery. ► Do not store the device in very hot locations such as the inside of a car in summer or at locations with exposure to direct sunlight. LAP-TEQ PLUS... -
Page 30: Disposal
Disposal Disposal The packaging consists of environmentally friendly materials that can be disposed of at your local recycling centre. Devices that are marked with the symbol opposite are not to be disposed of with the household trash. You under obligation to dispose of such electrical and electronic devices separately. -
Page 31: 10.2 Removing The Battery
If the battery is defective, it can be replaced by a service shop. In this case please contact your sales partner. ► Remove the caps on the display unit with a small screwdriver. ► Unscrew screws (1). ► Disconnect cable (2). ► Remove battery (3) and dispose of properly. LAP-TEQ PLUS... -
Page 32: Technical Data
Technical data Technical data LAP-TEQ set Angle measurement resolution 0.1° Permissible ambient temperature for operation 0 – 40 °C Permissible ambient temperature for storage -20 – 50 °C Total weight of set 1.485 kg Transport case 293 × 228 × 80 mm LAP-TEQ Display PLUS Protection type IP53... - Page 33 Order numbers for single components LAP-TEQ PLUS sensor unit T87001004 LAP-TEQ PLUS display unit T87001005 LAP-TEQ PLUS case with inlay T87001006 LAP-TEQ PLUS calibration cable T87001013 LAP-TEQ PLUS angle notes T87001014 LAP-TEQ PLUS note pen...
-
Page 34: Declaration Of Conformity
Declaration of Conformity Declaration of Conformity V-04/2018... - Page 35 Declaration of Conformity LAP-TEQ PLUS...
- Page 36 TEQSAS GmbH Phone: +49 (0)2233 611-500 Otto-Hahn-Str. 20a Fax: +49 (0)2233 611-511 50354 Hürth E-mail: sales@teqsas.de Germany Web: www.teqsas.de...
Need help?
Do you have a question about the LAP-TEQ PLUS and is the answer not in the manual?
Questions and answers