
Related Manuals for AFG Pro 7.2AI


Summary of Contents for AFG Pro 7.2AI
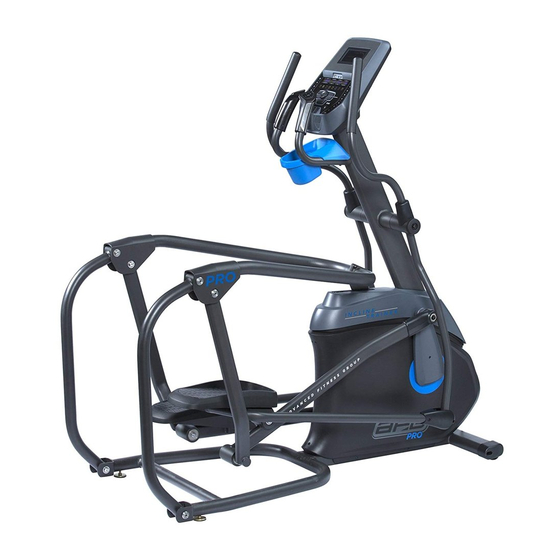
- Page 1 Issue e date 20 016-11-14 Edition Doc No SM-TM M-AF-006 JOHNSO vision Edition ti Page 7.2AI Servic ce Ma anual Approval Review Editor le Schweitz Alex Tang...
- Page 2 Pro o duct B B rowse e...
-
Page 3: Table Of Contents
Contents CHAPTER 1: SERIAL NUMBER LOCATION ....................5 CHAPTER 2: CONSOLE INSTRUCTION 2.1 Console Overview ............................. 6 2.2 Engineering Mode Instruction ........................8 CHAPTER 3: TROUBLESHOTING 3.1 Electrical Diagram ..........................10 3.2 Circuit Board Instructions ........................12 3.3.0 Troubleshooting summary ........................ - Page 4 Contents (cont.) 4.9 ECB Motor Replacement……………………………………………………………………………………..32 4.10 MCB Replacement…………………………………………………………….……………………………….33 4.11 Flywheel replacement………………………………………………………………………………………..34 4.13 Incline motor replacement…………………………………………………………………………………...35 4.11 Console circuit board replacement………………………………………………………………………..36...
-
Page 5: Chapter 1: Serial Number Location
HAPTER 1: : Serial Number Loca ation 1.1 Serial l Number Location... -
Page 6: Chapter 2: Console Instruction
CHAPTER R 2: Con sole Instru uction 2.1 Console e Instruction: Note: There e is a thin pro otective shee et of clear pla astic on the o overlay of the e console tha at should be removed before use. A) LCD DIS SPLAY WIND DOWS: Inclin... - Page 7 CHAPTER R 2: Con sole Instru uction ‧ TIME: S Shown as min nutes: secon nds. View the e time remain ning or the ti me elapsed in your work kout. ‧ DISTAN NCE: Shown as miles. Ind dicates distan nce traveled ‧...
-
Page 8: Engineering Mode Instruction
CHAPTER R 2: Console Instru u ction 2.2. Engin neering mo ode instruc ction. - Page 9 CHAPTER R 2: Console Instru u ction...
-
Page 10: Chapter 3: Troubleshoting
CHAPTER R 3: Trou bleshootin g 3.1 ELEC CTRICAL D DIAGRAM 7.2AI SCH HEMATIC- -MCB & EC 10 0... - Page 11 CHAPTER R 3: Troubleshooting Console c connection n layout...
- Page 12 CHAPTER R 3: Trou bleshootin g Assembly c connection layout 3.2.1 .Boa ard Connec ctor instruc ction 1, ECB Fig-1 JP01 Console conn nection JP02 Speed senor r connection JP03 12 2...
- Page 13 2. MCB AC-IN AC P Power line inp put. LED1 PU STATUS see (Table1 To In ncline motor LED2 NCLINE MOV VE UP To E CB control b board LED3 NCLINE MOV VE DOWN To C Console board Prog raming conn nector Fig-2 D Flash...
- Page 14 3. Console e control boa LCD display om heart rate e grip om Quick key y Left hand b om Quick key y right hand b Audio In& O ut interface Speaker JP10 Keypad (Blu etooth & Res sistance) F ig-1 14 4...
-
Page 15: Console Does Not Light Up
3.3.0. Troubleshooting summaries: Code Description Symptom Solution CONSOLE DOES NOT LIGHT A .the power switch is in the on position, but See section the console will not turn on. 3.3.1 b. The console is damaged or the console cable is not connected properly. c. - Page 16 CHAPTER 3: Troubleshooting 3.3.1 TROUBLESHOOTING –CONSOLE DOES NOT LIGHT UP SOLUTION: 1. Check if the outlet the machine is plugged into is functional. 2. Check if the correct power cord is being used. Only use the power cord included or provided by customer tech Support.
- Page 17 CHAPTER 3: Troubleshooting 3.3.2 TROUBLESHOOTING – Speed Does Not Display SOLUTION: Unplug the power cord, remove the console and check that all connections to the console are secure and not damaged or pinched. Remove the side cover and check to see if the sensor wire(JP02) is connected well and not damaged.(page 12 Fig-1) 3.
- Page 18 CHAPTER 3: Troubleshooting 3.3.3 TROUBLESHOOTING- HEART RATE ISSUES SOLUTION: elemetric HR: a. Re-center the HR strap on user's chest, strap mast have some moisture for good connection. b. Replace the battery in the wireless HR Strap. 2. HR grips c. Wet user's hand, and then reestablish contact with the HR grip. d.
- Page 19 CHAPTER 3: Troubleshooting 3.3.4 TROUBLESHOOTING- QUICK KEY ISSUES SOLUTION: a. Remove the back of console and see if the keypad connecting ribbon cable is connected properly to the console control board. Reconnect the cable and test the keypad for function (Page14 , JP4 & JP5) b.
- Page 20 CHAPTER R 3: Trou bleshootin 3.3.5 TRO OUBLESH OOTING- NOISE ISS SUES SOLUTION Make sure th hat the conso ole mast is ti ightly attache ed to the fram Make sure th hat the front stabilizer an nd rear stabil izer are tight tly attached t to the frame.
- Page 21 CHAPTER R 3: Trou bleshootin 3.3.6 TRO OUBLESH OOTING- NO RESIS STANCE O OR INCOR RRECT RES SISTANCE SOLUTION 1. C Check if the c console show ws RPM valu ue. If no, refe er to solution for section 3 3.3.2“Speed d Does Not Disp...
- Page 22 CHAPTER R 3: Trou bleshootin 3.3.7. TRO OUBLESH HOOTING- - No Bluet tooth Func ction SOLUTION 1) Check if mobile devic ce’s Bluetoot h function is turn on. If N No, try turn on n the Bluetoo oth function a again.
-
Page 23: No Function Or Noise On Incline Motor
Troublesh hooting 3.3.8. No Function or Noise on incline e motor The in ncline motor d does work. The in ncline motor i is noisy SOLUTION 1) Press re esistance “↑” ” and “↓”... at t the same tim me for 3 seco onds. - Page 24 CHAPTE ER 4: Pa rt Replace ment Guid 4.1 CONS SOLE REP PLACEME 1) Disconne ect the conso ole cable and d HR connec ctions from th he defective console and remove the console. 2) Reinstall the wire con nnections to t the new cons sole.
- Page 25 APTER 4: Part Rep placement Guide 4.2 HEAR RT RATE A AND QUIC K KEY RE EPLACEM a. HEART RATE PLAT ATES 1) Remove the 2 screws s from heart rate plastic h housing.(Fig- 2) Open the e plastic hous sing.
- Page 26 APTER4: Part Rep placement G Guide 4.3 CUP H HOLDER R REPLACE EMENT 1) Remove e the 4 screw ws from both sides.(Fig-1 2) Remove e the bad cu p holder and d install new cup holder 3) Fasten the 4 screws Fig-1 26 6...
-
Page 27: Chapter 4: Part Replacement Guide
CHAPTER R 4: Part Replacem ment Guide 4.4 SIDE COVER R REPLACEM MENT Remo ve the handl lebar.(secton n4.6) Remo ve the link a rm (section 4 4.7) Remo ve the crank k(section 4.8) Loose the screws in side cover Replac ce new side cover and fa... - Page 28 APTER 4: Part Rep placement Guide 4.5 CONS SOLE MAS ST REPLA ACEMENT 1) Remove e the console e and discon nnect the con nsole cable. 2) Remove e the cover o of the consol e mast (Fig- 3) Loosen the 4 bolts t to remove th e mast, care...
- Page 29 APTER 4: Part Rep placement Guide 4.6 HAND DLEBAR R REPLACEM MENT 1) Loosen the bolts an nd take off the e washers, th hen move to o next step. 2) Take the e arm set off 3) Replace e the new ha andlebar.
-
Page 30: Link Arm Replacement
APTER 4: Part Rep placement Guide 4.7 LINK ARM REP PLACEMEN 1) Remove e handlebar (section 4.6) 2) Loosen the bolts an nd washers to o remove the e link arm fro om the handl ebar. (Fig-1) 3) Reinsta all new link ar rm and tightn ness bolts wi ith 250kgf-cm... - Page 31 APTER 4: Part Rep placement Guide 4.8 CRAN NK REPLA ACEMENT Remo ve the handl lebar(section n4.6). Remo ve the link a rm (section 4 4.7). Remo ve line crank k screws. Remov ve the old cr rank. Replac ce new cran k.
- Page 32 APTER 4: Part Rep placement Guide 4.9 ECB m motor Rep placement 1) Remove e the handle bar(section4 4.6) 2) Remove e the link arm m (section 4. 3) Remove e crank(sect ion4.8) 4) Remove e the side co over(section.4 4.4) 5) .If you a are replacing...
- Page 33 APTER 4: Part Rep placement Guide 4.10 MCB B Replacem ment Remo ve the handl lebar(section n4.6) Remo ve the link a rm (section 4 4.7) Remo ve the crank k (section 4.8 Remo ve the side c cover(section n.4.4) Loose en MCB screw ws and conn...
- Page 34 APTER 4: Part Rep placement Guide 4.11 Flyw wheel and Drive belt t replacem ment Remo ve the handl lebar (section n4.6) Remo ve the link a rm (section 4 4.7) Remo ve the crank k (section 4.8 Remo ve the side c cover (sectio n.4.4) Remov...
- Page 35 APTER 4: Part Rep placement Guide 4.12 INCL LINE MOT OR Repla cement Remo ve the conso ole mast with h console (se ection4.5) Remov ve the handl ebar (section n 4.6) Remov ve the link A Arm (section4 4.7) Remov ve the crank k (section 4.8...
- Page 36 APTER 4: Part Rep placement Guide 4.13 CON NSOLE CIR RCUIT BO OARD REP PLACEMEN Note: it t is important t to wear an ESD wrist st trap. Remo ove the cons sole from the console ma ast. Disconn nect the cons sole cable an nd heart rate e wires.
Need help?
Do you have a question about the Pro 7.2AI and is the answer not in the manual?
Questions and answers
What to use and how often and where to lubricant
Lubricant should be applied to the treads if the grease is dry. Synthetic grease should be used.
This answer is automatically generated