Table of Contents
Advertisement
Quick Links
- 1 Chapter 5 - I-Mop Brushmotor Replacement Instructions
- 2 Chapter 6 - I-Mop Magnetic Valve Replacement Instructions
- 3 Chapter 7 - I-Mop Mainboard Assembly Instructions
- 4 Chapter 10 - I-Mop Tubes Replacement Instructions
- 5 Chapter 13 - I-Mop Filter and Deflector Replacement Instructions
- 6 Chapter 16 - Electrical Scheme
- 7 Chapter 17 - Batteries
- 8 Chapter 19 - Repair Flow Chart
- Download this manual
Advertisement
Table of Contents

Related Manuals for Tennant i-team i-mop xxl


Summary of Contents for Tennant i-team i-mop xxl
- Page 1 Jan.2018 i-mop xxl – Service Manual Warning: read the instructions before using the machine 1/64...
-
Page 2: Table Of Contents
SUMMARY CHAPTER 1 – GENERAL INFORMATION ....................... 4 1.1 CONVENTIONS ........................... 4 1.2 WORKING ON THE MACHINE......................4 1.3 TRANSPORTING THE MACHINE ....................... 4 1.4 OTHER REFERENCE MANUALS ....................... 4 CHAPTER 2 – SAFETY............................. 5 2.1 SYMBOLS USED ..........................5 2.2 GENERAL INSTRUCTIONS ........................ - Page 3 CHAPTER 15 – WATER SAFE INTERVAL ADJUSTMENT ................56 CHAPTER 16 – ELECTRICAL SCHEME......................57 CHAPTER 17 – BATTERIES .......................... 58 DATASHEET ............................58 ASSEMBLY INSTRUCTIONS ........................59 CHAPTER 18 – CHARGER ..........................62 DATASHEET ............................62 REFERENCE STANDARDS ........................62 CHAPTER 19 –...
-
Page 4: Chapter 1 - General Information
CHAPTER 1 – GENERAL INFORMATION 1.1 CONVENTIONS All references to forward, backward, front, rear, right, left indicated in this manual shall be considered as referred to the operator in the working position with the hands on the handle and the sticker facing the direction of travel. -
Page 5: Chapter 2 - Safety
CHAPTER 2 – SAFETY The following symbols are used to indicate potential hazardous conditions. Always read this information with attention and take any precautions necessary to protect the people and things. 2.1 SYMBOLS USED DANGER! Indicates a danger with risk, possibly even deadly for the user. WARNING! Indicates a potential risk of injury to persons or damage to devices. - Page 6 WARNING! Before performing any maintenance/repair, carefully read all the instructions relevant to the maintenance/repair. Do not use the machine for purposes other than those listed in the user manual. Only use accessories recommended by the manufacturer. Always protect the machine from sun, rain, and other weather conditions, both when on and off, this is to avoid the risk of electrical shock.
-
Page 7: Chapter 3 - Machine Description
CHAPTER 3 – MACHINE DESCRIPTION 3.1 TECHNICAL CHARACTERISTICS DESCRIPTION VALUES Voltage 24 V Washed track 64 cm Vacuum 5.8 kPa Solution tank capacity Recovery tank capacity Disc brush speed 350 rpm Number of disc brushes Disc brush pressure 24.6 kg Maximum floor slope for using the machine No. -
Page 8: Description
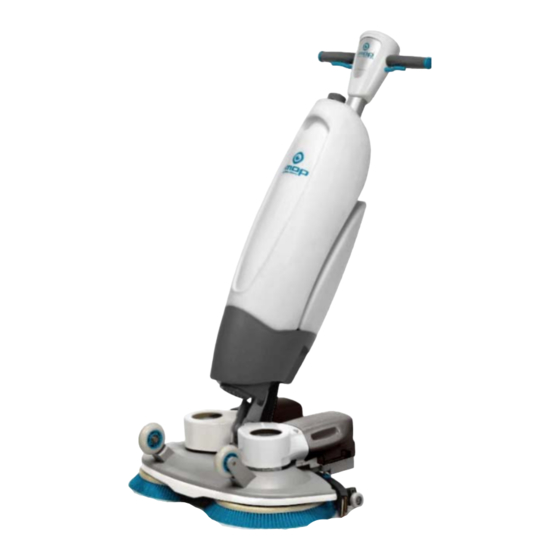
3.2 DESCRIPTION Control panel and controls 1. A l u m i n u m Dashboard 2. Battery charger status in graphic scale 3. Light indication of the brush working 4. Light indication of the vacuum working 5. Select switch 6. Water safe button 7. - Page 9 External view 1. Handle 2. Lever 3. Squeegee 4. Brushes 5. Solution tank 6. Transport handle 9/64...
- Page 10 7. Recovery tank 8. Left battery 9. Right battery 10. Transport wheels 11. Brush motors 10/64...
- Page 11 Internal view 1. Vacuum motor filter 2. Transparent plastic deflector 3. Vacuum hose 11/64...
-
Page 12: Chapter 4 - Scheduled Maintenance
CHAPTER 4 – SCHEDULED MAINTENANCE The service life of the machine and its maximum safety of operation are guaranteed by careful and regular maintenance. WARNING! See the chapter GENERAL INFORMATION AND SAFETY. The Scheduled Maintenance Plan is detailed as below. The frequency specified may be subject to change depending on particular work conditions, to be defined by the maintenance manager. -
Page 13: Chapter 5 - I-Mop Brushmotor Replacement Instructions
CHAPTER 5 – I-MOP BRUSHMOTOR REPLACEMENT INSTRUCTIONS 1. Disassemble the two BRUSH MOTOR COOLING COVERs by removing the 4 SCREWS EJOT DELTA PT 50X14, then remove the two BRUSH MOTOR COOLING COVERs 13-1 13-2 2. Disconnect the cables that are protected with the HEAT SHRINKBALE TUBE and unsolder the cables or cut them 13-3 13-4... - Page 14 5. Remove 2pcs COUNTER SUNK BOLT M5X18.5 at the center of the motor shaft 6. Remove the2pcs DRIVING WHEEL BOTTOM 14-1 14-2 7. Remove the BRUSH UNIT BOTTOM PART by unscrewing 13pc SCREWS SOCKET HEAD CAP M5X10 with attention to the LOCTITE 222 8.
- Page 15 10. Remove the BRUSH MOTOR FIXATION RUBBER and the BRUSH MOTOR SUPPORT RUBBER 15-1 15-2 11. Remove the DRIVING WHEEL TOP from the shaft of the BRUSH MOTOR HELICAL GEARS if needed with an extractor / pulley lifter 12. Remove the SUPPORT DISC GEARBOX SIDE Puller Lifter See toolbox 15-3...
- Page 16 16-1 15. Put the DRIVING WHEEL TOP on the shaft of the BRUSH MOTOR HELICAL GEARS 16-2 16. Put the BRUSH MOTOR SUPPORT RUBBER in the upper side of the BRUSH MOTOR HELICAL GEARS by pushing it close to the flange 17.
- Page 17 LEFT RIGHT 17-1 17-2 20. Put the BRUSH UNIT PROTECTOR on the BRUSH MOTOR CONSTRUCTION COVER and close everything with the BRUSH UNIT BOTTOM PART 17-3 17-4 21. Block the BRUSH UNIT BOTTOM PART with the SCREWS SOCKET HEAD CAP M5X10 dipped in the LOCTITE 222 22.
- Page 18 18-1 18-2 25. Fasten 3pcs EJOT SCREW 50X14 each side to fix the COVER BRUSH MOTOR SCREW 18-3 26. Adjust the cables in the correct position and re-assemble the BRUSH MOTOR CONSTRUCTION COVER by fastening 2 SCREWS EJOT on each side 18-4 18-5 18/64...
-
Page 19: Chapter 6 - I-Mop Magnetic Valve Replacement Instructions
CHAPTER 6 – I-MOP MAGNETIC VALVE REPLACEMENT INSTRUCTIONS WARNING! Wear gloves when you touch electrical components to avoid ESD. 2. Remove the 4 SCREWS M4X12 CROSS HEAD and open the MOTOR UNIT TOP 3. Remove the 2 SCREWS EJOT DELTA PT 50X14 and extract the ASSY MAGNETIC VALVE 19-1 19-3 19-2... - Page 20 7. Put the MAGNETIC VALVE COUPLING on the WATER CHANNEL Ø6 MM, then connect it to the ASSY MAGNETIC VALVE, Block the TRANSPARENT WATER CHANNEL Ø6 MM on the ASSY MAGNETIC VALVE with the MAGNETIC VALVE COUPLING 20-1 20-2 20-3 8.
- Page 21 9. Close the MOTOR UNIT COVER with attention to not press the cables or the hoses 10. Screw the MOTOR UNIT TOP on the MOTOR UNIT COVER with 4 SCREWS CROSS HEAD M4X12 21-1 21-2 21/64...
-
Page 22: Chapter 7 - I-Mop Mainboard Assembly Instructions
CHAPTER 7 – I-MOP MAINBOARD ASSEMBLY INSTRUCTIONS WARNING! Wear gloves when you touch electrical components to avoid ESD damage. See Toolbox 22-1 2. Disassemble the two BRUSH MOTOR COOLING COVERS by removing the 4 SCREWS EJOT DELTA PT 50X14, then remove the two BRUSH MOTOR COOLING COVERs 22-3 22-2 3. - Page 23 23-1 23-2 5. Cut the cable tie fixed to the 8-pin connector of UTP cable and HOT SHRINK TUBING fixed to the grounding wire, then pull out the 8-pin connector from MAIN PCB. 23-4 23-3 6. Remove the 11 screws of the MAIN PCB which fix the terminal of the wires for the battery, brush motor and main wires to vacuum motor housing.
- Page 24 7. Take the MACHINE BATTERY CONTROL PCB ASSY out of the MAIN LEVER COVER by removing 10 SCREWS EJOT DELTA PT 25X10 24-2 24-1 8. Block the POWER CABLE 3 WIRES with a CABLE TIE 3X15 to the MAIN LEVER COVE 9.
- Page 25 11. Fix the four input cables to the MACHINE BATTERY CONTROL PCB ASSY following the scheme of the pictures below 25-1 25-2 12. Fix the seven output cables to the MACHINE BATTERY CONTROL PCB ASSY following the scheme of the pictures below 25-3 25-4 25-5...
- Page 26 26-1 26-2 14. Block the UTP CABLE with a CABLE TIE 3.5X30, , remove the residue of the cable tie with a diagonal cutting pliers. 26-3 26-4 15. Put a small piece of HEAT SHRINK TUBING around the ESD CABLE and bend it with an angle of 90°, 26-6 26-5 16.
- Page 27 27-2 27-1 19. Add 4 pieces of insulating tape onto the MAIN LEVER HOUSING 20. Add the whole preassembly on the MAIN LEVER HOUSING centering the BRISH MOTORS HELICAL GEARS on their own seats 27-3 27-4 21. Turn the MAIN LEVER HOUSING and close the MAIN LEVER UNIT ASSY with the MAIN LEVER COVER, paying attention not to damage the mini USB on the main board while screwing it with 8 screw EJOT DELTA PT 50X14 27-5...
- Page 28 22. Close the opening on the MAIN LEVER COVER with the USB UPDATE SLOT COVER and 1 SCREW COUNTER SUNK M1.7X6 Special screw driver in Toolbox 28-1 28/65...
-
Page 29: Chapter 8 - I-Mop Main Lever Replacement
CHAPTER 8 – I-MOP MAIN LEVER REPLACEMENT 1. Remove the 6 pcs EJOT SCREW 50X14 which fixed the two COVER BRUSH MOTOR SCREW, then remove the 2pcs COVER BRUSH MOTOR SCREW 2. Remove the 2pcs COUNTER SUNK BOLT M5X18.5 at the center of brush motor shaft 29-1 29-2 3. - Page 30 6. Remove the 2 BRUSH UNIT HINGE SUPPORTS from the CHASSIS HINGE 7. Remove the CHASSIS HINGE from the centering hole of the MAIN LEVER HOUSING while unscrewing the SCREW COUNTER SUNK M4X12 previously dipped in the LOCTITE 222 8. Remove from both sides the SCREW COUNTER SUNK M4X12 previously dipped in the LOCTITE 222 30-1 30-2 30-3...
- Page 31 10. Turn the MAIN LEVER HOUSING and open the MAIN LEVER UNIT ASSY removing the MAIN LEVER COVER unscrewing the 8 SCREWS EJOT DELTA PT 50X14 11. Replace the MAIN LEVER HOUSING 31-1 31-2 12. Recompose everything putting the 2 MAIN LEVER SUPPORT PLATES on the side of the MAIN LEVER HOUSING and block it with 2 SCREWS COUNTER SUNK M3X8 dipped in the LOCTITE 222 31-3 31-4...
- Page 32 15. Put the 2 BRUSH UNIT HINGE SUPPORTS from the 2 sides of the MAIN LEVER HOUSING 32-1 16. Put the BRUSH UNIT PROTECTOR on the BRUSH MOTOR CONSTRUCTION COVER and close everything with the BRUSH UNIT BOTTOM PART 32-2 32-3 17.
- Page 33 19. Fasten the 2pcs COUNT SUNK SCREW M5X18.5 to fix the two DRIVING WHEEL TOP 20. Put on 2pcs COVER BRUSH MOTOR SCREW 33-2 33-1 21. Fasten 3pcs EJOT SCREW 50x14 to fix COVER BRUSH MOTOR SCEW each side 22. Add the WASHER AXIS MAIN LEVER that will be the spacer between the HINGE CARDAN TOP UNIT and the MAIN LEVER HOUSING 33-4 33-3...
-
Page 34: Chapter 9 - I-Mop Dashboard Assembly Instructions
CHAPTER 9 – I-MOP DASHBOARD ASSEMBLY INSTRUCTIONS WARNING! Wear gloves when you touch electrical components in order to avoid ESD damage. SEE TOOLBOX 34-1 18. Put the PCB CONTROL UNIT on the TOP HOUSING CONTROL UNIT 19. Fix the TOP HOUSING CONTROL UNIT with 1 SCREW PARKER 2.9X16 34-3 34-2 20. - Page 35 21. Assemble the quick connector by putting the cables in the connector following the scheme below 35-1 35-2 22. Fix the esd wire of top board onto the hole of the INLET TUBE with a SCREW CROSS HEAD M4X12 35-3 23.
- Page 36 36-3 36-1 36-2 9. Close the INLET TUBE ASSY with the FRONT HOUSING CONTROL UNIT 36-4 25. Cover the cable with a piece of heat shrink tubing Ø8 – Ø4 long enough to wrap a portion of the grey sheath that covers the cable. 26.
- Page 37 30. Close the HOUSING CONTROL UNIT with the TOP HOUSING CONTROL UNIT and put two sleeves to the two holes 31. Fix the top aluminum dashboard via two screws 37-1 37-2 32. Add the Rubber Block for water flow adjustment to the board 33.
-
Page 38: Chapter 10 - I-Mop Tubes Replacement Instructions
CHAPTER 10 – I-MOP TUBES REPLACEMENT INSTRUCTIONS 1. Brush tube replacement – WATER CHANNEL Ø4 MM 1.1. Remove the 6pcs EJOT SCREW 50 X14 1.2. Remove the 2pcs COVER BRUSH MOTOR SCREW 38-2 38-1 1.3. Remove the COUNTER SUNK BOLT M5X18.5 1.4. Remove the DRIVING WHEEL BOTTOM 38-4 38-3 1.5. - Page 39 1.7. Remove the WATER CHANNEL Ø4 MM from the WATER COUPLING BRUSH MOTOR and from the BRUSH MOTOR SUPPORT RUBBER after having cut the CABLE TIE 3.X15 1.8. Replace the WATER CHANNEL Ø4 MM 39-2 39-1 1.9. Re-assemble the group putting the WATER CHANNEL Ø 4 MM in the BRUSH MOTOR SUPPORT RUBBER and block it with a CABLE TIE 3X15 1.10.
- Page 40 1.11. Put the BRUSH UNIT PROTECTOR onto the BRUSH MOTOR CONSTRUCTION COVER and close everything with the BRUSH UNIT BOTTOM PART 40-2 40-1 1.12. Block the BRUSH UNIT BOTTOM PART with the SCREWS SOCKET HEAD CAP M5X10 dipped in the LOCTITE 222 1.13.
-
Page 41: Main Tube Replacement - Transparent Water Channel Ø6 Mm
1.16. Fasten 3pcs EJOT SCREW 50X14 each side to fix 2pcs COVER BRUSH MOTOR 41-1 2. Main tube replacement – TRANSPARENT WATER CHANNEL Ø6 MM 2.1. Remove the 6pcs EJOT SCREW 50 X14 2.2. Remove the 2pcs COVER BRUSH MOTOR SCREW 41-2 41-3 2.3. Remove the COUNTER SUNK BOLT M5X18.5 2.4. - Page 42 2.5. Remove the BRUSH UNIT BOTTOM PART by unscrewing the SCREWS SOCKET HEAD CAP M5X10 doing attention to the LOCTITE 222 2.6. Remove the BRUSH UNIT BOTTOM PART 42-1 42-2 2.7. Remove the WATER CHANNEL Ø6 MM from the WATER COUPLING BRUSH MOTOR 2.8.
- Page 43 2.12. Put the TRANSPARENT WATER CHANNEL Ø6 MM on the ASSY MAGNETIC VALVE 2.13. Lock the TRANSPARENT WATER CHANNEL Ø6 MM on the ASSY MAGNETIC VALVE with the MAGNETIC VALVE COUPLING 43-1 2.14. Put the WATER CHANNEL Ø6 MM through the MOTOR UNIT TOP until it comes out on the other side 43-2 2.15.
- Page 44 2.17. Close everything with the BRUSH UNIT BOTTOM PART 44-1 44-2 2.18. Lock the BRUSH UNIT BOTTOM PART with the SCREWS SOCKET HEAD CAP M5X10 dipped in the LOCTITE 222 2.19. Put the DRIVING WHEEL BOTTOM, with attention to the side of mounting, on the DRIVING WHEEL TOP 44-4 44-3...
-
Page 45: Internal Tube Replacement - Water Channel Ø6 Mm
2.22. . Fasten 3pcs EJOT SCREW 50X14 each side to fix 2pcs COVER BRUSH MOTOR 45-1 3. Internal tube replacement – WATER CHANNEL Ø6 MM 3.1. Remove the 4 SCREWS COUNTER SUNK M6X12 and open the MOTOR UNIT TOP 3.2. Remove the MAGNETIC VALVE COUPLING from the MAGNETIC VALVE ASSY and remove the WATER CHANNELS Ø6 MM from the MAGNETIC VALVE ASSY 45-3 45-2... - Page 46 3.5. Put the WATER CHANNEL Ø6 MM on the ASSY MAGNETIC VALVE and on the ANGLE METAL CONNECTOR and block it with the MAGNETIC VALVE COUPLINGS 3.6. Close the MOTOR UNIT COVER with attention not pressing the cables or the hoses in between. 46-2 46-1 3.7.
-
Page 47: Chapter 11 - I-Mop Vacuum Motor Replacement
CHAPTER 11 – I-MOP VACUUM MOTOR REPLACEMENT WARNING! Wear gloves when you touch electrical components to avoid ESD damage. 2. Remove the 4 SCREWS M4X12 CROSS HEAD and open the MOTOR UNIT TOP 3. Remove the 2 SCREWS EJOT DELTA PT 50X14 and extract the ASSY MAGNETIC VALVE 47-1 47-3 47-2... - Page 48 48-1 48-2 10. Put the other side of the cables through the VACUUM MOTOR SEALING SUPPORT 48-3 11. Put the VACUUM MOTOR SEALING SUPPORT on the DOMEL VACUUM CLEANER MOTOR 12. Fit the whole VACUUM MOTOR GROUP in the MOTOR UNIT COVER 48-5 48-4 13.
- Page 49 14. Put the POWER CABLES 2 WIRES in the MOTOR UNIT COVER 15. Close the group with 8 SCREWS EJOT DELTA PT 50X14 49-1 49-2 16. Take away the steel tool such as a wrench then put the MAGNET TOP UNIT 40X20X10MM there 49-3 49-4 17.
-
Page 50: Chapter 12 - I-Mop Wheel And Wheel Support Replacement
CHAPTER 12 – I-MOP WHEEL AND WHEEL SUPPORT REPLACEMENT 1. Wheel replacement 1.1. Put the SHAFT TRANSPORT CASTOR( 72.0027.1) one the work table , then put the TRANSPORT CASTOR (72.0029.2/797) 50-2 50-1 1.2. then locate the TRANPORT WHEEL PILLA (left or right), . Add NUT M5 NYLON/M5 (04.0048.0) on it, then use wrench to fix them together tightly 50-3 50-4... - Page 51 2.3. Remove 2pcs COUNT SUNK SCREW M5X18.5 at the center of brush motors 2.4. Remove the DRIVING WHEEL BOTTOM 51-1 51-2 2.5. Remove the BRUSH UNIT BOTTOM PART by unscrewing the SCREWS SOCKET HEAD CAP M5X10 with attention to the LOCTITE 222 2.6.
- Page 52 2.9. Put the BRUSH UNIT PROTECTOR on the BRUSH MOTOR CONSTRUCTION COVER and close everything with the BRUSH UNIT BOTTOM PART 52-2 52-1 2.10. Lock the BRUSH UNIT BOTTOM PART with the SCREWS SOCKET HEAD CAP M5X10 dipped in the LOCTITE 222 2.11.
- Page 53 2.14. Fasten 3pcs EJOT SCREW 50X14 to fix the COVER BRUSH MOTOR SCREW each side 53-1 53/65...
-
Page 54: Chapter 13 - I-Mop Filter And Deflector Replacement Instructions
CHAPTER 13 – I-MOP FILTER AND DEFLECTOR REPLACEMENT INSTRUCTIONS 1. replace the filter cassette inside dirty tank 2. Put the TRANSPARENT PLASTIC DEFLECTOR DIRTY TANK on his seat on the TANK HOLDER REAR, recognizable from the O-RING around the lips of the DIRT COMPARTMENT SEAL 54-2 54-1 54/65... -
Page 55: Chapter 14 - Squeegee Wheels Cleaning
CHAPTER 14 – SQUEEGEE WHEELS CLEANING Part List : 72.0137.2 ,shaft squeegee castor dia.8mm,3pcs 72.0235.0 M5 washer stainless steel 5X15X1MM,6pcs 04.0048.0, NUT M5 NYLON, 6pcs 72.0138.1, height adjust plate ver.1, 3pcs 72.0238.32,SQUEEGEE CASTOR GREY DIA.8MM,3pcs 1. Use wrench to assemble SHAFT SQUEEGEE CASTOR (72.0137.2) SQUEEGEE CASTOR GREY (72.0238.32) , M5 WASHER STAINLESS STEEL 5X15X1MM (72.0235.0) and NUT M5 NYLON (04.0048.0) together. -
Page 56: Chapter 15 - Water Safe Interval Adjustment
CHAPTER 15 – WATER SAFE INTERVAL ADJUSTMENT 1. Remove the rubber block of water save internal setting 2. Adjust the position of the interval functioning moving the selector with a screw driver to the desired position following the scheme 56-2 56-1 56-3 56-4... -
Page 57: Chapter 16 - Electrical Scheme
CHAPTER 16 – ELECTRICAL SCHEME 57-1 57/65... -
Page 58: Chapter 17 - Batteries
CHAPTER 17 – BATTERIES DATASHEET Model Samsung ICR18650‐GA Voltage and capacity Nominal voltage 4.2 V Nominal capacity @ 25 °C * 100% - 220 mAh Nominal capacity @ 0°C * 80% - 1760 mAh Nominal capacity @ -20 °C * 60% - 1320 mAh Nominal energy @ 25 °C * 8.14 Wh * Discharge current ≤... -
Page 59: Assembly Instructions
ASSEMBLY INSTRUCTIONS Paste the SIDE FOAM MOTOR VACUUM to the BATTERY PACK CELLS. Put the BATTERY CONNECTOR FEMALE into the BATTERY PACK HOUSING BOTTOM. The BLUE in the LEFT battery and the GREY in the RIGHT battery. 59-1 59-2 Screw the BATTERY CONNECTOR FEMALE to the BATTERY PACK HOUSING BOTTOM with 2 SCREW WN 5451 25X10 EJOT DELTA PT. - Page 60 Cover the soldering with the heat shrinkable tubing and heaten it to shrink it. 60-1 60-2 Put the fuse into its seat in the BATTERY PACK CELLS. Close the ASSY BATTERY PACK with the BATTERY PACK HOUSING TOP. 60-4 60-3 9.
- Page 61 D, if the reading is above 16V, the battery is OK. 61-1 61-2 61/65...
-
Page 62: Chapter 18 - Charger
CHAPTER 18 – CHARGER DATASHEET Model Input voltage AC 100-240 V Frequency 50-60 Hz Output current Charging voltage 29.4 V “Float” voltage 27.4 V Charge current Charge features 3 phases with max time of 20 hours per absorption Minimum capacity of the batteries 10 Ah Thresholdcharge interrupt 0.3 Ah... -
Page 63: Chapter 19 - Repair Flow Chart
CHAPTER 19 – REPAIR FLOW CHART 64-1 64-2 63/64... - Page 64 65-1 Tennant Company PO Box 1452 Minneapolis, MN 55440 Phone: 1-800-553-8033 www.tennantco.com 64/64...
Need help?
Do you have a question about the i-team i-mop xxl and is the answer not in the manual?
Questions and answers