AGA eR7 User Manual
Hide thumbs
Also See for eR7:
- User's manual & installation instructions (64 pages) ,
- Installation manual (24 pages) ,
- Owner's manual (12 pages)

Related Manuals for AGA eR7


Summary of Contents for AGA eR7
- Page 1 Users Guide LPRT 517763 PLEASE READ THESE INSTRUCTIONS 08/19 EINS 517764 BEFORE USING THIS APPLIANCE.
- Page 2 © AGA Rangemaster Limited 2019 AGA is a trading name of AGA Rangemaster Ltd. AGA brand names, words and logos are registered trademarks of the AGA Rangemaster Ltd, Meadow Lane, Long Eaton, Nottingham NG10 2GD...
-
Page 3: Table Of Contents
The ovens Introduction Slumber mode A brief description - AGA eR7 The roasting oven A brief description - AGA eR7 hotcupboard The baking oven Equipment supplied with your AGA eR7 The simmering oven AGA Utensils and Accessories The simmering oven... -
Page 4: Warnings
Warnings WARNING: The appliance and its accessible parts become hot during use. Care should be taken to avoid touching heating elements. Children less than 8 years of age should be kept away unless continuously supervised. The appliance can be used by children aged from 8 years and above and persons with reduced physical, sensory or mental capabilities or lack of experience and knowledge if they have been given supervision... -
Page 5: Introduction
Introduction Your new AGA eR7 gives you everything you love about the classic AGA heat storage cooker, but with the ability to turn each cooking area on and off, and the added convenience of touchscreen control to select from a range of cooking temperatures. -
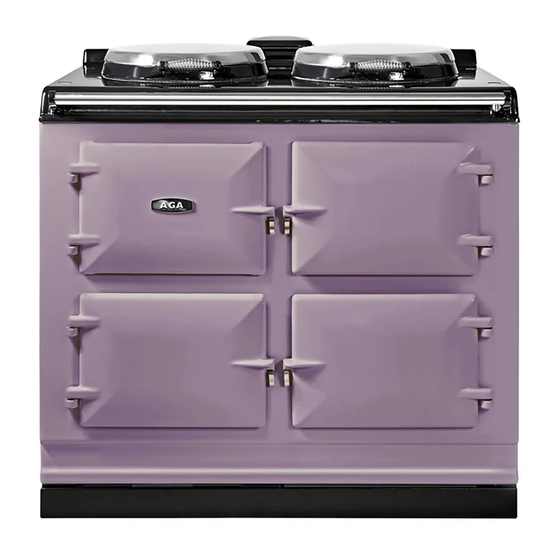
Page 6: A Brief Description - Aga Er7
A brief description - AGA eR7 Simmering plate Boiling plate Top plate Control door Roasting oven Baking oven Simmering oven... - Page 7 Hotplates Roasting oven The two hotplates are at different heats; the boiling plate The hottest oven for high temperature cooking pastries, being the hottest of the two and the simmering plate at breads, roasting of meat, vegetables and poultry, grilling a lower heat.
-
Page 8: A Brief Description - Aga Er7 Hotcupboard
A brief description - AGA eR7 hotcupboard Warming plate Boiling plate Hotcupboard ON/OFF Simmering plate Slow cooking oven Top plate Warming oven Control door Roasting oven Baking oven Simmering oven... - Page 9 Hotplates Roasting Oven The two hotplates are at different heats; the boiling plate The hottest oven for high temperature cooking pastries, being the hottest of the two and the simmering plate at breads, roasting of meat, vegetables and poultry, grilling a lower heat.
-
Page 10: Equipment Supplied With Your Aga Er7
Equipment supplied with your AGA eR7 Large Size Roasting Tin with Grill Rack Half Size Roasting Tin and Grill Rack This is designed to slide onto the oven runners without This tin can be slid onto the oven runners width-ways the need for it to sit on an oven grid shelf. - Page 11 Handset This is situated behind the top left hand door. The Your AGA eR7 cooker also comes with a Handset which control panel has a capacitive touch screen with LED can be used to programme the ovens. It displays the indicators and character display to indicate which zone time, date and programme events.
- Page 12 1 Floor Grid 3 Oven Grid Shelves Roasting Oven Perforated Baffle This grid is used on the These are for inserting floor of the ovens, in in each oven to provide A roasting oven perforated particular the roasting a surface for dishes and baffle is positioned in the and simmering ovens to tins which do not fit direct...
- Page 13 Take thick slices of bread and place in surfaces, keeping them the AGA toaster - if the bread is very moist or very fresh, clear of crumbs and burnt heat the toaster beforehand to prevent sticking - lift the on debris –...
-
Page 14: Aga Utensils And Accessories
AGA Specialist for details. A demonstration will show you bases and stacking lids so that the maximum use of oven how to get the best from your new AGA and will give you space is made and an AGA kettle for boiling water. AGA hints and tips. -
Page 15: How To Use Your Aga Er7
The AGA cooker will emit an odour for a short while, this is simply due to the protective oil we put on the hotplates and ovens burning off. Due to the newness in the first couple of hours, it is advisable to open the kitchen window while this takes place. - Page 16 Vent Fan ON/ Boiling spot ON/OFF Simmering spot Hob POWER POWER ON/OFF OFF button ON/OFF supply ON Oven Manual & Simmering Baking Oven ON/OFF temperature Slumber select Oven ON/ Zone selections and select button select buttons OFF button indicator Roasting Oven Programme mode Auto &...
-
Page 17: Aga Er7 Operating Hobs And Ovens
AGA eR7 Operating hobs and Options to turn the hobs Off De-select the hotplate or simmer plate by pressing the ovens illuminated symbol. The LED will turn off to indicate that hob is no longer active. After 3 seconds of both hotplate and simmer plate being de-selected the ‘Hob Power’... - Page 18 Ovens To turn OFF a single oven press the desired button. The appliance has 4 oven operating modes: • MANUAL For the roast and bake ovens, the button is to be pressed twice, once to select and once to switch OFF. •...
- Page 19 To override an oven setting while in slumber mode Auto No individual oven can be ‘OFF’ . However the roast or This mode setting brings selected ovens up to full heat bake oven can be switched from ‘Slumber’ to a cooking from off.
- Page 20 NOTE: AUTO/Slumber (ovens only) This mode setting brings selected ovens up to full heat During Auto-Slumber mode the simmering oven is not from Slumber. affected by event periods and can be switched ON or OFF at any time. The ovens can be selected to operate once or twice each day.
-
Page 21: Cooking On Your Aga Er7
Cooking on your AGA eR7 The Aga eR7 is designed to give you flexibilty when cooking a range of dishes through the four settings in the baking oven and the five settings in the roasting oven, as well as the long slow cooking in the simmering oven. -
Page 22: Oven Venting
It is recommended to install a cooker hood above Cleaning of Ovens. the AGA eR7 if the AGA powered vent kit is not fitted. The cooker hood should be positioned not less than the minimum height as recommended by the manufacturer from the top of the AGA. -
Page 23: General Advice
These times are based on the cooker having a single has warmed up. AGA recommends that to fully saturate phase supply of 32 amps @ 230 V. For other power supply the castings it is best to leave them for one hour for the configurations, these times may change. -
Page 24: Handset - A Hand Held Control
Handset - A hand held control Button operations Communication or ‘Handshake’ button used initially to synchronise the handset to the AGA eR7. Clock button Opens and closes the date and time settings screen. Left/Back Button Moves back and highlights the previous setting. -
Page 25: Handset Advice
If the handset is A power cut damaged or lost, a replacement can be obtained from Handset is out of range of the AGA eR7 cooker AGA and re-programmed to suit your appliance. When transferring information from or to the controller... -
Page 26: Communication/Handshake
This process will be required on the original installation of power has been applied to the cooker. The Standby the AGA eR7. If the handset is replaced for any reason the button on the touch panel must be ‘ON’ . It must then be new handset will need to be synchronised. - Page 27 Step 4 Notes • Use the buttons to choose the language you Symbol appears in the top right hand corner of want the handset text to be in, then press to confirm the screen, if the handset is out of range with the the language choice required.
-
Page 28: The Date/Time Setting Screen
The date/time setting screen Press and hold Clock button until the screen is displayed. In this screen the time, date, month and year can be altered/set. Press the buttons to alter the highlighted time, date, month and year settings. Press the buttons to cycle between the time, date, month and year. - Page 29 Press button at any stage to save the settings and exit the DATE/TIME screen. ‘Message sent OK’ will appear on the screen when the handset is in range of the cooker. ‘Changes stored on handset only’ will appear on the screen, when the controller handset is out of range of the cooker.
-
Page 30: Auto/Events Programme Screen
Auto/events programme screen This screen is opened by pressing the 7-day event button In this screen, the number of events and the start and end time of events can be set. Each day can have a different number of events, and start and end times, or all seven days can be the same. - Page 31 How you do it What you can do Press the buttons to navigate through the The current day is shown on the display, this can be settings on the screen. When a setting is selected it will changed to the day that you wish to edit by pressing be highlighted by a dark box.
-
Page 32: Information (Home) Screen
‘Sleep’ mode. (during AUTO/Slumber event) Symbol indicating the battery life. If there is no communication between the AGA eR7 and the handset because: the cooker is not powered, in standby or the handset is out of range from the cooker. The symbol is displayed. - Page 33 Power cuts under 10 minutes Automatic update of time When the power is restored, the AGA eR7 will resume In the event of power cuts the handset will normal operation as was set prior to the power automatically update the controls within the cooker interruption.
-
Page 34: Batteries
The handset is fitted with four ‘AAA’ batteries, which are packed separately. Your Engineer will insert them when your AGA eR7 cooker is installed. When replacing the batteries, follow these instructions in conjunction with the diagrams. Remove the handset from its backplate, then remove the battery cover plate from the rear of the handset (Fig. -
Page 35: Using The Zones Of The Aga Er7
AGA eR7 but is not necessary. For instance, if making a pasta dish with sauce on the AGA eR7, it can all be done on the hotplates. -
Page 36: The Boiling Plate
AGA Splash Shield the AGA toaster. bako-glide can be used to protect the which will protect the insulated cover from splatter, hotplate surface when direct on cooking. -
Page 37: The Top Plate
The roasting oven for high temperature cooking. The top plate is the enamelled surface surrounding the hotplates. It will become warm when the AGA Total Offering a range of cook settings B4, R6, R7, R8, and R9. Control hotplates are in use. Although it is not a cooking The baking oven for moderate temperature cooking. -
Page 38: Slumber Mode
Slumber mode In Slumber mode, all three ovens operate like a simmering oven. The simmering oven is always in Slumber, whereas the roasting and baking oven can be set on Slumber mode for either cooking at a low heat, or to generate gentle warmth into the kitchen, or in readiness for turning up to their normal pre-set heat. -
Page 39: The Roasting Oven
These elements heat the air and the cast iron within to provide cooking results consistent with the classic AGA heat-storage cooker, with the flexibility of being able to turn it to change the cooking temperature. - Page 40 The roasting oven is zoned in heat, meaning it is slightly Roasting oven at slumber hotter towards the top than the centre and the oven grid When the roasting oven is set at Slumber it can be used to shelf set on the oven floor is slightly less hot than the cook rich fruit cakes or slow cook roasts, casseroles and centre.
-
Page 41: The Baking Oven
These elements heat the air and the cast iron within to provide cooking results consistent with classic AGA heat- storage cookers, with the flexibility of being able to turn it to change the cooking temperature. -
Page 43: The Simmering Oven
• To get the very best performance, we recommend to use AGA cookware with thick bases and stacking lids. • DO NOT place dishes directly on to the oven base. -
Page 44: Aga Hotcupboard
AGA (Hotcupboard) Points to remember when Slow Cooking: • Pre-heat the oven for 30 minutes before starting to Slow Cooking Oven plus Warming Oven cook. These ovens are heated by a single element at the rear of • Bring casseroles, soups etc to the boil on the hob the oven cavity. -
Page 45: Caring And Cleaning
Top Plate and Front Plate impregnated pad you will see the circular marks but these The easiest way to clean the AGA top plate and front are reduced and the surface of the linings become shinier plate is to mop up spills as soon as they happen. It maybe each time of use. -
Page 46: Important
DO NOT PUT OVEN DOORS IN A DISHWASHER. Roasting Tins The enamelled roasting tins supplied with the AGA Total Ovens Control should be cleaned in hot soapy water, soaking if The cast iron ovens help to keep themselves clean, they necessary. -
Page 47: Fitting Of Oven Shelves
Fitting of oven shelves When using the oven shelves for the first time follow Figs. 4 - 7. fig 4 fig 5 Removal of oven shelves fig 6 fig 7... -
Page 48: Servicing And Warranty
Servicing and warranty Serial number • Your Aga does not need to be regularly serviced. Make a note of your AGA eR7 Serial Number when it is being installed. The serial number can be found behind • Fans may need periodic replacement. -
Page 49: Deep Fat Frying
• DO NOT hang clothes on the left hand side of the AGA hand-rail. The electrical controls are behind the top left hand door, blocking the air vent can cause excessive control temperatures, and will prevent... -
Page 50: Aga Basic Recipes
These are some fundamental recipes and methods to compliment your first AGA cooking ventures. The real basics to get you started and used to using your AGA eR7 cooker. Relax, enjoy and then try some of our ideas in the Recipe section of this handbook. - Page 51 - just brush over the cast iron with the wire brush, supplied with your new AGA eR7. Pointing the spout towards the lid lining will help keep it clean, as the steam can loosen splashes.
Need help?
Do you have a question about the eR7 and is the answer not in the manual?
Questions and answers