Table of Contents

Related Manuals for Philips MCD183/12


Summary of Contents for Philips MCD183/12
- Page 1 Register your product and get support at www.philips.com/welcome EN User manual DA Brugervejledning DE Benutzerhandbuch ES Manual del usuario FR Mode d’emploi Manuale utente NL Gebruiksaanwijzing SV Användarhandbok MCD183...
-
Page 3: Table Of Contents
Contents 1 Important Safety Notice 2 Your DVD Micro Theater Introduction What’s in the box Overview of the main unit Overview of the remote control 3 Connect Place the unit Connect speakers and subwoofer Connect FM antenna Connect TV Connect power 4 Get started Prepare the remote control Set clock... -
Page 4: Important
1 Important Safety This ‘bolt of lightning’ indicates uninsulated material within your unit may cause an electrical shock. For the safety of everyone in your household, please do not remove product covering. The ‘exclamation point’ calls attention to features for which you should read the enclosed literature closely to prevent operating and maintenance problems. - Page 5 • Install all batteries correctly, + and - as marked on the unit. • Do not mix batteries (old and new or carbon and alkaline, etc.). • Remove batteries when the unit is not used for a long time. o Apparatus shall not be exposed to dripping or splashing.
-
Page 6: Hearing Safety
European Community. Any changes or modifications made to this device that are not expressly approved by Philips Consumer Lifestyle may void the user’s authority to operate the equipment. Your product is designed and manufactured with high quality materials and components, which can be recycled and reused. - Page 7 Environmental information All unnecessary packaging has been omitted. We have tried to make the packaging easy to separate into three materials: cardboard (box), polystyrene foam (buffer) and polyethylene (bags, protective foam sheet.) Your system consists of materials which can be recycled and reused if disassembled by a specialized company.
-
Page 8: Your Dvd Micro Theater
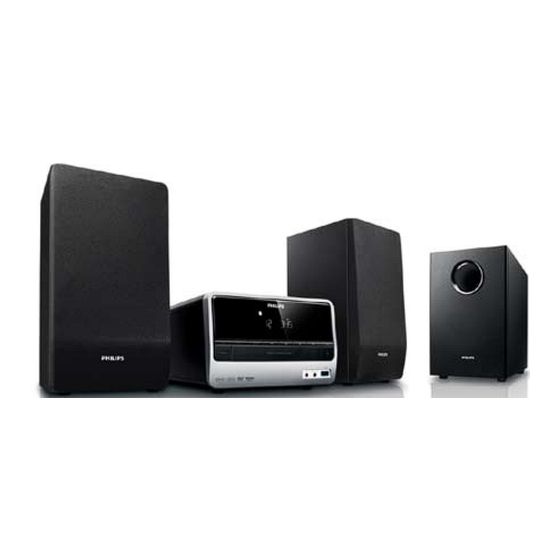
2 Your DVD Micro Theater Congratulations on your purchase, and welcome to Philips! To fully benefit from the support that Philips offers, register your product at www.Philips.com/welcome. Introduction With this unit, you can: • watch video from DVD/VCD/SVCD or USB devices •... -
Page 9: Overview Of The Main Unit
Overview of the main unit • Turn on the apparatus or switch to the Eco Power standby mode. b SOURCE • Select a source. c VOL -/+ • Adjust volume. • Adjust time. • Skip to the previous/next track. • Skip to the previous/next title or chapter. -
Page 10: Overview Of The Remote Control
h USB DIRECT • USB socket. • Open or close the disc compartment. j MODE • Select repeat play modes. • Select shuffle play modes. k Remote control sensor • Start or pause play. • Stop play. • Erase a program. •... - Page 11 c DISPLAY/RDS • Display play information on a connected TV. • For selected FM radio stations: display RDS information. d DISC MENU • For video discs: access or exit the disc menu. • For video discs with playback control(PBC): turn on/off PBC. e AUDIO •...
-
Page 12: Connect
3 Connect Place the unit Place the unit near to the TV. Place the left and right speakers at equal distance from the TV and at an angle of approximately 45 degrees from the listening position. Place the subwoofer at the corner of the room or at least one meter away from the TV. -
Page 13: Connect Tv
• For optimal reception, fully extend and adjust the position of the antenna. • For better FM stereo reception, connect an outdoor FM antenna to the FM AERIAL jack. • The unit does not support MW radio reception. Connect the supplied FM wire antenna to the FM AERIAL socket on the unit. -
Page 14: Connect Power
Option 3: Connect through S-Video Connect an S-video cable (not supplied) • S-Video socket on this unit. • S-Video socket on the TV. Option 4: Connect through composite video Connect the supplied composite video cable to: • VIDEO OUT socket on this unit. •... - Page 15 Caution • Risk of product damage! Ensure that the power supply voltage corresponds to the voltage printed on the back or the underside of the unit. • Before connecting the AC power cord, ensure you have completed all other connections. Connect the AC power cord to the wall socket.
-
Page 16: Get Started
Always follow the instructions in this chapter in sequence. If you contact Philips, you will be asked for the model and serial number of this apparatus. The model number and serial number are on the bottom of the apparatus. Write the numbers here: Model No. -
Page 17: Find The Correct Viewing Channel
• Go to the lowest channel on your TV, then press the Channel Down button until you see the Philips screen. • Press the source button repeatedly on the remote control of your TV. - Page 18 Note • If a blank/distorted screen is displayed, wait for 15 seconds for auto recovery or turn off progressive scan manually. Turn on the progressive scan mode on the TV.
-
Page 19: Play
5 Play Note • With some disc/file types, play may differ. Play a disc Caution • Never look at the laser beam inside the unit. • Risk of product damage! Never play discs with accessories such as disc stabilizer rings or disc treatment sheets. -
Page 20: Play From Usb
Play from USB Note • Ensure that the USB device contains playable music, pictures or video. Insert the USB device. Press USB to select the USB source. Press / to select a folder, then press OK to confirm. Press / to select a file from the folder. Press to start play. -
Page 21: Play Control
Play control Select repeat/shuffle play options During play, press MODE/DIM repeatedly to select a repeat option or the shuffle play mode. • To resume normal play, press MODE/DIM repeatedly until no option is displayed. Repeat A-B (DVD/VCD/CD/MP3/ WMA) During music or video play, press A-B at the start point. -
Page 22: Picture View Options
Select a file, then press ANGLE/PROG to add the file to the program list. Repeat steps 2 until the program is complete. Press DISC MENU until the program list is displayed. Press to play the program. To delete a file from the [Program List]: Press DISC MENU until the program list is displayed. -
Page 23: Adjust Settings
6 Adjust settings Press SYSTEM MENU. Select a setup page. Select an option and then press Select a setting and then press OK. • To return to the previous menu, press • To exit the menu, press MENU. General setup On [General Setup Page], you can set the following options: [TV Display]... -
Page 24: Video Setup
[Night Mode] Make loud sound level softer and soft sound level louder so that you can watch the DVD movies at a low volume, without disturbing others. • [On] – enjoy quiet viewing at night (DVDs only). • [Off] – enjoy surround sound with its full dynamic range. - Page 25 Note • Rated discs above the level you set in [Parental] require a password to be played. • The ratings are country-dependent. To allow all discs to play, select [8 ADULT]. • Some discs have ratings printed on them but are not recorded with ratings.
-
Page 26: Tune To Fm Radio Stations
7 Tune to FM radio stations Ensure that you have connected and fully extended the supplied FM antenna. Press TUNER. Press and hold When the frequency indication starts to change, release the button. » The FM tuner tunes to a station with strong reception automatically. -
Page 27: Show Rds Information
Note • The accuracy of the transmitted time depends on the RDS station that transmits the time signal. Show RDS information RDS (Radio Data System) is a service that allows FM stations to show additional information. If you tune to a RDS station, a RDS icon and the station name are displayed. -
Page 28: Adjust Volume Level And Sound Effect
8 Adjust volume level and sound effect Adjust volume level During play, press VOL +/- to increase/ decrease the volume level. Select a sound effect Note • You cannot use different sound effects at the same time. Select a preset sound effect During play, press DSC repeatedly to select: •... -
Page 29: Other Features
9 Other features Activate demonstration mode You can see an overview of all features. In standby mode, press unit to activate the demonstration mode. » A demonstration of major available features starts. To deactivate the demonstration mode: Press on the main unit again. Adjust brightness of display panel In standby mode, press MODE/DIM... -
Page 30: Record To A Digital Recorder
• For audio players with headphone sockets: Connect the supplied MP3 Link cable to the MP3 LINK socket and to the headphone socket on the audio player. Select the MP3 Link/AUX source. Start play on the audio player. Record to a digital recorder You can record audio from this unit to a digital recorder. -
Page 31: Product Information
10 Product information Note • Product information is subject to change without prior notice. Specifications Amplifier Rated Output Power 2X25 + 50W RMS Frequency Response 20 -20000 Hz, ±3dB Signal to Noise Ratio >65dB Aux Input 0.5 V RMS 20kohm Disc Laser Type Semiconductor... -
Page 32: Supported Disc Formats
Supported disc formats • Digital Video Discs (DVDs) • Video CDs (VCDs) • Super Video CDs (SVCDs) • Digital Video Discs + Rewritable (DVD+RW) • Compact Discs (CDs) • Picture (Kodak, JPEG) files on CDR(W) • DivX(R) disc on CD-R(W): •... - Page 33 CLASSICS Classical music OTHER M Special music programs WEATHER Weather FINANCE Finance CHILDREN Children’s programs SOCIAL Social Affairs RELIGION Religion PHONE IN Phone In TRAVEL Travel LEISURE Leisure JAZZ Jazz Music COUNTRY Country Music NATION M National Music OLDIES Oldies Music FOLK M Folk Music DOCUMENT...
-
Page 34: Troubleshooting
If the problem remains unsolved, go to the Philips web site (www.philips.com/support). When you contact Philips, ensure that your unit is nearby and the model number and serial number are available. No power •... - Page 35 © 2010 Koninklijke Philips Electronics N.V. All rights reserved. Document order number: MCD183_12_UM_V3.1...
Need help?
Do you have a question about the MCD183/12 and is the answer not in the manual?
Questions and answers