Advertisement
Step 1: Connect all the cables up before switching it on at the
socket. (THIS IS VITAL AS IT MAY CAUSE THE CONTROL BOX TO
SHORT OUT AND BREAK)
Step 2: Connect the USB to the PC port on the front whilst the
PC is still turned off
Step 3: Make sure the CompuTrainer unit switch is set to the off
position before turning on at the wall socket and power on the
PC
Step 4: Warm up the computer whilst powered on by cycling for
5‐10 minutes at a decent pace
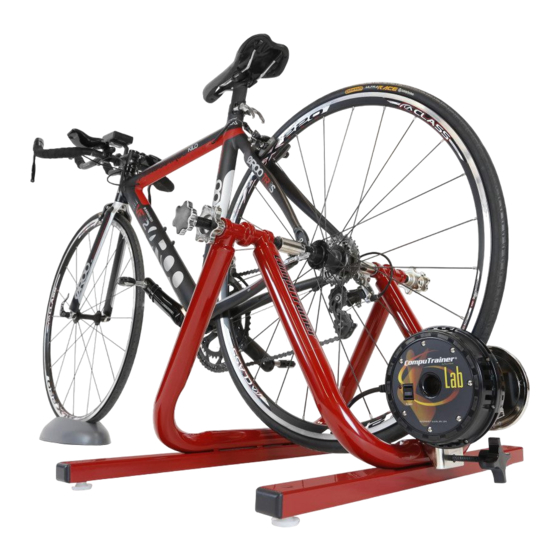
Step 5: Once the CompuTrainer is warmed up, it will need to be
calibrated. (IMPORTANT: Make sure the PC cable is UNPLUGGED
from the control box) On the control box (the yellow and black
box with buttons on) it will display 0.00. To calibrate, simply
pedal up to approximately 25mph on the display, this should
take about 5‐6 revolutions of the pedals if you try to sprint and
stop pedalling once the display stops saying 'UP'. Wait for the
back wheel to slow down to 0mph. If it fails to reach the
required levels (below), use the adjustment screw on the
CompuTrainer by the back wheel to tighten/loosen. It is a very
fine adjustment so small adjustments.
You want a reading between 2.00‐2.20lbs of pressure. Press F3
CompuTrainer User Guide
Advertisement
Table of Contents

Related Manuals for RacerMate CompuTrainer

Summary of Contents for RacerMate CompuTrainer
- Page 1 CompuTrainer User Guide Step 1: Connect all the cables up before switching it on at the socket. (THIS IS VITAL AS IT MAY CAUSE THE CONTROL BOX TO SHORT OUT AND BREAK) Step 2: Connect the USB to the PC port on the front whilst the PC is still turned off Step 3: Make sure the CompuTrainer unit switch is set to the off position before turning on at the wall socket and power on the PC Step 4: Warm up the computer whilst powered on by cycling for 5‐10 minutes at a decent pace Step 5: Once the CompuTrainer is warmed up, it will need to be calibrated. (IMPORTANT: Make sure the PC cable is UNPLUGGED from the control box) On the control box (the yellow and black box with buttons on) it will display 0.00. To calibrate, simply pedal up to approximately 25mph on the display, this should take about 5‐6 revolutions of the pedals if you try to sprint and stop pedalling once the display stops saying ‘UP’. Wait for the back wheel to slow down to 0mph. If it fails to reach the required levels (below), use the adjustment screw on the CompuTrainer by the back wheel to tighten/loosen. It is a very fine adjustment so small adjustments. You want a reading between 2.00‐2.20lbs of pressure. Press F3 ...
- Page 2 † Up to 5.0% Grade ‐ Use 3.0 lbs of Press‐On Force † Up to 7.5% Grade ‐ Use 3.5 lbs of Press‐On Force † Up to 10.0% Grade ‐ Use 4.0 lbs of Press‐On Force † Up to 12.5% Grade ‐ Use 4.5 lbs of Press‐On Force † Up to 15.0% Grade ‐ Use 4.99 lbs of Press‐On Force* † Plus/minus .20 lbs acceptable. † *5.0 lbs exceeds the maximum value you can save. Step 6: Load up the CompuTrainer 3D software (desktop shortcut) Step 7: Select ‘Setup Options’, then select the options tab (top right of screen), select the parameters you want displayed on the screen (e.g. speed, watts, RPM, distance etc). At the bottom of this box select ‘New’ to add a subject, then press ‘OK’ Step 8: Click on the road segments to create a course (left, right and straight) keep clicking to add as many as you require. You can also alter the length of the segments to speed up the process. Make sure you add a ‘Finish’ at the end of the course (bottom left of the screen) Step 9: To start the test press F1 on the control box and a 3, 2, 1 Go countdown will show on screen Step 10: At the end of the test a box will appear saying ‘Save Rider 1 Performance’, select Yes. Another box will appear after this, select Yes again. Step 11: Minimise CompuTrainer 3D and open CompuTrainer CS 1.6 on the desktop. Select File – Export – Export. Select the subject who tested and click open. ...
- Page 3 Step 12: Select Start – All Programs – Accessories – Open Wordpad Step 13: Click File – Open. Then My Computer – Local Disk (C:) – Program Files – Computrainer 3D V3 – Rider Performance (Change file type to All documents) – Select your subject – Open. The data will now be listed in the WordPad document. ...
Need help?
Do you have a question about the CompuTrainer and is the answer not in the manual?
Questions and answers