
Related Manuals for Steak Locker SL-520


Summary of Contents for Steak Locker SL-520
- Page 1 The Art of Dry Aged Steak U S E R MANUAL SL-520 Enhanced Flavor Tenderized Meat Charcuterie Functionality Fan Forced Air-Flow Germicidal UV Light Smart App Controlled Temperature & Humidity Patented Technology w w w . s t e a k l o c k e r . c o m...
- Page 2 INSTRUCTION MANUAL FOR STEAK LOCKER - PRO EDITION SL520 US & EU MODEL SL-520...
-
Page 3: Table Of Contents
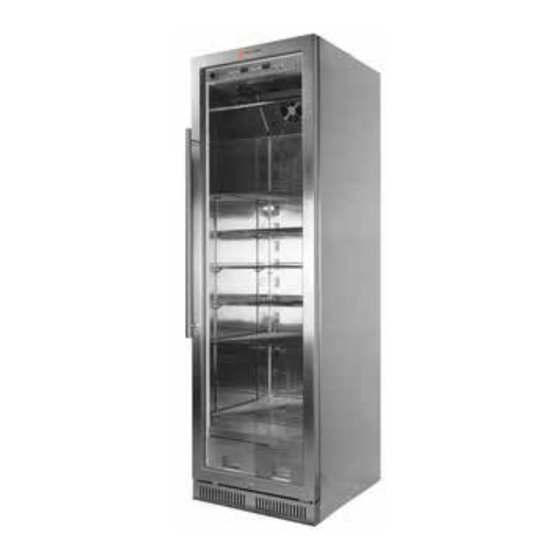
CONTENT 1..................Construction 2..................Important Safety Instructions 3..................Power Supply Connection 4..................Installation 5..................Temperature Setting 6..................Handle Bar - Installation 6A..................Cut In Dimensions 7..................How to Sync to Smart App 8..................Maintenance 9..................Troubleshooting - Refrigerator For Assistance; Visit www.steaklocker.com/support... - Page 4 1. CONSTRUCTION OF STEAK LOCKER Installation Drawing (1) Door Frame (2) Door Handle (3) Control Board (4) Electric Box (5) Evaporator Fan (6) Hang Lever (7) Hanger (8) Rack (9) Humidifier (10) Gating Switch (11) Front Grill (12) Top Wheel (13) Adjustable Foot...
-
Page 5: Important Safety Instructions
You must always observe basic precautions when using your Steak Locker, including : (1) Only use your Steak Locker for its intended purposes, as described in this guide. (2) Never unplug it by pulling out the power cord, grip the plug firmly and pull straight out from wall. -
Page 6: Power Supply Connection
(f) Follow the regular syncing instructions shown under section 7 in the SL150 Manual. The best placement for the S4 controller is on the lower wire shelf inside the Steak Locker, this allows for airflow around it’s interior temperature and humidity sensors. -
Page 7: Installation
3-5 inches between the back cabinet and the wall. B. Place your Steak Locker on a floor that is strong enough to support it when it is fully loaded. Adjust the four adjustable legs to ensure proper leveling of your Steak Locker. -
Page 8: Temperature Setting
5. Temperature Setting 1. Temperature setting range is 1 22 C (33 72 F ). Alter button, when press this button, the display screen of temperature will start to blink, then, you can set the temperature. Up setting, press one time, the temperature increase 1 degree Down setting, press one time, the temperature decrease 1 degree The system will save the current setting temperature after did not set for 3 seconds and quit the temperature setting mode. -
Page 9: Handle Bar: Installation
6. Handle Bar: INSTALLATION 6A. Cut In Dimensions... - Page 10 Press the small white button in the front of the controller for 10 seconds to activate broadcast mode. The best placement for the S4 Controller is on the wire shelf inside the Steak Locker, this allows for airflow around it’s interior temperature and humidity sensors.
- Page 11 Once completed tap the “Finish” button on the bottom of the screen. 7. This next step can take a minute or two for the Steak Locker to get setup. Once complete you’ll be redirected to the Dashboard. Use the Settings Tab to set the Humidity algorithim by scrolling to 70% mark.
-
Page 12: Maintenance
8. MAINTENANCE Your Steak Locker is easy to operate and will provide long-lasting operations if you follow the simple maintenance and cleaning operations listed below: 1 Pull the plug before cleaning 2 General parts can use the wet soft cloth to wipe, if the stain is hard to clean, can use the neutral detergent wipes, but do not let any liquid enter the fan, the wind hole. -
Page 13: Troubleshooting - Refrigerator
9. TROUBLESHOOTING - REFRIGERATOR If these troubleshooting solutions do not resolve the issue, please remove the product inside the SL Unit and place in a safe environment then contact Steak Locker immediately. Issue: Solution: Make sure there is proper power to the SL and that it is NOT Digital Display Panel Faulty: plugged into an extention cord.
Need help?
Do you have a question about the SL-520 and is the answer not in the manual?
Questions and answers