enphase ENCHARGE-10-1P-NA Quick Install Manual
Hide thumbs
Also See for ENCHARGE-10-1P-NA:
- Installation manual ,
- Technical brief (19 pages) ,
- Quick install manual (8 pages)
Advertisement
Q U I C K I N S T A L L G U I D E
Install the Enphase Encharge Storage System
To install the Enphase Encharge 3™ or Encharge 10™ and the Enphase Wall-Mount Bracket, read and follow all warnings and instructions in this guide. Safety
warnings are listed on the back of this guide. These instructions are not meant to be a complete explanation of how to design and install an energy storage
system. All installations must comply with national and local electrical codes and standards. Only qualified electricians shall install, troubleshoot, or replace
the Encharge 3 or Encharge 10.
The Enphase Storage System includes the Enphase Encharge Battery(ies) with integrated Enphase Microinverters™. The Enphase IQ Envoy™ gateway
measures PV production and home energy consumption. The Enphase Storage System senses when it is optimal to charge or discharge the battery so that
energy is stored when it is abundant and used when scarce. Encharge storage systems are capable of providing backup power when Enphase Enpower™ is
installed at the site.
Five unique installation scenari-
os are shown:
Whole home backup with Enpower
as service entrance and PV combiner
connected to Enpower. This is the
preferred configuration for back up
of the entire main load panel. This
configuration supports up to an 80A
breaker for the PV circuit and an 80A
breaker for battery storage.
Whole home backup with Enpower
as service entrance and PV combiner
connected to main load panel. This is
the preferred configuration when you
back up the entire main load panel, and
the size of the PV combiner circuit is
more than 80A. In this configuration, the
PV combiner circuit connection space
in Enpower is left vacant. When existing
PV combiner circuits are connected to
the main load panel, and you want to add
battery storage to the system, you can
keep the PV combiner connected to the
main load panel and connect only the
battery storage system to Enpower.
Partial home backup with main load
panel as service entrance and PV
combiner connected to Enpower.
When PV circuits breaker size is
less than 80A, this is the preferred
configuration for partial home backup
with sub-panel.
(Models ENCHARGE-3-1P-NA and ENCHARGE-10-1P-NA)
Advertisement
Table of Contents

Related Manuals for enphase ENCHARGE-10-1P-NA


Summary of Contents for enphase ENCHARGE-10-1P-NA
- Page 1 Install the Enphase Encharge Storage System To install the Enphase Encharge 3™ or Encharge 10™ and the Enphase Wall-Mount Bracket, read and follow all warnings and instructions in this guide. Safety warnings are listed on the back of this guide. These instructions are not meant to be a complete explanation of how to design and install an energy storage system.
- Page 2 Encharge and Enpower. Includes USB cable for connection to IQ Envoy / IQ Combiner and allows redundant wireless F ) Install the PV system and the IQ Combiner as directed by the Enphase communication with Encharge and Enpower.
-
Page 3: Installation
Encharge 10 add up to 157 kg (346 lbs). G ) Select a location where you can interconnect to the Enphase C ) Starting at installation position closest to the power source, mark a Enpower MID. - Page 4 Install the Encharge 3 (single width) or Encharge 10 (triple width) wall mount bracket Follow the instruction below for the bracket you are installing. Encharge 3 — single-width bracket Encharge 10 — triple-width bracket A ) Place the wall-mount bracket on the wall so that the mounting holes A ) Place the wall-mount bracket on the wall so that the mounting in the middle of the bracket align with the center of the stud.
- Page 5 Mount the Encharge Battery(ies) on the wall WARNING: Risk of injury. Take care when lifting. Each Encharge Battery is heavy (47 kg/ 104 lbs) and requires two persons to lift. WARNING! Risk of injury and equipment damage. Avoid dropping the Encharge Battery(ies). Doing so may create a hazard, cause seri- ous injury, and/or damage the equipment.
- Page 6 A ) Remove the sealing plug for entry into the field wiring compartment. Note that if an Enphase Enpower is in line-of-sight, the breaker can If installing only one battery or when installing the last battery in the service as a disconnect.
-
Page 7: Operation
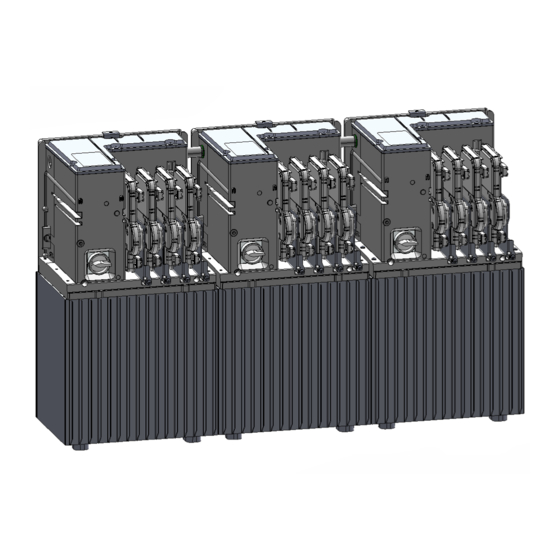
Troubleshooting. If the Encharge Battery(ies) are not operating correctly, perform the fol- Encharge 10 without cover lowing steps. If the issue persists, contact Enphase Customer Support enphase.com/en-us/support/contact. A ) If the Encharge Battery(ies) do not operate, check the temperature in the room and increase cooling and/or ventilation as required. -
Page 8: Safety Instructions
IMPORTANT SAFETY INSTRUCTIONS. SAVE THESE INSTRUCTIONS. This guide contains important instructions that you must follow during installation and maintenance of the Enphase Encharge Battery(ies). Failing to follow any of these instructions may void the warranty (enphase.com/warranty). In Case of Fire or Other Emergency...
Need help?
Do you have a question about the ENCHARGE-10-1P-NA and is the answer not in the manual?
Questions and answers