
Related Manuals for Panasonic NN-CD87KS


Summary of Contents for Panasonic NN-CD87KS
- Page 1 Bedienungsanleitung Convection/Grill/Microwave Oven Model No. NN-CD87KS NN-CD87KS FOR HOUSEHOLD USE ONLY...
- Page 2 WICHTIGE SICHERHEITSANWEISUNGEN. Bitte sorgfältig durchlesen und zur weiteren Bezugnahme aufbewahren.
-
Page 3: Table Of Contents
Thank you for purchasing this Panasonic appliance. Contents Operating Instructions ....2-51 Grilling ..........23 Safety Instructions ......2-6 Convection........24-25 Disposal of Old Equipment ....7 Combination Cooking ....26-27 Installation and Connection ....8 Multistage Cooking ......28 Placement of Your Oven ....8 Using the Timer ......29-30... -
Page 4: Operating Instructions
Safety Instructions Important safety instructions. Before operating this oven, � please read these instructions carefully and keep for future reference. This appliance can be used by children aged from � 8 years and above and persons with reduced physical, sensory and mental capabilities or lack of experience and knowledge if they have been given supervision or instruction by a person responsible for their safety concerning the use of the appliance in a safe way... - Page 5 It is not intended for use inside a cupboard. This oven may be built into a wall cabinet by using the proper trim kit, (NN-TK81KCSCP) which may be purchased from a local Panasonic dealer. For Countertop use: Oven must be placed on a flat, stable surface 85 cm �...
- Page 6 Safety Instructions If smoke is emitted or a fire occurs in the oven, press � Stop/Cancel button and leave the door closed in order to stifle any flames. Disconnect the power cord, or shut off power at fuse or circuit breaker panel. This appliance is intended to be used in household �...
- Page 7 Safety Instructions Failure to maintain the oven in a clean condition could � lead to deterioration of surfaces that could affect the life of the appliance and possibly result in a hazardous situation. Warning! The appliance and its accessible parts become �...
- Page 8 Safety Instructions In case of electronic failure, the oven can only be turned � off at the wall socket. This combination oven is intended for heating food and � beverages only. Take care when heating foods low in moisture, e.g. bread items, chocolate, biscuits and pastries.
-
Page 9: Disposal Of Old Equipment
Disposal of Old Equipment By disposing of them correctly, you will Only for European Union help to save valuable resources and and countries with prevent any potential negative effects recycling systems on human health and the environment. For more information about collection This symbol on the products, and recycling, please contact your local packaging, and/or accompanying... -
Page 10: Installation And Connection
Installation and Connection Examine your Oven Important! Unpack the oven, remove all packing This unit has to be properly material, and examine the oven for any earthed for personal safety. damage such as dents, broken door latches or cracks in the door. If you find any damage, notify your dealer Operation Voltage immediately. -
Page 11: Important User Instructions
Important User Instructions 1. Do not use the oven for any reason sponges, damp cloth, wheat bags, other than the preparation of food. hot water bottles and similar may This oven is specifically designed lead to risk of injury, ignition or fire. to heat or cook food. - Page 12 Important User Instructions 4. The accessible parts may become Small Quantities of Foods hot in convection, combination Small quantities of food or foods with and grill use. Young children less low moisture content can burn, dry out than 8 years of age should be kept or catch on fire if cooked too long.
- Page 13 Important User Instructions Liquids Utensils/Foil When heating liquids, e.g. soup, Do not heat any closed cans or bottles sauces and beverages in your oven, because they might explode. overheating the liquid beyond boiling point can occur without evidence of Metal containers or dishes with bubbling.
-
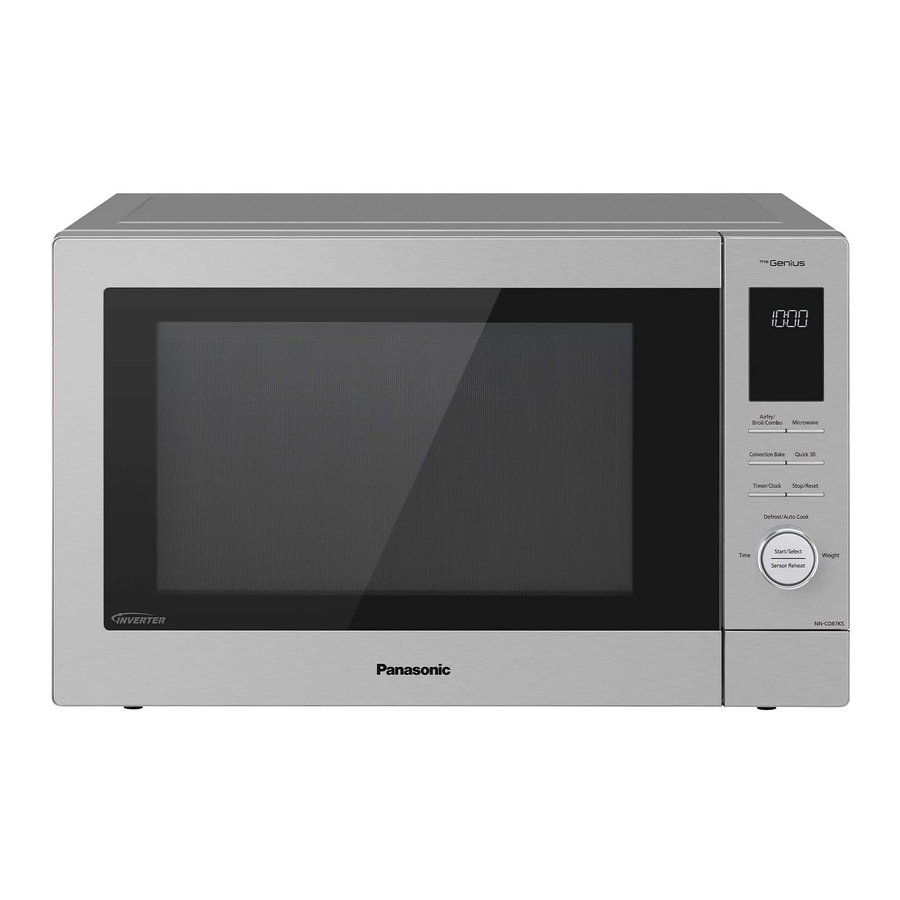
Page 14: Parts Of Your Oven
Parts of Your Oven Door release 9 Plug 10 Identification label Press to open the door. When 11 Glass tray you open the oven door during 12 Roller ring cooking, the cooking is stopped temporarily without clearing earlier 13 Heating elements 14 Caution label (hot surfaces) made settings. -
Page 15: Oven Accessories
Oven Accessories Accessories Roller Ring The oven comes equipped with a 1. The roller ring and the oven floor variety of accessories. Always follow should be cleaned frequently to the instructions given for use of the prevent noise and build-up of accessories. -
Page 16: Control Panel
Control Panel Display window NN-CD87KS Convection button (pages 24-25) Micro Power button (page 19) Grill button (page 23) Combination button (pages 26-27) Timer/Clock button (pages 17-18, 29-30) Stop/Cancel button Before cooking: One press clears your instructions. During cooking: One press temporarily stops the cooking program. -
Page 17: Display Window
Display Window Temperature Display Preheating Child Lock Setting Auto Beverage Number/Character program Defrost mode Time Display (Minute/Second) Prompt to enter Weight Weight Display (g) Multistage Display Junior Menu Program Convection mode Auto Weight Program Grill mode More/Less Display Enamel Tray Wire Rack Microwave mode Auto Sensor Program... - Page 18 Cooking Modes Accessories Cooking modes Uses Containers to use GRILL Use heatproof • Grilling of meat or fish. dishes, plates or • Toast grilling. ® Wire rack bowls eg. Pyrex • Colouring of gratin dishes on enamel directly on the or meringue pies.
-
Page 19: Word Prompting
Word Prompting Word prompting "DEUTSCH" In German "NEDERLANDS" In Dutch Press Start These models have a unique function “Word Prompting” which guides you through the operation of your microwave. After plugging in the oven press Start until you locate your language. As you press the buttons and turn the dial, the display will scroll the next instruction eliminating the opportunities for mistakes. -
Page 20: Setting The Clock
Setting the Clock When the oven is first plugged in “HERZLICH WILLKOMMEN VOR GEBRAUCH DIESES GERAETES BITTE BEDIENUNGSANLEITUNG LESEN” appears in display window. Press Timer/Clock twice Turn dial Press Timer/Clock “ZEIT EINGEBEN” will Enter the time by turning The colon stops appear in the display the dial. -
Page 21: Microwave Cooking And Defrosting
Microwave Cooking and Defrosting The glass tray must always be in position when using the oven. There are 7 different microwave power levels available (see the chart below). Use of accessory: Glass tray Set time Press Start Select Microwave power level Select cooking time by The cooking Press this button until the power... -
Page 22: Defrosting Guidelines
Defrosting Guidelines quickly. Place them near the centre Tips for Defrosting of the glass tray or protect them with Check the defrosting several times, small pieces of foil. even if you use the auto programs. Observe the standing times. Bread Loaves will require a standing time Standing Times of 5-30 minutes to allow the centre to... -
Page 23: Defrosting Charts
Defrosting Charts Choose defrost power 270 W then calcuate the cooking time as per the chart below. For large quantities, adjust the cooking time. The times indicated are for guidance only. Always check the food during defrosting by opening the door then restarting the defrosting. - Page 24 Defrosting Charts Choose defrost power 270 W then calcuate the cooking time as per the chart below. For large quantities, adjust the cooking time. The times indicated are for guidance only. Always check the food during defrosting by opening the door then restarting the defrosting.
-
Page 25: Grilling
Grilling The grill system on the oven gives fast efficient cooking for a wide variety of foods e.g. chops, sausages, steaks, toast, etc. There are 3 different grill settings available. The glass tray must always be in position when using the oven. -
Page 26: Convection
Convection This feature offers a choice of convection temperatures 40 °C, 100 - 220 °C in 10 °C increments. For quick selection of the most commonly used cooking temperatures, the temperatures start at 150 °C and count up to 220 °C then 40 °C, 100 °C, 110 °C etc. -
Page 27: Convection
Convection Note 1. When the selected cooking time is less than one hour, the time counts down second by second. 2. When the selected cooking time is over one hour, the time counts down minute by minute until only “1H 00” (1 hour) remains. The display then indicates minutes and seconds and counts down second by second. -
Page 28: Combination Cooking
Combination Cooking Combination cooking is ideal for many foods. The microwave power cooks them quickly, whilst the oven or grill gives traditional browning and crispness. All this happens simultaneously resulting in most foods being cooked in 1/2 - 2/3 of the conventional cooking time. There are 5 fixed combination settings (see table below). -
Page 29: Combination Cooking
Combination Cooking Notes on Preheating 1. When using Grill + Microwave mode, preheat is not available. 2. When using Convection + Microwave, the oven can be preheated. Press Start after selecting Combi level 2, 3, 4 or 5. No microwaves are emitted during combination preheating. -
Page 30: Multistage Cooking
Multistage Cooking 2 or 3 Stage Cooking Example To cook on 600 W for 2 minutes, cook on 180 °C for 15 minutes and cook on Grill 1 for 10 minutes. Press Convection Press Micro Set the Set the button 4 times to cooking time Power 4 times to cooking time... -
Page 31: Using The Timer
Using the Timer The timer can be used either before or after a cooking program. This feature can be used to set a standing time after cooking or to delay the start of your cooking. 1. To Set a Standing Time: Set the desired cooking program, by selecting power... -
Page 32: Using The Timer
Using the Timer 3. To Set a Delay Start: Set the desired cooking program, by selecting power level and time required (up to 2 stages). Press Set desired Delay Press Start Timer/Clock time using the dial Delayed time (max 9 hours). An will count “H”... -
Page 33: Using The Add Time Function
Using the Add Time Function This feature allows you to add cooking time at the end of previous cooking. After cooking, turn dial to select Press Start Add Time function. Maximum cooking Time will be added. time: Micro Power: 1000 W (High) up to The time in the display 30 minutes;... -
Page 34: One Push Reheating
One Push Reheating This unique feature ‘the Genius’ built in sensor allows you to reheat a chilled meal with one push of the dial. It is not necessary to select the power level or cooking time. The built-in sensor measures the humidity of the food and calculates the microwave power level together with a cooking time. - Page 35 One Push Reheating Note This feature is not suitable for foods that cannot be stirred eg. lasagne / macaroni cheese. The oven automatically calculates the reheating time or the remaining reheating time. The door should not be opened before the time appears in the display window.
-
Page 36: Turbo Defrost
Turbo Defrost This feature allows you to defrost minced meat, chops, chicken portions, meat joints and bread. Foods should be placed in a suitable dish, whole chickens and joints of meat should be on an upturned saucer or on a microwave safe plate. Chops, chicken portions and slices of bread should be placed in a single layer. - Page 37 Turbo Defrost With this feature you can defrost frozen food according to the weight. Press the dial to confirm the program selection. Auto program number appears in the display. The microwave, auto and defrost symbols light. Select the weight of Press Start To allow auto program the food by turning...
-
Page 38: Auto Weight Programs
Auto Weight Programs This feature allows you to cook or reheat foods by setting the weight only. The oven determines the Microwave power level and/or Convection or grill and/or Combination setting, then the cooking time automatically. Select the category of food and then just enter the weight. -
Page 39: Auto Weight Programs
Auto Weight Programs It is not necessary to preheat the oven for the remaining auto programs. Operate as below: Auto Programs without Preheating Press the dial to confirm the program. Auto program number appears in the display. The microwave and /or grill or convection and auto weight symbols appear in the display... -
Page 40: Auto Beverage Programs
Auto Beverage Programs Program Weight Accessories Instructions For reheating one beverage with a fixed 4. Tea/ weight of 200 g or two beverages of Coffee 200 g each from room temperature eg. tea, coffee or hot chocolate. Turn dial 200 g or to select program 4, Tea/coffee. -
Page 41: Re-Bake Bread Programs
Re-Bake Bread Programs Program Weight Accessories Instructions To re-bake baguettes and crusty 7. Baguette/ rolls. This program is suitable for Crusty reheating, browning and crisping pre- Rolls purchased baguettes and rolls from room temperature. Ensure height of baguette/rolls is no more than 5 cm. Turn the dial to select program 7, Baguette/Crusty Rolls. -
Page 42: Auto Sensor Programs
Auto Sensor Programs This feature allows you to cook or reheat foods without entering the weight. The built-in sensor measures the humidity of the food and calculates the recommended microwave power level together with a suggested cooking time. How it works for the oven to calculate how much Once the food has been selected and longer the food needs to cook. - Page 43 Auto Sensor Programs Note 1. The oven automatically calculates the cooking time or the remaining cooking time. 2. The door should not be opened before the time appears in the display window. 3. The temperature for frozen food is assumed to be -18 °C to -20 °C, for other types of food +5 °C to +8 °C (refrigerator temperature).
-
Page 44: Auto Sensor Programs
Auto Sensor Programs Program Weight Instructions 9. Fresh To cook fresh vegetables. Place prepared vegetables Vegetables into a suitable sized container. Sprinkle with 1 tbsp water per 100 g vegetables. Cover with cling film. 200 g - Pierce cling film with a sharp knife once in the centre 1000 g and four times around the edge. -
Page 45: Junior Menu Programs
Junior Menu Programs The Junior Menu offers a range of programs catering for babies, toddlers and older children - great for time saving and convenience. The fruit and vegetable purées are ideal first foods for weaning babies. Homemade purées taste like real food and cost less than jars or packets. - Page 46 Junior Menu Programs Program Weight Accessories Instructions 17. Junior For cooking fresh pasta bake using fresh Pasta Bake pasta (penne, spaghetti, fusilli), cheese or tomato based sauce and grated mild cheddar cheese. Use a suitable square, shallow Pyrex container. Use the ®...
-
Page 47: Junior Menu Programs
Junior Menu Programs ingredients Banana Mug cake 1. Mix together flour, baking powder and sugar. For 1 serving 3 tbsp flour 2. Add melted butter, milk, beaten egg and honey. ½ tsp baking powder 3 tbsp light brown sugar 3. Add mashed banana. Mix thoroughly. 1 tbsp melted butter 1 tbsp milk 4. -
Page 48: Auto Combi Programs
Auto Combi Programs For operation refer to pages 36-37. Program Weight Accessories Instructions For reheating and browning of pre- 22. Frozen purchased frozen pizza. Turn the dial to Pizza select program 22, Frozen Pizza. Press the dial to confirm the program. Remove 200-450 g all packaging and place the pizza directly on the wire rack on the enamel tray. - Page 49 Auto Combi Programs Program Weight Accessories Instructions For reheating and browning frozen 25. Frozen purchased savoury dishes eg. Lasagne Lasagne or Gratin. Remove any lid or covering. If in a foil container transfer to a similar sized heatproof dish and place on glass tray. If using heatproof plastic based dish 400-800 g that food is purchased in, take...
-
Page 50: Questions And Answers
Questions and Answers Q: Why won’t my oven turn on? microwaves in the air. The oven vents should never be blocked A: When the oven does not turn on, during cooking. check the following: 1. Is the oven plugged in securely? Q: Can I easily cook my favourite Remove the plug from the outlet, recipes using convection/grill? -
Page 51: Care Of Your Oven
Questions and Answers Q: The oven stops cooking by Q: The fan continues to rotate after microwave and ‘H97’ or ‘H98’ cooking. Why? appears in the display. Why? A: After using the oven, the fan motor A: This display indicates a problem may rotate to cool the electrical with the microwave generation components. -
Page 52: Building-In Your Oven
10. A steam cleaner is not to be used for cleaning. Building-in Your Oven In case of fitting into an oven A microwave which is built in must housing, please use Panasonic’s be more than 850 mm above floor Trim Kit NN-TK81KCSCP- level. Read Trim- Kit instructions Stainless. -
Page 53: Technical Specifications
Class B means that this product may be used in normal household areas. Manufactured by: Panasonic Appliances Microwave Oven (Shanghai) Co., Ltd. 888, 898 Longdong Road. Pudong, Shanghai, 201203, China. Imported by: Panasonic Marketing Europe GmbH REP. - Page 54 Panasonic Corporation http://www.panasonic.com F0003CD10GT PA0319-0 Printed in P.R.C. © Panasonic Corporation 2019...
Need help?
Do you have a question about the NN-CD87KS and is the answer not in the manual?
Questions and answers
Hi! Is there a way to mute the beeps without having to unplug the unit and starting over with all the settings? Thank you.
To mute the beeps on the Panasonic NN-CD87KS, press the Stop/Reset button. This will change the beep mode to Beep OFF without unplugging the unit.
This answer is automatically generated