Table of Contents
Advertisement
Quick Links
Advertisement
Table of Contents

Summary of Contents for AutoAqua Smart AWC touch SAWC-200P
- Page 1 Change for Simple Smart AWC touch Manual Model SAWC-200P...
-
Page 2: List Of Parts
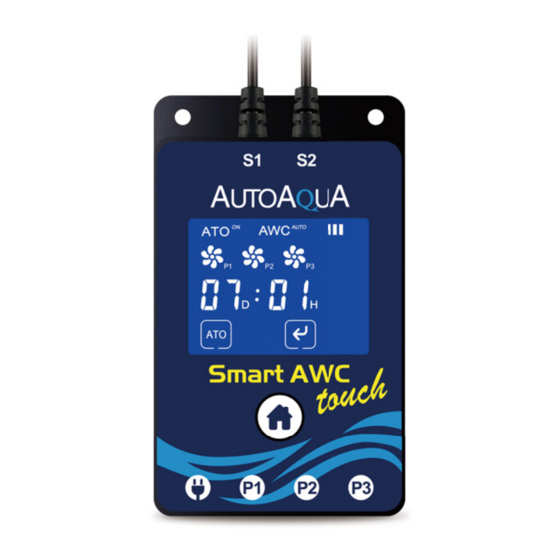
Change for Simple List of Parts Item Pictures Description 1. Controller with touch panel & Optical Level Sensor with wet side magnet X 2 : Black sensor Smart AWC touch : Blue sensor Controller X 1 2. Dry side magnet X 2 3. -
Page 3: Installation
Change for Simple Installation Smart AWC touch Controller : ATO/AWC Sensor (Refill) : AWC Sensor (Drain) : Power DC Jack : ATO Refill Pump DC Jack : AWC Drain Pump DC Jack : AWC Refill Pump DC Jack 1. AWC (Automatic Water Change) Step 1 : Changed Water Volume Mount black sensor... - Page 4 Change for Simple Arrow on siphon break indicates water flow direction. Step 4 : Connect AWC drain pump’s cable to P2. Waste Water AWC Drain Pump Waste Water Container Tank/Sump *Note : Place siphon break inside the tank/sump but above the water level. Air In : Siphon break allows air in to break the siphon Air In...
- Page 5 Change for Simple Step 7 : Step 6 : Power Connect AWC Connect AWC refill pump’s controller’s power. cable to P3. Step 5 : Connect AWC refill tube. Waste Water AWC Refill Pump Waste Water Container Tank/Sump New Water Reservoir 2.
- Page 6 Change for Simple Arrow on siphon break indicates Step 3 : water flow direction. Connect ATO refill pump’s cable to P1. Step 2 : Connect ATO refill tube (pump siphon break* tubing holder). ATO Refill Pump Tank/Sump ATO Reservoir *Note : Place siphon break inside the tank/sump but above the water level.
- Page 7 Change for Simple Power Step 4 : Connect AWC controller’s power. ATO Refill Pump Tank/Sump ATO Reservoir...
- Page 8 Change for Simple Calculating Water Volume to Be Changed The volume can be calculated by multiplying the width and length of your tank and the distance between the pyramids of the two sensors. * For example, a tank has 18 inches in length and 17 inches in width. If the distance between the two sensors is 3 inches, the water volume to be changed will be around 4 gallons.
- Page 9 Change for Simple Icons & Buttons for Setting No. Icon/Button Function Turn ATO on or off Choose AWC mode : MANUAL / AUTO or turn AWC off 1. Start the AWC process 2. Pause / resume the AWC process 3. Dismiss alarm Choose the setting item in the AWC MANUAL / AUTO mode Increase time / speed Decrease time / speed...
-
Page 10: Display Indication
Change for Simple Display Indication Status of Pump : ATO refill pump is connected. : AWC drain pump is connected. : AWC refill pump is connected. Status of ATO showing : The pump is off. : ATO is on. rotating : The pump is on. : ATO is off. - Page 11 Change for Simple Alarm and Reminder...
- Page 12 Change for Simple Quick Security Technology (QST) Smart AWC touch uses QST for real-time protection against any failure situation.* QST can detect the malfunction of the sensor the controller, and the empty reservoir to avoid the pump running dry. The controller will give an audible and visual alert when any one of the following situations occurs.
- Page 13 Change for Simple Power Outage Security Measures 1. ATO will be turned off automatically (ATO flashing ) after restoration of power as if its previous status is on. It will be turned back on after 15 minutes automatically. Users could also turn it back on manually. 2.
- Page 14 Change for Simple 2. AWC AUTO Mode (Periodic AWC) Water change in AUTO mode will perform in two different ways when ATO is off and on. When ATO is off, it performs periodic AWC. Users set the timer to decide the water change interval.
-
Page 15: Specifications
Change for Simple 3. AWC Refilling Speed Setting The refilling speed will select different lengths of refilling time. The slower the speed is, the longer the refilling process is. Speed 5 no pause during the refilling process Speed 4 refill 20 sec and pause 200 sec repeatedly Low Average Speed Speed 3 refill 10 sec and pause 200 sec repeatedly... -
Page 16: Limited Warranty
2. All warranty repairs or replacement are performed by the authorized distributor or authorized reseller in the region where the Product was first shipped by AUTOAQUA. 3. The limited warranty is valid for a period of 1 year under proper installation and normal use from the date of the original purchase listed on the proof of purchase or sales receipt.


Need help?
Do you have a question about the Smart AWC touch SAWC-200P and is the answer not in the manual?
Questions and answers