
Related Manuals for Philips HTS3510E/94


Summary of Contents for Philips HTS3510E/94
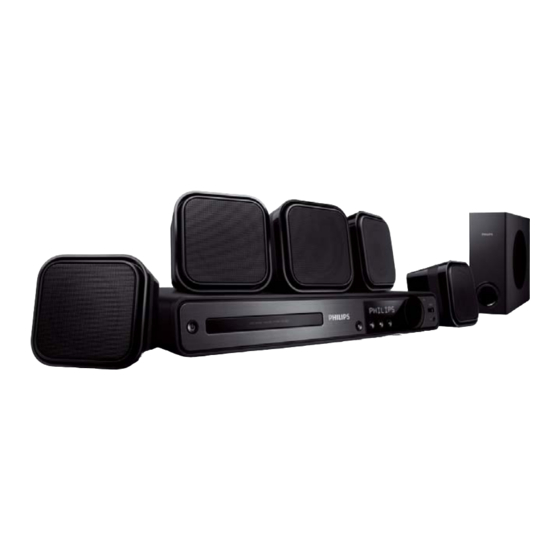
- Page 1 Register your product and get support at www.philips.com/welcome HTS3181 EN User manual...
-
Page 3: Table Of Contents
Contents 1 Important Safety and important notice Trademark notice 2 Your product Feature highlights Product overview 3 Connect Place the product Connect video cables Connect speakers and subwoofer Connect radio antenna Connect audio cables/other devices Connect power cord 4 Get started Insert the remote control batteries Find the correct viewing channel Select menu display language... -
Page 4: Important
1 Important Safety and important notice Warning • Risk of overheating! Never install the product in a confi ned space. Always leave a space of at least 4 inches around the product for ventilation. Ensure curtains or other objects never cover the ventilation slots on the product. -
Page 5: Trademark Notice
Trademark notice Manufactured under license from Dolby Laboratories. Dolby, Pro Logic and the double-D symbol are trademarks of Dolby Laboratories. DivX, DivX Ultra Certifi ed, and associated logos are trademarks of DivX, Inc. and are used under license. Offi cial DivX® Ultra Certifi ed product. Plays all versions of DivX ®... -
Page 6: Your Product
2 Your product Congratulations on your purchase, and welcome to Philips! To fully benefi t from the support that Philips offers, register your product at www.philips.com/welcome. Feature highlights Listen to rich uncompressed multi-channel surround sound This Home Theater System supports 5.1... -
Page 7: Product Overview
Product overview Remote control ( Standby-On ) • Turns on the Home Theater System or switches to standby mode. ( Open/Close ) • Opens or closes the disc compartment. c Source buttons • AUDIO SOURCE : Selects an audio input source. •... -
Page 8: Main Unit
o REPEAT / PROGRAM • Selects or turns off repeat or shuffl e mode. • In radio mode, resets the list of preset stations: press to manually reset; press and hold to automatically reset. p OK • Confi rms an entry or selection. BACK •... -
Page 9: Connect
Different types of connectors can be used to connect this product, depending on availability and your needs. A comprehensive interactive guide to help you connect your product is available at www.connectivityguide.philips. com. Place the product • Place the product where it cannot be pushed, pulled over or knocked down. -
Page 10: Connect Video Cables
Connect video cables Connect this Home Theater System to TV to view disc play. Select the best video connection that the TV can support. • Option 1: Connect to the VIDEO jack (for a standard TV). • Option 2: Connect to the component video jacks (for a standard TV or Progressive Scan TV). -
Page 11: Connect Speakers And Subwoofer
Connect speakers and subwoofer Connect the speakers and subwoofer to the matching jacks on this Home Theater System. Note • Ensure that the colors of the plugs and jacks are matched. Connect radio antenna Connect the FM antenna to the FM75 jack on this Home Theater System (for some models, this cable is already connected). -
Page 12: Connect Power Cord
Connect audio from cable box/ recorder/game console AUDIO OUT Connect the audio cables (not supplied) to the AUDIO IN-AUX2 jacks on this Home Theater System and the AUDIO output jacks on the device. Note • To listen to the audio output from this connection, press AUDIO SOURCE repeatedly until ‘AUX2’... -
Page 13: Get Started
4 Get started Insert the remote control batteries Slide the battery cover off the back of the remote control. Insert the 2 supplied batteries (AAA). Be sure the + and - ends of the batteries line up with the markings inside the case. Slide the cover back into position. -
Page 14: Find The Correct Viewing Channel
• Go to the lowest channel on your TV, then press the Channel Down button until you see the Philips screen. • Press SOURCE button repeatedly on the remote control of your TV. -
Page 15: Change Speaker Settings
Select [Progressive] > [On] , then press OK . » A warning message is displayed. To proceed, select [Ok] and press OK . » The progressive setup is complete. Note • If a blank/distorted screen is displayed, wait for 15 seconds for the auto recover. •... -
Page 16: Select A Play Source
• Repeat the above setting for other speakers until all the speakers output level sounds equally balance. • To exit the menu, press To set the output delay time (center and rear speakers only) Select [Speakers Delay] in the menu, then press . -
Page 17: Play
5 Play Play a disc Caution • Never place any objects other than discs into the disc compartment. • Never touch the disc optical lens inside the disc compartment. Press to open the disc compartment. Insert a disc with its label facing up. •... - Page 18 Change video play Play a title. Use the remote control to change the video play. Button Action AUDIO Selects an audio language or SYNC channel. SUBTITLE Selects a subtitle language for video. REPEAT Selects or turns off repeat or shuffl e mode. •...
- Page 19 • You can change the PBC setting (see ‘Adjust settings’ > ‘Preference’ > [PBC]). Sync audio output with video play If the video play is slower than the audio output (sound does not match with the pictures), you can delay the audio output to match the video.
-
Page 20: Play Music
Play DivX® video DivX video is a digital media format that retains high quality despite a high rate of compression. You can enjoy DivX video on this DivX® Certifi ed product. Insert a disc or USB that contains the DivX videos. Press DISC or USB . -
Page 21: Play Photo
Note • For disc recorded in multiple sessions, only the fi rst session is played. • This product does not support MP3PRO audio format. • If any special characters are present in the MP3 track name (ID3) or album name, it might not be displayed correctly on the screen because these characters are not supported. -
Page 22: Play From Usb Device
Play musical slideshow Play MP3/WMA music fi les and JPEG photo fi les simultaneously to create musical slideshow. The MP3/WMA and JPEG fi les must be stored on the same disc or USB device. Play MP3/WMA music. Navigate to the photo folder/album and press OK to start slideshow play. -
Page 23: Listen To Radio
Press » All detected radio stations are stored. » Once complete, it tunes to the fi rst preset radio station. • To stop auto tuning, press Note • This Home Theater System can store up to a maximum of 40 radio stations. •... -
Page 24: Adjust Sound
6 Adjust sound Control the volume Press VOL +/- to increase or decrease the volume. • To mute, press • To restore the volume, press or press VOL + . Select surround sound Press SURR repeatedly to select the best surround output that’s available on the disc. -
Page 25: Adjust Microphone Volume Level
Adjust microphone volume level Connect a microphone (not supplied) to MIC jack on this Home Theater System. Turn on the microphone output. (see ‘Karaoke settings’.) Press MIC ( VOL +/- ) to adjust the microphone volume. » ‘MIC XX’ is displayed. •... -
Page 26: Adjust Settings
7 Adjust settings You can customize various kinds of settings as you prefer. Refer to the following instructions to navigate through the setup menus. Symbol Options [General Setup] [Audio Setup] [Video Setup] [Preference] Note • If the setup option is grayed out, it means the setting cannot be changed at the current state. -
Page 27: Audio Setup
[Sleep Timer] Switches to standby automatically after the preset time. • [15 mins] , [30 mins] , [45 mins] , [60 mins] – Selects the count down time before the Home Theater System switches to standby. • [Off] – Disables sleep timer mode. [DivX(R) VOD Code] Displays the DivX®... -
Page 28: Video Setup
Note • Applicable only to Dolby Digital encoded discs. Video setup Video Setup TV System TV Display Progressive Picture Settings Press SETUP . » [General Setup] menu is displayed. Press to select [Video Setup] , then press . Select an option, then press OK Select a setting, then press OK . -
Page 29: Preference
Preference Note • Stop disc play before you can access to [Preference] . Preference Audio Subtitle Disc Menu Parental MP3/JPEG Display Password DivX Subtitle Press SETUP . » [General Setup] menu is displayed. Press to select [Preference] , then press Select an option, then press OK . - Page 30 Theater System. • This information is required when you want to fi nd out if a newest software version is available at the Philips website that you may download and install on this Home Theater System. [Default] Resets all the settings of this Home Theater System to factory default, except for [Disc Lock] , [Password] and [Parental] settings.
-
Page 31: Additional Information
OK . Write down the version number, then press SETUP to exit the menu. Go to www.philips.com/support to check the latest software version available for this Home Theater System. If the latest software version is higher than the software version of this Home Theater System, download it and store onto a CD-R or USB fl... -
Page 32: Specifi Cations
9 Specifications Note • Specifi cation and design are subject to change without notice Playback media • DVD-Video, DVD+R/+RW, DVD-R/-RW, DVD+R DL, CD-R/CD-RW, Audio CD, Video CD/SVCD, Picture CD, MP3-CD, WMA-CD, DivX-CD, USB fl ash drive Amplifi er • Total output power: 300 W RMS (30% THD) •... -
Page 33: Troubleshooting
If you still have a problem, register your product and get support at www.philips.com/welcome. If you contact Philips, you will be asked for the model and serial number of your product. The model number and serial number are on the back or bottom of your product. - Page 34 Play DivX video fi les cannot be played. • Make sure that the DivX fi le is encoded according to the ‘Home Theater Profi le’ with the DivX encoder. • Make sure that the DivX video fi le is complete. The aspect ratio of the screen is not aligned with the TV display setting.
-
Page 35: Glossary
11 Glossary Aspect ratio Aspect ratio refers to the length to height ratio of TV screens. The ratio of a standard TV is 4:3, while the ratio of a high-defi nition or wide TV is 16:9. The letter box allows you to enjoy a picture with a wider perspective on a standard 4:3 screen. - Page 37 Language Code Abkhazian 6566 Afar 6565 Afrikaans 6570 Amharic 6577 Arabic 6582 Armenian 7289 Assamese 6583 Avestan 6569 Aymara 6589 Azerhaijani 6590 Bahasa Melayu 7783 Bashkir 6665 Belarusian 6669 Bengali 6678 Bihari 6672 Bislama 6673 Bokmål, Norwegian 7866 Bosanski 6683 Brezhoneg 6682 Bulgarian...
- Page 38 © 2009 Koninklijke Philips Electronics N.V. All rights reserved. sgpjp_0930/94_v1...