
Related Manuals for LaCimbali Q10 New Touch


Summary of Contents for LaCimbali Q10 New Touch
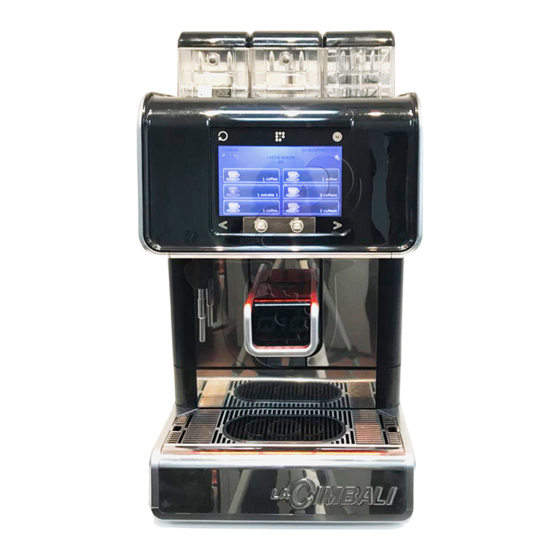
- Page 1 Q10 New Touch USO E INSTALLAZIONE USE AND INSTALLATION USAGE ET INSTALLATION GEBRAUCH UND INSTALLATION USO Y INSTALACIÓN USO E INSTALAÇÃO...
- Page 2 Q10 New Touch...
- Page 3 Legenda - Legend - Legende - Legende - Leyenda - Legenda LEGENDA LEGEND LEGENDE Erogatore caffè/cappuccino/ Delivery spout Bec débit café/cappuccino/soluble solubile Coffee hoppers 1 Trémies café 1 Tramoggia caffè 1 Coffee hoppers 2 Trémies café 2 Tramoggia caffè 2 6b Soluble hoppers 6b Trémies soluble 6b Tramoggia solubile...
-
Page 4: Table Of Contents
Dear Madam, Dear Sir Congratulations on your new Cimbali! With this purchase, you have chosen an advanced espresso coffee machine built with the most modern technologies. This machine not only offers you a perfect combination of efficiency and functionality, but also provides you with all the tools you need to do your job in the best possible way. -
Page 5: General Rules
1. General Rules Please read the warnings and rules in this User’s Manual carefully before using or handling the machine in any way because they provide important information regarding safety and hygiene when operating the machine. Keep this booklet handy for easy reference. •... -
Page 6: Installation Rules
These chapters in the manual are to be used by qualified, authorized technical staff. 2. Installation Rules WARNING Installation, dismantling, and adjustments must only be performed by qualified and authorized technicians. Carefully read the warnings and rules in this manual because they provide important information regarding safe installation, use and maintenance of the machine. -
Page 7: Water Installation Rules
These chapters in the manual are to be used by qualified, authorized technical staff. 4. Water Installation Rules WATER REQUIREMENTS Water used in coffee machines must be potable and suitable for human consumption (see laws and regulations in force). Check on the machine’s water inlet that: •... -
Page 8: Emptying The Hydraulic Circuit
These chapters in the manual are to be used by qualified, authorized technical staff. EMPTYING THE HYDRAULIC CIRCUIT When the machine is stored or during transportation from one location to another, the services boiler, coffee boiler, and the tubes of the hydraulic circuit must be emptied. For this procedure, open the rear panel to access the tubes. -
Page 9: Installation Check-Up
These chapters in the manual are to be used by qualified, authorized technical staff. 5. Installation Check-up WARNING: AFTER INSTALLATION, CHECK TO SEE IF THE MACHINE IS WORKING PROPERLY (see the Installation Module C) WATER CONNECTIONS • No leaks from the connections or tubes FUNCTIONING •... -
Page 10: Description Of The Control Panel - Keyboard
6. Description of the control panel - Keyboard DESCRIPTION OF THE COMPONENTS Hot water key-icon “RES” key-icon (to quit programming mode) "PRG" key-icon (to access programming mode/menu) Card services slit (technical programming) Icon-key display scroll SM “Sleep mode” button TSn Touch screen... -
Page 11: Daily Powering
7. Daily powering “Before setting the machine at work, make sure that: • the main electric power switch is on • the mains water cock has been turned on ". MANUAL POWERING Set in action the main switch (23) to turn on the machine. The following message will appear on the touch screen (TSn): 15:15:04 14 March 2012... -
Page 12: Dispensing Of Beverages
8. Dispensing of beverages - GENERAL INDICATIONS DISPLAY SCREENS In Touch Screen machines, up to 18 different beverage options can be set, divided into three screens with 6 options each. To display the different beverage options available, use the keys (47) to scroll through the screens (only if function is enabled). -
Page 13: Coffee Dose Variation
Coffee dose variation (Self version: activable only if card is enabled) The machine is equpped with a software program that makes it possible to quickly change the coffee dose without needing the technician’s assistance. Note: This function is possible ONLY if the entry “bean key”, in the technical configuration menu, has been set to “YES”... -
Page 14: Emptying The Coffee Grounds Drawer
Emptying the coffee grounds drawer When the machine has reached the amount of coffee grounds This message warns the user that the coffee grounds drawer is set by the installer, the following warning message will appear full. It is still possible to dispense ten coffee-based beverages on the display: before the machine is blocked. -
Page 15: Checking The Water Level In The Tray
Checking the water level in the tray EMPTY ME When the tray is filled with water, the words “EMPTY ME” appear in the special slot on the grid. Carefully remove the tray and empty the Open the lock (F). water. Pull out the drawer (16); lifting it Self version only slightly at points (A). -
Page 16: Connecting The Machine - Modulo Milk + Cup
Connecting the Machine – Modulo Milk + Cup Please follow these steps to connect the MODULO MILK + CUP to the machine: 1) insert the milk intake tube (40), from the machine, in the manifold (C) positioned in the specific hole of the MODULO MILK + CUP;... -
Page 17: Dispensing Of Beverages - Chocolate / Solubles
8.3 Dispensing of beverages - Chocolate / Solubles Preliminary operations Place the cup under dispenser (1) of the required group. Soluble beverage dispenser Press the chocolate (or other soluble beverage) dispensing button corresponding to the required dose. The selected key remains pressed and the beverage is dispensed. - Page 18 9. Cleaning operations Level 1 The following cleaning operations can be carried out by a Level 1 worker (barman/user). For correct application of the food safety system (HACCP), please follow the instructions in this paragraph. Card MILK CIRCUIT AND COFFEE CIRCUIT CLEANING CYCLES The purpose of the flushing cycle is to remove all traces of grease and scaling deposited when the milk is conveyed and...
-
Page 19: Coffee Circuit Cleaning Cycle
Level 1 COFFEE CIRCUIT CLEANING CYCLE (Self version: activable only if card is enabled) These procedures are to be performed at the end of the work "EXECUTE WASHING GROUP", accompanied by an acoustic day or when the machine sends a message (see paragraph signal. -
Page 20: Milk Circuit Cleaning Cycle
Level 1 MILK CIRCUIT CLEANING CYCLE (Self version: activable only if card is enabled) These procedures are to be performed at the end of the work MILK IS A FOOD PRODUCT THAT REQUIRES MAXIMUM day or when the machine sends a message (see paragraph HYGIENE! NOT PERFORMING REGULAR AND DAILY “Customer programming –... - Page 21 Press the key and wait The washing cycle has ended Eliminate any remaining washing when this message appears on the until the machine performs an solution in the container and add display: automatic washing cycle (approximately about 0.7 liters of cold water, leaving the 2 minutes).
-
Page 22: Cleaning The Solubles Circuit
Level 1 CLEANING THE SOLUBLES CIRCUIT (Self version: activable only if card is enabled) WASHING THE SOLUBLES CIRCUIT Functioning: At the end of each soluble product dispensing phase, the preset counter starts (from 1 to 20 minutes, OFF, function disabled). Afterwards, the request to wash the circuit will appear. - Page 23 WASHING THE SOLUBLES CIRCUIT The following indications are in addition to the washing procedure described above. MIXER CLEANING powder funnel powder storage drawer mixer conveyor mixer blade nozzle Here are the steps to perform at the end of the work day. Please follow these steps: 1) Open the lock (A) to access the solubles mixer;...
- Page 24 9. Cleaning operations Level 1 Preset automatic washing cycle Function - after each milk cycle has terminated, the timer count-down starts (max 210'). At the end, "AUTOMATIC WASHING" appears on the display, with the time remaining before the wash cycle begins. Activation - activation is automatic at the end of the remaining 30"...
- Page 25 9. Cleaning operations Level 1 CUP TRAY (16) At the end of the working day remove the tray (16) and wash it under running water in order to remove any deposits from the drain. For removal: • Raise the dispensing nozzle ( •...
-
Page 26: Cleaning The Coffee Beans Hopper
9. Cleaning operations Level 2 The following cleaning operations MUST be carried out by a Level 2 worker (trained user). CLEANING THE COFFEE BEANS HOPPER (6 - 6a) The coffee hoppers (6 and 6a) must be periodically cleaned (every week, approximately). Depending on consumption and type of coffee, cleaning can be performed more frequently. -
Page 27: Solubles Hopper Cleaning
9. Cleaning operations Level 2 SOLUBLES HOPPER CLEANING (6b) The solubles hopper (6b) must be periodically cleaned (every week, approximately). Depending on consumption and type of product, cleaning can be performed more frequently. The images opposite are that of a double solubles hopper. Please follow these steps: 1) Open the lock (A);... - Page 28 9) Remove the wheel fastening pin on the side (L) and remove the moving mechanisms inside the hopper; 10) Turn the fastening ring (M) at the rear of the hopper clockwise and remove the dispensing screw unit (Q); 11) Remove the worm screw (K) from the (R);...
-
Page 29: Rules For The Worker Operating The Machine
10. Rules for the worker operating the machine BEFORE YOU START WARNING: BEFORE YOU START OPERATING THE MACHINE, WASH THE INTERNAL COMPONENTS FOLLOWING THE INSTRUCTIONS INDICATED BELOW. THESE STEPS MUST BE REPEATED AT LEAST ONCE A DAY AND WHEN THE MACHINE HAS NOT BEEN OPERATED FOR MORE THAN 8 HOURS. -
Page 30: Maintenance And Repairs
11. Caution Danger of burns WARNING: Hot surface The areas marked with this sign become hot. Great ACHTUNG: Heisse Oberfläche care should be taken when in the vicinity of these ATTENTION: Surface chaude areas. ATTENZIONE: Superficie calda GENERAL Cup-warming plate Place only coffee cups, cups and glasses to be used in The manufacturer disclaims all liability for damages to conjunction with the coffee machine on the cup-warming... -
Page 31: Dismantling The Machine
13. Dismantling the machine Electrical equipment cannot be disposed of as ordinary Improper disposal of electric equipment that fails to respect urban waste: it must be disposed of according to the special the laws in force will be subject to administrative fines and EU directive for the recycling of electric and electronic penal sanctions. -
Page 32: Check Control Messages
Check Control Messages The check-control messages are divided into two groups: 1. Messages in explicit mode: they position on the last line at the bottom of the Display (5). They are cancelled on each new cycle and then appear again if the cause that generated them returns 2. -
Page 33: Defects - Malfunctions
Messages in explicit mode MESSAGE POSSIBLE CAUSES: when the message is visualized VERIFICATIONS Softener This message is displayed when the softener resins need to Once regeneration has been completed, keep be regenerated. (Follow the instructions on softener mainte- the RESET key pressed for approximately 8 nance). -
Page 34: Customer Programming
CUSTOMER PROGRAMMING (Self version: activable only if card is enabled) 16. How to access the programming mode Access to the programming menu is permitted ONLY if the Select a dispensing key. The display screen will show: "Customer Progr." option is set on "YES" and the "progr. KEY MENU block"... -
Page 35: Labels
Exiting the programming menu "i" Press the RES (24) key; every pressure of the key corrispond If the key " i " is pressed when any coffee, cappuccino, to a return to the previous menu. water, or steam option is displayed, the dispensing process can If the "Customer Progr."... -
Page 36: Key Menu
18. Icons The word “icon” refers to the symbolic image of the beverage The following appears on the display screen: that appears on the dispensing key of the display: KEY MENU MENU TASTO icon COFFEE CAPPUCCINO The icon can be personalized by selecting the icon entry in the machine’s key menu. -
Page 37: Key Menu - Cappuccino Selection
19.2 Key menu - Cappuccino selection Press one of the cappuccino dispensing keys. The following - milk dose (milk dispensing time: 0 ÷ 60 seconds, with message will appear on the display: increments of 0.1);); - emulsion ((foamed milk dispensing time, 0 ÷ time set in KEY MENU the milk dose);... -
Page 38: Key Menu - Chocolate / Solubles Selection
19.5 Key menu - Chocolate / Solubles selection Press one of the soluble dispensing keys. The display appears The following chocolate (or other soluble beverage) selection as follows: parameters can be modified: - repetition (it represents the number of distributions of the KEY MENU selected drink, from 001 to 099);... -
Page 39: Meter Display And Reset
20. Meter display and reset CUSTOMER PROG. COUNTERS MENU KEY MENU CUSTOMER PROG. PERSONALIZATION Press the key to view the counters. The following message will appear on the Touch Screen: COUNTERS MENU To zero the count: go to the parameter, press the "plus" "minus"... -
Page 40: Customer Programming Menu
21. Customer programming menu CUSTOMER PROG. COUNTERS MENU KEY MENU CUSTOMER PROG. PERSONALIZATION To access the “CUSTOMER PARAMETERS” menu, press key. The following is displayed on the Touch Screen: CUSTOM. PARAM. Press the “SERVICE HOURS” key, and the following appears on the display: SERVICE TIME ON time 00:00... -
Page 41: Washing Hours
Press the “WASHING HOURS” key, and the following appears on the display: WASHING TIME Washing 1 00:00 Washing 2 Washing 3 Washing 4 Washing 5 Use the keys to move the cursor from hours to minutes. Afterwards, press the key to confirm the "WASH 1”... -
Page 42: Personalization Menu
22. Personalization Menu CUSTOMER PROG. COUNTERS MENU KEY MENU CUSTOMER PROG. PERSONALIZATION To access the "PERSONALIZATION" menu, press the key. The following will appear on the Touch Screen: PERSONALIZATION screen saver screen saver start 15 s screen saver type imag. perman. time 10 s screen saver effect The parameters of the personalization menu are:... -
Page 43: Illustrations
Immagini - Illustrations - Images - Abbildungen - Imágenes - Imagens Fig. MACCHINA Fig. Abb. MACHINE Abb. MACHINE MASCHINE MÁQUINA MÁQUINA Fig. Abb. Fig. Abb. A) eventuale dispositivo per il trattamento dell’acqua A) possible water treatment device A) éventuel dispositif pour le traitement de l’eau A) Einheit zur Wasseraufbereitung (sofern installiert) A) posible dispositivo para el tratamiento del agua A) eventual dispositivo para o tratamento da água...
Need help?
Do you have a question about the Q10 New Touch and is the answer not in the manual?
Questions and answers