Table of Contents
Advertisement
Available languages
Available languages
H-1679
π
H-2331
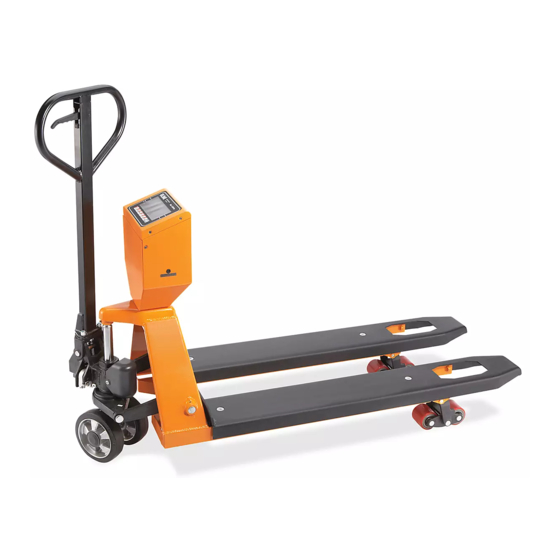
PALLET TRUCK SCALE
AVOID PLACING THE SCALE IN LOCATIONS THAT MAY AFFECT ACCURACY:
1. Temperature extremes – Do not place in direct sunlight or near air conditioning vents.
2. Keep scale dry – Do not place in high humidity, damp or wet locations.
3. Keep away from air movers like fans or open doors and windows.
4. Keep scale clean.
5. Do not stack items on the scale when not in use.
WARNING! Scale is not waterproof. Avoid direct contact with water, high
humidity and condensation. Do not spray or immerse scale in water. Data
may become unstable or scale may malfunction. Turn power off and allow
scale to dry before reuse.
1-800-295-5510
uline.com
GENERAL INFORMATION
1 of 62
Para Español, vea páginas 21-41.
Pour le français, consulter les pages 42-62.
0319 IH-1679
Advertisement
Chapters
Table of Contents

Related Manuals for U-Line H-1679


Summary of Contents for U-Line H-1679
- Page 1 Para Español, vea páginas 21-41. Pour le français, consulter les pages 42-62. H-1679 π 1-800-295-5510 H-2331 uline.com PALLET TRUCK SCALE GENERAL INFORMATION AVOID PLACING THE SCALE IN LOCATIONS THAT MAY AFFECT ACCURACY: 1. Temperature extremes – Do not place in direct sunlight or near air conditioning vents.
-
Page 2: Table Of Contents
TABLE OF CONTENTS SPECIFICATIONS LCD DISPLAY DISPLAY CHARACTERS CONTROLS ASSEMBLY SAFETY 10-13 OPERATION BATTERY MAINTENANCE/CALIBRATION 16-19 PARTS DIAGRAMS ERROR CODES 2 of 62 0319 IH-1679... -
Page 3: Specifications
SPECIFICATIONS H-1679 AND H-2331 PALLET TRUCK SCALES MODEL H-1679 H-2331 Max. Lifting Weight 5,000 lbs. Min. Fork Height 3⁄" 7½" Max. Fork Height Fork Length 48" 46" Fork Overall Width 27" 21½" Individual Fork Width 7" Capacity 5,000 lbs. Division 1 lb. -
Page 4: Lcd Display
LCD DISPLAY 4 of 62 0319 IH-1679... -
Page 5: Display Characters
DISPLAY CHARACTERS CHARACTER DISPLAY CHARACTER DISPLAY 5 of 62 0319 IH-1679... -
Page 6: Controls
CONTROLS primary function secondary function ON/OFF Key: Accumulate Key (M+): Turn the power on or off. Adds the value to the accumulation memory. Zero display and press this key to show current total value. Spaces left ' < ' to change different Zero Key (ZERO): numbers on the display. -
Page 7: Assembly
ASSEMBLY INSTRUCTIONS I. CAREFULLY UNPACK ALL ITEMS 3. Align mounting holes on pallet truck with mounting holes on control panel. (See 1. Remove control panel from packing Figure 4) foam. (See Figure 1) Figure 4 Figure 1 4. Insert and tighten 3 hex screws (H109) with spring washers (H110) through II. -
Page 8: Assembly
ASSEMBLY INSTRUCTIONS CONTINUED III. HANDLE INSTALLATION 5. Attach handle to base (103) using 3 hex screws (H109) and 3 spring washers 1. Remove handle from protective (H110) and tighten with Hex Wrench wrapping. provided. (See Figure 9) 2. Loosen set screw (140) on crank link Figure 9 (139H). -
Page 9: Safety
SAFETY SAFETY NOTE For safe operation of the truck, please read all warnings and instructions in this guide and on the truck before use. 1. Do not operate the pallet truck unless 6. Do not handle unstable or loosely you are familiar with it and have been stacked loads. -
Page 10: Operation
BASIC OPERATIONS ENSURE FORKS RAISE/LOWER PROPERLY Control Lever (H106) is located on pallet truck handle (H101) and can be set to 3 positions: LOWER, NEUTRAL and ASCENT. 1. Tighten set screw (140) on crank link (139H) until LOWER position on Control LOWER Lever functions properly. -
Page 11: Operation
OPERATION CONTROL LEVER The "GROSS" indicator will be off and "NET" indicator on. As product is added, only The control lever (H106) can be set in three the weight of the product will be shown. positions (see below). The scale could be tared a second time if another type of product was to be added LOWER: to the first one. - Page 12 OPERATION CONTINUED ACCUMULATION Press U key to go back to normal weighing mode. NOTE: Before using Accumulation function, remove all weight from SELECT PRETARE forks and zero the scale. 1. Press G/N key to ensure scale is in net 1. Weigh item on scale. Once "stable" mode.
- Page 13 OPERATION CONTINUED FUNCTION SETTING TABLE FUNCTION SUB-FUNCTION DESCRIPTION DEFAULT VALUE F1 u nt Sets the displayed weight unit. Select kg/lb. kg/lb F2 dat Scale will show y-n-d or d-n-y at first, this is date format (year- 2000/01/01 month-date or date-month-year). Then you need set year, 00:00 month and date.
-
Page 14: Battery
BATTERY OPERATION BATTERY LIFE BATTERY PERFORMANCE The weighing indicator is battery operated. Always use original batteries and AC The battery life is approximately 60 hours. adapter. Scale is not intended for use with non-original batteries and/or battery LOW BATTERY INDICATOR chargers. -
Page 15: Maintenance/Calibration
MAINTENANCE DAILY CHECK AND MAINTENANCE 2. Use the hydraulic type oil according to temperature scale below. A daily check of the pallet truck can help prevent accidents. Give special attention to Temperature the wheels (127), the axles (109), the handle -5°C ~ +45°C L-HM68 Hydraulic (H101), the forks and control lever (H106). -
Page 16: Parts Diagrams
PARTS DIAGRAM DIAG 1 DIAG 2 H110 H109 LOWER position H107 NEUTRAL position ASCENT position H106 H101 139H 122H DIAG 3 PART NO. PART NAME QTY. 139H H107 Wire, Chain and Pin H109 Hex Screw H110 Spring Washer 122H Pump Housing 139H Crank Link Base... -
Page 17: Parts Diagrams
PARTS DIAGRAM CONTINUED H101 H102 H103 H104 H111 H105 H112 H106 H107 H108 H109 H110 PART NO. PART NAME QTY. H101 Handle H102 Spring Pin H103 Spring Leaf H104 Spring Pin H105 Spring Pin H106 Control Lever H107 Wire, Chain and Pin H108 Rubber Cushion H109... - Page 18 PARTS DIAGRAM CONTINUED 157-1 158H 159H 108107 106 105 104 103 102 160H 161H 162H 163H 164H 112 113 165H 114 115 166 118 139H 122H 154 155 18 of 62 0319 IH-1679...
- Page 19 PARTS LIST PART NO. PART NAME QTY. PART NO. PART NAME QTY. Steel Ball Screw 139H Crank Link Base Set Screw Steel Roller Bushing Parallel Pin Retaining Cover Shaft Spring Cover Retaining Ring Spring Axle Pump Rod Screw Dust Proof Ring Washer Pump Cylinder Spring...
-
Page 20: Error Codes
ERROR CODES ERROR CODES DESCRIPTION RESOLUTION ----- Overload Remove weight from the scale. If the problem persists contact Uline Customer Service. Err 1 Date Setting Error Enter date using correct format. Format: yy:mm:dd Err 2 Time Setting Error Enter time using correct format. Format: hh:mm:ss Err 4 Zero Setting Error... - Page 21 H-1679 π 800-295-5510 H-2331 uline.mx BÁSCULA CON PATÍN HIDRÁULICO INFORMACIÓN GENERAL EVITE COLOCAR LA BÁSCULA EN UBICACIONES QUE PUEDAN AFECTAR LA PRECISIÓN: 1. Temperaturas extremas: No colocar bajo la luz solar directa o cerca de rejillas de ventilación de aire acondicionado.
- Page 22 TABLA DE CONTENIDOS ESPECIFICACIONES PANTALLA LCD CARACTERES DE LA PANTALLA CONTROLES 27-28 ENSAMBLE SEGURIDAD 30-34 FUNCIONAMIENTO BATERÍA MANTENIMIENTO/ 36-37 CALIBRACIÓN 37-40 DIAGRAMAS DE PARTES CÓDIGOS DE ERROR 22 of 62 0319 IH-1679...
-
Page 23: Especificaciones
ESPECIFICACIONES BÁSCULAS CON PATÍN HIDRÁULICO H-1679 Y H-2331 MODELO H-1679 H-2331 Peso de Levantamiento 2,267 kg (5,000 lbs.) Máx. Altura Mín. de Horquilla 8.5 cm (3⁄") Altura Max. de Horquilla 19.1 cm (7½") 1.21 m (48") 1.16 m (46") Longitud de Horquilla Ancho Total de Horquilla 68.6 cm (27") -
Page 24: Pantalla Lcd
PANTALLA LCD 24 of 62 0319 IH-1679... -
Page 25: Caracteres De La Pantalla
CARACTERES DE LA PANTALLA CARACTER PANTALLA CARACTER PANTALLA 25 of 62 0319 IH-1679... -
Page 26: Controles
CONTROLES función primaria función secundaria Tecla ON/OFF: Tecla de acumulación (M+): Enciende o apaga la unidad. Añade el valor a la memoria de acumulación. Ponga la pantalla en cero y presione esta tecla para mostrar el valor total actual. Espacio a la izquierda ' < ' para Tecla Cero (ZERO): cambiar distintos números en la Pone la pantalla en cero para... -
Page 27: Ensamble
INSTRUCCIONES DE ENSAMBLE I. DESEMPAQUE CON CUIDADO 3. Alinee los orificios de montaje del patín hidráulico con los orificios de montaje TODOS LOS ARTÍCULOS del panel de control. (Vea Diagrama 4) Saque el panel de control del Diagrama 4 empaque de protección. (Vea Diagrama 1) Diagrama 1 4. - Page 28 CONTINUACIÓN DE INSTRUCCIONES DE ENSAMBLE III. INSTALACIÓN DEL ASA 5. Fije el asa a la base (103) usando 3 tornillos hexagonales (H109) y 3 Saque el asa de su envoltura protectora. rondanas de resorte (H110) y apriete con la llave hexagonal incluida. (Vea 2.
-
Page 29: Seguridad
SEGURIDAD NOTA DE SEGURIDAD Para la operación segura del patín, lea todas las instrucciones y advertencias de seguridad que aparecen aquí o en el patín antes de usarlo. 1. No opere el patín hidráulico a menos 6. No maneje cargas inestables ni que esté... -
Page 30: Funcionamiento
FUNCIONAMIENTO ASEGÚRESE QUE LAS HORQUILLAS ESTADO DE LA BATERÍA SUBAN/BAJEN CORRECTAMENTE (INDICADOR DE LED) La palanca de control (H106) está ubicada • Verde: La batería está completamente cargada. en el asa del patín hidráulico (H101) y se puede colocar en 3 posiciones: LOWER •... - Page 31 FUNCIONAMIENTO PALANCA DE CONTROL Presione la tecla TARE para tarar la báscula. El peso que se mostraba se almacenará La palanca de control (H106) tiene tres como valor de tara y dicho valor se restará posiciones (vea abajo). del valor mostrado en la pantalla. La pantalla se muestra a cero.
- Page 32 CONTINUACIÓN DE FUNCIONAMIENTO SELECCIONAR LAS UNIDADES PRETARA DE PESAJE Para fijar, presione y mantenga presionada la tecla PT durante 3 Presione la tecla U para seleccionar la segundos para mostrar el valor de tara unidad de pesaje deseada (lbs o kg). actual.
- Page 33 CONTINUACIÓN DE FUNCIONAMIENTO PARÁMETROS 6. Use la tecla "U" para dejar un parámetro sin cambiar. La báscula dispone de parámetros que el Por ejemplo, cuando la pantalla usuario puede establecer. muestre "F1 unit" presione la tecla ZERO Para establecer parámetros, presione para comenzar.
- Page 34 CONTINUACIÓN DE FUNCIONAMIENTO TABLA DE CONFIGURACIÓN DE FUNCIONES FUNCIÓN FUNCIÓN DESCRIPCIÓN VALOR SECUNDARIA PREDETERMINADO F1 u nt Configura la unidad de pesaje kg/lbs mostrada. Seleccionar entre kg/lbs. F2 dat La báscula mostrará en principio a-m-d o d-m-a, que 2000/01/01 equivale al formato de la fecha (año-mes-día o día-mes- 00:00 año).
- Page 35 FUNCIONAMIENTO DE LA BATERÍA VIDA ÚTIL DE LA BATERÍA RENDIMIENTO DE LA BATERÍA El indicador de pesaje está operado por Utilice siempre baterías y un adaptador AC una batería. La vida útil de la batería es de originales. La báscula no ha sido creada aproximadamente 60 horas.
-
Page 36: Mantenimiento
MANTENIMIENTO REVISIÓN DIARIA Y MANTENIMIENTO Temperatura Aceite Las revisiones diarias del patín hidráulico -5 °C ~ +45 °C Aceite hidráulico pueden ayudar a evitar accidentes. Preste L-HM68 (equivalente a ISO especial atención a las llantas (127), los ejes VG68) (109), el asa (H101), las horquillas y la palanca de control (H106). -
Page 37: Diagramas De Partes
CONTINUACIÓN DE CALIBRACIÓN Una vez introducido el peso, presione La pantalla volverá a su estado la tecla ZERO para confirmarlo. La normal una vez que la calibración se pantalla mostrará "LOAD". haya realizado con éxito. Si aparece un mensaje de error, vuelva a repetir Coloque el peso de calibración los pasos para la calibración, alguna sobre las horquillas. - Page 38 CONTINUACIÓN DE DIAGRAMA DE PARTES H101 H102 H103 H104 H111 H105 H112 H106 H107 H108 H109 H110 NO. DE PARTE NOMBRE DE LA PARTE CANT. H101 H102 Perno con Resorte H103 Resorte de Ballesta H104 Perno con Resorte H105 Perno con Resorte H106 Palanca de Control H107...
- Page 39 CONTINUACIÓN DE DIAGRAMA DE PARTES 157-1 158H 159H 108107 106 105 104 103 102 160H 161H 162H 163H 164H 112 113 165H 114 115 166 118 139H 122H 154 155 39 of 62 0319 IH-1679...
- Page 40 LISTA DE PARTES NO. DE PARTE NOMBRE DE LA PARTE CANT. NO. DE PARTE NOMBRE DE LA PARTE CANT. Bola de Acero Anillo-o Regulador de Presión Varilla Tornillo Base 139H Eslabón de la Manivela Rodillo de Acero Tornillo de Ajuste Casquillo Tuerca Clavija...
-
Page 41: Códigos De Error
CÓDIGOS DE ERROR CÓDIGOS DESCRIPCIÓN RESOLUCIÓN DE ERROR ----- Sobrecarga Retire el peso de la báscula. Si el problema continúa, llame a la línea de Servicio a Clientes de Uline. Err 1 Error en la configuración Ingrese la fecha con el formato correcto. de la fecha Formato: aa:mm:dd Err 2... - Page 42 H-1679 π 1-800-295-5510 H-2331 uline.ca TRANSPALETTE PESEUR RENSEIGNEMENTS GÉNÉRAUX ÉVITEZ DE PLACER LA BALANCE DANS DES ENDROITS OÙ SA PRÉCISION PEUT ÊTRE COMPROMISE : 1. Températures extrêmes : Ne placez pas la balance au soleil ou près de bouches de climatisation. 2. Gardez la balance au sec : Ne placez pas la balance dans des endroits très humides ou mouillés.
- Page 43 TABLE DES MATIÈRES SPÉCIFICATIONS ÉCRAN D'AFFICHAGE ACL CARACTÈRES D'AFFICHAGE COMMANDES 48-49 ASSEMBLAGE SÉCURITÉ 51-55 FONCTIONNEMENT BATTERIE 57-58 ENTRETIEN/ÉTALONNAGE 58-61 SCHÉMAS DES PIÈCES CODES D'ERREUR 43 of 62 0319 IH-1679...
-
Page 44: Spécifications
SPÉCIFICATIONS H-1679 ET H-2331 TRANSPALETTES PESEURS MODÈLE H-1679 H-2331 Capacité de levage 2 2268 kg (5 000 lbs.) maximale Hauteur minimale des 8,5 cm (3⁄ po) fourches Hauteur maximale des 19,1 cm (7½ po) fourches Longueur des fourches 1,21 m (48 po) 1,16 m (46 po) Largeur hors tout des 68,6 cm (27 po) 54,6 cm (21½ po) -
Page 45: Écran D'affichage Acl
AFFICHAGE ACL 45 of 62 0319 IH-1679... -
Page 46: Caractères D'affichage
CARACTÈRES D'AFFICHAGE CARACTÈRE AFFICHAGE CARACTÈRE AFFICHAGE 46 of 62 0319 IH-1679... -
Page 47: Commandes
COMMANDES Fonction principale Fonction secondaire Touche ON/OFF (marche/arrêt) : Touche d'accumulation « M+ » : Allume ou éteint l'appareil. Ajoute la valeur à la mémoire accumulée. Réinitialisez l'affichage et appuyez sur cette touche pour afficher la valeur totale actuelle. Les espaces à gauche « < » Touche Zero «... -
Page 48: Assemblage
INSTRUCTIONS D'ASSEMBLAGE I. DÉBALLEZ SOIGNEUSEMENT TOUS 3. Alignez les trous de montage du transpalette avec ceux du panneau de LES ÉLÉMENTS commande. (Voir Figure 4) 1. Retirez le panneau de commande de la Figure 4 mousse d'emballage. (Voir Figure 1) Figure 1 4. À l'aide de la clé hexagonale fournie, insérez et serrez trois vis à... -
Page 49: Figure
INSTRUCTIONS D'ASSEMBLAGE SUITE III. INSTALLATION DE LA POIGNÉE 5. À l'aide de trois vis à tête hexagonale (H109) et trois rondelles à ressort (H110), 1. Retirez la poignée de l'emballage fixez la poignée à la base (103), et protecteur. serrez à l'aide de la clé hexagonale fournie. -
Page 50: Sécurité
SÉCURITÉ REMARQUES PORTANT SUR LA SÉCURITÉ Afin d'assurer un fonctionnement sécuritaire du transpalette, veuillez lire tous les avertissements et consignes qui figurent dans ce guide et sur le transpalette avant l'utilisation. 1. N'utilisez pas le transpalette si vous 5. Il est recommandé à l'opérateur de porter n'avez pas une bonne connaissance des gants et des chaussures de sécurité... - Page 51 FONCTIONNEMENT DE BASE ASSUREZ-VOUS QUE LES FOURCHES SE LÈVENT ET S'ABAISSENT ADÉQUATEMENT Le levier de commande (H106) est situé sur la poignée (H101) du transpalette et peut prendre trois positions : LOWER, NEUTRAL et ASCENT (DESCENDRE, NEUTRE et MONTER) 1. Serrez la vis de réglage (140) sur la manivelle (139H) jusqu'à...
-
Page 52: Fonctionnement
FONCTIONNEMENT LEVIER DE COMMANDE de tare et soustrait de l'affichage. Le chiffre zéro s'affiche. Le levier de commande (H106) peut être L'indicateur « GROSS » s'éteindra et « NET » réglé dans trois positions (voir ci-dessous). s'allumera. Lorsque vous ajouterez un produit, seul le poids du produit s'affichera. LOWER : La balance pourrait être tarée une Poussez le levier vers le... - Page 53 FONCTIONNEMENT SUITE ACCUMULATION 3. Après avoir saisi la valeur de la tare prédéfinie, appuyez sur la touche ZERO. REMARQUE : Avant d'utiliser la fonction 4. Pour saisir manuellement une valeur de Accumulation, retirez tout poids des tare, utilisez la touche TARE afin de fourches et réinitialisez la balance.
- Page 54 FONCTIONNEMENT SUITE 3. Appuyer sur la touche TARE permettra 5. Il pourrait être nécessaire d'utiliser la de passer d'une fonction à la suivante. touche TARE pour définir une valeur ou d'utiliser les touches M+ et PT pour 4. Appuyer sur la touche ZERO vous déplacer le chiffre actif pour ensuite permettra de définir la fonction.
-
Page 55: Figure
FONCTIONNEMENT SUITE TABLEAU DE RÉGLAGE DES FONCTIONS FONCTION SOUS-FONCTION DESCRIPTION VALEUR PAR DÉFAUT F1 u nt Configurez l'unité de pesage affichée. kg/lb Sélectionnez kg/lb. F2 dat La balance affichera d'abord y-n-d ou d-n-y; il s'agit du 2000/01/01 format de date (année-mois-jour ou jour-mois-année). Puis 00:00 vous devez configurer l'année, le mois et le jour. - Page 56 FONCTIONNEMENT DE LA BATTERIE DURÉE UTILE DE LA BATTERIE RENDEMENT DE LA BATTERIE L'indicateur de pesage fonctionne grâce à Utilisez toujours des batteries et un la batterie. La durée utile de la batterie est adaptateur c.a. originaux. La balance d'environ 60 heures. n'est pas adaptée pour une utilisation avec d'autres batteries et/ou chargeurs non INDICATEUR DE DÉCHARGE...
-
Page 57: Entretien/Étalonnage
ENTRETIEN VÉRIFICATION ET ENTRETIEN QUOTIDIENS 2. Utilisez une huile de type hydraulique en fonction de l'échelle de température La vérification quotidienne du transpalette ci-dessous. contribue à la prévention des accidents. Portez une attention spéciale aux roues Température Huile (127), aux essieux (109), à la poignée (H101), -5 °C ~ +45 °C L-HM68 Huile... - Page 58 ÉTALONNAGE SUITE 5. Après avoir saisi le poids, appuyez sur L'affichage retourne à la normale la touche ZERO pour entrer. L'affichage dès que l'étalonnage est réussi. Si un indiquera « LOAD ». message d'erreur s'affiche, refaites les étapes d'étalonnage; une perturbation 6. Ajoutez le poids d'étalonnage aux pourrait être à...
-
Page 59: Schémas Des Pièces
SCHÉMAS DES PIÈCES SUITE H101 H102 H103 H104 H111 H105 H112 H106 H107 H108 H109 H110 DE PIÈCE NOM DE LA PIÈCE QTÉ H101 Poignée H102 Cheville de ressort H103 Lame de ressort H104 Cheville de ressort H105 Cheville de ressort H106 Levier de commande H107... - Page 60 SCHÉMAS DES PIÈCES SUITE 157-1 158H 159H 108107 106 105 104 103 102 160H 161H 162H 163H 164H 112 113 165H 114 115 166 118 139H 122H 154 155 60 of 62 0319 IH-1679...
- Page 61 NOMENCLATURE DE PIÈCE NOM DE LA PIÈCE QTÉ DE PIÈCE NOM DE LA PIÈCE QTÉ Bille d'acier Joint torique de régulation de pression Tige Base 139H Bielle de manivelle Galet en acier Vis de réglage Bague Écrou Broche Broche parallèle Arbre Couvercle de retenue Bague de retenue...
-
Page 62: Codes D'erreur
CODES D'ERREUR CODES D'ERREUR DESCRIPTION RÉSOLUTION ----- Surcharge Retirer du poids de la balance. Si le problème persiste, communiquer avec le service à la clientèle Uline. Err 1 Erreur de définition Inscrire la date dans le bon format. de date Format : aa:mm:jj Err 2 Erreur de réglage...
Need help?
Do you have a question about the H-1679 and is the answer not in the manual?
Questions and answers
Need a colored wiring diagram for mother board.