Table of Contents
Advertisement
Quick Links
Advertisement
Chapters
Table of Contents

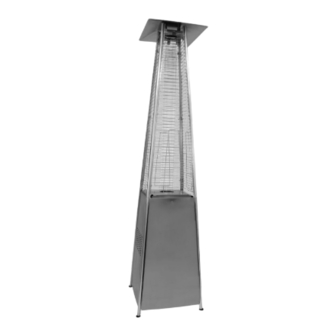
Summary of Contents for Alva GHP20
- Page 2 DO NOT use this patio heater if you do not clearly understand the instructions and/or how to operate the controls. • Phone the customer care line at 086 100 ALVA (2582) or email info@stingray.co.za for assistance. • DO NOT store flammable materials or another cylinder near the patio heater.
- Page 3 HEATER SET UP LOCATION LEAK TEST Danger USING YOUR HEATER FLASHBACK (Flames in the burner tube) Contact an approved CHANGING YOUR CYLINDER ALVA technician. MAINTENANCE FREQUENTLY ASKED QUESTIONS TROUBLE SHOOTING GUIDE Do It Yourself SPECIFICATIONS AFTER SALES SERVICE Instructional video available...
-
Page 4: Warranty
PLEASE RETAIN YOUR PROOF OF PURCHASE FOR WARRANTY CLAIMS. Thank you for your purchase of this ALVA warrants this appliance to be free of defects in material and instant infrared heater. quality for a period of 12 months from date of original purchase. Please read these This warranty covers the intended use of this appliance –... - Page 5 • PARTS DIAGRAM 650 mm Flame Screen / Glass Tube Protective Guard Upper Support Front Panel Side Panel Lower Support Bottom plate Refer to your ‘Key’ on the index page. 730 mm...
-
Page 6: Exploded View
• EXPLODED VIEW... -
Page 7: Parts Listing And Tools Required
PARTS LISTING AND TOOLS REQUIRED PARTS SUPPLIED QUANTITY Reflector Flame Screen Upper Glass Tube Upper Support Protective Guard Black Silicone Ring Side Panel Front Panel Gas Hose and Regulator Control Box Assy Lower Support Block Belt Wheel Assembly Bottom plate Wing Nut Fixing Bracket Small flat washer... -
Page 8: Assembly
Assembly of the heater involves large components and it is advisable to have two people to assemble the unit. This patio heater makes use of an industrial cylinder (9kg ALVA cylin- der recommended) with a 5/8” BSP thread; horizontal exit valve. - Page 9 Nose cone sealing washer Fig.B bolts that have come loose. STEP 1 Assemble the wheel assembly to the bottom plate. Fix the wheel assembly to the bottom plate using 4pcs bolt M6X12 and 4pcs...
-
Page 10: Upper
STEP 2 Insert the pins of the base to the holes of lower support, press to secure the pins. Using 4pcs screw M5x12 to secure the lower support and base. Insert the pins of the control box assy to the holes of upper support, press to secure the pins. -
Page 11: Lower
STEP 4 Assemble the middle support. Insert the 4pcs upper support to the lower support. Secure them with 8pcs screw 3/16”. STEP 5 3/16”. - Page 12 STEP 6 Secure them with 3pcs washer Φ6 and 3pcs wing nut. STEP 7 To aid in installation place black silicone ring on the middle plate and then install glass tube. Ensure the rim of the glass tube sits silicone ring. WARNING! Black Silicone Ring The black silicone...
-
Page 13: Front
STEP 8 Assemble the protective guard. Hang the hooks of the protec- tive guard onto the holes in the supports. Secure the protective STEP 9 Note : Do not cover the front side where the control knob is. Attach the three side panels to the heater using 18pcs 3/16”... -
Page 14: Side
STEP 10 Place the control knob onto the M4x10 screw. Hang the chain to the hole on the control box assembly and align the hooks of the front panel to the holes in the bottom plate. STEP 11 Warning : Ensure the hose does not make contact with any high temperature... -
Page 15: Location
“IMPORTANT cool, well-ventilated area and SAFETY contact Alva on 086 100 ALVA INFORMATION” (2582). section of this manual. Connections to be leak tested • A leak between the heater and... -
Page 16: Using Your Heater
If the heater does not ignite the first time, wait for 5 minutes normal when the and repeat the lighting instructions. If you still experience burner is extin- ignition problems, contact 086 100 ALVA (2582) for assis- guished). tance. •... -
Page 17: Flashback (Flames In The Burner Tube)
FLASHBACK (flames in the burner tube) If a flash back occurs (indicated by a roaring noise), immediately close the cylinder valve. • Turn the heater OFF at the control knob. • Disconnect the regulator and allow the heater to cool. • Check for blockages in the burner head. Clean with com- pressed air, a small soft brush or pipe cleaners. -
Page 18: Maintenance
Clean with a soft brush or blow clean with compressed air. If any part of the heater is in need of replacing, use only original Alva parts. Using any other spare parts is dangerous and will void the warranty. When the heater is not in use for extended periods ,always keep the burner head covered. -
Page 19: Frequently Asked Questions
Disconnect the cylinder and store seperately in a protected dry and cool place. Alva recommends that you cover your heater. FREQUENTLY ASKED QUESTIONS Q: Why is there an odour when I use a gas heater? All gas appliances give off an odour. -
Page 20: Trouble Shooting Guide
Turn valve to ON Thermocouple bad Replace thermocouple Not in correct Position properly and location retry SPECIFICATIONS Model ALVA GHP20 Type of Gas Operating pressure 2.8kPa Injector size 1.65mm (Main burner) 0.18mm (Pilot burner) Gas Consumption 945gr/hr at MAX Heat output 13kW This appliance operates with a Bullnose 5/8”... -
Page 21: After Sales Service
AFTER SALES SERVICE MANUFACTURED AND DISTRIBUTED BY Alva Marketing (Pty) Ltd P.O. Box 30014 Tokai, 7966 Tel: 021 442 1540 E-mail: info@stingray.co.za www.alva.co.za @StingrayGroupSA www.facebook.com/AlvaGas TOLL FREE NUMBER 086 100 ALVA (2582)

Need help?
Do you have a question about the GHP20 and is the answer not in the manual?
Questions and answers