Table of Contents
Advertisement
SERVICE, INSTALLATION, AND INSTRUCTION MANUAL
For AUTHORIZED PARTS or TECHNICAL SERVICE, please contact:
1-877-368-2797
FOR SOME MODELS the POWER SUPPLY CORD is NOT INCLUDED.
MUST HAVE A 3-PRONG GROUNDING PLUG.
3355 Enterprise Avenue, Suite 160, Fort Lauderdale, FL 33331
BC360N-BC360NH
BC370N-BC370NH
BC500N-BC500NH
BC650N-BC650NH
BC1000N-BC1000NH
COMMERCIAL ICE MACHINE
PLEASE READ CAREFULLY
Page | 1
Advertisement
Table of Contents

Related Manuals for BERG BC360N


Summary of Contents for BERG BC360N
- Page 1 For AUTHORIZED PARTS or TECHNICAL SERVICE, please contact: 1-877-368-2797 FOR SOME MODELS the POWER SUPPLY CORD is NOT INCLUDED. MUST HAVE A 3-PRONG GROUNDING PLUG. 3355 Enterprise Avenue, Suite 160, Fort Lauderdale, FL 33331 BC360N-BC360NH BC370N-BC370NH BC500N-BC500NH BC650N-BC650NH BC1000N-BC1000NH COMMERCIAL ICE MACHINE...
-
Page 2: Table Of Contents
Ice-Making System Cleaning Condenser Cleaning TROUBLESHOOTING GUIDE TROUBLESHOOTING Berg reserves the right to make specifications and design changes without prior notice. NOTICE: This instruction manual is for the models noted on the front over. Ice storage bins are NOT INCLUDED. -
Page 3: Ice Maker Safety
ICE MAKER SAFETY Always read and obey all safety messages. This is the Safety Alert Symbol This symbol alerts you to potential hazards that can injure or kill you and others All safety messages will follow the Safety Alert Symbol and either the words “DANGER”, “WARNING” OR “CAUTION”. DANGER DANGER means that failure to heed this safety statement may result in death or severe personal injury. -
Page 4: Important Safeguards
IMPORTANT SAFEGUARDS Before the ice maker is used, it must be properly positioned and installed as described in this manual, so read the manual carefully We strongly recommend that you have a professional install your new machine The warranty may be affected or voided by an incorrect installation. To reduce the risk of fire, electrical shock or injury when using the ice maker, follow basic precautions, including the following: DANGER... -
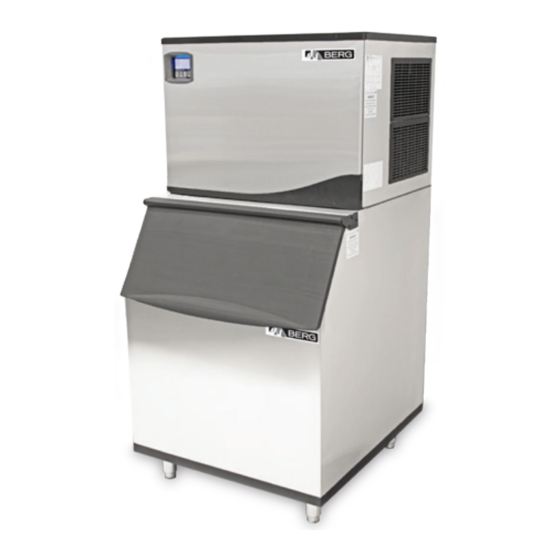
Page 5: Major Features
Periodically draining water allows more pure ice and keep minimum mineral buildup. A sensitive probe and accurate timer enhance the performance of the ice maker. Technical Information MODEL BC360N/360NH BC370N/370NH BC500N/500NH BC650N/650NH BC1000N/1000NH Electrical input 115VAC / 60Hz 115VAC / 60Hz... -
Page 6: Introduction
UL563 and sanitation standard NSF12. The Legacy Companies assumes no liability or responsibility of any kind for products manufactured by Berg , that have been altered in any way, including the use of any parts and/or other components not specifically approved by The Legacy Companies. -
Page 7: Ice Maker Installation
Ice Maker Installation POWER SUPPLY CORD - NOT INCLUDED. MUST HAVE A 3-PRONG GROUNDING PLUG. UNPACKING WARNING Excessive Weight Hazard Use two or more persons to move and install ice maker. Failure to do so may result in back or other injury. This unit is an ice maker only. - Page 8 INSTALLATION CLEARANCE TOP VIEW of ICE MACHINE REAR VIEW of ICE MACHINE Page | 8...
-
Page 9: Electrical Requirements
REAR VIEW if ATTACHING to an ICE BIN The (2) security latch holes are used when securing to an ice bin. Connection Brackets Rear of Ice Storage Bin Drain TO INSTALL ICE MACHINE to a ICE STORAGE BIN Two connecting brackets are attached to the upper rear edge of the ice storage bin. •... -
Page 10: Connecting The Power Supply Line
RECOMMENDED GROUNDING METHOD POWER SUPPLY CORD - NOT INCLUDED. MUST HAVE A 3-PRONG GROUNDING PLUG. For your personal safety, this appliance must be grounded. To minimize possible shock hazard, the cord must be plugged into a mating 3-pronged and grounding-type wall receptacle, grounded in accordance with the National Electrical Code and local codes and ordinances. -
Page 11: Installation Types
INSTALLATION TYPES This ice maker has only been designed for mobile (free-standing) installation Mobile installation: An enclosed installation will allow you to install the ice cube machine under a counter or in a kitchen cabinet provided the required clearance space around the ice maker is respected.. You must follow the stated instructions for: a Electrical requirements b Water supply... - Page 12 OPERATION OF THE CONTROL PANEL: 1. When the unit is plugged in and turn on the power switch. Only “OFF” displays on the LCD screen. 2. Press the ON/OFF button, the LCD screen lights. If normal, only the words of “Water Fill” and “3 Min To End” displays on the LCD screen. The ice maker will start to make ice automatically when the words of “3 Min To End”...
- Page 13 Additional Functions: Draining Function: press the “Clean” button and hold for 6 seconds, the machine will go into the draining water mode automatically. The words of “Purging Water” appear on the LCD screen. The words disappear after 3 minutes and the draining process stops.
-
Page 14: Normal Sounds
HOW THE ICE MACHINES MAKES ICE Turn the power switch to the ON position. Then press ON/OFF button in front panel. The LCD screen lights. After about 3 minutes the machine will automatically go into the ice-making stage. There are two distinct cycles: freeze and harvest. In the freeze cycle, water flows to the evaporator surface. -
Page 15: Cleaning And Maintenance
Cleaning and Maintenance CAUTION If the ice maker is left unused for a long time, before the next use it must be thoroughly cleaned Follow carefully any instructions provided for cleaning or use of sanitizing solution Do not leave any solution inside the ice maker after cleaning. -
Page 16: Water Distribution Tube Cleaning
Cleaning and Maintenance WARNING DO NOT use solvent-based cleaning agents or abrasives on the interior These cleaners may transmit taste to the ice cubes, or damage or discolor the interior. WATER DISTRIBUTION TUBE CLEANING When you find that the ice cubes are incompletely formed or the output of ice cubes is low, the water distribution tube may be blocked Set the power switch to OFF Unscrew the six screws holding the top panel and remove the panel You will see the water distribution tube Rotate the water distribution tube so that the holes in it are facing up Using a toothpick or similar tool, dredge the holes, then rotate the... -
Page 17: Condenser Cleaning
WARNING The ice machine cleaner contains acids. DO NOT use or mix with any other solvent-based cleaner products. Use rubber gloves to protect hands. Carefully read the material safety instructions on the container of the ice machine cleaner. DISCARD the first batch of ice produced after cleaning. -
Page 18: Troubleshooting Guide
Troubleshooting Guide PROBLEM POSSIBLE CAUSE PROBABLE CORRECTION The ice maker is unplugged Plug the ice maker in Replace fuse If it happens again, The fuse is blown The machine call for service to check for a short doesn't circuit in the ice maker operate The ice maker power switch is Turn the ice maker power switch ON...
Need help?
Do you have a question about the BC360N and is the answer not in the manual?
Questions and answers