Lenovo 300e Chromebook 2nd Gen Hardware Maintenance Manual
Hide thumbs
Also See for 300e Chromebook 2nd Gen:
- Hardware maintenance manual (61 pages) ,
- Manual (9 pages) ,
- Troubleshooting (5 pages)
Table of Contents
Advertisement
Advertisement
Table of Contents

Related Manuals for Lenovo 300e Chromebook 2nd Gen


Summary of Contents for Lenovo 300e Chromebook 2nd Gen
- Page 1 Hardware Maintenance Manual Lenovo 300e/500e Chromebook 2nd Gen...
- Page 2 First Edition (March 2019) © Copyright Lenovo 2019. LIMITED AND RESTRICTED RIGHTS NOTICE: If data or software is delivered pursuant to a General Services Administration “GSA” contract, use, reproduction, or disclosure is subject to restrictions set forth in Contract No. GS-...
-
Page 3: Table Of Contents
LCD FRUs and CRUs ... Trademarks ....lv Miscellaneous parts ... © Copyright Lenovo 2019... - Page 4 Hardware Maintenance Manual...
-
Page 5: About This Documentation
• This documentation applies to the following product models. Machine type Model name Lenovo 300e Chromebook 2nd Gen 81MB Lenovo 500e Chromebook 2nd Gen 81MC • To improve readability, this manual commonly takes Lenovo 500e Chromebook 2nd Gen as an example. © Copyright Lenovo 2019... - Page 6 Hardware Maintenance Manual...
-
Page 7: Chapter 1. Safety Information
Chapter 1. Safety information This chapter presents the safety information that you need to be familiar with before you service a Lenovo notebook computer. This chapter contains the following topics: “General safety” on page 1 “Electrical safety” on page 1 “Safety inspection guide”... -
Page 8: Safety Inspection Guide
Important: Use only approved tools and test equipment. Some hand tools have handles covered with a soft material that does not insulate you when working with live electrical currents.Many customers have, near their equipment, rubber floor mats that contain small conductive fibers to decrease electrostatic discharges. Do not use this type of mat to protect yourself from electrical shock. -
Page 9: Handling Devices That Are Sensitive To Electrostatic Discharge
4. Check for cracked or bulging batteries. 5. Remove the cover. 6. Check for any obvious non-Lenovo alterations. Use good judgment as to the safety of any non-Lenovo alterations. 7. Check inside the unit for any obvious unsafe conditions, such as metal filings, contamination, water or other liquids, or signs of fire or smoke damage. -
Page 10: Grounding Requirements
• Use a grounded work mat to provide a static-free work surface. The mat is especially useful when handling ESD-sensitive devices. • Select a grounding system, such as those listed below, to provide protection that meets the specific service requirement. Note: The use of a grounding system to guard against ESD damage is desirable but not necessary. - Page 11 DANGER DANGER DANGER DANGER DANGER DANGER Chapter 1 Safety information...
- Page 12 Hardware Maintenance Manual...
- Page 13 PERIGO PERIGO Chapter 1 Safety information...
- Page 14 PERIGO PERIGO PERIGO PERIGO PERIGO Hardware Maintenance Manual...
- Page 15 PERIGO DANGER DANGER DANGER DANGER Chapter 1 Safety information...
- Page 16 DANGER DANGER DANGER DANGER VORSICHT Hardware Maintenance Manual...
- Page 17 VORSICHT VORSICHT VORSICHT VORSICHT Chapter 1 Safety information...
- Page 18 VORSICHT VORSICHT VORSICHT Hardware Maintenance Manual...
- Page 19 Chapter 1 Safety information...
- Page 20 Hardware Maintenance Manual...
- Page 21 Chapter 1 Safety information...
- Page 22 Hardware Maintenance Manual...
- Page 23 Chapter 1 Safety information...
- Page 24 Hardware Maintenance Manual...
- Page 25 Chapter 1 Safety information...
- Page 26 Hardware Maintenance Manual...
-
Page 27: Chapter 2. General Checkout
The following are not covered under warranty: • LCD panel cracked from the application of excessive force or from being dropped • Scratched (cosmetic) parts • Distortion, deformation, or discoloration of the cosmetic parts © Copyright Lenovo 2019... -
Page 28: Checking The Ac Power Adapter
• Plastic parts, latches, pins, or connectors that have been cracked or broken by excessive force • Damage caused by liquid spilled into the system • Damage caused by the improper insertion of a personal-computer card (PC card) or the installation of an incompatible card •... -
Page 29: Chapter 3. Create And Use A Usb Repair Shim
Step 2. Download the image file of the repair shim from . A Lenovo service http://www.lenovo.com/support credential is needed to download the image file. Attention: Make sure to download the latest version of the image file. A shim created with an earlier version of the image file may cause the repair process to fail. -
Page 30: Factory Test Items
If the system board is replaced, you are required to enter the VPD. Note: The VPD is a 20 — character string. Table 1. Combination of the 20 – character VPD Preceding characters Machine type Model number “1S”, 2 digits 7 digits 3 digits 8 digits... - Page 31 Table 2. Factory test items (continued) FATP Test The FATP Test is designed to test the individual component to verify its function, such as the display, audio, camera, keyboard, and other components. It is recommended that you run all the FATP Test items. Some test items might require an HDMI monitor or an SD card.
- Page 32 Hardware Maintenance Manual...
-
Page 33: Chapter 4. Identifying Frus (Crus)
Lenovo will ship the CRU to you. CRU information and replacement instructions are shipped with your product and are available from Lenovo at any time upon request. You can find a list of CRUs for your product in this Hardware Maintenance Manual. An electronic version of this manual can be found at . -
Page 34: Major Frus And Crus
Major FRUs and CRUs Figure 1. 300e/500e Chromebook 2nd Gen exploded view Hardware Maintenance Manual... - Page 35 Note: Depending on the computer model, your computer might look different from the illustration above. Table 3. Major FRUs and CRUs FRU description Self-service CRU Optional-service CRU LCD module Upper case (with keyboard) System board Bracket (L) Speakers Worldfacing camera Wireless module Straight power board cable Power board...
-
Page 36: Lcd Frus And Crus
LCD FRUs and CRUs Figure 2. LCD module – exploded view Hardware Maintenance Manual... -
Page 37: Miscellaneous Parts
• Screw M1.6 x L1.5, silver (3) • Screw M2.5 x L6, black (9) ac power adapter Power cord Rubber pack Thermalpad Looking up FRU information For detailed FRU information, including part numbers, descriptions, and substitution part numbers, go to: https://support.lenovo.com/partslookup Chapter 4 Identifying FRUs (CRUs) - Page 38 Hardware Maintenance Manual...
-
Page 39: Chapter 5. Removing A Fru Or Cru
6. If screws are missing, look up details in “Miscellaneous parts” on page 31 for replacement screws and order them through the Lenovo CRM system. 7. When replacing the base cover, reapply all labels that come with the replacement base cover. If some original labels are not included with the replacement base cover, peal them off from the original base cover and paste them on the replacement base cover. -
Page 40: Remove The Stylus Pen
Type sudo bash and press enter. Step 6. Type ectool batterycutoff and press enter. Step 7. When the message SUCCESS. The battery has arranged a cut-off and the system should be Step 8. shutdown immediately. is printed, disconnect the ac power adapter from the computer and the computer turns off immediately. -
Page 41: Remove The Battery Pack
Screw specifications Number of screws M2.5 x 6 Step 2. Remove the lower case. Figure 5. Remove the lower case Refer to “Major FRUs and CRUs” on page 28 to look up details about the following replacement part: Lower case Remove the battery pack Make sure the following FRUs (or CRUs) have been removed. - Page 42 Figure 7. Remove the power board cable Step 3. Remove the 4 screws. Figure 8. Remove the 4 screws Number of screws Screw specifications M2.0 x 4 Step 4. Take out the battery pack. Figure 9. Take out the battery pack Refer to “Major FRUs and CRUs”...
-
Page 43: Remove The Wireless Module
Remove the wireless module Make sure the following FRUs (or CRUs) have been removed. “Remove the Stylus Pen” on page 34 “Remove the lower case” on page 34 “Remove the battery pack” on page 35 Step 1. Detach the main and auxiliary antenna cable connectors. Figure 10. -
Page 44: Remove The Speakers
Figure 12. Remove the wireless module Refer to “Major FRUs and CRUs” on page 28 to look up details about the following replacement part: Wireless module Remove the speakers Make sure the following FRUs (CRUs) have been removed. “Remove the Stylus Pen” on page 34 “Remove the lower case”... -
Page 45: Remove The Power Board
Figure 14. Remove the 2 screws Screw specifications Number of screws M2.0 x 2.5 Step 3. Remove the speakers. Figure 15. Remove the speakers Refer to “Major FRUs and CRUs” on page 28 to look up details about the following replacement parts: speakers Remove the power board Make sure the following FRUs (or CRUs) have been removed. - Page 46 Figure 16. Detach the cable connector Step 2. Remove the 4 screws. Figure 17. Remove the 4 screws Screw specifications Number of screws M2.0 x 4 Step 3. Remove the power board and bracket. Figure 18. Remove the power board and bracket Refer to “Major FRUs and CRUs”...
-
Page 47: Remove The System Board
power board power board bracket Remove the system board Make sure the following FRUs (or CRUs) have been removed. “Remove the Stylus Pen” on page 34 “Remove the lower case” on page 34 “Remove the battery pack” on page 35 “Remove the wireless module”... -
Page 48: Remove The Worldfacing Camera (For Selected Models)
Step 3. Carefully remove the system board and bracket. Figure 21. Remove the system board Refer to “Major FRUs and CRUs” on page 28 to look up details about the following replacement parts: System board Bracket Remove the WorldFacing camera (for selected models) Make sure the following FRUs (or CRUs) have been removed. -
Page 49: Remove The Upper Case (With Keyboard)
Figure 23. Remove the WorldFacing camera Refer to “Major FRUs and CRUs” on page 28 to look up details about the following replacement part: WorldFacing camera (for selected models) Remove the upper case (with keyboard) Make sure: • The LCD cable connector has been detached from the system board. •... -
Page 50: Disassemble The Lcd Module
Figure 25. Open the hinges Step 3. From the upper edge, slowly and carefully lift up the upper case. Figure 26. Remove the upper case (with keyboard) Attention: Do not pull up the upper case before detaching the antenna cable connectors and LCD cable connector. - Page 51 Figure 27. Remove the screw rubbers Step 2. Remove the 2 screws. Figure 28. Remove the 2 screws Number of screws Screw specifications M2.0 x 3 Step 3. Carefully remove the strip cover. Figure 29. Remove the strip cover Step 4. Remove the 3 screws.
- Page 52 Figure 30. Remove the 3 screws Screw specifications Number of screws M2.0 x 3 Step 5. Remove the hinge rubbers that secure the LCD cable and antenna cables. Figure 31. Remove the hinge rubbers Step 6. Push the LCD panel from top to bottom, and then remove the LCD panel Figure 32.
-
Page 53: Remove The Front Camera And The Lcd Cable
Hinge rubber Remove the front camera and the LCD cable Make sure the following FRUs (or CRUs) have been removed. “Remove the Stylus Pen” on page 34 “Remove the lower case” on page 34 “Remove the battery pack” on page 35 “Remove the upper case (with keyboard)”... -
Page 54: Remove The Hinges
Figure 35. Remove the front camera Step 4. Detach the LCD cable connector, Wacom connector, and sensor connector. Figure 36. Detach the connectors Step 5. Remove the LCD cable. Figure 37. Detach the connectors Refer to “LCD FRUs and CRUs” on page 30 to look up details about the following replacement parts: Front camera LCD cable Remove the hinges... - Page 55 “Remove the Stylus Pen” on page 34 “Remove the lower case” on page 34 “Remove the battery pack” on page 35 “Remove the upper case (with keyboard)” on page 43 “Remove the LCD panel” on page 44 “Remove the front camera and the LCD cable” on page 47 Step 1.
- Page 56 Hardware Maintenance Manual...
-
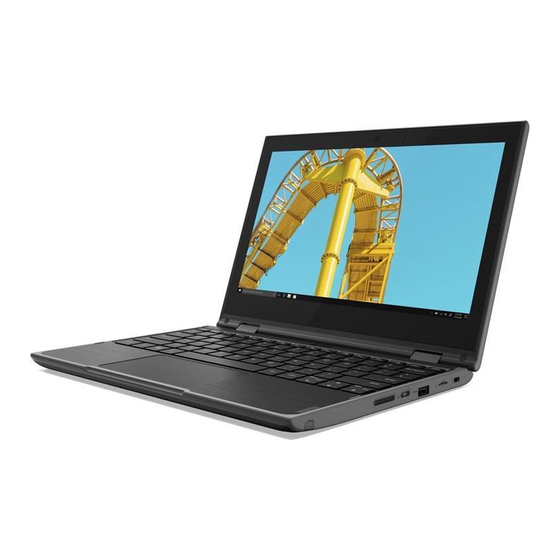
Page 57: Appendix A. Features, Controls, And Connectors
Front camera Microphone WorldFacing camera WorldFacing camera light Microphone Power key Security-lock slot USB-C connector USB 3.0 (Type-A) connector Power button and power light Volume buttons Stylus pen slot Touchpad Combo audio connector microSD card slot © Copyright Lenovo 2019... - Page 58 Table 6. 300e/500e Chromebook 2nd Gen Series features and connectors (continued) USB 3.0 (Type-A) connector dc-in / USB-C connector dc-in light for selected models Hardware Maintenance Manual...
-
Page 59: Appendix B. Label Locations
US/CA/TW W/L label US/CA 32 mm x 10 mm W/L label Israel India BIS label India 22 mm x 30 mm MCMC label Malaysia 8 mm x 8 mm W/L label South Africa 20 mm x 10 mm © Copyright Lenovo 2019... - Page 60 Hardware Maintenance Manual...
-
Page 61: Trademarks
Trademarks LENOVO and the LENOVO logo are trademarks of Lenovo. The terms HDMI and HDMI High-Definition Multimedia Interface are trademarks or registered trademarks of HDMI Licensing LLC in the United States and other countries. USB-C is a trademark of USB Implementers Forum. All other trademarks are the...