Table of Contents
Advertisement
Advertisement
Table of Contents

Related Manuals for Mamas & Papas Starlite Swing

Summary of Contents for Mamas & Papas Starlite Swing
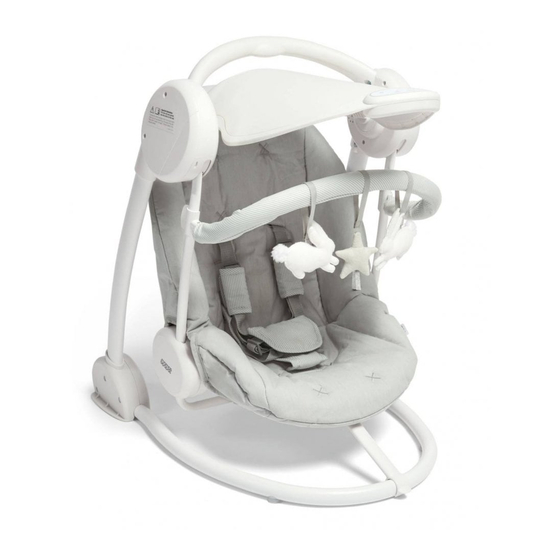
- Page 1 Starlite Swing STSW_0241_0817_V10 <15m © Mamas & Papas Ltd. 2017...
- Page 2 thank you... for ordering from mamas & papas Mamas & Papas started life as a family, then became a business. The founders wanted more for their children, so they took matters into their own hands. This core belief remains at the heart of what we do, using personal experiences, customer insights and rigorous testing, to create innovative products with thoughtful designs.
- Page 4 What’s in the box Design may vary from illustration.
- Page 5 Opening the frame 1. Grip the top of the metal tube at the back of the swing and rotate it until it locks into the foot moulding. 2. Push the leg rest on the front of the seat downwards until it is in the bottom position.
- Page 6 Attaching the canopy 1. Align the lugs on the sides of the canopy with the slots in the handle brackets. 2. Slot the lugs on the canopy into the slots in the handle brackets. 3. The canopy can be tilted up or down by lifting or pushing down on the front of the canopy with your hand. 4.
- Page 7 Adjusting the backrest The backrest can be adjusted into three different positions. Ensure that the seat is only used in the fully reclined position (1) until the child can hold its head up unassisted. Lowering the backrest: Lift the handle at the top of the backrest (4) upwards. Lower the backrest into the new position and release the handle.
- Page 8 Using the harness Never place your child in the seat without fitting and adjusting the safety harness. Opening the harness cover: Pull the front of the harness cover (1) upwards to access the buckle. Fasten the press studs on the harness cover to close. Always close the cover when the child is in the cradle. Locking the harness: Push the locking catch (2) into the buckle until it clicks into place.
- Page 9 Attaching the toys and play arch Slot the clips on the ends of the toy arch (1) over the arms of the swing, as shown in the diagram. Wrap the fabric straps (2) on the toys over the play arch and fasten the Velcro pads (3) on the ends of the straps together. The toy arch can also be fitted in the reverse position for when the seats backrest is in the lowest position.
- Page 10 Inserting the batteries 4x C/LR14 2x AAA/LR03 AAA / LR03 Canopy batteries: Remove the screw from the battery plate (1) in the underside of the canopy control panel with a cross head screwdriver. Insert two AAA ‘LR03’ batteries (2) into the compartment. Ensure that the battery polarities are correctly aligned. Refit the battery cover over the battery compartment.
- Page 11 Operating the sound system The Starlite Swing is equipped with a jack port on the plastic housing on the rear right leg. This enables you to plug in any audio device that has a 3mm headphone outlet built in to it.
- Page 12 Operating the canopy lights On the front of the canopy there is the control panel for the lights functions. 1. Power on/off: Press this button to switch the canopy lights on and off. 2. Starlight mode: This makes individual lights on the canopy flash in a random pattern. 3.
- Page 13 Operating the swing Weight in kilograms Peak performance Optimum performance On the right side of the frame there is the control panel for the swing and sound functions. 1. Swing power on/off: Press this button to activate and switch off the swing function. 2.
- Page 14 Using the frame lock The swinging seat can be locked into position. Under the front of the seat there is a locking arm. To lock the seat in place rotate the lock through 180º. Push the end of the locking arm over the metal tube at the front of the swing. To undo the lock, simply pull it up and rotate it back under the seat.
- Page 15 helpful hints Before using the swing, please read these helpful hints in addition to the user manual. Before starting the swing motion, make sure that the seat locking clasp has been unclipped from the frame. Remove all other obstructions before starting the swing.
- Page 16 When the product is not in use, store away from children and remove the batteries. Care & Maintenance • Assemble and adjust the Starlite Swing with care. • Occasionally clean the metal and plastic parts with a proprietary polish. Do not use abrasives or bleach.
- Page 17 Battery Information: • Only an adult should access the battery compartment. • Ensure that the battery compartment is securely closed before the product is used by your child. • Do not mix new and used batteries. • Do not mix different types of batteries. •...
- Page 18 Notes...
- Page 19 Notes...
- Page 20 Mamas & Papas, Huddersfield, HD5 0RH T: +44 (0)345 268 2000 T: 1-800-490-0331 T: 1-800-667-4111 T: 1300 814 557 Designed and distributed by Mamas & Papas in the UK © 2017 Mamas & Papas Ltd All rights reserved. mamasandpapas.com mamasandpapas.ca mamaspapas.kr...
Need help?
Do you have a question about the Starlite Swing and is the answer not in the manual?
Questions and answers