Table of Contents
Advertisement
Quick Links
Advertisement
Table of Contents

Related Manuals for Topcom BUTLER 900


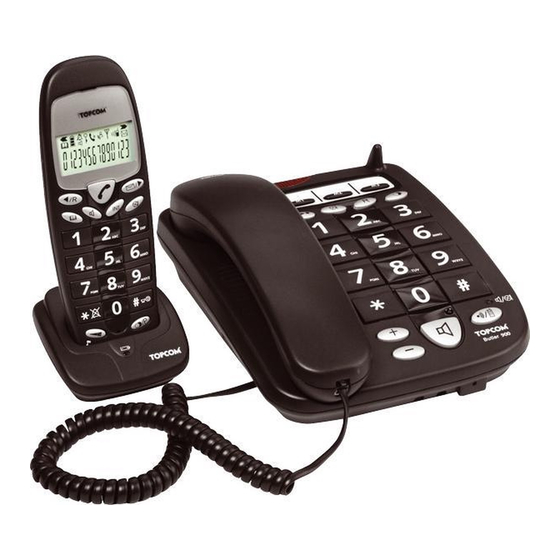
Summary of Contents for Topcom BUTLER 900
-
Page 3: Table Of Contents
13 Default settings...14 14 Warranty ...15 14.1 Warranty period... 15 14.2 Warranty handling ... 15 14.3 Warranty exclusions ... 15 15 Cleaning ...15 16 Disposal of the device (environment) ...15... -
Page 4: Safety Instructions
• Do not use the telephone in environments where there is a risk of explosions. • Dispose of the batteries and maintain the telephone in an environment-friendly manner. • As this telephone cannot be used in case of a power cut, you should use a mains-independent telephone for emergency calls, e.g. a mobile phone. - Page 5 Corded Phone 13. Visual call/Cordless phone in-use (LED) 14. Direct memory keys (M1-M2-M3) 15. Redial/Pause key 16. Flash R key 17. Alphanumerical keys 18. Handsfree volume slicer 19. Cordless handset in-use (LED) 20. Paging/Transfert key 21. Handsfree key 22. Handset volume key 23.
-
Page 6: Installation
Installation Corded phone 1 Plug one end of the telephone cable into the phone unit and the other end into the telephone line wall socket. 2 Connect the small plug of the AC adaptor to the phone and the other end of the power cable to the electric socket. -
Page 7: Battery Low Indication
Handset 1 Insert 2 rechargeable batteries (AAA) inside the battery compartment of the handset. Wall mounting You can hang the corded phone against the wall by 2 screws placed at 75mm vertical from eachother. To be able to hang the handset on the corded phone hook, you have to turn the lip 180° as below show on the picture. - Page 8 You will hear a confirmation tone. If you want to store a pause into the telephone number, press the pause key the location where you want a pause of 3 seconds. Calling a memory number 1 Pick up the handset or press the handsfree key.
- Page 9 The memory number will be dialled automatically. 3 Hang up or press the handsfree key again to terminate the call. Mute function It is possible to deactivate the microphone during a conversation. Now you can speak openly without being heard by your correspondent. 1 Press the mute key.
-
Page 10: Outgoing Calls
”6 Operation corded phone”. Outgoing calls Making a phone call 1 Press the line key. 2 Enter the desired telephone number. g h i j k l m n o 3 Press the line key when you want to terminate the call. - Page 11 When you press the flash key (also called recall), the unit generates a line interruption (100ms of 250ms). It gives you the possibility to use the special services of your telephone provider and/or to transfer calls when you have a telephone exchange.
-
Page 12: Setting The Ring Volume And Melody
Operation cordless handset Setting the flash time 1 Press and hold the redial key for 3 seconds. The display will show: “S” for 100ms “L” for 250ms The flash time setting will disappear from the display after 2 seconds. Setting the ring volume and melody Handset melody 1 Press and hold the melody key until the current melody is heard. -
Page 13: Caller-Id Function (Clip)
Caller-ID function (CLIP) The Topcom Butler 900 displays the telephone numbers of incoming calls. This function is only possible if you are subscribed to a telephone operator that provides this service. Contact your telephone provider for more information. -
Page 14: Register/De-Register A Handset
• you want to subscribe a different handset to this base unit. The below procedure is only applicable to a Topcom Butler 900 handset and base unit! 1 Press and hold the paging key on the base unit for 10 seconds. - Page 15 When the handset is registered, it will show “HS” followed by the handset number. Removing a handset from a Topcom Butler 900 base You can remove a handset from a base to allow another handset to be registered. 1 Press and hold the right key for 3 seconds.
-
Page 16: Call Transfer And Intercom Between Two Handsets
Volume of conversation partner too low Handset ringer volume too Possible cause Batteries uncharged Handset turned OFF Telephone cord badly connected Check the telephone cord The line is occupied by another handset Solution Check the position of the batteries Recharge the batteries... -
Page 17: Technical Data
Not possible to dial a number Wrong dial mode The icon flashes Base or handset do not ring Not possible to transfer a call on PABX Telephone does not react to pressing the keys 12 Technical data Range Handset Batteries: Base powersupply... -
Page 18: Disposal Of The Device (Environment)
14.1 Warranty period The Topcom units have a 24-month warranty period. The warranty period starts on the day the new unit is purchased. The warranty on batteries is limited to 6 months after purchase. Consumables or defects causing a negligible effect on operation or value of the equipment are not covered. - Page 19 SERVICE RETURN CARD - RÜCKSENDEKARTE - CARTE DE RETOUR SERVICE - RETOURFICHE RETURN WITH YOUR DEFECT PRODUCT Name/Vorname/Prénom/Naam: Surname/Familienname/Nom/Familienaam: Street/Straße/Rue/Straat: Nr./N°: Location/Ort./Lieu/Plaats: Country/Land/Pays/Land: Tel./Tél.: E-mail: Model name/Modellbezeichnung/Nom du modèle/Modelnaam: Serial Nr/Seriennummer/N° série/Serienummer: Purchase date/Kaufdatum/Date d’achat/Aankoopdatum: (DD/MM/YYYY) - (TT/MM/JJJJ) Fault description/Beschreibung des Defekts/Description de la panne/Beschrijving defect: (Original Proof of Purchase has to be attached to this return card to be valid for warranty) Model name/Modellbezeichnung/Nom du modèle/Modelnaam: Serial Nr/Seriennummer/N°...
- Page 20 BUTLER 900 visit our website www.topcom.net MC600052...
Need help?
Do you have a question about the BUTLER 900 and is the answer not in the manual?
Questions and answers