Konica Minolta Bizhub C759 Quick Manual
Hide thumbs
Also See for Bizhub C759:
- Quick start manual (268 pages) ,
- Quick manual (64 pages) ,
- Quick start manual (102 pages)
Table of Contents
Advertisement
Quick Links
Advertisement
Table of Contents

Related Manuals for Konica Minolta Bizhub C759


Summary of Contents for Konica Minolta Bizhub C759
- Page 1 C759/C659, AccurioPrint C759 QUICK GUIDE...
-
Page 3: Table Of Contents
Data stored in this machine ......................1-21 Legal restrictions on reproduction....................1-22 1.10 Trademark acknowledgements ....................1-23 Copyright ............................1-24 Note ..............................1-24 1.11 SOFTWARE LICENSE AGREEMENT ................... 1-25 1.12 i-Option LK-105 v4 (Searchable PDFs) End User License Agreement........1-27 bizhub C759/C659, AccurioPrint C759 Contents-1... - Page 4 How to display the Keypad.......................2-29 How to move the Keypad ........................ 2-30 How to close the Keypad......................... 2-30 To display the Keypad all the time....................2-30 2.6.5 Entering characters...........................2-31 When typing in "Group1": ........................ 2-31 Contents-2 bizhub C759/C659, AccurioPrint C759...
- Page 5 Checking the cable connection ....................... 3-13 Checking network settings of this machine ..................3-14 Checklist ............................3-14 Checking computer information ...................... 3-15 Configuring your computer ......................3-15 Registering destinations ........................3-16 Sending the original ......................... 3-18 bizhub C759/C659, AccurioPrint C759 Contents-3...
- Page 6 Saving data in the USB memory device ..................3-65 Using the guidance function ......................3-68 3.7.1 Guidance screen ..........................3-68 Getting help on the currently displayed screen: ................3-68 Getting help on the desired function or procedure:................. 3-70 Help Menu list ..........................3-72 Contents-4 bizhub C759/C659, AccurioPrint C759...
- Page 7 5.5.4 Replacing a Staple Cartridge ......................5-17 Finisher FS-537/Finisher FS-537 SD ....................5-17 Finisher FS-536/Finisher FS-536 SD ....................5-18 5.5.5 Replacing a Saddle Staple Cartridge....................5-19 Finisher FS-537 SD .......................... 5-19 Finisher FS-536 SD .......................... 5-20 Index bizhub C759/C659, AccurioPrint C759 Contents-5...
- Page 8 Contents-6 bizhub C759/C659, AccurioPrint C759...
-
Page 9: Introduction
Introduction... - Page 11 The illustrations and screens used in this manual may appear slightly different from views of the actual equip- ment and screens. Tips Please keep this manual as well as the attached CD/DVD in a safe place where you can access them easily. bizhub C759/C659, AccurioPrint C759...
-
Page 12: Environmental Information
With a product which has a duplex unit, you can print on both sides of paper automatically. Using this function leads to reducing consumption of natural resources and your cost. Attached printer driver provides this duplex printing function as initial setting in your computer (The setting can be changed after installation manually). bizhub C759/C659, AccurioPrint C759... -
Page 13: Certification For Usa, Canada, Mexico, Brazil And Europe Area
Certification for USA, Canada, Mexico, Brazil and Europe area For U.S.A This product is certified by the following model name in U.S.A. KONICA MINOLTA branded model C504501 (bizhub C759 and bizhub C659). For Canada This product is certified by the following model name in Canada. -
Page 14: Safety Information
These are some of major exemplary graphical symbols Graphic Descriptions Graphic Descriptions Graphic Descriptions symbols symbols symbols General prohibi- Do not disassem- Do not touch tion General instruc- Ground/Earth Unplug from outlet tion General precau- High temperature Electrical shock tion hazard bizhub C759/C659, AccurioPrint C759... -
Page 15: Power Source Connection
Make sure to ground this product. (Connect the power cord to an electri- cal outlet that is equipped with a grounding terminal.) Failure to do so and an unlikely event of leakage could result in a fire or electrical shock. bizhub C759/C659, AccurioPrint C759... -
Page 16: Installation
Make sure that the power cord is placed on a site in which no person would step on or trip over it. Stepping on or tripping over the power cord could heat the power cord, resulting in a fire or electric shock. bizhub C759/C659, AccurioPrint C759... -
Page 17: Using The Product
Do not use flammable sprays, liquids, or gases inside or near this ma- chine. Do not clean the inside of this machine using a flammable gas duster. A fire or explosion could result. bizhub C759/C659, AccurioPrint C759... - Page 18 When using the machine, do not look at the light of the lamp for a pro- longed time. Eyestrain could result. Do not use stapled paper, conductive paper (such as silver paper or car- bon paper) or treated heat-sensitive/inkjet paper, otherwise a fire may re- sult. 1-10 bizhub C759/C659, AccurioPrint C759...
-
Page 19: Consumables
Then, leave the machine to stand idle for a specified period of time and make sure that the fusing section has cooled down to room temperature. Failure to follow these in- structions could result in a burn. bizhub C759/C659, AccurioPrint C759 1-11... -
Page 20: Regulation Notices
Regulation notices CE Marking (Declaration of Conformity) for users of the European Union (EU) Hereby, Konica Minolta declares that the radio equipment types bizhub C759/C659, AccurioPrint C759 are in compliance with Directive 2014/53/EU. The full text of the EU declaration of conformity is available at the following internet address: "https://www.konicaminolta.eu/en/business-solutions/support/download-center.html". -
Page 21: Interference-Causing Equipment Standard (Ices-003 Issue 5) (For Canada Users)
The laser diode and the scanning polygon mirror are incorporated in the print head unit. The print head unit is NOT A FIELD SERVICE ITEM: Therefore, the print head unit should not be opened under any circumstances. Laser Aperture of the Print Head Unit Print Head bizhub C759/C659, AccurioPrint C759 1-13... -
Page 22: Cdrh Regulations
Pour avoir la certitude de travailler dans un environnment réunissant des conditions de confort, santé et de sécurité, il est préférable de bien aérer la pièce ou se trouve l’appareil. 1-14 bizhub C759/C659, AccurioPrint C759... -
Page 23: Acoustic Noise (For European Users Only)
USB Host Connect USB devices (Memory, Authentication, Hub etc.) devices directly to the USB host. If an extension cable is used, electromagnetic interference could occur. bizhub C759/C659, AccurioPrint C759 1-15... -
Page 24: Graphic Symbols Used On This Machine
CLASS II EQUIP- Class II equip- Functional earthing MENT ment with func- tional earthing General precau- High tempera- Electrical shock hazard tion ture CAUTION CAUTION moving fan blade DOUBLE POLE / NEUTRAL FUS- 1-16 bizhub C759/C659, AccurioPrint C759... -
Page 25: Caution Notations And Labels
Do not remove caution labels or notations. If any caution label or caution notation is soiled, please clean to make legible. If you cannot make them legible, or if the caution label or notation is damaged, please contact your service representative. bizhub C759/C659, AccurioPrint C759 1-17... -
Page 26: Special Notice To User
Special notice to user Special notice to user For Europe The Facsimile has been confirmed to meet the standards (or requirements) ETSI for pan-European single ter- minal connection to the public switched telephone network (PSTN). 1-18 bizhub C759/C659, AccurioPrint C759... -
Page 27: Space Requirements
To ensure that machine operation, consumables replenishing, part replacement, and regular maintenance can easily be performed, adhere to the recommended space requirements detailed below. bizhub C759/C659 + FS-537 SD + RU-515 + PI-507 + LU-205 Unit: inch (mm) AccurioPrint C759 + FS-537 SD + RU-515 + PI-507 + LU-205... - Page 28 Space requirements bizhub C759/C659 + FS-536 SD + RU-515 + LU-205 Unit: inch (mm) AccurioPrint C759 + FS-536 SD + RU-515 + LU-205 bizhub C759/C659 + FS-536 SD + RU-515 + LU-303 Unit: inch (mm) AccurioPrint C759 + FS-536 SD + RU-515 + LU-303...
-
Page 29: Operation Precautions
For details of the overwrite all data function, refer to the User's Guide. Contact your service representative before deleting data. It is recommended to backup HDD periodically as the measures for HDD defect. For the detail information of HDD backup, contact your service representative. bizhub C759/C659, AccurioPrint C759 1-21... -
Page 30: Legal Restrictions On Reproduction
This machine provides the forgery prevention function in order to prevent financial instruments from being re- produced illegally. We appreciate your understanding that printed images may infrequently have some noise or image data may not be stored under certain circumstances due to this forgery prevention function. 1-22 bizhub C759/C659, AccurioPrint C759... -
Page 31: Trademark Acknowledgements
Trademark acknowledgements 1.10 Trademark acknowledgements KONICA MINOLTA, the KONICA MINOLTA logo, Giving Shape to Ideas, PageScope, and bizhub are regis- tered trademarks or trademarks of KONICA MINOLTA, INC. Mozilla and Firefox are trademarks of the Mozilla Foundation. Microsoft, Windows, Windows 7, Windows 8.1, and Windows 10 are either registered trademarks or trade- marks of Microsoft Corporation in the United States and/or other countries. -
Page 32: Copyright
Note User's Guide may not be reproduced in part or in full without permission. KONICA MINOLTA, INC. will not be held liable for any incidents caused by using this printing system or Us- er's Guide. Information included in User's Guide is subject to change without notice. -
Page 33: Software License Agreement
Software, (b) such transfer of possession terminates your license from Konica Minolta, and (c) you must assure that such other party has agreed to accept and be bound by the terms and conditions of this Agreement. If such other party does not accept such terms and con- ditions then you shall not transfer any copy of the Software. - Page 34 BOUND BY ITS TERMS AND CONDITIONS. NEITHER PARTY SHALL BE BOUND BY ANY OTHER STATE- MENTS OR REPRESENTATIONS THAT ARE INCONSISTENT WITH THE TERMS AND CONDITIONS OF THIS AGREEMENT. NO AMENDMENT TO THIS AGREEMENT IS EFFECTIVE UNLESS IN WRITING AND SIGNED BY DULY AUTHORIZED REPRESENTATIVES OF EACH PARTY. 1-26 bizhub C759/C659, AccurioPrint C759...
-
Page 35: I-Option Lk-105 V4 (Searchable Pdfs) End User License Agreement
This license shall automatically terminate upon a failure on your part to comply with any term or condi- tion of this Agreement, in which case you agree to immediately stop use of the Program. This Agreement shall be governed by the laws of Japan. bizhub C759/C659, AccurioPrint C759 1-27... - Page 36 LK-105 v4 (Searchable PDFs) End User License Agreement 1.12 1-28 bizhub C759/C659, AccurioPrint C759...
-
Page 37: About This Machine
About this machine... -
Page 39: Intended Use Of Office Mfp Devices
Maintenance intervals have been exceeded, Mechanical or electrical functions do not work as they should. Exclusion of liability The manufacturer of the system assumes no liability for damages if the system was operated under imper- missible conditions. bizhub C759/C659, AccurioPrint C759... -
Page 40: Introduction To User's Guide
[Search by Usage] Searches for the required operations of this machine based on a re- quest "to do something". This function also provides security meas- ures against various situations and methods to realize cost reductions. bizhub C759/C659, AccurioPrint C759... -
Page 41: Operating Environment
This check mark symbol shows a precondition of a procedure. This format number "1" represents the first step. This format number represents the order of serial steps. % This symbol indicates a supplementary explanation of a procedural instruction. bizhub C759/C659, AccurioPrint C759... -
Page 42: Screens
"Scan/Fax" to "SCAN" to read a description. Names and notations of applications This manual uses a notation for each application name as shown below. Name Notations used in this manual PageScope Web Connection Web Connection PageScope My Panel Manager My Panel Manager bizhub C759/C659, AccurioPrint C759... -
Page 43: About This Machine
This is also used when the Authentication Unit AU-102 or Authenti- cation Unit AU-201S is installed. Keypad KP-101 It is equipped on the side of the Control Panel. Allows you to enter numbers by using the Hardware Keypad. bizhub C759/C659, AccurioPrint C759... - Page 44 This unit also allows you to manually operate the finisher (only the lower tray is available). Job Separator JS-602 Install this unit onto the Finisher FS-537/FS-537 SD. This unit sorts printed sheets. Output Tray OT-508 Outputs printed pages. bizhub C759/C659, AccurioPrint C759...
-
Page 45: List Of Other Optional Components
Prevents paper in a paper tray from being affected by humidity. The Heater HT-508 is installed as standard in some areas. Hard Disk HD-524 Install this unit to perform mirroring of the hard disk contained in the main unit. bizhub C759/C659, AccurioPrint C759... -
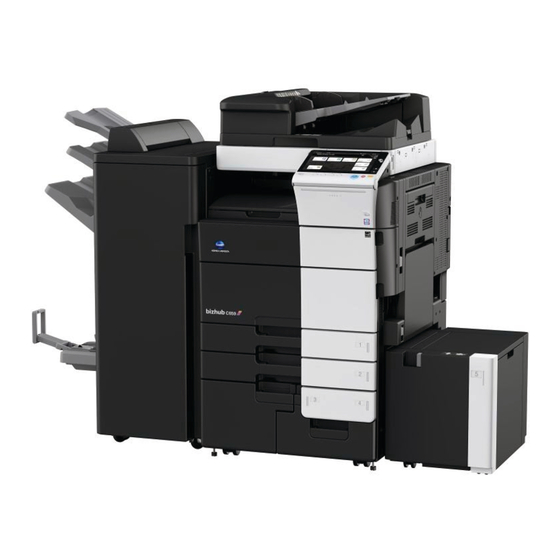
Page 46: Name Of Parts (Mfp)
Upper Front Door Open this door to replace a Toner Cartridge. Data Indicator Flashes blue while this machine is receiving a job. If a job is currently spooled, this indicator lamp lights up blue. 2-10 bizhub C759/C659, AccurioPrint C759... -
Page 47: Side/Rear
Power Cord Heater Power Switch Telephone Jack 1 (LINE PORT1) Jack for connecting a telephone (TEL PORT1) Network Connector (10Base-T/100Base-TX/1000Base-T) USB Port (Type A) USB2.0/1.1 Telephone Jack 2 (LINE PORT2) USB Port (Type B) USB2.0/1.1 bizhub C759/C659, AccurioPrint C759 2-11... -
Page 48: Name Of Parts (Optional Units)
This section shows the names of distinctive parts for each optional unit that can be installed in this machine. Finisher FS-537/Finisher FS-537 SD/Punch Kit PK-523/Z Folding Unit ZU-609 Name Output Tray Staple Cartridge Punch Kit Punch Scrap Box Saddle Stitcher 2-12 bizhub C759/C659, AccurioPrint C759... - Page 49 About this machine Name Z Folding Unit Saddle Staple Cartridge 1 Saddle Staple Cartridge 2 Folding Output Tray Stopper bizhub C759/C659, AccurioPrint C759 2-13...
-
Page 50: Job Separator Js-602
About this machine Job Separator JS-602 Name Output Tray 2-14 bizhub C759/C659, AccurioPrint C759... -
Page 51: Post Inserter Pi-507
About this machine Post Inserter PI-507 Name Lower Tray Upper Tray Post Inserter Control Panel Reference For details on how to use the Post Inserter Control Panel, refer to the User's Guide CD/DVD. bizhub C759/C659, AccurioPrint C759 2-15... -
Page 52: Finisher Fs-536/Finisher Fs-536 Sd/Punch Kit Pk-520
About this machine Finisher FS-536/Finisher FS-536 SD/Punch Kit PK-520 Name Output Tray Staple Cartridge Punch Scrap Box Saddle Stitcher 2-16 bizhub C759/C659, AccurioPrint C759... - Page 53 About this machine Name Punch Kit Saddle Staple Cartridge 1 Saddle Staple Cartridge 2 Folding Output Tray bizhub C759/C659, AccurioPrint C759 2-17...
-
Page 54: Large Capacity Unit Lu-303/Lu-205
About this machine Large Capacity Unit LU-303/LU-205 2-18 bizhub C759/C659, AccurioPrint C759... -
Page 55: Power Supply
Open the Lower Front Door, and press n on the Main Power Switch. Press o on the Main Power Switch. NOTICE When restarting this machine, turn the Main Power Switch off and on again after 10 or more seconds have passed. bizhub C759/C659, AccurioPrint C759 2-19... -
Page 56: Operating The Power Key
Power OFF mode, they are printed when the machine returns to the normal mode. Normal mode During opera- Lights up blue. tion Tips When the optional Image Controller is installed, the machine cannot shift to the Sub Power OFF mode. 2-20 bizhub C759/C659, AccurioPrint C759... -
Page 57: Power Save Function
To enable the machine to return to the normal mode from the Sub Power OFF or ErP Auto Power OFF mode, press the Power key again. Tips When the optional Image Controller is installed, [Power Key Setting] is not displayed. Reference For details, refer to the User's Guide CD/DVD. bizhub C759/C659, AccurioPrint C759 2-21... -
Page 58: Control Panel
Press this key to reset the settings you entered or changed on the Control Panel. Stop Press this key to temporarily stop an active copy, scan, or print job. Start Press this key to start an operation such as copying, scanning, faxing, or printing. 2-22 bizhub C759/C659, AccurioPrint C759... - Page 59 Use this keypad to enter numeric values such as the number of cop- ies, zoom ratio, and fax number. C (Clear) All the numeric values(number of pages, magnification, size, etc), which have been entered by Keypad, are canceled. bizhub C759/C659, AccurioPrint C759 2-23...
-
Page 60: Touch Panel
Tap this button to configure settings of this machine or check the use status of this machine. • [Utility] is always displayed. Page switching key Tap this key to switch pages when main menu keys are assigned to multiple pages. 2-24 bizhub C759/C659, AccurioPrint C759... -
Page 61: Customizing The Main Menu
Up to five slide menus can be set. You can configure the setting to prevent the slide menu. Also, you can display the Keypad or change the background color. Reference For details, refer to the User's Guide CD/DVD. bizhub C759/C659, AccurioPrint C759 2-25... -
Page 62: Operating The Touch Panel
User Box. Flick Make a slight fillip while sliding your finger on the screen. Used to scroll the destination/job list or to feed a page in the Main menu screen/Preview screen. 2-26 bizhub C759/C659, AccurioPrint C759... -
Page 63: Drag
Slide your finger parallel in a front-to-back and side-to-side direction on the screen. Used to move to the in- tended display location if data spans multiple screens. Long-tap Hold down the document by the finger. Used to display the icon related to the document. bizhub C759/C659, AccurioPrint C759 2-27... -
Page 64: Drag & Drop
Place two fingers on the screen and then open or close them. Used to enlarge or reduce a preview image. Rotation Place two fingers on the screen and then rotate them. Used to rotate a preview image. 2-28 bizhub C759/C659, AccurioPrint C759... -
Page 65: Precautions For Using The Touch Panel
Keypad will be displayed. It can also be displayed by pressing the 10 Keypad key (default: Register key 3). Input area for entering the number of copies Input area for entering values bizhub C759/C659, AccurioPrint C759 2-29... -
Page 66: How To Move The Keypad
The Keypad can always be displayed to enable entry of the number of copies on the copy screen, User Box print setting screen, or browser print setting screen. Reference For details, refer to the User's Guide CD/DVD. 2-30 bizhub C759/C659, AccurioPrint C759... -
Page 67: Entering Characters
% If you mistyped, tap [ ] or [ ] to move the cursor to the character you want to clear, then tap the [Delete] key. % Tap the [Shift] key again to return to the original keyboard screen. After typing completes, tap [OK]. bizhub C759/C659, AccurioPrint C759 2-31... -
Page 68: Jobs
The table below shows the maximum number of jobs that can be registered for each function. Function Minimum number of jobs Maximum number of jobs Copy Print Fax memory TX + Scan Fax RX Sharing These values may vary depending on conditions. 2-32 bizhub C759/C659, AccurioPrint C759... -
Page 69: Loading Paper
Length: 7-3/16 to 18 inches (182 mm to 457.2 mm) How to load paper Pull out the tray. NOTICE Be careful not to touch the Film. Slide the Lateral Guide to fit the size of the loaded paper. bizhub C759/C659, AccurioPrint C759 2-33... -
Page 70: Loading Paper In Tray 3 To Tray 4
(4 e 6 (A6 Card)) Applicable paper sizes Type Size 8-1/2 e 11 v, 5-1/2 e 8-1/2 v, 4 e 6 w, A4 v, A5 v, B5 v, A6 Card w, Standard-size paper 16K v 2-34 bizhub C759/C659, AccurioPrint C759... -
Page 71: How To Load Paper
When you do not change the paper type when adding paper, you can use the current setting without making any changes. Change the paper type setting. % When loading paper other than plain paper, change the paper type setting. For details, refer to the User's Guide CD/DVD. bizhub C759/C659, AccurioPrint C759 2-35... -
Page 72: Loading Paper Into The Large Capacity Unit
12 e 18 w, 11 e 17 w to 8-1/2 e 11 w/v, SRA3 w, A3 w, B4 w, A4 w/v How to load paper Open the Upper Door. NOTICE Be careful not to touch the surface of the Paper Feed Rollers with your hand. 2-36 bizhub C759/C659, AccurioPrint C759... -
Page 73: Bypass Tray
Monarch (3-7/8 inches e 7-1/2 inches (98.4 mm e 190.5 mm))) Custom-size paper Paper width: 3-9/16 inches to 12-5/8 inches (90 mm to 320 mm) Paper length: 5-1/2 inches to 47-1/4 inches (139.7 mm to 1,200 mm) bizhub C759/C659, AccurioPrint C759 2-37... -
Page 74: Paper Not Available
% To load large-sized paper, pull out the Tray Extension. % To load banner paper, install the optional Mount Kit MK-715. NOTICE Be careful not to touch the surface of the Paper Feed Rollers with your hand. 2-38 bizhub C759/C659, AccurioPrint C759... -
Page 75: Loading Postcards
Load postcards in the w direction as shown in the figure with the print side facing down, then align the Lateral Guide to the paper. % Insert postcards into the tray until their edges are pressed against the back. max. 50 sheets NOTICE When loading postcards into the Bypass Tray, note the following points. bizhub C759/C659, AccurioPrint C759 2-39... - Page 76 The screen for selecting the paper type and paper size appears. Change the paper size setting. % In [Paper Size] - [Envelope/4 e 6] ([Envelope/A6 Card]), select [4 e 6] ([A6 Card]). Selecting [4 e 6] ([A6 Card]) sets [Paper Type] to [Thick3]. 2-40 bizhub C759/C659, AccurioPrint C759...
-
Page 77: Loading Transparencies
Change the paper type setting. % Select [Transparency] from [Paper Type]. % Transparencies can only be printed in black. When the color function is other than black and [Trans- parency] is selected, check the displayed message, and tap [Yes]. bizhub C759/C659, AccurioPrint C759 2-41... -
Page 78: Loading Envelopes
% Insert envelopes into the tray until their edges are pressed against the back. % The flap side of envelopes cannot be printed on. max. 10 sheets NOTICE When loading envelopes into the Bypass Tray, note the following points. 2-42 bizhub C759/C659, AccurioPrint C759... - Page 79 % Do not put spare envelopes in the Bypass Tray. Doing so causes a size detection error. The screen for selecting the paper type and paper size appears. Tap [Envelope/4 e 6] ([Envelope/A6 Card]) from [Paper Size]. bizhub C759/C659, AccurioPrint C759 2-43...
-
Page 80: Loading Label Sheets
Load label sheets in the w direction as shown in the figure with the print side facing down, then align the Lateral Guide to the paper. % Insert label sheets into the tray until their edges are pressed against the back. The screen for selecting the paper type and paper size appears. 2-44 bizhub C759/C659, AccurioPrint C759... -
Page 81: Loading Index Papers
% Insert index papers into the tray until their edges are pressed against the back. The screen for selecting the paper type and paper size appears. Change the paper type setting. % Select [Index Paper] from [Paper Type]. bizhub C759/C659, AccurioPrint C759 2-45... - Page 82 Loading Paper 2-46 bizhub C759/C659, AccurioPrint C759...
-
Page 83: Basic Settings And Operations
Basic Settings and Operations... -
Page 85: Print Function
% Check the network settings of this machine. For details, refer to page 3-4. You can use this function with the default settings unless otherwise requested. Installing the printer driver % Install the printer driver on the computer. For details, refer to page 3-5. bizhub C759/C659, AccurioPrint C759... -
Page 86: Operation Flow
If no IP address is displayed, you need to set up the network. Tap [Utility], and select [Administrator Settings] - [Network Settings] - [TCP/IP Settings]. Configure the required settings to suit your environ- ment. For details, refer to the User's Guide CD/DVD. bizhub C759/C659, AccurioPrint C759... -
Page 87: Installing The Printer Driver
This driver is effective for high-definition printing of data created in PostScript- supporting application software from Adobe or other vendors. This driver is of- ten used in graphics and light printing applications where good color repro- ducibility is important. bizhub C759/C659, AccurioPrint C759... -
Page 88: Required Settings And Basic Operations (For Mac Os)
% Install the printer driver on the computer. For details, refer to page 3-9. Adding and configuring a printer driver % Set up your computer so that data can be printed using the installed printer driver. For details, refer to page 3-9. bizhub C759/C659, AccurioPrint C759... -
Page 89: Operation Flow
Check that a LAN cable is connected to the LAN port of this machine and the green LED is on. Checking network settings of this machine Tap [Utility], and select [Device Information]. Check that the IP address is displayed. bizhub C759/C659, AccurioPrint C759... - Page 90 If no IP address is displayed, you need to set up the network. Tap [Utility], and select [Administrator Settings] - [Network Settings] - [TCP/IP Settings]. Configure the required settings to suit your environ- ment. For details, refer to the User's Guide CD/DVD. bizhub C759/C659, AccurioPrint C759...
-
Page 91: Installing The Printer Driver
% If the target printer name is not displayed, select [Add Other Printer or Scanner] or [Add Printer or Scanner] to set up the printer. For details, refer to the User's Guide CD/DVD. Select the installed optional units. bizhub C759/C659, AccurioPrint C759... -
Page 92: Printing Data
Open the data you want to print using the application software. From the [File] menu, select [Print]. Select the Bonjour name of this machine. Tips If necessary, you can click [Show Details] to change the settings of the printer driver. 3-10 bizhub C759/C659, AccurioPrint C759... -
Page 93: Scan-To-Send Function
For details, refer to page 3-28. Saving data to the USB memory device (External memory) Directly save scanned data on the USB memory device connected to this machine. For details, refer to page 3-64. bizhub C759/C659, AccurioPrint C759 3-11... -
Page 94: Various Methods For Transmitting And Saving Data
For details, refer to the User's Guide CD/DVD. 3.2.2 Sending data to your Windows computer (SMB Send) Send scanned data to a computer on the network. Once settings are configured, you can send data easily. 3-12 bizhub C759/C659, AccurioPrint C759... -
Page 95: Preparation Flow
Press the Start key. % Press the Start key to scan the original. Checking the cable connection Check that a LAN cable is connected to the LAN port of this machine and the green LED is on. bizhub C759/C659, AccurioPrint C759 3-13... -
Page 96: Checking Network Settings Of This Machine
User name required to log in to the computer page 3-15 Password Password required to log in to the computer Contact your sys- • You should not enter this column for security reasons. tem administrator. 3-14 bizhub C759/C659, AccurioPrint C759... -
Page 97: Checking Computer Information
Click the [Sharing] tab, and also click [Advanced Sharing]. Select the [Share this folder] check box, then click [Permissions]. Select [Everyone] from the [Group or user names:] list, then select all of the [Allow] check boxes. bizhub C759/C659, AccurioPrint C759 3-15... -
Page 98: Registering Destinations
For [Name], specify the name to be displayed on the assigned key. % For [Sort Character], enter the same name as [Name]. % This sets the appropriate index for the name, which you entered into [Name], to [Index]. To change the setting, tap [Index]. 3-16 bizhub C759/C659, AccurioPrint C759... - Page 99 Scan-to-Send function While checking the checklist, enter the user ID and password you wrote down. While checking the checklist, enter the host address and file path you wrote down. Tap [Close]. bizhub C759/C659, AccurioPrint C759 3-17...
-
Page 100: Sending The Original
Scan-to-Send function Sending the original Load the original. Tap [Scan/Fax]. Select a destination. 3-18 bizhub C759/C659, AccurioPrint C759... - Page 101 ON. You can load the pages of the original in several batches and handle them as one job. For details on using the separate scan function, refer to the User's Guide CD/DVD. Press the Start key. bizhub C759/C659, AccurioPrint C759 3-19...
-
Page 102: Sending Data To Your Mac Computer (Smb Send)
% Configure settings to share a computer, or create a dedicated folder to receive files. For details, refer to page 3-23. Registering destinations % Register destinations to which files are sent while checking the checklist. For details, refer to page 3-24. 3-20 bizhub C759/C659, AccurioPrint C759... -
Page 103: Operation Flow
If no IP address is displayed, you need to set up the network. Tap [Utility], and select [Administrator Settings] - [Network Settings] - [TCP/IP Settings]. Configure the required settings to suit your environ- ment. For details, refer to the User's Guide CD/DVD. bizhub C759/C659, AccurioPrint C759 3-21... -
Page 104: Configuring This Machine
Select [NTLM v1/v2] in [Utility] - [Administrator Settings] - [Network Settings] - [SMB Settings] - [Client Settings], then tap [OK]. Select [Utility] - [Administrator Settings] - [System Settings] - [Date/Time Settings] to specify the same date/time and time zone between this machine and your computer, then tap [OK]. 3-22 bizhub C759/C659, AccurioPrint C759... -
Page 105: Checklist
Under [Shared Folders:], click [+]. Select a new folder, then click [Add]. Click the new folder to check the access right. If the access right is changed to [Read & Write], the setting is completed. bizhub C759/C659, AccurioPrint C759 3-23... -
Page 106: Registering Destinations
For [Name], specify the name to be displayed on the assigned key. % For [Sort Character], enter the same name as [Name]. % This sets the appropriate index for the name, which you entered into [Name], to [Index]. To change the setting, tap [Index]. 3-24 bizhub C759/C659, AccurioPrint C759... - Page 107 Scan-to-Send function While checking the checklist, enter the user ID and password you wrote down. While checking the checklist, enter the host address and file path you wrote down. Tap [Close]. bizhub C759/C659, AccurioPrint C759 3-25...
-
Page 108: Sending The Original
Scan-to-Send function Sending the original Load the original. Tap [Scan/Fax]. Select a destination. 3-26 bizhub C759/C659, AccurioPrint C759... - Page 109 ON. You can load the pages of the original in several batches and handle them as one job. For details on using the separate scan function, refer to the User's Guide CD/DVD. Press the Start key. bizhub C759/C659, AccurioPrint C759 3-27...
-
Page 110: Transmit The Scanned Data Via E-Mail (E-Mail Tx)
% Configure a server for E-mail TX. For details, refer to page 3-30. Configuring administrator information (Administrator) % Register the administrator name and E-mail address used as the sender's address of an E-mail to be sent. For details, refer to page 3-32. 3-28 bizhub C759/C659, AccurioPrint C759... -
Page 111: Operation Flow
If no IP address is displayed, you need to set up the network. Tap [Utility], and select [Administrator Settings] - [Network Settings] - [TCP/IP Settings]. Configure the required settings to suit your environ- ment. For details, refer to the User's Guide CD/DVD. bizhub C759/C659, AccurioPrint C759 3-29... -
Page 112: Configuring The E-Mail Transmission Environment
Configuring the E-mail transmission environment Tap [Utility], and select [Administrator Settings] - [Network Settings] - [E-Mail Settings]. % For information on the default administrator password, refer to the User’s Guide CD/DVD. Tap [E-Mail TX (SMTP)]. 3-30 bizhub C759/C659, AccurioPrint C759... - Page 113 Scan-to-Send function Select [ON] to enable E-mail TX (SMTP) settings and E-mail TX function. Enter the SMTP server address. bizhub C759/C659, AccurioPrint C759 3-31...
-
Page 114: Configuring Administrator Information
Scan-to-Send function Configuring administrator information Tap [Utility], and select [Administrator Settings] - [Administrator/Machine Settings] - [Administrator Reg- istration]. Enter the required information, then tap [OK]. 3-32 bizhub C759/C659, AccurioPrint C759... -
Page 115: Sending The Original
Scan-to-Send function Sending the original Load the original. Tap [Scan/Fax]. bizhub C759/C659, AccurioPrint C759 3-33... - Page 116 Scan-to-Send function Enter a destination. 3-34 bizhub C759/C659, AccurioPrint C759...
- Page 117 ON. You can load the pages of the original in several batches and handle them as one job. For details on using the separate scan function, refer to the User's Guide CD/DVD. Press the Start key. bizhub C759/C659, AccurioPrint C759 3-35...
-
Page 118: Fax Function
% Specify the name and fax number to be displayed as a sender when sending a fax from this ma- chine. For details, refer to page 3-37. Selecting the dialing method (Administrator) % Select the dialing method to suit your environment. For details, refer to page 3-39. 3-36 bizhub C759/C659, AccurioPrint C759... -
Page 119: Operation Flow
Check that a modular cable is connected to the LINE port of this machine. Registering transmission information Tap [Utility], and select [Administrator Settings] - [Fax Settings] - [Header Information]. % For information on the default administrator password, refer to the User’s Guide CD/DVD. bizhub C759/C659, AccurioPrint C759 3-37... - Page 120 Fax function Enter the sender information, then tap [OK]. % Sender settings Enter the name to be displayed as a sender. % Sender Fax No. Settings Enter the fax number to be displayed as a sender. 3-38 bizhub C759/C659, AccurioPrint C759...
-
Page 121: Selecting The Dialing Method
If you do not know the type of the dialing method, operate push buttons of your phone. When you hear "beep boop beep", set [Dialing Method] to [PB]. If you do not hear "beep boop beep" after operating push buttons, select [10pps]. bizhub C759/C659, AccurioPrint C759 3-39... -
Page 122: Sending The Original
Fax function Sending the original Load the original. Tap [Scan/Fax]. 3-40 bizhub C759/C659, AccurioPrint C759... - Page 123 % You can also check the setting using the keys displayed on the Touch Panel. % To change the setting, tap the desired key on the Touch Panel. [Color], [File Type], and [File Name/Subject Name/Other] are not available when sending to a fax num- ber. bizhub C759/C659, AccurioPrint C759 3-41...
-
Page 124: Sending A Fax Directly From A Pc (Pc-Fax Tx)
Completing fax operations without leaving your desk Offering clear images by sending data directly from a computer Tips To use this function, the optional Fax Kit is required. This function is not supported in the Mac operating system. 3-42 bizhub C759/C659, AccurioPrint C759... -
Page 125: Preparation Flow
% Create data to be sent using application software. Configuring the fax driver % Select a fax driver, and change the setting if necessary. Entering a destination to send data % Enter a destination to send data. bizhub C759/C659, AccurioPrint C759 3-43... -
Page 126: Checking The Cable Connection
If no IP address is displayed, you need to set up the network. Tap [Utility], and select [Administrator Settings] - [Network Settings] - [TCP/IP Settings]. Configure the required settings to suit your environ- ment. For details, refer to the User's Guide CD/DVD. 3-44 bizhub C759/C659, AccurioPrint C759... -
Page 127: Installing The Fax Driver
Enter the destination [Name] and [FAX Number]. % To send data to more than one destination, repeat this step. % Clicking [Add from Address Book] can retrieve the registered destinations of this machine. Click [OK]. bizhub C759/C659, AccurioPrint C759 3-45... -
Page 128: Copy Function
If user authentication is enabled, the login screen appears. Tap the entry area or keyboard icon to enter the required information, then tap [Login] or press the Access key. % If IC card or biometric authentication is enabled, refer to page 3-48. Load the original. Tap [Copy]. 3-46 bizhub C759/C659, AccurioPrint C759... - Page 129 Specify the zoom ratio. [Duplex/Combine] Specify double-sided copying or combine copying. [Finishing] Configure the offset, punch, or staple setting for output paper. [Density] Adjust the copy density. Tap the input area for entering the number of copies. bizhub C759/C659, AccurioPrint C759 3-47...
-
Page 130: User Authentication
If IC card or NFC authentication is enabled, place the IC card or Android terminal on the card reader of the authentication unit. If biometric authentication is enabled, put your finger on the finger vein reader of the authentication unit. 3-48 bizhub C759/C659, AccurioPrint C759... -
Page 131: Registering A Destination
Select a destination type, and register destination information. Tap [Utility], and select [One-Touch/User Box Registration] - [Create One-Touch Destination] - [Address Book]. Select the type of the destination you want to register. Tap [New]. bizhub C759/C659, AccurioPrint C759 3-49... - Page 132 For information on entry items, refer to page 3-57. Enter the fax number. % Tap [Display Keypad] to display the Keypad, and enter the fax number. Tap [Close]. 3-50 bizhub C759/C659, AccurioPrint C759...
-
Page 133: Using The Control Panel To Register An Address Book - Registration From [Address Book]
Using the Control Panel to register an address book - Registration from [Ad- dress book] Select a destination type, and register destination information. Tap [Address book]. Tap [New]. Select the type of the destination you want to register. bizhub C759/C659, AccurioPrint C759 3-51... - Page 134 [Index] field. % Entry items and the number of setting screens vary depending on the destination type. For informa- tion on entry items, refer to page 3-57. Enter the fax number. Tap [Close]. 3-52 bizhub C759/C659, AccurioPrint C759...
-
Page 135: Using The Control Panel To Register An Address Book - Registration In Scan/Fax Mode
Using the Control Panel to register an address book - Registration in scan/fax mode Select a destination type, and register destination information. Display the scan/fax screen. Tap [Address Reg.]. Tap [New]. Select the type of the destination you want to register. bizhub C759/C659, AccurioPrint C759 3-53... - Page 136 [Index] field. % Entry items and the number of setting screens vary depending on the destination type. For informa- tion on entry items, refer to page 3-57. Enter the fax number. Tap [Close]. 3-54 bizhub C759/C659, AccurioPrint C759...
- Page 137 If [Favorite] is selected as an index, the destination appears in the basic screen of the transmission screen after it has been registered in the address book; enabling the user to easily select a destination. bizhub C759/C659, AccurioPrint C759 3-55...
-
Page 138: Using A Computer To Register A One-Touch Destination
% If the login screen appears, enter the required items, then click [Login]. Select [Store Address] - [Address Book] and click [New Registration]. Select the type of the destination you want to register, and enter the required information such as the name, fax number, and index. 3-56 bizhub C759/C659, AccurioPrint C759... -
Page 139: Information Required To Register A Destination
Enter the user ID required to log in with WebDAV. [Password] Enter the password required to log in with Web-DAV. [Host Address] Enter the address of the WebDAV serv- [File Path] Enter the directory to be used as the destination. bizhub C759/C659, AccurioPrint C759 3-57... -
Page 140: Registering A Group
% For [Name], enter the destination name using the displayed keyboard. % For [Sort Character], enter the same name as [Name]. % This sets the appropriate index for the name, which you entered into [Name], to [Index]. To change the setting, tap [Index]. 3-58 bizhub C759/C659, AccurioPrint C759... - Page 141 % [Index]: Searches for the target destination name using an index. % [Registration Number]: Searches for the target destination using a registration number. Repeat Step 4 until you select all address books to be grouped. bizhub C759/C659, AccurioPrint C759 3-59...
-
Page 142: Retrieving A Registered Destination
Retrieve an address book or group to specify it as a destination to which data is sent. Retrieving a destination Tap [Scan/Fax]. The destinations, which are categorized into [Favorite] when registering indexes, are displayed on the basic screen. 3-60 bizhub C759/C659, AccurioPrint C759... -
Page 143: Specifying A Destination
Retrieves destination candidates by the prefix search function using the name (registered destination name) or address (fax number, E-mail ad- dress, or computer name). This function is convenient when there are too many registered destinations. Reference For details, refer to the User's Guide CD/DVD. bizhub C759/C659, AccurioPrint C759 3-61... -
Page 144: Using A Usb Memory Device
Insert a USB memory device into the USB port of the machine. NOTICE Use the USB connector on the side that is near the Control Panel. Do not use a USB device other than a flash-memory device. Tap [Print a document from External Memory.]. 3-62 bizhub C759/C659, AccurioPrint C759... - Page 145 Using a USB memory device Select data to be printed, and tap [Print]. Check print settings. Press the Start key. NOTICE Do not disconnect the USB memory device during data printing. bizhub C759/C659, AccurioPrint C759 3-63...
-
Page 146: Saving The Scanned Data In The Usb Memory Device (External Memory)
Change the settings to save documents in the USB memory device. Tap [Utility], and select [Administrator Settings] - [System Settings] - [User Box Settings]. % For information on the default administrator password, refer to the User’s Guide CD/DVD. Tap [External Memory Functional Settings]. 3-64 bizhub C759/C659, AccurioPrint C759... -
Page 147: Saving Data In The Usb Memory Device
Load the original. Connect a USB memory device to this machine. NOTICE Use the USB connector on the side that is near the Control Panel. Do not use a USB device other than a flash-memory device. bizhub C759/C659, AccurioPrint C759 3-65... - Page 148 Using a USB memory device Tap [Save a document to External Memory.]. Check the file name. 3-66 bizhub C759/C659, AccurioPrint C759...
- Page 149 For details on using the separate scan function, refer to the User's Guide CD/DVD. Press the Start key. NOTICE Do not disconnect the USB memory device during data saving. bizhub C759/C659, AccurioPrint C759 3-67...
-
Page 150: Using The Guidance Function
If you have any questions during operation, try to use this guidance function. Getting help on the currently displayed screen: Select [Function] on the Help Menu to display the guidance screen. Press the Guidance key (default: Register key 2). Select a menu. 3-68 bizhub C759/C659, AccurioPrint C759... - Page 151 Using the guidance function Narrow down the information you want to know. bizhub C759/C659, AccurioPrint C759 3-69...
-
Page 152: Getting Help On The Desired Function Or Procedure
Getting help on the desired function or procedure: Open the Help Menu, and select a menu depending on an objective to display the guidance screen. Press the Guidance key (default: Register key 2). Select a menu. 3-70 bizhub C759/C659, AccurioPrint C759... - Page 153 Using the guidance function Narrow down the information you want to know. bizhub C759/C659, AccurioPrint C759 3-71...
-
Page 154: Help Menu List
Tap this button to display the service or administrator information, ad- ministrator name, extension number, and E-mail address. [Consumables Replace/Pro- Tap this button to check how to replace consumables or dispose of cessing Procedure] punch scraps. 3-72 bizhub C759/C659, AccurioPrint C759... -
Page 155: Using The [Quick Security] Function
Select whether to use Web Connection. [Security Warning Display Select whether to display the security warning screen if the adminis- Setting] trator password remains set to the default or if password rules are not satisfied. bizhub C759/C659, AccurioPrint C759 3-73... - Page 156 [Utility], and select [Administrator Settings] - [System Settings] - [Custom Display Set- tings] - [Main Menu Default Settings] - [Main Menu Key]. For information on the default administrator password, refer to the User’s Guide CD/DVD. Reference For details, refer to the User's Guide CD/DVD. 3-74 bizhub C759/C659, AccurioPrint C759...
-
Page 157: Advanced Functions
Advanced Functions... -
Page 159: Using Advanced Functions
You can use the address book for personal use (My Address Book). • This requires the association with My Panel Manager. In addition, this machine supports advanced functions such as the barcode font, unicode font, and OCR font. bizhub C759/C659, AccurioPrint C759... -
Page 160: Association With Application
% Enter the license code to enable the function. For details, refer to page 4-8. Configuring each function (Administrator) % Configure the required settings for each advanced function. For details, refer to page 4-9. Reference For details on the procedure, refer to the User's Guide CD/DVD. bizhub C759/C659, AccurioPrint C759... -
Page 161: Enabling The I-Option Function
% For information on the default administrator password, refer to the User’s Guide CD/DVD. Enter the token number shown in the token certificate. Select [Yes], then tap [OK]. This machine is connected to the Internet to communicate with the License Management Server (LMS), and it restarts automatically. bizhub C759/C659, AccurioPrint C759... -
Page 162: Registering The I-Option License
% Prepare at hand the printed serial number, request code, and token certificate supplied with i-Op- tion. Access the Web site of the License Management Server (LMS). Enter the [MFP Serial Number] and [Re- quest Code], then click [Next]. % The URL is https://lms.konicaminolta.com/index.aspx. bizhub C759/C659, AccurioPrint C759... - Page 163 You could also store them in your USB memory device. The license code input could be omitted by using a USB memory device to achieve a convenient operation. When using a USB memory device, insert the USB memory device and click [Download] to store the license code. bizhub C759/C659, AccurioPrint C759...
-
Page 164: Enabling The I-Option Function Using The License (Administrator)
Tap [Utility], and select [Administrator Settings] - [Forward] - [License Settings] - [Install License] - [Function/Licence Code]. % For information on the default administrator password, refer to the User’s Guide CD/DVD. Enter the license and function codes you wrote down. Select [Yes], then tap [OK]. This machine restarts automatically. bizhub C759/C659, AccurioPrint C759... -
Page 165: Configuring Each Function
Select [Yes], then tap [OK]. This machine restarts automatically. Configuring each function Configure the required settings for each advanced function. Reference For details on the required setting items for each advanced function, refer to the User's Guide CD/DVD. bizhub C759/C659, AccurioPrint C759... -
Page 166: Using The Web Browser Function
% Register the license on a dedicated Web site. For details, refer to page 4-12. Enabling the Web browser using the license (Administrator) % Enter the license code to enable the function. For details, refer to page 4-13. 4-10 bizhub C759/C659, AccurioPrint C759... -
Page 167: Operation Flow
% For information on the default administrator password, refer to the User’s Guide CD/DVD. Select [ON], then tap [OK]. This machine is connected to the Internet to communicate with the License Management Server (LMS), and it restarts automatically. bizhub C759/C659, AccurioPrint C759 4-11... -
Page 168: Registering The License
Write down the serial number of this machine. Access the Web site of the License Management Server (LMS). Enter the [MFP Serial Number], then click [Next]. % The URL is https://lms.konicaminolta.com/activate. Check the message, then click [OK]. 4-12 bizhub C759/C659, AccurioPrint C759... -
Page 169: Enabling The Web Browser Using The License
Tap [Utility], and select [Administrator Settings] - [Network Settings] - [Forward] (twice) - [Web Browser Settings] - [Web Browser Usage Settings]. % For information on the default administrator password, refer to the User’s Guide CD/DVD. bizhub C759/C659, AccurioPrint C759 4-13... - Page 170 Using the Web browser function Select [ON], then tap [OK]. When the screen shown below appears, tap [Function/License Code]. Enter the license code you wrote down. 4-14 bizhub C759/C659, AccurioPrint C759...
- Page 171 This machine restarts automatically. By using a USB memory device Tap [Utility], and select [Administrator Settings] - [Network Settings] - [Forward] (twice) - [Web Browser Settings] - [Web Browser Usage Settings]. Select [ON], then tap [OK]. bizhub C759/C659, AccurioPrint C759 4-15...
- Page 172 Using the Web browser function Wait a few moments until the screen shown below appears. Connect the USB memory device stored with the license code. Select [Install License from Ext. Memory]. 4-16 bizhub C759/C659, AccurioPrint C759...
-
Page 173: Starting The Web Browser
Selecting [Menu] - [Display] allows you to zoom in and out from a page or change the character code. Selecting [Menu] - [Tab] allows you to open a new tab and display a different page. bizhub C759/C659, AccurioPrint C759 4-17... -
Page 174: Printing The Currently Displayed Page Or The Linked File
Select whether to print one side or both sides of sheets of paper. To specify 2-sided printing, select the binding position. [Finishing] Configure the offset, punch, or staple setting for output paper. Press the Start key. 4-18 bizhub C759/C659, AccurioPrint C759... -
Page 175: Troubleshooting
Troubleshooting... -
Page 177: Main Messages And Remedies
For Waste Toner Box: When the message [Waste Toner Box needs to be replaced.] appears, replace it based on the maintenance contract. Contact your service representative if the messages continue to appear even after replacement or cleaning has been carried out. bizhub C759/C659, AccurioPrint C759... -
Page 178: When A Paper Jam Message Persists
If a defective part can be separated in order to be able to continue operations after a problem has been de- tected, [Continue] or [Recover Data] is displayed. To continue operations, select any key. However, the prob- lem has not been resolved, so contact your service representative immediately. bizhub C759/C659, AccurioPrint C759... -
Page 179: When [Stabilizing Image.] Appears
In case image stabilization does not finish after a short while, contact your service representative. NOTICE You cannot interrupt or prohibit image stabilization. Reference To perform image stabilization on a voluntary basis, refer to the User's Guide CD/DVD. bizhub C759/C659, AccurioPrint C759... -
Page 180: When Printing Quality Has Deteriorated
Printing quality deteriorates if the Print Head Glass is dirty. If this occurs, clean the Print Head Glass ac- cording to the following procedure. Pull out Tray 2. Remove the Printhead Cleaner from Tray 2. Open the Lower Front Door of the machine. bizhub C759/C659, AccurioPrint C759... - Page 181 % Repeat this operation approximately three times for all the Print Head Glass sections. Install the Waste Toner Box. Close the Lower Front Door of the machine. Place back the Printhead Cleaner to Tray 2. Close Tray 2. bizhub C759/C659, AccurioPrint C759...
-
Page 182: When The Machine Cannot Be Powered On
Check whether the power plug of this machine is firmly plugged into the power outlet. Also check that the breaker has not tripped. Check to see that the Main Power Switch and the Power key are turned ON. In case the machine cannot be powered on even after checking, contact your service representative. bizhub C759/C659, AccurioPrint C759... -
Page 183: When The Touch Panel Is Not Visible
Check to see that the Main Power Switch and the Power key are turned ON. In case the Touch Panel does not appear even after checking it, contact your service representative. bizhub C759/C659, AccurioPrint C759... -
Page 184: When A Message Appears To Replace Consumables Or Carry Out Cleaning
For details on how to replace a staple cartridge when [Replace the Staple Cartridge. ] is displayed, refer to page 5-17. For details on how to replace a saddle staple cartridge when [Replace the Saddle Staple Cartridge 1 or 2. ] is displayed, refer to page 5-19. 5-10 bizhub C759/C659, AccurioPrint C759... -
Page 185: When The Punch Scrap Box Is Full
When toner is running out in the Toner Cartridge When it is almost time to replace a Toner Cartridge, an advanced warning message appears. Prepare a re- placement Toner Cartridge based on the maintenance contract. bizhub C759/C659, AccurioPrint C759 5-11... -
Page 186: When It Is Time To Replace A Toner Cartridge
When it is time to replace an Imaging Unit of a color other than black, printing can be forcibly continued using black. Tap [Continue], and then select a desired print job. 5-12 bizhub C759/C659, AccurioPrint C759... -
Page 187: When The Waste Toner Box Is Full
When the Waste Toner Box is full When the Waste Toner Box is full, a message appears to prompt you to replace it (at replacement by user). Tap [Start Guidance], then follow the displayed guidance to take an action. bizhub C759/C659, AccurioPrint C759 5-13... -
Page 188: Replacing A Toner Cartridge
If you get toner into your eyes, immediately rinse them with running water for over 15 minutes. Seek medical advice if irritation persists. If you swallow toner, rinse out your mouth and drink a few glasses of water. Seek medical advice if nec- essary. 5-14 bizhub C759/C659, AccurioPrint C759... -
Page 189: Replacing A Waste Toner Box
If you get toner into your eyes, immediately rinse them with running water for over 15 minutes. Seek medical advice if irritation persists. If you swallow toner, rinse out your mouth and drink a few glasses of water. Seek medical advice if nec- essary. bizhub C759/C659, AccurioPrint C759 5-15... -
Page 190: Replacing An Imaging Unit
If you get toner into your eyes, immediately rinse them with running water for over 15 minutes. Seek medical advice if irritation persists. If you swallow toner, rinse out your mouth and drink a few glasses of water. Seek medical advice if nec- essary. 5-16 bizhub C759/C659, AccurioPrint C759... -
Page 191: Replacing A Staple Cartridge
NOTICE Be sure to replace the Staple Cartridge after the relevant message has appeared. If a Staple Cartridge is removed before the relevant message appears, it may result in a failure. bizhub C759/C659, AccurioPrint C759 5-17... -
Page 192: Finisher Fs-536/Finisher Fs-536 Sd
NOTICE Be sure to replace the Staple Cartridge after the relevant message has appeared. If a Staple Cartridge is removed before the relevant message appears, it may result in a failure. 5-18 bizhub C759/C659, AccurioPrint C759... -
Page 193: Replacing A Saddle Staple Cartridge
Be sure to replace the Saddle Staple Cartridge after the relevant message has appeared. If a Saddle Staple Cartridge is removed before the relevant message appears, it may result in a failure. bizhub C759/C659, AccurioPrint C759 5-19... -
Page 194: Finisher Fs-536 Sd
Be sure to replace the Saddle Staple Cartridge after the relevant message has appeared. If a Saddle Staple Cartridge is removed before the relevant message appears, it may result in a failure. 5-20 bizhub C759/C659, AccurioPrint C759... -
Page 195: Index
Index... - Page 197 User authentication 3-48 Job 2-32 Web Browser 4-10 Keypad 2-29 License Management Server (LMS) 4-6 4-12 Loading Paper 2-33 2-34 2-36 2-37 Low Power mode 2-21 Main Menu 2-24 MFP 2-10 Multi-job 2-32 Options 2-7 2-12 bizhub C759/C659, AccurioPrint C759...
- Page 198 C759/C659, AccurioPrint C759...
Need help?
Do you have a question about the Bizhub C759 and is the answer not in the manual?
Questions and answers