Table of Contents
Advertisement
Quick Links
Network Attached Storage
TeraStation WSS WS5020N6
User Manual
Please make sure to read this manual before using and follow the procedures. If you have any inquiries about
the product, contact the number on the warranty statement or the packing box. Do not discard this manual, the
warranty statement, or the packing box.
Americas: www.buffaloamericas.com
Europe: www.buffalo-technology.com
Asia Pacific: www.buffalo-asia.com
35021477-01
April, 2018
Advertisement
Table of Contents

Related Manuals for Buffalo TeraStation WSS WS5020N6


Summary of Contents for Buffalo TeraStation WSS WS5020N6
- Page 1 Network Attached Storage TeraStation WSS WS5020N6 User Manual Please make sure to read this manual before using and follow the procedures. If you have any inquiries about the product, contact the number on the warranty statement or the packing box. Do not discard this manual, the warranty statement, or the packing box.
-
Page 2: Safety Precautions
Notice Regulatory Compliance Information For Customers in the United States This equipment has been tested and found to comply with the limits for a Class A digital device, pursuant to Part 15 of the FCC Rules. These limits are designed to provide reasonable protection against harmful interference when the equipment is operated in a commercial environment. -
Page 3: Warning Symbols And Graphical Icons On The Product Label
(4) Only use the cables and accessories that are included in the package. Don’t use other accessories or cables unless specifically instructed to in the documentation. Also, do not use USB cables that are 3 meters or longer to connect USB devices. Warning Symbols and Graphical Icons on the Product Label Warning symbols are used on the product label for the safety operation and prevention of injury to you and damage to the unit. -
Page 4: Table Of Contents
Turning the TeraStation On and Off..........14 Installing Antivirus Software ............14 Chapter 2 Preinstalled Software ........ 15 RAID Builder .................. 15 Buffalo Dashboard ................ 16 Email Notification ................. 18 Buffalo Replication ............... 19 TeraStation Backup & Replication Folder Settings ..... 20... -
Page 5: Notice
Backing Up in Windows Storage Server ........33 Preparing a Backup Destination .............33 Recovering Backup Data .................38 Configuring Replication ............... 42 Differences Between Buffalo Replication and DFS Replication ...42 Before Using Replication .................43 Buffalo Replication ..................43 DFS Replication ..................46 Chapter 5 Additional Settings ........63 Changing Server Name, Workgroups, and Domains .... - Page 6 Enabling Email Notification ............74 Configuring Email Server ................74 Specifying TeraStation Reports ..............76 Specifying Windows Event Logs .............78 Changing Front Panel Settings ............ 79 Acquiring Windows Event Logs ............ 79 Configuring NIC Teaming ............. 81 Enabling Wake-on-LAN ..............83 Chapter 6 Drive Replacement ........87 LEDs ....................
- Page 7 Unable to Access the Shared Folder or the System Becomes Unstable ..................105 I12 Message Appears Despite No Drive Errors ......105 TeraStation Does Not Boot ............107 Notice Before Recovery .................107 Recovering Windows Storage Server ...........107 Additional Information ............... 108 Chapter 9 Appendix ..........
-
Page 8: Chapter 1 Getting Started
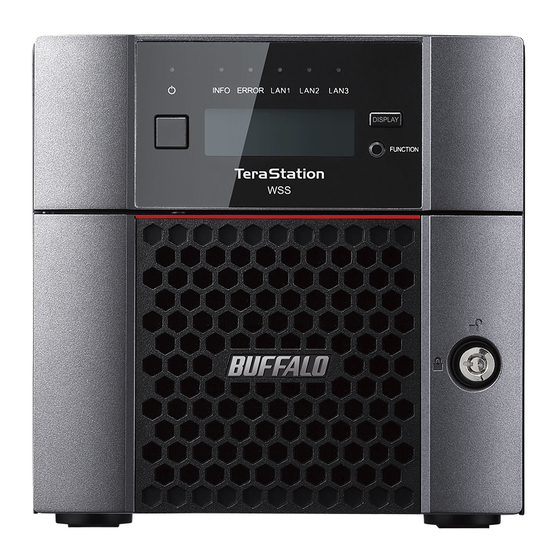
Chapter 1 Getting Started Diagrams WS5220DN6 1 2 3 4 5 6 7 16 17 18 19 WS5420DN6 1 2 3 4 5 6 7... - Page 9 WS5420RN6 23 3 4 5 6 17 18 Power Button ( To power on, connect the power cable and wait for 10 seconds, then press the power button. To power off, press the power button. Power LED When the TeraStation is on, the LED glows green. Info LED If there is a status message, the amber info LED will light up.
- Page 10 You can connect a VGA monitor to this port. Connecting a monitor directly to the TeraStation is only supported for monitoring the progress of Windows Update. USB 3.0 Port ( Compatible Buffalo USB drives, USB memory devices, and USB UPS devices can be connected. USB hubs are not supported. LAN Port 1 ( Connect an Ethernet cable to use this network port.
-
Page 11: Opening Windows Storage Server
Opening Windows Storage Server To connect Windows Storage Server, follow the procedure below. Note: If using macOS, download and install “Microsoft Remote Desktop” from the Mac App Store. Double-click the icon to start NAS Navigator2. Right-click your TeraStation’s icon and select Open Remote Desktop. For macOS, select the TeraStation’s icon while holding down the control key, then select Open Remote Desktop. -
Page 12: Creating A Shared Folder
Click Change date and time settings > Change date and time, select the current date and time, and click OK. Note: From the Internet Time tab, click Change settings, then select Synchronize with an Internet time server. The date and time can be obtained automatically. Creating a Shared Folder No shared folders are configured by default. - Page 13 Right-click Shares and click New Share. Click Next. Enter the path of an existing folder or a new folder, then click Next. Notes: • Enter “D:\Share” into the folder path to create the shared folder for the first time. • If the message “The system cannot find the specified path. Do you want to create it?” is displayed, click Yes.
- Page 14 Enter a name for the share and a description (optional), then click Next. Select “Customize permissions”, then click Custom.
- Page 15 Choose Everyone and select the “Allow” checkbox for “Change”. From the Security tab, click Edit > Add.
- Page 16 Enter “Everyone” under “Enter the object names to select”, then click OK. Choose “Everyone”, then select the “Allow” checkbox for Modify. Click OK > OK > Finish > Finish. Notes: Enable a guest account: (1) From Server Manager, click Tools > Computer Management. (2) Click Local Users and Groups.
-
Page 17: Turning The Terastation On And Off
(1) From Server Manager, click Tools > Computer Management. (2) Click Shared Folders. (3) Double-click Shares, then double-click the desired shared folder. (4) From the Security tab, click Edit. (5) From the Local Users and Groups list, add the users or groups that will be allowed access (the groups and users must be created beforehand). -
Page 18: Chapter 2 Preinstalled Software
Chapter 2 Preinstalled Software The following software is preinstalled on the TeraStation. • RAID Builder • Buffalo Dashboard • Email Notification • Buffalo Replication • TeraStation Backup & Replication Folder Settings • Display Settings RAID Builder RAID Builder is used to create RAID volumes. See the “Storage Management” chapter for more details. To launch RAID Builder, you must be logged in as a member of the Administrators group in Windows Storage Server. -
Page 19: Buffalo Dashboard
Buffalo Dashboard Buffalo Dashboard displays system information and dismounts hard drives. To launch it, double-click the Buffalo Dashboard icon in the system tray. Note: This software cannot be accessed by multiple users at the same time. Before launching it, make sure that it is... - Page 20 Check for updates: Enables or disables checking for new firmware releases. When a new firmware version is available, you will be notified here. Manufacturer: Displays “Buffalo Inc. ” . Temperature Displays the temperature of the system. Displays the fan rpm.
-
Page 21: Email Notification
Items Descriptions Displays the status, drive numbers, names, capacity, and physical sector sizes of each drive. Refresh: Updates the displayed drive information. Dismount Drive: Dismounts a drive for safe removal. Select the drive to dismount and click OK. Options: • Shut down the TeraStation when the temperature of the drive Drive becomes abnormally high: The TeraStation will automatically shut down if the drive gets too hot. -
Page 22: Buffalo Replication
Your TeraStation can be synchronized with another TeraStation, replicating most data. See the “Configuring Replication” section in chapter 4 for more details. To launch Buffalo Replication, you must be logged in as a member of the Administrators group in Windows Storage Server. -
Page 23: Terastation Backup & Replication Folder Settings
TeraStation Backup & Replication Folder Settings Before using it as a backup device on the network, configure your TeraStation in “TeraStation Backup & Replication Folder Settings”. To launch TeraStation Backup & Replication Folder Settings, you must be logged in as a member of the Administrators group in Windows Storage Server. -
Page 24: Display Settings
Buffalo device unless it’s entered. To remove a folder from the list of available backup targets, select the folder and click this button. -
Page 25: Chapter 3 Storage Management
Chapter 3 Storage Management Working with Volumes Notice When Creating Volumes • To create a volume, use RAID Builder instead of the Disk Management option in Windows Storage Server. • When volumes are deleted, formatted, or changed to another volume type, all data stored on the volumes is erased. -
Page 26: Creating A Volume
Creating a Volume To create a volume, follow the procedure below. Successfully following the procedure will erase all data stored on the volumes. From Server Manager, click Tools > Computer Management. Click Disk Management. - Page 27 Right-click the volume that you want to delete and then select Delete Volume. Read the warning message carefully about the data that will be erased and click Yes. Click the Start button, then RAID Builder.
-
Page 28: Deleting Volumes
Select “Create RAID array” from the drop-down menu and select the volume type under “RAID Mode”. Select the drives to create a volume. If creating a RAID 5 volume, at least three drives are required. If creating a volume other than RAID 5 volume, at least two drives are required. Click OK. - Page 29 From Server Manager, click Tools > Computer Management. Click Disk Management.
-
Page 30: Formatting Volumes
Right-click the volume labeled “Failed” and click Delete Volume. Formatting Volumes From Server Manager, click Tools > Computer Management. - Page 31 Click Disk Management. Right-click the volume that you want to format and select Format.
-
Page 32: Enabling Data Deduplication
Enabling Data Deduplication Installing Deduplication Role From Server Manager, click Dashboard > Add roles and features. Click Next. Select “Role-based or feature-based installation”. - Page 33 Click Next, then click Next again. Select “Data Deduplication” under “File and Storage Services” > “File and iSCSI Services”. Click Next twice, then click Install. Click Close to finish. Configuring Data Deduplication From Server Manager, click File and Storage Services.
- Page 34 Click Volumes. Right-click the drive which will be used to configure data duplication and click Configure Data Deduplication.
- Page 35 Select “General purpose file server” to the right of “Data deduplication” and click OK.
-
Page 36: Chapter 4 Backup And Replication
Data stored in the TeraStation may be lost through drive failure or wrong operation. To avoid losing data accidentally, back up your data regularly. You can back up data using the following functions: • Windows Server Backup • Buffalo Replication • DFS Replication Backing Up in Windows Storage Server Preparing a Backup Destination Follow the procedure below to set your backup schedule. - Page 37 Click Local Backup. If “Reading data; please wait... ” is displayed, please wait until any messages disappear. Right-click on “Local Backup” and select Backup Schedule..The “Backup Schedule Wizard” will start. Click Next.
- Page 38 Select “Custom” and click Next. Click Add Items.
- Page 39 Select the backup source folders or drives and click OK. Click Next.
- Page 40 Specify the schedule to run the backup and click Next.
-
Page 41: Recovering Backup Data
Select the backup destination and click Next. Step through the wizard to finish. Recovering Backup Data Follow the procedure below to recover the backup data to the TeraStation. - Page 42 From Server Manager, click Tools > Windows Server Backup. The “Windows Server Backup” wizard will start. Click Local Backup. If “Reading data; please wait... ” is displayed, please wait until any messages disappear.
- Page 43 Right-click on “Local Backup” and click Recover..The recovery wizard will start. Select where the backup data is saved and click Next. When “A backup stored on another location” is selected, specify the folder of the backup data in the next page.
- Page 44 Select the date when a data backup occurred and click Next.
-
Page 45: Configuring Replication
Differences Between Buffalo Replication and DFS Replication Buffalo Replication • One-way replication (from the TeraStation to another device) • Another Buffalo NAS devices can easily be configured for the replication destinations. DFS Replication • Two-way replication • The Active Directory domain environment is required and the TeraStation should be joined to the domain. -
Page 46: Before Using Replication
If your environment must join the Active Directory domain, use DFS Replication. If joining the Active Directory is not required, or if a TeraStation or LinkStation has been configured as the replication destination, using Buffalo Replication is recommended. Before Using Replication • For best results, use static IP addresses with the same subnet masks for both replication TeraStations (source and... - Page 47 Click the blank space under “Replication Source”, click , and select a folder from the list as the replication source folder, then click OK. If you had configured a backup device access key to the replication destination folder, click Set Backup Device Access Key.
- Page 48 To configure folders on the device that is located on another network, click Add and enter the IP address of the device, then click Save. After the IP address is added to the list, click Refresh again to add the folder to the list of folders.
-
Page 49: Dfs Replication
LAN port or changing the IP address of the replication source or destination TeraStation. If the network settings are changed, refresh the list of TeraStations and LinkStations as follows. Click Buffalo Replication in the Start menu on Windows Storage Server. Click Refresh and refresh the detected TeraStations and LinkStations list. - Page 50 Joining an Active Directory From Server Manager, click Local Server. Click the hostname of your TeraStation. From the Computer Name tab, click Change.
- Page 51 Select “Domain”, enter a domain name, and click OK. Enter an administrator username and password for the Active Directory domain controller. Click OK, then click OK again. Click Close. Click Restart Now and restart your computer to apply settings.
- Page 52 Installing DFS From Server Manager, click Dashboard > Add roles and features. Click Next. Select “Role-based or feature-based installation” and click Next. Click Next.
- Page 53 Select “DFS Namespaces” and “DFS Replication” under “File and Storage Services” > “File and iSCSI Services”. Select “Include management tools (if applicable)” and click Add Features. Click Next twice, then click Install.
- Page 54 Click Close to finish. Creating Namespaces From Server Manager, click Tools > DFS Management. Right-click Namespaces, then click New Namespace.
- Page 55 Enter a hostname for the namespace server and click Next.
- Page 56 Enter a name for the namespace and click Next.
- Page 57 Select Domain-based namespace and click Next. Click Create. Click Close when the New Namespace Wizard finishes.
- Page 58 From DFS Management, right-click the name you created through the wizard and click New Folder. Enter a folder name and click Add.
- Page 59 Enter a path to the folder or select from the list by clicking Browse. Click OK. You may be asked to create a new folder if the selected path doesn’t exist. In such a case, click Yes. Click OK again. Configuring DFS Replication From Server Manager, click Tools >...
- Page 60 Right-click Replication, then click New Replication Group. Select “Replication group for data collection” as the replication group type and click Next.
- Page 61 Enter a name for the replication group and click Next.
- Page 62 Enter the hostname of the file server for the replication source and click Next. Click Add.
- Page 63 Enter the path or select the replication source folder and click OK. Click Next.
- Page 64 Enter the hostname of the file server for the replication destination and click Next.
- Page 65 Enter the path of the replication destination. Alternatively, click Browse and select the folder from the list. Click Next, then click Next again. Note: You have options to specify the network band and the date and time. To configure bandwidth, select Replicate continuously using the specified bandwidth and the bit rate from the drop-down list.
-
Page 66: Chapter 5 Additional Settings
Chapter 5 Additional Settings Changing Server Name, Workgroups, and Domains From Server Manager, click Local Server. Click the hostname of your TeraStation. - Page 67 From the Computer Name tab, click Change. Enter the computer name, choose domain or workgroup, and click OK. Note: The computer name should contain 16 characters or less. If more than 16 characters are entered, all characters from the 17th character on are ignored.
-
Page 68: Changing The Password
Changing the Password The default password for the TeraStation’s administrator account is “password”. This is public knowledge, so for security, you should change it immediately. Follow the procedure below to change the password. Administrator’s Password Log on to Windows Storage Server using “Administrator”. Press Ctrl+Alt+End. -
Page 69: Passwords For Other Users
Passwords for Other Users From Server Manager, click Tools > Computer Management. Click Local Users and Groups, then double-click Users. Right-click the user whose password will be changed and click Set Password. Click Proceed. -
Page 70: Adding A User
Enter a new password (twice). Adding a User From Server Manager, click Tools > Computer Management. Click Local Users and Groups. -
Page 71: Connecting With Standard Accounts
Right-click Users and click New User. Enter the desired settings and click Create. Click Close. Connecting with Standard Accounts Accounts not belonging to the Administrators group cannot connect to Windows Storage Server through the remote desktop. Those accounts must be added to the “Remote Desktop Users” group. Follow the procedure below to add accounts to the group. - Page 72 From Server Manager, click Tools > Computer Management. Click Local Users and Groups, then double-click Groups.
- Page 73 Double-click Remote Desktop Users. Click Add. Click Advanced. Click Find Now.
- Page 74 Select the user to be added as a group member and click OK. Click OK, then click OK again.
-
Page 75: Adding A Group
Adding a Group From Server Manager, click Tools > Computer Management. Click Local Users and Groups. Right-click Groups and choose New Group. - Page 76 Enter a group name and click Add. Click Advanced. Click Find Now.
-
Page 77: Enabling Email Notification
Select the users to be registered to the group. Click OK, then click OK again. Click Create. Click Close. Enabling Email Notification Your TeraStation can send you email reports daily, or when settings are changed or an error occurs. Notification emails may be triggered by any of TeraStation reports or Windows event logs. - Page 78 Select the “Enable email notification” checkbox. Click New and enter an email address. Enter your email server settings. Click OK to finish the email notification settings. You can send a test email when clicking Test Message. Enter the password of the user you’re logged in as and click OK. Items Descriptions Enable email notification...
-
Page 79: Specifying Terastation Reports
Items Descriptions SMTP Server Address: Enter your email SMTP server’s address and port number. Port number 25 is configured by default. Note: If you choose “None” or “POP before SMTP” for the user authorization, the port number is locked to “25”. User Authentication Method: Select the user authorization type from “None”, “POP before SMTP”, “LOGIN (SMTP-AUTH/LOGIN)”, and Authentication... - Page 80 Click the Report Settings tab and select the “Use TeraStation reports to determine notification type” checkbox. Click On or Off to enable/disable the notifications of the function. When you select the checkboxes to the left of each log level, all notifications of the line will be selected at once. Click OK, then click OK again.
-
Page 81: Specifying Windows Event Logs
Levels Details Sends a notification email if an error occurs. Error reports will describe any Error critical failures that prevented a function or TeraStation from operating. It is recommended to do the corrective action for the error immediately. Specifying Windows Event Logs A notification email will be sent when the specified event occurs. -
Page 82: Changing Front Panel Settings
Select “System” from the “Log Type” list. Enter “Microsoft-Windows-WindowsUpdateClient” into the “Source” box. An event ID can be blank. All events triggered by Windows Update will be notified. If you prefer only being notified of specific events, enter those event IDs. Click OK, then click OK again. - Page 83 From Server Manager, click Tools > Event Viewer. Double-click Windows Logs. Right-click on either “Application”, “Security”, “Setup”, or “System” in the left-side menu to determine the logs to be saved. Click Save All Events As. Specify the desired location and enter a filename, then click Save. Do not change the file type. When the “Display Information”...
-
Page 84: Configuring Nic Teaming
Configuring NIC Teaming From Server Manager, click Local Server. Click Disabled to the right of “NIC Teaming”. - Page 85 From the “TEAMS” field, click TASKS, then select New Team.
-
Page 86: Enabling Wake-On-Lan
Enter a desired team name. Select the 1GbE adapters to join the team and click OK. The created team will be added to the list. Wait until the status changes to “OK”. It may take a few minutes. Enabling Wake-on-LAN You can turn on the TeraStation via Wake-on-LAN. - Page 87 From Server Manager, click Tools > Computer Management. Click Device Manager.
- Page 88 Right-click the network adapter to use for Wake-on-LAN and click Properties. Click the Advanced tab. If you use the 1GbE ports (LAN 1 or LAN 2), then select “Enable PME” under “Property” and change “Value” to “Enabled”.
- Page 89 For any adapters, select “Wake on Magic Packet” under “Property” and change “Value” to “Enabled”. Notes: • To use Wake-on-LAN, you’ll need Wake-on-LAN software that sends magic packets. The TeraStation does not include Wake-on-LAN software. • If the TeraStation is powered off by Wake-on-LAN using 10GbE ports (LAN3), the link speed will be fixed to 100 Mbps.
-
Page 90: Chapter 6 Drive Replacement
TeraStation may malfunction. • For the replacement drive, use a Buffalo OP-HDN series drive. The new drive should be the same size or larger. If a larger drive is used, the extra space will not be usable in a volume. -
Page 91: Example Of Drives 1 And 2
• The boot drive (C:) consists of the mirrored volume and a portion of the two drives from the top. Do not replace both of these drives at the same time. • If a drive is replaced while saving a file, the file can be corrupted. Be sure that the saving operation is completed before replacing the drive. - Page 92 Pull out the drive cartridge and remove it from the TeraStation. Firmly insert the new drive into the empty slot. Slide the drive in with the locking mechanism open. Make sure the replacement drive is inserted exactly as the previous drive. Swing the lock back down until it clicks into place.
- Page 93 Close the front cover with the included key. Press the power button on the TeraStation to turn it on. Double-click the icon to start NAS Navigator2. Right-click your TeraStation’s icon and select Open Remote Desktop. For macOS, select the TeraStation’s icon while holding down the control key, then select Open Remote Desktop.
- Page 94 Select Create or repair a mirrored volume of the system area, check the replaced drive, and click OK. When “Drive x will be initialized. Continue?” is displayed, click OK. It will take about an hour for the mirrored volume to be repaired. You can check the progress of the repair in Disk Management. After creating a mirrored volume, you will see the message dialog to restart your TeraStation.
- Page 95 From Server Manager, click Tools > Computer Management. Click Disk Management. Select the step depending on your reason for a created volume. To create a new volume (except for a RAID 5 volume or mirrored volume): (1) Right-click the new dynamic disk and select New Volume. (2) Follow the instructions on the screen to create a new volume.
-
Page 96: Example Of Drives 3 And 4
If a mirrored volume on the system area doesn’t restore the first time, try initializing the drive and converting it to a dynamic disk, then restart the TeraStation. After the TeraStation restarts, try the steps above a second time. If the mirrored volume still cannot be restored, contact Buffalo technical support for assistance. Example of Drives 3 and 4 Double-click the icon to start NAS Navigator2. - Page 97 The error message (E30) will be displayed in Buffalo Dashboard. Click Dismount Drive x (where “x” is the number of the failed drive). When the message “Drive dismount finished. ” is displayed, click OK. The status LED will stop flashing and glow steadily.
- Page 98 Buffalo Dashboard will show the drive status “Getting drive status... ” . After the drive status changes to “Normal”, open Server Manager and click Tools > Computer Management. Click Disk Management.
- Page 99 When the “Initialize Disk” window appears, click OK. Right-click the initialized drive and select Convert to Dynamic Disk. A volume cannot be created unless the drive is converted to a dynamic disk. Select the step depending on your reason for a created volume. To create a new volume (except for a RAID 5 volume or mirrored volume): (1) Right-click the new dynamic disk and select New Volume.
- Page 100 (3) When “Are you sure you want to remove the mirror?” is displayed, click Yes. Repeat steps (1) to (3) for each volume that requires resynchronization. (4) Select the volume to be repaired and select Add Mirror. (5) When “Add Mirror” is displayed, select the drive to be added to the mirrored volume and click Add Mirror.
-
Page 101: Chapter 7 Utilities
NAS Navigator2 is a utility program that makes it easy to display Windows Storage Server, change the TeraStation’s IP address, or check its drive in remote desktop. To install NAS Navigator2, download the installer from http://d.buffalo.jp/WS5020N6/. Double-click the icon to start NAS Navigator2. - Page 102 I’m here Causes your Buffalo NAS device to beep. *Click on the Buffalo NAS device’s icon to display these options. When NAS Navigator2 is closed, right-click the NAS Navigator2 icon in the system tray for the following options.
-
Page 103: Changing The Ip Address
Searches for the Buffalo NAS devices on the network again. Open NAS Navigator2 Opens the NAS Navigator2 window. Exit Exits NAS Navigator2. The following tasks may be performed from the Buffalo NAS device’s properties page. Name Description Remote Desktop Click Open Remote Desktop to open Windows Storage Server. -
Page 104: Nas Navigator2 For Mac
Double-click the icon to open a share on the TeraStation. Name Description Open Opens the Buffalo NAS device’s shared folders. Searches for the Buffalo NAS devices on the network Refresh again. I’m here Causes your Buffalo NAS device to beep. - Page 105 Causes your Buffalo NAS device to beep. Label Color Selects the color of the name displayed below the icon. The following tasks may be performed from the Buffalo NAS device’s properties page. Name Description Click Open Remote Desktop to open Windows Storage Server.
-
Page 106: Changing The Ip Address
NovaBACKUP is a Windows utility that lets you back up the data on your computer. The NovaBACKUP installer is available from http://d.buffalo.jp/WS5020N6/. Select the region and model to go to your specific model’s d.buffalo website. Download the NovaBACKUP installer and install it onto your computer. -
Page 107: Chapter 8 Troubleshooting
While using the TeraStation, you may lose your important data due to sudden accidents, hard disk failure, or accidental misoperation. Back up your data regularly! For best results, back up your data to Buffalo drives like the TeraStation, LinkStation, or DriveStation series. -
Page 108: Shared Folders Suddenly Do Not Open
Cause 10. Remote desktop connection software is not installed on your Mac: If using macOS, download and install “Microsoft Remote Desktop” from the Mac App Store. Shared Folders Suddenly Do Not Open If the TeraStation shared folder is assigned and used as a network drive, the TeraStation may suddenly become inaccessible if network settings such as IP addresses or groups are changed. - Page 109 Click Disk Management. Check whether the volume status shows either “Failed Redundancy” or “Failed”. Status Shows “Failed Redundancy” If the status shows “Failed Redundancy”, then a volume in the RAID volume has been corrupted and the RAID volume is operating in degraded mode. In such a case, right-click the volume labeled “Failed Redundancy” and click Reactivate Volume in Disk Management.
-
Page 110: Terastation Does Not Boot
Status Shows “Failed” If the two or more volumes are corrupted, the volume status will show “Failed” and the TeraStation will not be accessible. Data cannot be recovered. In such a case, right-click the volume labeled “Failed” and click Delete Volume in Disk Management. -
Page 111: Additional Information
Buffalo Dashboard and Windows Disk Management Display Different Information Because different drive error algorithm rules are used between Buffalo Dashboard and Windows Disk Management, drive error may appear in different timing. Preinstalled Software Does Not Work... -
Page 112: Chapter 9 Appendix
Chapter 9 Appendix LCD Panel The LCD panel can be cycled through different modes by pressing the display button on the front of the TeraStation. Modes LCD Message Description Corrective Action Connect an Ethernet LANx Not connected to a network. cable to the LAN Not Connected port. -
Page 113: Default Settings
4 TB TeraStation x... during the rebuilding process. model. This message will disappear when resynchronization finishes. From Buffalo Replication, click Sync to execute I33 Replication An error occurred in replication. resynchronization. If the error is displayed again, Failure contact Buffalo technical support for assistance. -
Page 114: Specifications
Note: For other installed roles and features, see “Roles and Features”, which you can reach by clicking “Local Server” on the left side menu in “Server Manager”. Specifications Check the Buffalo website for information about the latest products and specifications. Workgroup Edition Model: Microsoft Windows Storage Server 2016 Workgroup Edition... - Page 115 Buffalo OP-HDN series drive Note: The new drive should be the same size as Replacement Drive the replacement drive. The drives listed above are available from the Buffalo website. WS5220DN6, WS5420DN6: AC 100–240 V, 1.5 A, Power Supply 50/60 Hz WS5420RN6: AC 100–240 V, 2.5–1.25 A, 50/60 Hz...
Need help?
Do you have a question about the TeraStation WSS WS5020N6 and is the answer not in the manual?
Questions and answers