Table of Contents
Advertisement
Advertisement
Table of Contents

Summary of Contents for VIZU X22
- Page 1 Drone X22 USER MANUAL © Elmarc, 19/10...
-
Page 2: Table Of Contents
Content Intended use Safety Labels in this manual 2.2 General safety instructions Preparations for use Unpacking 3.2 Package contents Main parts Installation 5.1 Charging the battery 5.2 Memory Card: Placement and access 5.3 Inserting the batteries in the joystick Installing the HFUN app Usage 6.1 Turning the drone On or Off 6.2 Installing guards 6.3 Connecting the joystick 6.4 Control with the joystick 6.5 Connecting the HFUN app 6.6 Control using the HFUN app 6.7... -
Page 3: Intended Use
1 Intended use The Drone X22 is an advanced unmanned air vehicle that you can control remotely. The product is equipped with a camera, which allows you to make 720P video recordings and take 2 MP photos. The product supports joystick, telephone and gesture control. The product is intended for consumer use, not for professional use. -
Page 4: Safety
2 Safety 2.1 Labels in this manual 6 WARNING A warning means that injury is possible if the instructions are not obeyed. 1 CAUTION A caution means that damage to the equipment is possible. 5 A note gives additional information, e.g. for a procedure. 2.2 General safety instructions General 6 To prevent damage or malfunctions: Please take time and read the general safety instructions. This will avoid fire, explosions, electric shocks or other hazards that may result in damage to property and/ or severe or fatal injuries. 6 The manufacturer is not liable for cases of material damage or personal injury caused by incorrect handling or non compliance with the safety instructions. In such cases, the warranty will be voided. WARNING 6 Do not put force on the appliance. 6 Only use original accessories from the manufacturer. 6 Do not spill any liquid on the appliance. 6 Do not insert any objects in the ventilation holes. 6 Do not block the ventilation holes. 6 Never leave children unattended with the packaging material. The packaging material represents a danger of suffocation. Children frequently underestimate the danger. Always keep children away from the packaging material. - Page 5 CAUTION 1 Clean the outside of the appliance with a soft cloth. When the appliance is very dirty, dampen the cloth slightly with water and a neutral solution. 1 Do not put the appliance near a heat source. This could damage the appliance. 1 Check the product, cable and (if applicable) adapter for any damage before use. If there is any visible damage, strong odour, or excessive overheating of components, unplug the product. 1 The camera contains sensitive components, including the battery. Avoid exposing your camera and battery to very cold or very hot temperatures. Low or high temperature conditions may temporarily shorten the battery life or cause the camera to temporarily stop working properly. Avoid dramatic changes in temperature or humidity when using the camera, as condensation may form on or within the camera. Remarks 6 WARNING It is not permitted to open the product yourself or to have it opened, neither is it permitted to repair the product yourself or to have it repaired. This will void the warranties. Please let any maintenance be carried out by certified maintenance personnel. Before flying 6 Consult the locally applicable laws and regulations concerning the use of drones. 6 Make sure you are sufficiently insured according to local laws and regulations. 6 Recharge the batteries completely. 6 Take into account the weather conditions: avoid rain and strong winds. 6 Never fly in a no fly zone.
- Page 6 6 Keep the firmware of the drone up-to-date. 6 Check the drone and propellers for defects and / or damage for each flight. 6 Check the surroundings for obstacles and transmitter masts. 6 Not suitable for children under fourteen years. While flying 6 Follow local applicable laws and regulations regarding the use of drones. 6 Keep bystanders at a suitable distance 6 Do not lose sight of the drone. 6 Only use the drone in daylight. 6 Do not fly above people, (rail) roads and buildings. 6 Pay attention to the battery level and return in time. After flying 6 Switch off the drone and remove the battery. 6 Clean and dry the drone. 6 Store the drone carefully.
-
Page 7: Preparations For Use
3 Preparations for use 3.1 Unpacking • Unpack the appliance carefully. • Check the package contents as described below. If any item is missing, please contact your reseller. • We recommend that you retain the original carton and packaging materials in case it ever becomes necessary to return your product for service. This is the only way to safely protect the product against damage in transit. If you do dispose of the carton and the packaging materials, please remember to recycle with due care to the environment. 3.2 Package contents The following items are included in the received package: 1. Drone 2. Screwdriver 3. Guards 4. Battery 5. Joystick 6. Telephone holder 7. AAA batteries 8. USB connectingcable 9. -
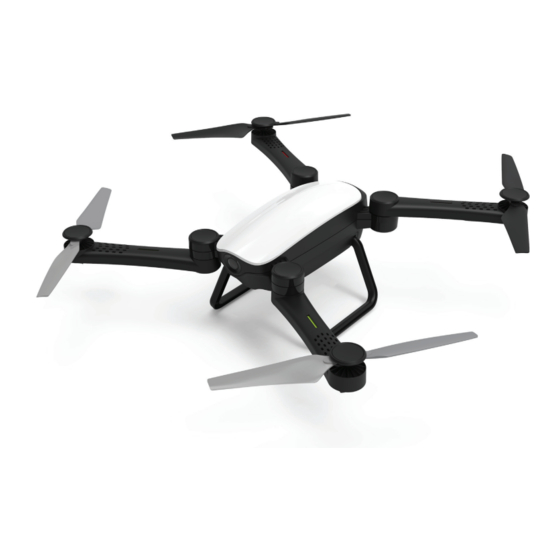
Page 8: Main Parts
4 Main parts Drone 1. Landing gear 2. Front LED indicator (green) 3. Camera 4. Protective guard 5. Back LED indicator (red) 6. Propeller 7. Blade cover 8. Slot-in for micro SD card 9. On/Off 10. Battery cover 11. Battery... - Page 9 Joystick 12. Low / middle / high speed 13. Take a photo 14. On/Off 15. Forward fine tuning 16. LED on / LED off 17. Forward / right / backward / left 18. Left fine tuning 19. Right fine tuning 20. Backward fine tuning 21. Automatic take off / Automatic landing 22. Record video 23. Right rotating fine tuning 24. Left rotating fine tuning 25. Rise / rotate right / decline / rotate left...
-
Page 10: Installation
5 Installation 5.1 Charging the battery • Open the battery cover. • Disconnect the battery. • Connect the USB connection cable to the battery. • Connect the USB to a power source. 5 It takes approximately 90 minutes to fully charge the battery. 5.2 Memory Card: Placement and access 5 Due to the great variety of products with external memory connection (USB, SD/MMC, etc.) and their sometimes quite manufacturer-specific functions we can neither guarantee that all devices will be recognised, nor that all operating options that are possible in theory will actually work. -
Page 11: Inserting The Batteries In The Joystick
• Insert the memory card into the Micro SD card slot. 5 Memory card max. 32 Gb. 5.3 Inserting the batteries in the joystick • Open the battery compartment of the joystick. • Insert the AAA batteries into the battery compartment of the joystick. 5 Insert the batteries matching the (+) and (-) polarity markings. 5.4 Installing the HFUN app • Download the HFUN app for Android of iOS onto your phone via Google Play or the Apple App Store. -
Page 12: Usage
6 Usage 6.1 Turning the drone On or Off Hold 1s • Fold out the landing gear. • Open the arms of the drone. • Press and hold the on/off button for 1 second. The drone is now on. 5 Press and hold the power button again for 1 second to turn off the drone. 6.2 Installing guards • Slide the guards onto the arms. 5 When you hear a click, the guard is securely attached. -
Page 13: Connecting The Joystick
6.3 Connecting the joystick 5 Make sure the drone is switched on before establishing a connection with the joystick. • Press and hold the on/off button for 1 second. • Move the left thumbstick up and down. The joystick is now connected to the drone. 5 The LED indicators of the drone will flash when the drone is ready to connect. The LED indicators of the drone light up when the joystick is connected to the drone. 6.4 Control with the joystick 6.4.1 Start • To start the drone, move the left thumbstick to the bottom left and the right thumbstick to the bottom right at the same time. 6.4.2 Rise • Move the left thumbstick up to move the drone upwards. 6.4.3 Decline • Move the left thumbstick down to move the drone downwards. -
Page 14: Connecting The Hfun App
6.4.4 Rotate • Move the left thumbstick to the left or right to make the drone rotate. 6.4.5 Panning • Move the right thumbstick to fly the drone forwards, backwards, left or right. 6.5 Connecting the HFUN app 5 Make sure the drone is switched on before establishing a connection with the app. • Enable the WiFi function on your phone. • Open the WiFi settings and select the drone. The drone is now connected to your phone. • Open the HFUN app on your mobile phone. • Press 'Start'. The drone control screen is displayed. 6.6 Control using the HFUN app 6.6.1 Start • Press 'Take off' in the bottom left corner. The drone starts and moves upwards to a certain height. 6.6.2 Rise •... -
Page 15: Adjusting The Controller's Interface
6.6.4 Rotate • M ove the left thumbsti ck to the left or right to make the drone rotate. 6.6.5 Panning • M ove the right thumbsti ck to fl y the drone forwards, backwards, left or right. 6.7 Adjusti ng the controller's interface • P ress the butt on with the setti ngs icon. U nder 'Control Mode' four diff erent control opti ons are shown: 1. -
Page 16: Take A Photo
6.8 Take a photo You can take a photo with the joystick or with the app. 6.8.1 Taking a photo with the joystick • Press the 'take a photo' button. 5 Make sure you have inserted a micro SD card into the drone, otherwise the photo will not be saved. 6.8.2 Taking a photo with the app • Press the button with the camera icon. 5 The photo is stored in the memory of your phone. -
Page 17: Starting A Movie Recording
6.9 Starting a movie recording You can make a video with the joystick or with the app. 6.9.1 Making a video with the joystick • Press the 'start a video' button. 5 Make sure you have inserted a micro SD card into the drone, otherwise the video will not be saved. 6.9.2 Making a video with the app • Press the button with the video icon. 5 The video is stored in the memory of your phone. -
Page 18: Using The Follow Me Function
6.10 Using the Follow Me functi on • M ove the drone upwards. • P ress the air plane icon. T he icon changes to the master icon. P ersons in front of the camera of the drone will be identi fi ed with a blue frame. • P ress a blue frame to acti vate the Follow Me functi on. T he blue frame turns red and the drone will follow the selected person. 6.11 Controlling the drone with your hand •... -
Page 19: Storing The Drone
6.12 Storing the drone • Turn off the drone before storing. • Remove the guards. • Close the arms of the drone. • Fold the landing gear. -
Page 20: Cleaning And Maintenance
7 Cleaning and maintenance • Clean regularly with a soft, clean, dry cloth. Avoid abrasives that can damage the surface. • Do not use aggressive chemical cleaning agents such as ammonia, acid or acetone when cleaning the product. -
Page 21: Technical Specifications
8 Technical specifications • Model number: Drone X22 • Max. signal distance: 30 - 50 m • Max. flight time: 12 min • Frequency range: 2.4 GHz • Viewing angle: 120 degrees • Resolution: 2 MP (1280 x 720P) • Battery: Li-Po battery • Battery capacity: 1200 mAh • Voltage: 3.7 V • Battery charging time: 90 min • Dimensions: 38 x 41 x 8.8 mm • Memory: Micro SD card (Max. 32 Gb) • Working range: -10°C - +55°C • Temperature for storage: -20°C - +70°C... -
Page 22: Disposal Of Used Electric And Electronic Equipment
9 Disposal of used electric and electronic equipment The meaning of the symbol on the material, its accessory or packaging indicates that this product shall not be treated as household waste. Please, dispose of this equipment at your applicable collection point for the recycling of electrical and electronic equipments waste. In the European Union and other European countries which there are separate collection systems for used electrical and electronic product. By ensuring the correct disposal of this product, you will help prevent potentially hazardous to the environment and to human health, which could otherwise be caused by unsuitable waste handling of this product. The recycling of materials will help conserve natural resources. Please do not therefore dispose of your old electrical and electronic equipment with your household waste. For more detailed information about recycling of this product, please contact your local city office, your household waste disposal service or the shop where you purchased the product.
Need help?
Do you have a question about the X22 and is the answer not in the manual?
Questions and answers