Advertisement
Quick Links
Advertisement

Related Manuals for Markforged Onyx Series

Summary of Contents for Markforged Onyx Series
- Page 1 INDUSTRIAL PRINTER QUICK START GUIDE INDUSTRIAL PRINTER QUICK START GUIDE...
- Page 2 For the latest PDF version of this document, visit our support website. Copyright © 2019 Markforged, Inc. All rights reserved. Changes are periodically made to the information herein which will be incorporated in revised editions of this publication.
- Page 3 INDUSTRIAL PRINTER QUICK START GUIDE TABLE OF CONTENTS USER NOTES UNBOXING AND ASSEMBLY QUICK START GUIDE NETWORK REQUIREMENTS...
-
Page 4: User Notes
In this guide, “Onyx” refers to Onyx and Onyx FR; “Nylon” refers to Tough Nylon and Nylon White. TABLETOP USE ONLY Markforged Industrial Series printers are approved for tabletop use only. Set up your printer on a sturdy level surface with sufficient access on all sides. The printer is not approved for free-standing floor use. - Page 5 INDUSTRIAL PRINTER QUICK START GUIDE UNBOXING AND ASSEMBLY WHAT’S IN THE BOX Your Industrial Series printer ships with a number of accessories, listed below. With the exception of the last three items, everything on the list below can be found in the accessory kit shipped inside your printer. ●...
- Page 6 INDUSTRIAL PRINTER QUICK START GUIDE UNBOX AND ASSEMBLE YOUR PRINTER Supplies ● 3mm hex key The printer will be delivered on a pallet with a cover box. The box does not have a bottom and the printer will sit directly on the pallet, so please take care when unboxing and moving the printer. The printer and cabinet are heavy and require two people to move or set up.
-
Page 7: Quick Start Guide
Note: The print head will become hot during the plastic loading process. Exercise caution when working near the nozzles. Only use materials that have been approved by Markforged for use with this printer. The Industrial Series is designed to work only with proprietary materials and consumables from Markforged. - Page 8 INDUSTRIAL PRINTER QUICK START GUIDE much moisture from the air will often cause underextrusion, which can in turn cause print failures. Please take special care to never leave plastic materials exposed to ambient air, and always keep plastic materials in the provided drybox.
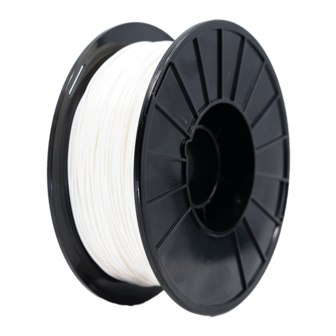
- Page 9 INDUSTRIAL PRINTER QUICK START GUIDE Place the spool and spindle in the drybox such that filament exits from the of the spool. Note: The plastic spool is wound under tension. Always hold the plastic against the spool to prevent unwinding during the loading routine. Using wire cutters or a similar tool, cut the plastic filament at a 45 angle.
- Page 10 INDUSTRIAL PRINTER QUICK START GUIDE Carefully unwind two and a half feet of material from the spool, then re-apply the tape to keep the rest of the material from unspooling. Note: To avoid bending the material, tape it to the inside of the spool wall. Use wire cutters or a similar tool to trim off any filament that appears bent, as it may be difficult to load.
- Page 11 INDUSTRIAL PRINTER QUICK START GUIDE When the fiber is under tension on the spool, remove the tape from inside the spool and set it aside for later use. We recommend taping it to the front face of the spool. At the end of the Load Fiber routine, remove the cut piece of fiber from the print head. SET UP YOUR PRINT BED Before printing a part, you will need to level your print bed and apply glue to the region of the bed where the parts will print.
- Page 12 INDUSTRIAL PRINTER QUICK START GUIDE Apply glue from the provided glue stick to the print bed, as shown in purple in the image below. Reinstall the print bed on the printer. PRINT YOUR FIRST PART - ONLINE VERSION Note: We recommend that users use the online version of Eiger and print via Wi-Fi or Ethernet, but if you are unable to connect your printer to Eiger, please see the section titled Offline Printing in the Industrial Printer User Guide.
- Page 13 INDUSTRIAL PRINTER QUICK START GUIDE Select Industrial Series from the Printer Type drop-down menu in the Part Settings panel on the right side of the screen. Select the material types that you will use for this print from the Material Reinforcement Material drop-down menus in that same panel. Note: This part can be printed with any combination of fiber and plastic.
- Page 14 Remove the print bed from the printer, and use the provided scraper to remove the part from the print bed. Warning: The scraper provided with Markforged printers is sharp and can cause injury if used incorrectly. Tip: Always scrape away from your body. When removing a part, brace the bed in a vertical position against a sturdy level surface.
-
Page 15: Network Requirements
Ethernet connection must utilize cables less than 30 meters in length. FIREWALL SETTINGS Markforged products support DHCP only; there is no support for static IP addresses. If a static IP is needed, the network’s DHCP server should be configured with a “reservation” or static host entry assigning the desired IP address to the printer’s MAC address;... - Page 16 Currently, NTP — Network Time Protocol, on UDP port 123 — is the only supported mechanism for time synchronization, and Markforged printers will attempt to connect to four different servers within the global public NTP server pool, determined by querying hostnames ending in “.pool.ntp.org”.
Need help?
Do you have a question about the Onyx Series and is the answer not in the manual?
Questions and answers