Table of Contents
Advertisement
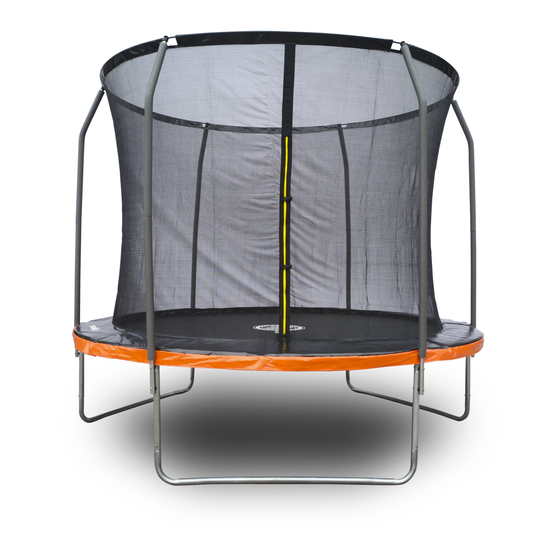
TRAMPOLINE
10 FT (3 M) COMBO SET
WITH SAFETY NET & SPRING COVER
INSTRUCTION MANUAL
Thank you for purchasing the BOUNCEKING 10 FT (3 M) Trampoline Combo Set.
Please read carefully through all the precautions and instructions in this manual
before using this equipment and keep this manual for your future reference.
#18M12BK003 10 FOOT UM.indd 1
2018/12/20 3:10 PM
Advertisement
Table of Contents

Summary of Contents for BounceKing 10 ft Trampoline Combo
- Page 1 WITH SAFETY NET & SPRING COVER INSTRUCTION MANUAL Thank you for purchasing the BOUNCEKING 10 FT (3 M) Trampoline Combo Set. Please read carefully through all the precautions and instructions in this manual before using this equipment and keep this manual for your future reference.
-
Page 2: Table Of Contents
CONTENTS SAFETY INFORMATION, WARNINGS AND USE INSTRUCTIONS Pg. 3 BOUNCING TECHNIQUES Pg. 5 TRAMPOLINE PLACEMENT Pg. 8 TRAMPOLINE AND ENCLOSURE PARTS LIST Pg. 6 (Frame assembly) ASSEMBLY INSTRUCTIONS Pg. 9 (Enclosure assembly) ASSEMBLY INSTRUCTIONS Pg. 13 CARE AND MAINTENANCE Pg.19 WARRANTY PROCEDURE Pg. -
Page 3: Safety Information, Warnings And Use Instructions
SAFETY INFORMATION, WARNINGS AND USE INSTRUCTIONS Before you begin using the trampoline, be sure to carefully read all the information provided to you in this manual. Just like any other type of physical recreational activity, participants can be injured. To reduce the risk of injury, be sure, to follow the appropriate safety rules and tips. - Page 4 • DO NOT smoke while using the trampoline. • DO NOT use the trampoline in bad weather conditions. Gusty or severe winds and rain will make using the trampoline hazardous. • NEVER use the trampoline if the mat is wet or dirty. •...
-
Page 5: Bouncing Techniques
BOUNCING TECHNIQUES Initially you should become accustomed to the feel and bounce of the trampoline. The focus must be on the fundamentals of your body position and the basic bouncing techniques should be practiced until you can do each technique with ease and control. A certified trampoline instructor should be contacted to further develop your trampoline skills. -
Page 6: Trampoline And Enclosure Parts List
TRAMPOLINE AND ENCLOSURE PARTS LIST Make sure you have all the parts listed. If you are missing any please contact our Service Centre. PART PART DIAGRAM DESCRIPTION DIAGRAM DESCRIPTION TRAMPOLINE ARC WASHER FRAME PAD WRENCH TOP RAIL WITH SPRING LEG SOCKETS LOADING TOOL ALLEN LEG BASE... - Page 7 TRAMPOLINE AND ENCLOSURE PARTS LIST Make sure you have all the parts listed. If you are missing any please contact our Service Centre. PART DIAGRAM DESCRIPTION ENCLOSURE SAFETY INSTRUCTION PLACARD SMALL SPRING WASHER PLASTIC CAP GAP SPACER END CAP BK-10FTTRAMP #18M12BK003 10 FOOT UM.indd 7 2018/12/20 3:10 PM...
-
Page 8: Trampoline Placement
TRAMPOLINE PLACEMENT For safe use of the trampoline, please be aware of the following when selecting the place for your trampoline: • Make sure it is placed on a level surface. • The area is well lit. • There are no obstructions beneath the trampoline. •... -
Page 9: Assembly Instructions (Frame Assembly)
ASSEMBLY INSTRUCTIONS (Frame assembly) STEP 1 – Before assembly, layout parts as shown below. STEP 2 – Slide Right L-Shaped leg (6A) and Left L-Shaped leg (6B) into the small ends of the Leg Base (4). Align the holes and secure them together using parts (9), (11) and (12) with the Allen Wrench (15) as shown in the diagram below. - Page 10 ASSEMBLY INSTRUCTIONS (Frame assembly) STEP 3 – Slide each Top Rail with Leg Sockets (3) into each other as shown in the Diagram below. Once all Top Rails with leg Sockets are connected, they should form a circle. Slide each Top Rail (3) into the already made legs as shown in the diagram below.
- Page 11 ASSEMBLY INSTRUCTIONS (Frame assembly) STEP 4 – Layout the trampoline mat (1) with the warning labels facing upwards. Make sure to wear heavy duty working gloves to protect your hands as well as goggles to avoid injuries in your eyes. Use the special Spring Loading tool (14) included.
- Page 12 ASSEMBLY INSTRUCTIONS (Frame assembly) STEP 5 – Slide the Frame Pad (2) over the Lower Frame Tubes through the holes on the edge of the pad so that the springs and steel frame are fully covered. Ensure that the Frame pad covers all metal parts.
-
Page 13: Assembly Instructions (Enclosure Assembly)
ASSEMBLY INSTRUCTIONS (Enclosure assembly) STEP 6 – Connect the Lower Frame Tube with Foam (B) to the Leg Base (4) as shown in the diagram below. Align the holes and secure them by using parts (5), (10), (11), (12), (L), (M) and (D) using the Allen Wrench (15) and Wrench (13) ASSEMBLY STEPS BK-10FTTRAMP... - Page 14 ASSEMBLY INSTRUCTIONS (Enclosure assembly) STEP 7 – Connect all the Cable Wire (C) together using the Wrench (13) to tighten. Once all the pieces are connected, feed the connected Cable Wire through the top of the Enclosure Netting (G). once completely through, fasten the two ends of the Cable Wire together and tighten with the Wrench (13).
- Page 15 ASSEMBLY INSTRUCTIONS (Enclosure assembly) STEP 8 – Attach the Plastic Cap (J) to the end of the Upper Frame Tube with Foam (A) using Self-Locking Screw (E) to secure it. Once each Upper Frame Tube has a Plastic Cap attached, clip each Upper Frame Tube onto the Cable Wire (C) as shown in the diagram below.
- Page 16 ASSEMBLY INSTRUCTIONS (Enclosure assembly) STEP 9 – Lift the enclosure net onto the already assembled trampoline as shown in the diagram below. Connect the Upper Frame Tube (A) to the Lower Frame Tube (B) by aligning the holes and securing them using parts (I) and (E) with the Allen Wrench (15).
- Page 17 ASSEMBLY INSTRUCTIONS (Enclosure assembly) STEP 10 – Secure the enclosure net to the trampoline mat using the Cord (F). Lift up the frame pad and tie one end of the cord to any of the trampoline loop and the other end of the cord through the next hoke until the end of the cord is reached the tie it.
- Page 18 ASSEMBLY INSTRUCTIONS (Enclosure assembly) STEP 11 – Hang the Enclosure Safety Instruction Placard (H) onto the enclosure and the Trampoline Safety Instruction Placard (16) onto the trampoline as shown in the diagram below. BK-10FTTRAMP #18M12BK003 10 FOOT UM.indd 18 2018/12/20 3:10 PM...
-
Page 19: Care And Maintenance
CARE AND MAINTENANCE The trampoline was designed and manufactured with quality materials and craftsmanship. If proper care and maintenance is provided it will give jumpers years of exercise, fun and enjoyment as well as reduce the risk of injury. The trampoline and enclosure are prone to wear and tear. The trampoline and enclosure need top be properly maintained and checked following the Maintenance Schedule set out below. -
Page 20: Proof Of Purchase
PROOF OF PURCHASE Any claims in terms of the warranty must be supported by a proof of purchase or warranty number. Warranty numbers can be issued through contacting our service centre. If such proof is not available then notwithstanding anything to the contrary herein, the service agents prevailing charges for services/repairs including call out and/or spares will be payable by the Consumer upon collection or delivery of the repaired product. -
Page 21: Repairs Procedure
A quote for the repair/replacement of these items will be provided to the Consumer for approval prior to repairs being conducted. FOR QUERIES OR ADDITIONAL INFORMATION CONTACT OUR CALL CENTRE ON: 0800 037 778 OR www.bounceking.co.za #18M12BK003 BK-10FTTRAMP #18M12BK003 10 FOOT UM.indd 21... - Page 22 BK-10FTTRAMP #18M12BK003 10 FOOT UM.indd 22 2018/12/20 3:10 PM...
- Page 23 BK-10FTTRAMP #18M12BK003 10 FOOT UM.indd 23 2018/12/20 3:10 PM...
- Page 24 BK-10FTTRAMP #18M12BK003 10 FOOT UM.indd 24 2018/12/20 3:10 PM...
Need help?
Do you have a question about the 10 ft Trampoline Combo and is the answer not in the manual?
Questions and answers