
Related Manuals for ToolKitRC M6


Summary of Contents for ToolKitRC M6
- Page 1 Manual V1.0 2019.06 www.ToolkitRC.com ToolkitRC Technology (Shenzhen) Co.. Ltd. @ ToolkitRC 2019...
-
Page 2: Introduction
Introduction Thank you for purchasing the M6 Toolkit Charger. Please read this manual carefully before use. Key Points Tips Important Information Further information To ensure you have the best experience with this product please scan the QR code below to stay up to date with news. -
Page 3: Safety
Safety 1. The M6 charger allows input from 7-28V. For best operation ensure the power supply is stable and pay attention to connection polarity. 2. Do not use this product in excessively hot, wet or moist conditions or near flammable objects, liquids or gas. -
Page 4: Table Of Contents
Contents Introduction ............ 2 Key Points ............2 Safety............... 3 M6 Layout ............6 Quick start ............7 Charge and discharge........9 1. Battery type setting........9 2. Cutoff voltage setting(TVC) ....11 3. NiMH Setting(PeakV) ......12 4. Battery Setting..........12 5. Current setting ......... 14 6. - Page 5 Product description M6 is a multi-function charger and discharger that integrates receiver and servo test functions along with power supply functions. • Lipo. LiHV. LiFe Lion1-6S. NiMh 1-16s. PB 1-12s battery charging and discharging and balance management •Charging current: Maximum 10A @150W •Discharge Current: Recovery MAX 10A@150W...
-
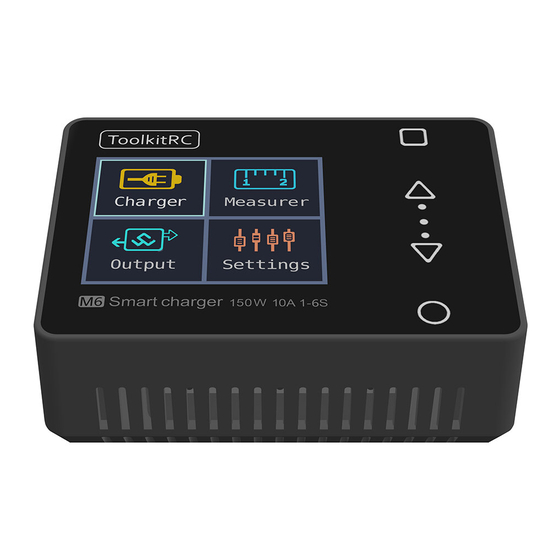
Page 6: M6 Layout
M6 Layout Exit Display Up/Down Output Balance Port Front Input Cooling USB port Signal Port Back @ ToolkitRC 2019... -
Page 7: Quick Start
Quick start 1. The 7-28V power supply is connected to the input port on the back of the M6 2. The display shows the bootup logo and stays for 2 seconds 3. Accompanied with do-re-mi bootup sound 4. the bootup is completed. the display enters into the main interface as shown below 5. - Page 8 =============================== 1. Short press the [OK] once to determine the key function. 2. Press and hold the [OK] for 2 seconds as the delete key function. 3.Pressing any button will give a sound prompt. =============================== @ ToolkitRC 2019...
-
Page 9: Charge And Discharge
1. Battery type setting Press [up] or [down] to move the cursor. Select the battery type to be set. Press [OK] to enter the battery setting interface as shown below. Move the cursor to [Lipo] and press [OK] to modify @ ToolkitRC 2019... - Page 10 3.85V. 4.35V battery after full LiFe: often referred to as lithium-iron Phosphate battery. nominal voltage 3.30V. fully charged 3.60V battery Li-ion: often referred to as lithium-ion battery. nominal voltage 3.60V. fully charged 4.10V battery @ ToolkitRC 2019...
-
Page 11: Cutoff Voltage Setting(Tvc
2. Do not modify the cutoff voltage when you are unfamiliar with battery characteristics. 3. the cutoff voltage can be set to the range of positive and negative 50mV of full voltage 4. vocabulary explanation: TVC: terminal voltage control @ ToolkitRC 2019... -
Page 12: Nimh Setting(Peakv
NiMH battery is full =============================== 4. Battery Setting Move the cursor to the [Cells] and press the [OK] button to change the number of battery cells. Press [up] or [down] to adjust the value. When set to @ ToolkitRC 2019... - Page 13 2. If the number of cells was set incorrectly. The battery cannot be full charged. or be overcharged and damaged. please set it carefully. After the Lixx battery is connected to the balance port. the number of battery cells can be more accurately identified. =============================== @ ToolkitRC 2019...
-
Page 14: Current Setting
1. ordinary discharge mode. through internal heat dissipation discharge. maximum support 2.0A@8W. 2. Recovery discharge mode. When the input power source is a battery this function can recover electrical energy to the input battery, the maximum support 10.0A current. @ ToolkitRC 2019... -
Page 15: Working Mode
Move the cursor to [Charge] [DisCHG] [StoCHG] position. press [OK]. the charger will work in the mode of the selected function. When selected as [Charge]. it will indicate the target voltage that will charge the battery. As shown below @ ToolkitRC 2019... - Page 16 As shown ================================= Tip: 1,To use energy recovery discharge mode (recycle) please read the details on setting discharge mode on page 37 of this manual. ================================= @ ToolkitRC 2019...
- Page 17 ================================= Tip:The discharge cutoff voltage should be set. According to the discharge characteristics of the battery. After the recovery limit voltage is set to the highest protection voltage of the power supply. @ ToolkitRC 2019...
- Page 18 Setting a high overvoltage may damage the input power. Do not set the input limit higher than the capacity of the power source battery. =============================== @ ToolkitRC 2019...
- Page 19 Press [up] or [down] key on this screen to switch the bottom status display information or press and hold [OK] for 2 seconds to dynamically set the working current. As shown below 25.20V: The battery voltage of the output port. 5.0A: Charging or discharging current @ ToolkitRC 2019...
- Page 20 -.--V : no battery connected To end the charge and discharge work. short press [Exit]. in the pop-up prompt box. select [OK] to exit. When charging is complete or charging is wrong A pop-up windows display and a tone sounds. @ ToolkitRC 2019...
- Page 21 When set to a fixed number of cells. you need to access the same number of batteries. When setting to automatically detect the number of battery cells. please pay attention to whether the number of detected cells matches the actual ones. =============================== @ ToolkitRC 2019...
- Page 22 [OK] to enter the function and display the following interface. Press up or down to select the type of signal to be tested. Move the cursor to the [PWM] item. press [OK] to enter the PWM test interface as shown below. @ ToolkitRC 2019...
- Page 23 Move the cursor to the [SBUS] item and press [OK] to enter the compatible signal test of SBus. Dbus. etc.. Press up or down and switch the 16 channel value and status bit. The display interface is as follows 2 (9-16 channel display is omitted) @ ToolkitRC 2019...
- Page 24 @ ToolkitRC 2019...
-
Page 25: Battery Measurement
Move the cursor select [Balance] and press [OK] to start balancing management of the batteries. Move the cursor to the [Voltage] position press [OK] to switch to internal resistance mode and display the following figure. @ ToolkitRC 2019... - Page 26 5 seconds and shows the internal resistance of the battery =============================== Tips: 1. This testing needs to charge the battery for 5A current for a short time. please ensure that the input power is sufficient and the battery is not overcharged. =============================== @ ToolkitRC 2019...
-
Page 27: Signal Output
Press [up] or [down] to move the cursor to the [PWM] item press [OK] to enter the PWM test interface as shown below. Move the cursor to the [Manual] item press [OK] to set the output mode. which can be set to Manual. @ ToolkitRC 2019... - Page 28 Press up or down under the output main interface to move the cursor to the [SBUS] item. press [OK] to enter the compatible signal output of SBus. Dbus. @ ToolkitRC 2019...
- Page 29 (9-16 channel and status display interface diagram omitted) Press [up] or [down] to move the cursor to the value of the channel to be modified. Press [OK] to modify the output pulse width value of this channel. @ ToolkitRC 2019...
-
Page 30: Power Output
2. custom: users can manually set the value of voltage and current limit according to demand 3. commonly used drone battery charging: select @ ToolkitRC 2019... - Page 31 CV CC: current working mode. CV: constant voltage CC: constant current =============================== Important: 1. Do not charge the normal battery when the power output is turned on. Otherwise. the battery may be damaged or the device may be damaged. =============================== @ ToolkitRC 2019...
-
Page 32: Drone Charging
Typical: For common drone models. it can be set to the following four types of drones. Mavic2. Mavic. Phantom. Inspire. 17.6V: The voltage value when the current battery is full cannot be changed. 3.8AV: Maximum current for charging. adjustable current. Start: Start output. stop output button @ ToolkitRC 2019... - Page 33 1. There is no need to open the battery before charging. Automatic activation and charging =============================== Important: 1. Do not charge the normal battery in this working mode. otherwise the battery may be damaged or the device may be damaged. =============================== @ ToolkitRC 2019...
-
Page 34: System Settings
Safe charging time: The maximum time for continuous charging and discharging. will stop working if it exceeds Discharge mode: Can be set to normal discharge. discharged by internal heat dissipation. Or recycle the discharge and recover the energy to the input @ ToolkitRC 2019... - Page 35 Energy saving tips: The sound and light are not disconnected from the power supply during this time. Continuous operation: After charging discharging. whether to continue charging and discharging after replacing the battery Default setting: Restore all settings to their default values. @ ToolkitRC 2019...
-
Page 36: Other Functions
In addition to the above upgrade functions. the USB interface can also output 2.0A current to charge mobile devices. 3. energy saving reminder When the M6 is idle for 5 minutes. the backlight will automatically decrease. 4. Automatically continue to charge and discharge after the next one . - Page 37 When the lithium battery is fully charged. the prompt "fast charging has ended" .If the battery is not removed. constant voltage trickle charging will be performed automatically to bring the battery to the even more full state. @ ToolkitRC 2019...
-
Page 38: Specification
Measuring SBUS 880us-2200us*16ch @20-100Hz Voltage 1.0V-5.0V @1-6S 1-500mR @1-8S 500us-2500us @20-1000Hz 880us-2200us*8ch @50hz Output SBUS 880us-2200us*16ch @74Hz Power 1-10A@1-28V Mode: CC+CV Display TFT 1.8 inch 160*128 resolution 70mm*50mm*26mm Size Product Weight 75mm*75mm*35mm Size Individual packing 140g Weight @ ToolkitRC 2019...
Need help?
Do you have a question about the M6 and is the answer not in the manual?
Questions and answers