Advertisement
Table of Contents
- 1 Table of Contents
- 2 Lifetime Warranty
- 3 Important Safety Instructions
- 4 Base Installation
- 5 Operation/Control Panel
- 6 How to Connect to Wi-Fi/Wi-Fi Functionality
- 7 Maintenance
- 8 Filter Replacement
- 9 UVC Lamp Replacement
- 10 Troubleshooting Guide
- 11 Specifications
- Download this manual
See also:
User Manual
Advertisement
Table of Contents

Summary of Contents for Air Oasis iAdaptAir S
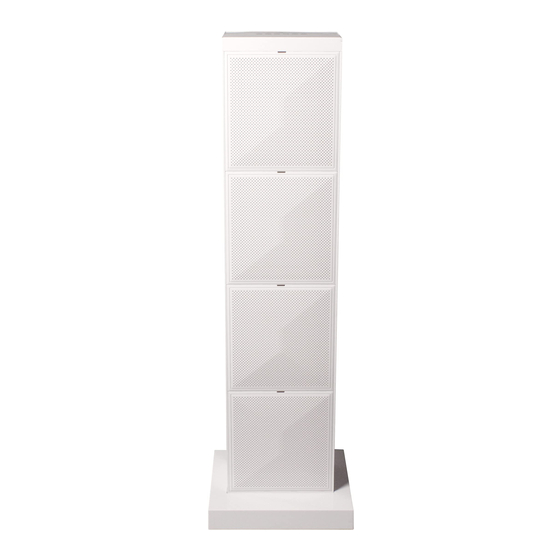
- Page 1 For use with iAdaptAir S, M, L Models ® Due to continuous improvements, the picture included within this owner’s manual may differ slightly from the actual product. For safety and to ensure proper use carefully read the contents of this manual before operating or installing the unit.
-
Page 3: Table Of Contents
® will give you important information to keep you safe from harm and ensure you get the most benefits from your device. For additional information please contact us: Mail: Air Oasis, LLC web: www.airoasis.com Attn: Customer Service e-mail: feedback@airoasis.com 3401 Airway Blvd. -
Page 4: Lifetime Warranty
God, the use of voltages other than indicated on the label displayed on this product or service of this product by anyone other than Air Oasis or an Air Oasis authorized dealer. •... -
Page 5: Important Safety Instructions
Important Safety Instructions When operating any electrical appliance, basic precautions should always be followed for safety. WARNING: To reduce the risk of fire, electric shock or injury: • Carefully read the entire contents of this manual. • Do not use outdoors or on wet surfaces. •... -
Page 6: Base Installation
Base Installation 1. Using the four included screws, attach the base. This will prevent injuries by ensuring the unit is stable and will not fall over. -
Page 7: Operation/Control Panel
Operation Control Panel • Feather touch controls are operated with a light touch of the finger. • The backlit controls allow for easy operation even in dark conditions. 1. After connecting the power supply, you will hear one beep and the control panel will illuminate for two seconds before entering standby mode. -
Page 8: How To Connect To Wi-Fi/Wi-Fi Functionality
How To Connect To WiFi (Optional) 1. Open the WiFi settings on your smart phone and connect to your WiFi (must be 2.4GHz, as the iAdaptAir cannot connect to 5GHz). ® 2. Plug in your iAdaptAir ® 3. Keep the iAdaptAir , router and your smart phone within a five ft. - Page 9 5. Click +NEW DEVICE and scan the device QR code. It’s located on the bottom right corner of the quickstart guide and under the filter cover. Click ADD after completing all fields. Personalize the name of your device. You can use the default image or take your own If you have other photo.
- Page 10 6. Step 1/3: writing the router information to the device. 7. Step 2/3: connecting the device with the cloud server. 8. Step 3/3: updating the device information into the app. 9. If connecting the device fails, check the following... • Do you have a WiFi signal? •...
- Page 11 Wi-Fi Functionality using the Control Panel Viewing Wi-Fi Status 1. Press Smart Mode button once at standby (power plugged-in but not operating). It will show the status of the Wi-Fi connection. Green Flashing Happy Face = not connected Solid Green Happy Face = connected Red Frowning Face = Wi-Fi turned off 2.
-
Page 13: Maintenance
Maintenance Dust Guard Maintenance Ensure the iAdaptAir is disconnected from its’ power source before ® performing any maintenance. • Pivot the dust guard outwards and lift up to remove it from the air purifier. • Use a vacuum to remove any debris. Wipe down the dust guard with a damp rag. - Page 14 • Bi-Polar Ion Brushes: Using a pipe cleaner or a 0.2” or less diameter dowel rod to insert in to the 2 holes in front of the brushes to knock off any debris buildup. Clean the brush heads periodically for optimal effectiveness. •...
-
Page 15: Filter Replacement
Filter Replacement When the filter replacement reminder turns red, the filter is nearing the end of its’ useful lifespan & needs to be replaced soon. 1. Open the filter cover by sliding it to the right. 2. Take out the old filter & replace with a new filter... - Page 16 3. Close the filter cover. 4. Press and hold the “Filter Replacement Reminder” for 3 seconds to reset it.
-
Page 17: Uvc Lamp Replacement
UV Lamp Replacement For optimal performance and maximum efficiency of your iAdaptAir , ensure ® all UV Lamps are replaced annually. Ensure the iAdaptAir is disconnected from its’ power source before ® performing any maintenance. UV Lamp may be hot. Allow time for the lamp to cool before removing it. -
Page 18: Troubleshooting Guide
Troubleshooting Guide Malfunction Checked Items Solving Measures Is the power switched on? Press the power button The Machine is Is the power adapter loose Connect or change the power adapter Not Working or broken? The filter cartridge has too Replace the filter cartridge Odors from the much debris. -
Page 19: Specifications
iAdaptAir Specifications ® Specifications iAdaptAir-S iAdaptAir-M iAdaptAir-L Warranty: Lifetime Warranty Lifetime Warranty Lifetime Warranty Voltage: 100-240VAC 100-240VAC 100-240VAC Rated Power: 8 WATTS 24 WATTS 32 WATTS Dimensions: 5.4in x 8.5in x 9.7in 11.2in x 11.2in x 28.3in 11.2in x 11.2in x 37in Weight: 7 lbs. - Page 20 We Care About Your Air Copyright © 2019 Air Oasis, LLC. All Rights Reserved.


Need help?
Do you have a question about the iAdaptAir S and is the answer not in the manual?
Questions and answers