Table of Contents
Advertisement
Available languages
Available languages
Advertisement
Table of Contents

Related Manuals for Apeman M4


Summary of Contents for Apeman M4
- Page 3 English 1-11 Deutsch 12-22...
- Page 4 Again, thanks so much for choosing APEMAN. Please note that items purchased from APEMAN are covered by 1 year warranty. Let us know if there is anything we can ever do to assist you further.
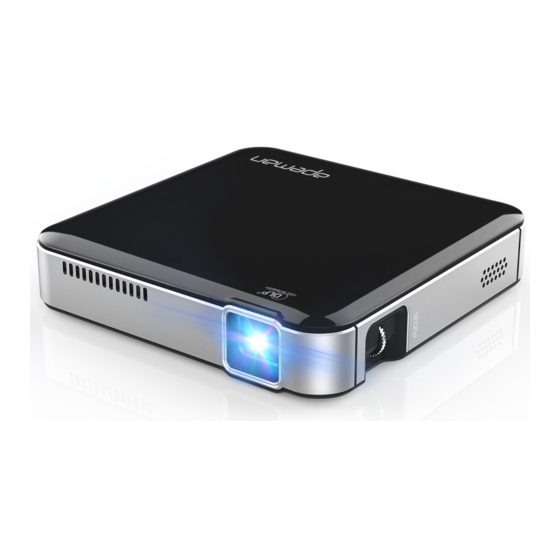
- Page 5 Components of Projector 3 4 5 1. 3.5mm earphone jack 2. Standard USB 5V/1A power output 3. HDMI signal input port 4. Reset button 5. Micro USB 5V/2.4A power input 6. Optical Lens 7. Volume up 8. Volume down 9. Power switch 10.
- Page 6 Specification Product dimensions: 98 * 98 * 21.5mm Brightness of projection: 50 Lumens Projection image size (recommended): 30" ~ 100" Projection distance (recommended): 0.8m ~ 2.6m Contrast: 1000:1 Resolution: 854*480 ( WVGA) Screen aspect ratio: 16:9 Charger specification: Micro USB 5V/2.4A Built-in battery: 3.7V/3400mA Projection time: >1.5hours Build-in loudspeaker: two 1-Watt loudspeakers...
- Page 7 Instruction Manual Charging The Projector · The Projector should be charged with the provided AC Adapter. When the LED Indicator lights on in White and flashes, the Projector is currently charging. Each LED light stands for 25% power, when all the 4 LED lights are on, the Projector is fully charged.
- Page 8 Powering Up And Vewing Media · Turn on the Projector by pressing the Power Switch to “on” for 3-5 seconds. Choose the media that you want to view from the menu on your device and play it as usual. The Projector can display media just almost everywhere! However, for the best viewing quality, we suggest you find a light-colored wall (preferably white and smooth) and place the Projector with its lens facing the location.
- Page 9 DO NOT BLOCK THE AIRFLOW CHANNELS ON THE SIDES OF YOUR PROJECTOR. DOING SO MAY RESULT IN OVERHEATING AND DAMAGE TO THE UNIT. Charging Your Device With The Projector · The Projector can also work as a back-up battery for your smart phones. Connect your device to the fully-charged Projector with a USB cable.
- Page 10 Important Safety Instructions All of the safety and operation instructions should be read, adhered to and followed before the unit is operated. If damage is caused by failure to follow the instructions, the warranty does not apply. Caution · TO REDUCE THE RISK OF ELECTRIC SHOCK, DO NOT REMOVE COVER.THERE ARE NO SERVICEABLE PARTS INSIDE.
- Page 11 a tub or sink. Do not place, drop or submerge the unit in water or other liquids. Do not touch a unit that has fallen into water. Unplug it immediately. Caution should be taken so that objects do not fall and liquids are not spilled over the unit.
- Page 12 openings may be blocked. Do not overload electrical outlet. Use only the power source as indicated. Do not carry this unit by cord or use cord as handle. Do not operate this unit if it has a damaged cord or plug; Or, if it is not work- ing properly, or damaged, or dropped into water.
- Page 13 Keep the product beyond the reach of children. Do not touch the product with damp hands. Dispose of the product properly. The product should not be discarded with ordinary household waste. Contact your local recycling center for proper disposal.
-
Page 14: Troubleshooting
Troubleshooting Q. The Projector will not display the video on the wall. · A. Recharge your device's battery. Also, check if the HDMI cable is fully inserted into the Projector and your device. Q. The video showing on my wall is blurry. ·... - Page 15 Trademarks HDMI, and HDMI logo and High-Definition Multimedia Interface, and the HDMI logo are trademarks or registered trademarks of HDMI Licensing LLC in the United States and countries.
- Page 16 Komponenten des Projektors 3 4 5 1. 3.5mm Kopfhöreranschluss 2. Standard-USB-Anschluss 5V / 1A für den Ladeausgang 3. HDMI Signaleingangsanschluß 4. Reset-Taste 5. Mikro-USB 5V / 2.4A Energieeingang 6. Optisches Objektiv 7. Lautstärke erhöhen 8. Lautstärke nach unten 9. Netzschalter 10.
- Page 17 Spezifikationen Produktmaße: 98 * 98 * 21.5mm Helligkeit der Projektion: 50 Lumen Projektionsbildgröße (empfohlen): 30 " ~ 100" Projektionsabstand (empfohlen): 0.8m-2.6m Kontrast: 1000:1 Auflösung: 854 * 480 (WVGA) Bildseitenverhältnis: 16: 9 Ladegerät Spezifikation: Micro-USB 5V / 2.4A eingebaute Batterie: 3.7V / 3400MA Batterie-Projektionszeit: >1.5 Stunden Eingebauter Lautsprecher: zwei 1-Watt-Lautsprecher...
- Page 18 Bedienungsanleitung Aufladen Des Projektors · Der Projektor sollte mit dem mitgelieferten Netzteil aufgeladen werden. Die LED-Anzeige leuchtet in Weiß und blinkt, dass der Projektor gerade geladen wird. Jedes LED-Licht steht für 25% Energie, wenn alle 4 LED-Lichter eingeschaltet sind, ist der Projektor voll aufgeladen. Wichtig: Laden Sie den internen Akku des Projektors vor dem ersten Gebrauch vollständig auf (ca.
- Page 19 Schließen Sie einen Lautsprecher an die 3.5 mm Audio-Ausgangsbuchse an. Stromversorgung Und Betrachtung Von Medien · Schalten Sie den Projektor ein, indem Sie den Netzschalter 3-5 Sekunden lang auf EIN schalten. Wählen Sie das gewünschte Medium aus dem Menü auf Ihrem Gerät und spielen Sie es wie gewohnt ab.
- Page 20 fein abzustimmen. Vorsicht · DIE LUFTSTROMKANÄLE NICHT AUF DEN SEITEN IHRES PROJEKTORS BLOCKIEREN. SO KANN AUCH ÜBERHITZUNG UND SCHADEN IM EINHEITEN FÜHREN. Aufladen Des Geräts Mit Dem Projektor · Der Projektor wird auch als Backup-Batterie für Ihre Smartphones. Schließen Sie Ihr Gerät mit einem USB-Kabel an den vollgeladenen Projektor an. Sie können auf dem Display Ihres Telephones sehen, dass es aufgeladen ist und wenn es voll aufgeladen ist.
- Page 21 Wichtige Sicherheitsanweisungen Alle Sicherheits-und Betriebsanweisungen sollten vor der Inbetriebnahme des Gerätes gelesen und befolgt werden. Wenn die Schäden durch Nichtbeachtung der Anweisungen verursacht werden, gilt die Garantie nicht. Vorsicht · UM DAS RISIKO DES ELEKTRISCHEN SCHLAGES ZU VERMEIDEN, ENTFERNEN SIE NICHT ABDECKUNG, SIND KEINE SERVICEBARE TEILE INNEN. UM DAS RISIKO VON FEUER ODER ELEKTRISCHEM SCHLAG ZU VERMEIDEN, DARF DIESES GERÄT NICHT REGEN ODER FEUCHTIGKEIT AUSGESETZT WERDEN.
- Page 22 Benutzen Sie das Gerät nicht beim Baden oder Duschen. Stellen Sie das Gerät nicht auf, wo es fallen oder in eine Wanne oder ein Waschbecken gezogen werden darf. Das Gerät nicht in Wasser oder andere Flüssigkeiten stellen, tauchen oder tauchen lassen. Greifen Sie nicht nach einer Einheit, die ins Wasser gefallen ist.
- Page 23 Das Gerät sollte sich vor direkter Sonneneinstrahlung oder Wärmequellen wie Heizkörpern, elektrischen Heizungen, Wärmeregistern, Öfen oder anderen Geräten (einschließlich Verstärkern), die Wärme erzeugen und befinden. Vermeiden Sie Platzierung auf der Stereoanlage, die Wärme ausstrahlt. Blockieren Sie niemals die Luftöffnungen des Gerätes mit Materialien wie Kleidung, Plastikbeuteln oder Papieren oder legen Sie es auf eine weiche Unterlage wie ein Bett oder eine Couch, wo die Luftöffnungen blockiert werden können.
- Page 24 Warnung · DIESES PRODUKT ENTHÄLT EIN WIEDERHOLBARE BATTERIE Lagern Sie dieses Produkt nicht in hohen Temperaturen, feuchten Bereichen oder direktem Sonnenlicht. Zerlegen Sie das Produkt niemals. Entsorgen Sie das Produkt niemals in Feuer oder Wasser, was zu Explosionen und / oder Verletzungen führen kann. Produkt außerhalb der Reichweite von Kindern aufbewahren.
- Page 25 Fehlerbehebubg F. Der Projektor zeigt das Video nicht an der Wand an. · A. Laden Sie die Batterie des Geräts auf. Überprüfen Sie auch, ob das HDMI-Kabel vollständig in den Projektor und das Gerät eingesetzt ist. F. Das Video auf meiner Wand ist verschwommen. ·...
- Page 26 Markenzeichen HDMI und HDMI-Logo sowie High-Definition Multimedia Interface und das HDMI-Logo sind Marken oder eingetragene Marken von HDMI Licensing LLC in den USA und anderen Ländern.
- Page 28 Made In China...
Need help?
Do you have a question about the M4 and is the answer not in the manual?
Questions and answers