
Related Manuals for Kolcraft Jeep Traveler Tandem


Summary of Contents for Kolcraft Jeep Traveler Tandem
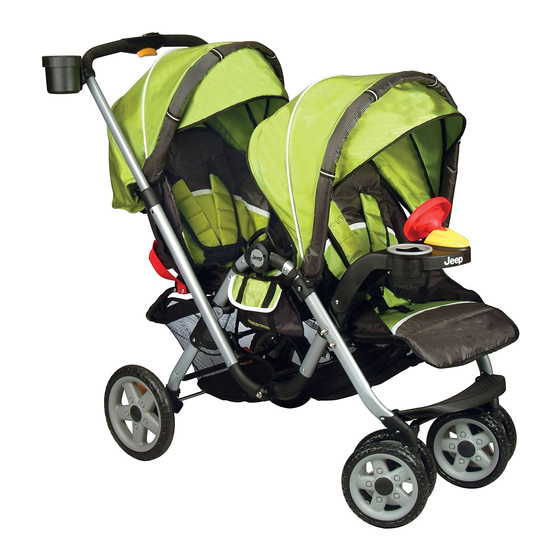
- Page 1 Jeep Traveler Tandem Stroller ® Instruction Sheet Hoja de Instrucciones para la carriola acoplada para viajeros Jeep ® Mode d’emploi pour poussette tandem de voyage de Jeep ® ©2009 Kolcraft Enterprises, Inc. S76-T-R2 2/09 ®...
-
Page 2: Important Safety Information
WARNING Avoid serious injury from falling or sliding out. Always use Restraint System. Your child's safety depends on you. Proper stroller use cannot be assured unless you follow these instructions. DO NOT USE STROLLER UNTIL YOU READ AND UNDERSTAND THESE INSTRUCTIONS. IMPORTANT SAFETY INFORMATION: How to Keep Your Child Safe While Using this Stroller Adult Assembly Required. - Page 3 • stroller, or if you have questions about assembly or use of the stroller, Do Not use this product. Call Kolcraft at 1-800-453-7673. • Make sure the stroller is fully unfolded and securely latched before attaching your Infant Car Seat. This prevents finger pinching and injuries caused by stroller collapsing.
- Page 4 ® , EvenFlo ® Graco ® , Maxi-Cosi ® , Peg Perego ® and Safety 1st ® are trademarks of their respective owners. They are not associated with Kolcraft Enterprises, Inc. and no approval by them is to be implied.
-
Page 5: Parts List
Parts List Brake Assembly Brake Assembly Left (with ▲) Right (with ★) Rear Wheels Stroller Frame Rear Axle Washers Cotter Hub Caps Pins (2) Front Wheel Front Tray Parent Cup Assembly (2) Holder (select models) (select models) Front Canopy Rear Canopy Cargo Bags (2) Continued on next page... -
Page 6: To Open Stroller
How to Assemble Your Stroller To Open Stroller Remove any cardboard inserts or plastic ties used to protect the product during shipment. To open Stroller Frame , a) pull up on the Automatic Locking Latch with 1 hand, gently move it to the lower left of the post. Post Place other hand on the foam handle while Automatic... - Page 7 Rotate the front footrest forward and down until it snaps onto the support tube. Raise the rear storage basket tube up until it clicks and remains horizontal. To extend handle, a) first push and hold the safety lock at the top of the handle to the left.
- Page 8 To Assemble Rear Wheels Turn stroller over as shown. There is a ★ ▲ LEFT and RIGHT brake assembly. Be sure to assemble them onto the Brake Lever 1 & 2 correct rear leg tube. LEFT and RIGHT Symbol will be identified as shown. Each brake assembly will have either a triangle or a star on the bottom of the part.
- Page 9 To Attach Front Wheels Lay stroller back on handle. Position front wheel assembly as shown. Push front wheel assembly onto front leg tube until it clicks into place. Repeat for other wheel. Tug firmly on each wheel assembly to be sure wheels are securely in place.
- Page 10 To Attach Toy (select models) CAUTION Toys intended to be assembled by adult! 1 & 2 Face the steering wheel of the toy towards the front seat. Tabs Align the 2 holes in the tray with tabs on the toy and insert. TO REMOVE: Squeeze the 2 tabs underneath the tray, then lift toy up.
- Page 11 To Attach Front Canopy Canopy Clip With tinted visor facing forward, align Hole canopy clip hole with the post on the front of the frame next to the front seat Post and snap onto the frame. Repeat for the other side. TO REMOVE CANOPY: Pull on lower part of canopy clip until clip comes off of the frame.
- Page 12 How to Properly Use Your New Stroller To Operate Brakes Push levers on both rear wheels down to lock. Unlock Pull levers up to unlock. Lock To Secure Child In Stroller Seat WARNING Avoid serious injury from falling or sliding out.
- Page 13 To Adjust Shoulder Strap Height Lower Higher NOTE: For a secure fit, straps should be at or below the child's shoulder. Adjust straps to higher position as your child grows. To readjust shoulder restraints, turn the plastic toggle and thread through the slot from the back of the seat.
- Page 14 To Recline Seat WARNING Child may slip into leg openings and strangle. Never use in reclined carriage position unless the canopy, side wings and raised safety boot are secured. Safety Boot MUST BE used when seat is in its full recline position and with use with an infant car seat.
- Page 15 Unsnap each support wing from the bottom of the Safety Boot Tube. To secure in place, fold the support wings inward towards the seat, and secure to the outer side of the seat wings to fully enclose the rear seat and create a boot.
- Page 16 WHEN FINISHED USING FULL RECLINE POSITION OF REAR SEAT Detach the support wings from the sides of the seat, fold them behind the Safety Boot Tube and snap the wings closed. Rotate the Safety Boot Tube as far back as it will go towards the back of the stroller, squeeze and hold the release tabs and rotate the support tube forward to fold it under the rear seat.
- Page 17 To Secure All Acceptable Infant Car Seats WARNING When using this product, to avoid serious injury from falling or sliding out, infant must always be secured in the Infant Car Seat with the Car Seat harness. Refer to Infant Car Seat Instructions for proper adjustment.
- Page 18 TO SECURE INFANT CAR SEAT To fasten car seat restraint belts - open up loop of the restraint belt. Adjust belt until the buckles almost touch. Pull end tab of restraint belt to set. Push buckles together to secure. To unsnap Restraint Belt - press tabs. Make sure Infant Car Seat is secure.
- Page 19 To Fold Stroller (Video instructions available at www.kolcraft.com) Lock brakes. Push the basket tube down until it’s flat against frame. Unlock Safety Boot Tube and rotate back under seat. Close Front Canopy fully and push all the way forward until it touches the front footrest.
- Page 20 a) Push down on the foam handle with one hand, and with your other hand, grab one of the side handles of the stroller frame. As the handle bottoms out inside the frame, b) pull the side handle towards you c) and push the foam handle forward.
-
Page 21: Care And Maintenance
Care & Maintenance • To keep your stroller running smoothly and avoid squeaking wheels use a silicon or graphite based lubricant. It is important to get it into the axle and the wheel assembly. • Clean metal parts with a damp cloth and wipe dry. •... -
Page 22: Limited Warranty
® For a period of ONE YEAR from the date of purchase, Kolcraft will repair or replace, at its option, the defective product. If you have a problem or are not satisfied with this product, please contact the Consumer Service Department at Kolcraft. - Page 24 Replacement Parts List / Lista de piezas de repuesto / Liste des pièces de rechange Circle the Part You Need Replacement parts may look slightly different than what is shown below. Marque con un círculo el Las piezas de recambio se pueden ver ligeramente diferentes de como se muestran abajo.
- Page 25 Total Due - Total a pagar - Total à régler : ❑ Check or money order (in US dollar) enclosed (payable to Kolcraft Enterprises, Inc.) Cheque o giro adjunto (a nombre de Kolcraft Enterprises, Inc.) Chèque ou mandat postal (montant en dollar US) inclus (à l'ordre de Kolcraft Enterprises, Inc.) ❑...
Need help?
Do you have a question about the Jeep Traveler Tandem and is the answer not in the manual?
Questions and answers