
Summary of Contents for HJC SMART HJC 10B
- Page 1 Motorcycle Bluetooth Communication System for HJC Helmets User’s Guide www.hjchelmets.com...
-
Page 2: Table Of Contents
SMART HJC 10B CONTENTS PACKAGE CONTENTS ....................3 UNIVERSAL INTERCOM ..................21 INSTALLING THE SMART HJC 10B ON YOUR HELMET ........4 FUNCTION PRIORITY ................... 21 2.1 Modular/Open Face Helmet Installation .................4 10 CONFIGURATION SETTING ................22 2.2 Full Face Helmet Installation ....................8 10.1 Assigning Speed Dial ......................23... -
Page 3: Package Contents
SMART HJC 10B Wired Microphone for Full Face Helmets 1 PACKAGE CONTENTS • Wired Microphone • Headset Main Unit • Hook and Loop Fastener for Wired Microphone for Full Face Helmet Others • Foam Speaker Covers (2) • USB Power & Data Cable (Micro USB Type) Wired Boom Microphone for Modular/Open Face Helmet • Wired Boom Microphone • Allen Wrench • Microphone Sponges (2) • Screws (2) -
Page 4: Installing The Smart Hjc 10B On Your Helmet
2 INSTALLING THE SMART HJC 10B ON 1. Lift the chin-bar completely. YOUR HELMET SMART HJC 10B compatible HJC helmets can be found by scanning the QR code of the product box. 2.1 Modular/Open Face Helmet Installation 2. Loosen the two short screws on the cover of the helmet with the To securely install the headset on the Modular Helmet or Open Face included allen wrench, and then remove the cover. - Page 5 SMART HJC 10B 3. Detach the snap fasteners of the cheek pad and remove the 2. Tighten the two long screws until the Bluetooth module is fastened cheek pad from the helmet. firmly to the helmet. 2.1.2 Installing the headset 1.
- Page 6 SMART HJC 10B 4. Insert longer hook of the right speaker unit into bottom hole of 5. Then push the top of the unit to fix onto the speaker pocket of the the speaker pocket. Place the Microphone wire under the bottom helmet.
- Page 7 SMART HJC 10B 7. Insert the back plate of the button module between the shell and Note: the EPS on the left side of the helmet. Removing the Speaker To remove the speaker, insert the Allen Wrench to the upper shorter hook area then gently pull out the speaker unit.
-
Page 8: Full Face Helmet Installation
To securely install the headset on the Full Face Helmet, please follow this procedure. Wired Microphone for Bluetooth Module Full Face Helmets 10. Lower the chin-bar completely. Speaker Button Module Note: Please refer to the video on the HJC homepage (www.hjchelmets.com) for detailed information. - Page 9 SMART HJC 10B 2.2.1 Preparing the helmet for installation 2.2.2 Installing the headset 1. Loosen the two short screws on the cover of the helmet with the 1. Align the arrows on the microphone cable and insert the included allen wrench.
- Page 10 SMART HJC 10B 3. Peel off the cover of the adhesive tape of the hook and loop 4. Insert longer hook of the right speaker unit into bottom hole of fastener for microphone and attach it to the inside of the helmet’s the speaker pocket.
- Page 11 SMART HJC 10B 5. Then push the top of the unit to fix onto the speaker pocket of the 6. Repeat step 4 and 5 to install the left speaker. helmet. Note: Removing the Speaker To remove the speaker, insert the Allen Wrench to the upper shorter hook area then gently pull out the speaker unit.
- Page 12 EPS on the left side of the helmet. snap fasteners. Note: Please refer to the video on the HJC homepage (www.hjchelmets.com) for 8. Slide the left clip into the corresponding side between the shell detailed information. and the EPS.
-
Page 13: Getting Started
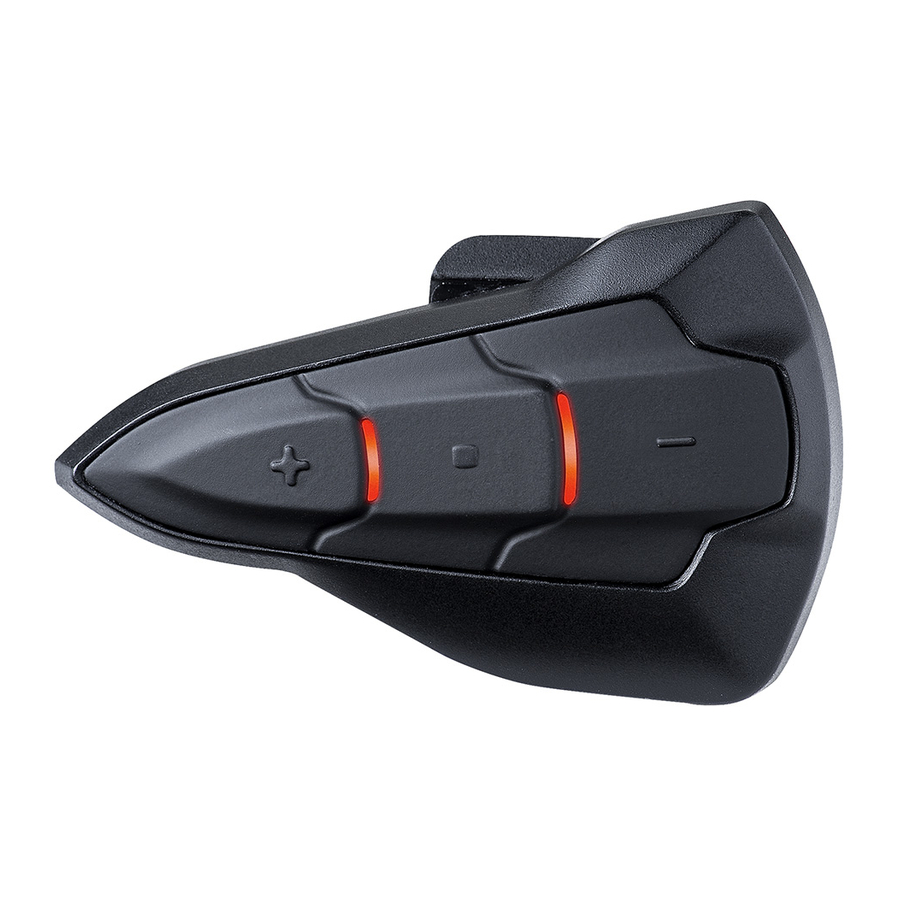
Note: (+) Button 1. Any 3rd party USB charger can be used with HJC products if the charger is approved by either the FCC, CE, IC, KC. 2. The headset is compatible with 5 V/1 A input USB-charged devices only. -
Page 14: Low Battery Warning
4 flashes = High, 70~100% 3.7.1 SMART HJC Device Manager 3 flashes = Medium, 30~70% The SMART HJC Device Manager allows you to upgrade the firmware 2 flashes = Low, 0~30% and configure the device settings directly from your PC. It is available to download for both Windows and Mac. -
Page 15: Pairing The Headset With Bluetooth Devices
SMART HJC Bluetooth headsets. The pairing operation is required 3. Search for Bluetooth devices on your mobile phone. Select the only once for each Bluetooth device. SMART HJC 10B in the list of the devices detected on the mobile phone. 4.1 Mobile Phone Pairing - Mobile Phone, Bluetooth 4. -
Page 16: Advanced Selective Pairing: A2Dp Stereo Or Handsfree
3. Search for Bluetooth devices on your mobile phone. Select the by wire. The GPS voice instruction or the radar detector alarm is also SMART HJC 10B in the list of the devices detected on the mobile heard in the background via SR10 while having an intercom conversation phone. -
Page 17: Intercom Pairing
2. Simply tap the Center Button of any one of the two headsets A SMART HJC 10B in the list of the devices detected on the mobile and B, and wait until the LEDs of both headsets turn to blue and phone. -
Page 18: Mobile Phone Call Making And Answering
SMART HJC 10B 4. The intercom pairing queue is ‘Last-Come, First-Served’. If a 5 MOBILE PHONE CALL MAKING AND headset has multiple paired headsets for intercom conversations, the last paired headset is set as first intercom friend. The ANSWERING previous intercom friend becomes second intercom friend, and third intercom friend. -
Page 19: Speed Dialing
SMART HJC 10B 5.2 Speed Dialing 6 STEREO MUSIC 1. Press and hold the (+) Button for 3 seconds and you will hear a mid-tone single beep and a voice prompt, “Speed dial”. 2. Tap the (+) Button or the (-) Button to navigate between the menus. -
Page 20: Intercom
SMART HJC 10B Note: 7 INTERCOM 1. Both you and your intercom friend can remotely control music playback during music sharing such as track forward and track back. 2. When you have an incoming call, make a phone call, or hear the turn-by- 7.1 Two-way Intercom... -
Page 21: Universal Intercom
HJC Bluetooth headsets. You can pair the (highest) Mobile phone headset with only one non-SMART HJC headset at a time. Non- SMART HJC headsets can be connected to the SMART HJC headset Intercom if they support the Bluetooth Hands-Free Profile (HFP). The intercom... -
Page 22: Configuration Setting
SMART HJC 10B Configuration Menu Tap the Center Button 10 CONFIGURATION SETTING Phone Pairing None Second Mobile Phone Pairing None 1. To enter configuration menu, press and hold the Center Button for Phone Selective Pairing None 12 seconds until you will also hear a voice prompt, “Configuration menu”. -
Page 23: Assigning Speed Dial
SMART HJC 10B 10.1 Assigning Speed Dial 10.2 VOX Phone (Default: Enable) If this feature is enabled, you can answer incoming calls by voice. 1. To assign a phone number as a speed dial, tap the (+) Button or the (-) Button until you hear a voice prompt saying “Speed dial”. -
Page 24: Noise Control (Default: Disable)
When it is disabled, the background noise is mixed with your voice during intercom. The headset supports firmware upgrades. You can update the firmware using the SMART HJC Device Manager. Please visit website at 10.6 Delete all pairings www.smarthjc.com/bt to check the latest software downloads. -
Page 25: Troubleshooting
SMART HJC 10B 12.2 Factory Reset 12 TROUBLESHOOTING You can restore the headset to factory default settings: • Press the Center Button for 12 seconds until you hear a voice prompt saying “Configuration menu”. 12.1 Fault Reset • Tap the (-) Button twice and you will hear a voice prompt saying “Factory reset”. - Page 26 1.0.0 www.hjchelmets.com User’s Guide for Firmware v1.0...
Need help?
Do you have a question about the SMART HJC 10B and is the answer not in the manual?
Questions and answers