Table of Contents
Advertisement
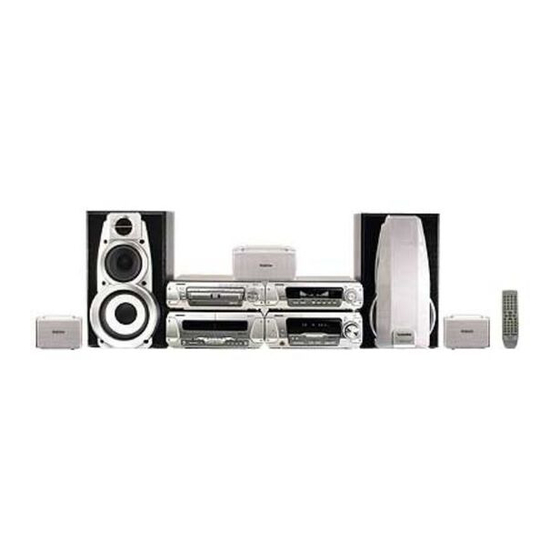
DVD Stereo System
Operating Instructions
SC-DV290
Model No.
Z
The illustration shows the model for the United Kingdom, Continental Europe and Russia.
EB
E
EE GN
Region number supported by
this player
Region numbers are allocated to DVD players and
software according to where they are sold.
For the United Kingdom and
Continental Europe
The region number of this player is "2".
The player will play DVD-Video marked with
labels containing "2" or "ALL".
Example:
2
ALL
For Australia and N.Z.
The region number of this player is "4".
The player will play DVD-Video marked with
labels containing "4" or "ALL".
Example:
4
ALL
For Russia
The region number of this player is "5".
The player will play DVD-Video marked with
labels containing "5" or "ALL".
Example:
5
ALL
Note
"EB" on the outer packaging indicates the
United Kingdom.
Before connecting, operating or adjusting
this product, please read these instructions
completely. Please keep this manual for fu-
ture reference.
RQT6894-B
2
3
5
2
4
6
1
2
5
Advertisement
Table of Contents

Related Manuals for Technics SC-DV290


Summary of Contents for Technics SC-DV290
-
Page 1: Operating Instructions
DVD Stereo System Operating Instructions SC-DV290 Model No. The illustration shows the model for the United Kingdom, Continental Europe and Russia. EE GN Region number supported by this player Region numbers are allocated to DVD players and software according to where they are sold. -
Page 2: Supplied Accessories
AC mains lead ........1 For the United Kingdom (RJA0053-3X) SC-DV290 SH-DV290 SA-DV290... -
Page 3: Table Of Contents
Table of contents Before use Safety precautions ....... . c3 Maintenance . -
Page 4: How To Replace The Fuse
Caution for AC Mains Lead (For United Kingdom) (“EB” area code model only) For your safety, please read the following text carefully. This appliance is supplied with a moulded three pin mains plug for your safety and convenience. A 5-ampere fuse is fitted in this plug. Should the fuse need to be replaced please ensure that the replacement fuse has a rating of 5-ampere and that it is approved by ASTA or BSI to BS1362. -
Page 5: Disc Information
DVD-RAM DVD-Audio DVD-Video DVD-R Video CD CD-R/RW Disc information [A[ Discs that can be played Use discs with the logos at left and that conform to specifications. The unit cannot play other discs correctly. Do not use irregularly shaped discs (e.g. heart-shaped), as these can damage the unit. -
Page 6: Locating
Surround speakers Place either side of the listening position, or slightly to the rear, about 1 meter higher than ear level with the Technics logo facing toward the listening position. The effect varies with the type of music and the music source. -
Page 7: Speaker Leads
STEP Speaker leads Surround and center speakers Right Front speaker Connect the leads to the terminals of the same colour. LF and HF stand for low frequency and high frequency. Connect the left (L) side in the same way. Note Never short-circuit positive ( ) and nega- tive ( ) speaker wires. -
Page 8: Antennas
STEP Antennas FM indoor antenna Fix the other end of the antenna where reception is best. AM indoor antenna Twist the vinyl tip and pull off. STEP Flat cables Keep the cables as flat as possible against the back of the unit. Connect the connectors to the terminals of the same colour. -
Page 9: Ac Mains Lead
STEP Video cords For the United Kingdom, Continental Europe and Russia Use the RCAJ adaptor (included) if your television has a 21-pin SCART terminal. You do not have to connect anything to the AUDIO terminals. DVD/Video CD/CD changer Video terminal Audio terminals STEP AC mains lead... -
Page 10: Front Panel Controls
ê PLAY/ ê CLOCK/ INPUT SELECTOR FM AUTO/ TIMER DEMO MONO ECHO TUNING PHONES TUNING MODE DISC A-B REPEAT REPEAT CD EDIT < º OPEN COUNTER DECK 1/2 RESET DISPLAY DIGITAL S.WOOFER VOLUME TUNER/BAND MIC EFFECT KEY CON LOUNGE CHORUS DOWN KARAOKE V.MUTE... -
Page 11: Remote Control
DISPLAY MODE SUPER SUPER CENTER VIRTUAL REAR MULTI REAR PRO LOGIC SURROUND SOUND EQ FOCUS SURROUND SURROUND OFF/ON SUBTITLE SETUP SLEEP POSITION MEMORY GROUP DISC 10/-/-- PRO LOGIC CH SELECT SUPER SRND KARAOKE KARAOKE EFFECT TEST TOP MENU MENU SUPER SOUND EQ DIRECT PLAY LIST... -
Page 12: The Remote Control
R6, AA, UM-3 ê CLOCK/ TIMER TUNING The remote control Batteries Insert so the poles ( Do not use rechargeable type batteries. Do not; mix old and new batteries. use different types at the same time. heat or expose to flame. take apart or short circuit. -
Page 13: Quick Setup
SUBTITLE SETUP SLEEP POSITION MEMORY GROUP DISC 10/-/-- PRO LOGIC CH SELECT SUPER SRND TEST TOP MENU MENU SUPER SOUND EQ DIRECT PLAY LIST NAVIGATOR ENTER S. 3D AI EQ AV EFFECT DISPLAY RETURN VCR(EXT)/ TAPE/ TUNER/ VDP(AUX) DECK 1/ 2 BAND CANCEL PLAY MODE... -
Page 14: Discs
SUBTITLE SLEEP POSITION MEMORY PRO LOGIC CH SELECT SUPER SRND TEST TOP MENU TOP MENU DIRECT NAVIGATOR ENTER S. 3D AI EQ ENTER DISPLAY VCR(EXT)/ TAPE/ VDP(AUX) DECK 1/ 2 CANCEL PLAY MODE MIX 2CH DIGITAL AUDIO S.WOOFER MUTING SHIFT SHIFT VOLUME [RAM] [DVD-A] [DVD-V]... -
Page 15: Skip Function/Search Function/Slow-Motion Play
SUBTITLE SETUP SLEEP POSITION MEMORY GROUP DISC 10/-/-- PRO LOGIC CH SELECT SUPER SRND TEST TOP MENU MENU SUPER SOUND EQ DIRECT PLAY LIST NAVIGATOR ENTER S. 3D AI EQ AV EFFECT DISPLAY RETURN VCR(EXT)/ TAPE/ TUNER/ VDP(AUX) DECK 1/ 2 BAND CANCEL PLAY MODE... -
Page 16: Position Memory Function/Selecting Groups To Play
SUBTITLE SLEEP POSITION MEMORY POSITION MEMORY PRO LOGIC CH SELECT SUPER SRND TEST TOP MENU DIRECT NAVIGATOR ENTER ENTER S. 3D AI EQ DISPLAY VCR(EXT)/ TAPE/ VDP(AUX) DECK 1/ 2 CANCEL PLAY MODE MIX 2CH DIGITAL SLOW/SEARCH AUDIO S.WOOFER SHIFT MUTING VOLUME Position memorized... -
Page 17: Soundtracks/Subtitles/Cinema
SUBTITLE SETUP SLEEP POSITION MEMORY GROUP DISC 10/-/-- PRO LOGIC CH SELECT SUPER SRND TEST TOP MENU MENU SUPER SOUND EQ DIRECT PLAY LIST NAVIGATOR ENTER S. 3D AI EQ AV EFFECT DISPLAY RETURN VCR(EXT)/ TAPE/ TUNER/ VDP(AUX) DECK 1/ 2 BAND CANCEL PLAY MODE... -
Page 18: Marking Places To Play Again/Variable Zoom Function
SUBTITLE SLEEP POSITION MEMORY PRO LOGIC CH SELECT SUPER SRND TEST TOP MENU DIRECT NAVIGATOR ENTER S. 3D AI EQ DISPLAY DISPLAY VCR(EXT)/ TAPE/ VDP(AUX) DECK 1/ 2 CANCEL PLAY MODE CANCEL DIGITAL MIX 2CH SLOW/SEARCH AUDIO S.WOOFER MUTING SHIFT SHIFT VOLUME Example [DVD-V]... -
Page 19: Repeat Play/A-B Repeat Play/All Group Play
A-B REPEAT REPEAT SUBTITLE SETUP SLEEP POSITION MEMORY GROUP DISC 10/-/-- PRO LOGIC CH SELECT SUPER SRND TEST TOP MENU MENU SUPER SOUND EQ DIRECT PLAY LIST NAVIGATOR ENTER S. 3D AI EQ AV EFFECT DISPLAY RETURN VCR(EXT)/ TAPE/ TUNER/ VDP(AUX) DECK 1/ 2 BAND... -
Page 20: Program Play
SUBTITLE SLEEP POSITION MEMORY PRO LOGIC CH SELECT SUPER SRND TEST TOP MENU SUPER SOUND EQ DIRECT NAVIGATOR ENTER S. 3D AI EQ DISPLAY TAPE/ VCR(EXT)/ VDP(AUX) DECK 1/ 2 CANCEL PLAY MODE PLAY MODE CANCEL MIX 2CH DIGITAL SLOW/SEARCH AUDIO S.WOOFER SHIFT... -
Page 21: Random Play/All Disc Play
SUBTITLE SETUP SLEEP POSITION MEMORY GROUP DISC 10/-/-- PRO LOGIC CH SELECT SUPER SRND TEST TOP MENU MENU SUPER SOUND EQ DIRECT PLAY LIST NAVIGATOR ENTER S. 3D AI EQ AV EFFECT DISPLAY RETURN VCR(EXT)/ TAPE/ TUNER/ VDP(AUX) DECK 1/ 2 BAND CANCEL PLAY MODE... -
Page 22: Playing The Programs Or Play Lists On Dvd-Ram
SUBTITLE SLEEP POSITION MEMORY PRO LOGIC CH SELECT SUPER SRND TOP MENU DIRECT TEST TOP MENU NAVIGATOR DIRECT NAVIGATOR ENTER ENTER S. 3D AI EQ DISPLAY VCR(EXT)/ TAPE/ VDP(AUX) DECK 1/ 2 DIRECT NAVIGATOR Date 21:02 12/23(SAT) 14:35 12/26(TUE) 20:00 1/12(FRI) 1/24(WED) 19:30... - Page 23 SUBTITLE SETUP SLEEP POSITION MEMORY GROUP DISC 10/-/-- PRO LOGIC CH SELECT SUPER SRND TEST TOP MENU MENU SUPER SOUND EQ DIRECT PLAY LIST NAVIGATOR ENTER ENTER S. 3D AI EQ AV EFFECT DISPLAY RETURN TAPE/ VCR(EXT)/ TUNER/ VDP(AUX) DECK 1/ 2 BAND CANCEL PLAY MODE...
-
Page 24: Using Gui Screens
SUBTITLE SLEEP POSITION MEMORY PRO LOGIC CH SELECT SUPER SRND TEST TOP MENU DIRECT NAVIGATOR ENTER S. 3D AI EQ DISPLAY DISPLAY VCR(EXT)/ TAPE/ VDP(AUX) DECK 1/ 2 CANCEL PLAY MODE MIX 2CH DIGITAL S.WOOFER AUDIO SHIFT MUTING VOLUME Example [DVD-V] [RAM] [DVD-A] [DVD-V] SETUP GROUP... - Page 25 Unless otherwise indicated, select items with [2, 1] and change with [3, 4]. Disc information PG: Program number [RAM] PL: Play list number [RAM] Group number [DVD-A] [WMA] [MP3] [JPEG] Title number [DVD-V] [VCD] [CD] Track number T: Track number in group [DVD-A] [WMA] [MP3] C: Chapter number [DVD-V] P: Picture number [JPEG]...
- Page 26 Using GUI screens Unit information Play menu A-B repeat ( page 19) [RAM] [DVD-A] [DVD-V] [VCD] [CD] [WMA] [MP3] Repeat mode ( page 19) [RAM] [DVD-A] [DVD-V] [JPEG] page 19) [DVD-A] Play mode ( ---: Normal play ALL: All group play Marker [RAM] [DVD-A] [DVD-V] [VCD]...
-
Page 27: The Radio: Manual Tuning
ê FM AUTO/ MONO PS-DISP MODE-PTY TUNER/BAND TUNING MODE TUNING VOLUME -- dB DOWN FM AUTO/ MONO DISP MODE PTY displays NEWS VARIED FINANCE AFFAIRS POP M CHILDREN INFO ROCK M SOCIAL A § SPORT M.O.R M RELIGION EDUCATE LIGHT M PHONE IN DRAMA CLASSICS... -
Page 28: The Radio: Preset Tuning
TUNING MODE TUNING " SUBTITLE SLEEP POSITION MEMORY PRO LOGIC CH SELECT SUPER SRND TEST TOP MENU DIRECT NAVIGATOR ENTER S. 3D AI EQ DISPLAY VCR(EXT)/ TAPE/ VDP(AUX) DECK 1/ 2 CANCEL PLAY MODE DIGITAL MIX 2CH SLOW/SEARCH S.WOOFER AUDIO SHIFT MUTING VOLUME... -
Page 29: Cassette Tapes
ê DECK 1/2 º DECK 1 < OPEN DOLBY NR REV MODE VOLUME -- dB DOWN DECK 1/2 Cassette tapes See page 3 for tape selection. Preparation: Press [Í/I] to turn the unit on. Press [< OPEN] on deck 1 or deck 2 and insert the cassette with a tape facing down. -
Page 30: Boosting The Super Woofer
SOUND EQ DIGITAL S.WOOFER SUPER SOUND EQ DOUBLE RE-MASTER MULTI JOG FLAT ª Boosting the super woofer adds power to the bass. Press [DIGITAL S.WOOFER]. The indicator turns green. DOUBLE RE-MASTER The display on the tuner/amplifier changes each time you press the button: MID (medium)>MAX (high)>cancel (off) ^--------------------------------------------------------} DIRECT OPEN... -
Page 31: Using The Acoustic Image Equalizer (Ai Eq)
MULTI JOG FLAT HEAVY CLEAR SUPER 3D AI EQ MULTI JOG HEAVY SOFT LIGHT MULTI JOG FLAT HEAVY CLEAR MULTI JOG Changing sound field and quality 1, 3, , ª Using the acoustic image equalizer (AI EQ) Achieve subtle sound quality settings with the soft, sharp, heavy, and light coordinates. -
Page 32: Enjoying Surround Sound
Enjoying surround sound The following chart gives a summary of this unit’s surround features. It also shows additional effects that can be used to enhance your enjoyment. Note ≥All the features are only effective if speakers are used. ≥You may experience a reduction in sound quality when these surround systems and effects are used with some sources. - Page 33 SURROUND SUBTITLE SETUP SLEEP POSITION MEMORY GROUP DISC 10/-/-- CH SELECT PRO LOGIC CH SELECT SUPER SRND TEST TEST TOP MENU MENU SUPER SOUND EQ DIRECT PLAY LIST NAVIGATOR ENTER S. 3D AI EQ AV EFFECT DISPLAY RETURN TAPE/ VCR(EXT)/ TUNER/ VDP(AUX) DECK 1/ 2...
-
Page 34: Surround Effects
VIRTUAL REAR SURROUND CENTER FOCUS MULTI REAR SURROUND SUBTITLE SLEEP POSITION MEMORY PRO LOGIC CH SELECT SUPER SRND TEST TOP MENU DIRECT NAVIGATOR ENTER S. 3D AI EQ DISPLAY VCR(EXT)/ TAPE/ VDP(AUX) DECK 1/ 2 CANCEL PLAY MODE DIGITAL MIX 2CH S.WOOFER AUDIO SHIFT... -
Page 35: Before Recording (Deck 2 Only)
COUNTER DECK 1/2 RESET DISPLAY COUNTER DISPLAY COUNTER RESET < OPEN DOLBY NR REV MODE Before recording (Deck 2 only) See page 3 for tape selection. Volume, sound quality and surround effects have no effect on re- cording. Sound quality and surround effects are automatically set to flat when recording. -
Page 36: Recording Discs
INPUT SELECTOR º CD EDIT DISC, 1–5 ´ PAUSE CD EDIT Recording discs Preparation: Do the preparatory steps ( Insert the disc(s) you want to record ( Press [DISC, 1–5] to select the disc where you want to start recording, then press [ ] to stop the disc. -
Page 37: Recording The Radio
º ´ PAUSE º DECK 1/2 TAPE EDIT Recording the radio Preparation: Do the preparatory steps ( Tune to the required station. page 27, 28) Press [ The deck goes into the recording standby mode and the play indicator “ ” or “ ” starts flashing. Press [ ] recording. -
Page 38: Using The Timers
PLAY/ CLOCK/ TIMER TUNING ê Using the timers The play timer This timer starts play of the selected source at the selected time. The displays in the illustrations show settings for preset radio channel 1 to play between 6:30 and 7:40 at Preparation: Turn the unit on, set the time ( tions if you want the timer to start playing the radio page 28). - Page 39 PLAY/ CLOCK/ TIMER TUNING ê Using the timers The record timer This timer records the radio at the set time. The displays in the illustrations show settings for recording preset chan- nel 1 from 18:30 to 19:30. Preparation: Turn the unit on, set the time ( tions ( Press [CLOCK/TIMER] to display “...
- Page 40 PLAY/ CLOCK/ TIMER SLEEP SLEEP PRO LOGIC CH SELECT TEST TOP MENU DIRECT NAVIGATOR S. 3D AI EQ DISPLAY VCR(EXT)/ TAPE/ VDP(AUX) DECK 1/ 2 CANCEL PLAY MODE DIGITAL MIX 2CH AUDIO S.WOOFER SHIFT MUTING VOLUME SLEEP Turning the timers on and off The timers come on at the set times if can be turned on and off by pressing [ PLAY/ REC].
-
Page 41: Changing The Sound Range Display
DISPLAY MODE DISPLAY MODE CANCEL PLAY MODE DIGITAL MIX 2CH SLOW/SEARCH AUDIO S.WOOFER SHIFT MUTING SKIP MUTING VOLUME MUTING PHONES Changing the sound range display The sound processor shows the level of each sound range with the three types of display described below. Press [DISPLAY MODE]. -
Page 42: Enjoying Karaoke (For Australia And N.z.)
SLEEP POSITION MEMORY PRO LOGIC CH SELECT TEST TOP MENU DIRECT NAVIGATOR ENTER S. 3D AI EQ DISPLAY VCR(EXT)/ TAPE/ VDP(AUX) DECK 1/ 2 CANCEL PLAY MODE MIX 2CH DIGITAL S.WOOFER AUDIO AUDIO SHIFT MUTING VOLUME VOLUME DOWN AUDIO KARAOKE V.MUTE Preparation: Press [ /I] to turn the unit on. - Page 43 ECHO CHORUS ECHO KEY CON TUNING LOUNGE CHORUS SUBTITLE SETUP SLEEP POSITION MEMORY GROUP DISC 10/-/-- PRO LOGIC CH SELECT SUPER SRND KARAOKE TEST KARAOKE EFFECT TOP MENU MENU SUPER SOUND EQ DIRECT PLAY LIST ENTER NAVIGATOR S. 3D AI EQ AV EFFECT DISPLAY RETURN...
-
Page 44: External Unit Connections
AUDIO L/R OUT AUDIO AUDIO VIDEO OUT VIDEO IN VIDEO Turn off all units before making connections. Refer to the manuals of the other units for details. (Cords and equipment not included.) S-video cord (not included) Video cord S-VIDEO (1 included for the United Kingdom, Continental Europe and Russia 2 included for Australia and N.Z.) Stereo phono cable (not included) -
Page 45: Optional Antenna Connections
F M A N T A M A N T LO O P E X T F M A N T G N D A M A N T LO O P E X T 30mm 15mm A M A N T L O O P E X T 5–12m... -
Page 46: Reference
Changing settings This chart shows the settings for this unit. Change the settings to suit your preferences and to suit the unit to the environment in which it is being used. These settings are retained in memory until they are changed, even if the unit is turned off. See page 47 for details on menu operation. Menus Disc Audio... - Page 47 SUBTITLE SETUP SLEEP POSITION MEMORY GROUP DISC 10/-/-- PRO LOGIC CH SELECT SUPER SRND TEST TOP MENU MENU SUPER SOUND EQ DIRECT PLAY LIST NAVIGATOR ENTER S. 3D AI EQ AV EFFECT ENTER DISPLAY RETURN VCR(EXT)/ TAPE/ TUNER/ VDP(AUX) DECK 1/ 2 BAND CANCEL PLAY MODE...
-
Page 48: Glossary
Glossary Decoder A decoder restores the coded audio signals on DVDs to normal. This is called decoding. Dolby Digital This is a method of coding digital signals developed by Dolby Laboratories. Apart from stereo (2-channel) audio, these signals can also be multi- channel audio. -
Page 49: Technical Specifications
Technical specifications SOUND PROCESSOR ∫ EQ/SFP section MANUAL GEQ 5-Band EQ Center frequency 70/300/1 k/3.15 k/10 k Hz n2.0, 4.0, 6.0 dB Level control EQ/Space mode 4 modes HEAVY, CLEAR, SOFT, HALL SUPER 3D AI EQ 3 modes AI EQ, SUPER 3D AI 1, SUPER 3D AI 2 ∫... -
Page 50: Troubleshooting Guide
Troubleshooting guide Before requesting service, make the below checks. If you are in doubt about some of the check points, or if the remedies indicated in the chart do not solve the problem, consult your dealer for instructions. Reference pages are shown as black circled numbers 7. Common Problems No sound. - Page 51 Enjoying discs “TAKE OUT/DISC” appears on There is a problem with the disc mechanism. (A power failure may have occurred.) display. The tray will open automatically. Remove the disc from the tray, and close it after ensuring there is no disc in the tray.
-
Page 52: Laser Product
CAUTION! THIS PRODUCT UTILIZES A LASER. USE OF CONTROLS OR ADJUSTMENTS OR PERFORMANCE OF PRO- CEDURES OTHER THAN THOSE SPECIFIED HEREIN MAY RESULT IN HAZARDOUS RADIATION EXPOSURE. DO NOT OPEN COVERS AND DO NOT REPAIR YOURSELF. REFER SERVICING TO QUALIFIED PERSONNEL. WARNING: TO REDUCE THE RISK OF FIRE, ELECTRIC SHOCK OR PRODUCT DAM- AGE, DO NOT EXPOSE THIS APPARATUS TO RAIN, MOISTURE, DRIP-...
Need help?
Do you have a question about the SC-DV290 and is the answer not in the manual?
Questions and answers