
Related Manuals for Panasonic TU-SZT105A

Summary of Contents for Panasonic TU-SZT105A
-
Page 1: Digital Terrestrial Receiver
Instruction Manual Standard Definition Digital Terrestrial Receiver Model Number TU-SZT105A Trade Mark of the DVB Digital Video Broadcasting Project (1991 to 1996) ® Declaration of Conformity No.3539, 22 April 2005... - Page 2 Safety Always Comes First This Digital Receiver is manufactured according to Australian safety standards. In order to obtain the best operation results, please read the entire manual, as you will be instructed on how to handle the equipment carefully and safely. Important Safety Tips: CAUTION To reduce the risk of electrical shock, DO NOT REMOVE cover.
-
Page 3: Table Of Contents
Contents Introduction...4 IMPORTANT: First time Installers ...4 The Digital Receiver ...4 Front Panel ...4 Rear Panel ...5 Box Contents ...5 The Remote Control ...5 Preparing the Remote Control ...5 Remote Control ...6 Installing Your Digital Receiver – QUICK CONNECT GUIDE...7 Installing Your Digital Receiver –... -
Page 4: Introduction
Introduction Thankyou for purchasing you new Panasonic Digital TV receiver. This User’s Manual is the GUIDE to be used to help you install and operate your new digital TV receiver. In it you shall find comprehensive descriptions to familiarise yourself with all the functionalities with which your receiver is equipped. -
Page 5: Rear Panel
2.2 Rear Panel • DC Power Mains: (100 - 250VAC~; 50/60 Hz), Power 15W Max. • RF IN: Used for connection of the cable from your outdoor terrestrial TV antenna. • RF OUT: Used for connection to your TV RF antenna Input or your VCR RF Input. •... -
Page 6: Remote Control
3.2 Remote Control : To turn your STB on/off (standby mode) TV/RADIO: To toggle between TV and Radio service AUDIO: To select the desired audio sound track Aspect ratio, to change to 16:9, 4:3 letterbox or 4:3 centre- cut mode : Mute function, to turn on/off sound (only used for analogue... -
Page 7: Installing Your Digital Receiver - Quick Connect Guide
4 Installing Your Digital Receiver - Quick Connect Guide The Set Top Box and the television use a number of different connectors. The main ones that you need to identify are: The POWER connector is used to connect mains power (via the power pack) to the Set Top Box. RF connectors are used for connecting antenna leads. -
Page 8: Installing Your Digital Receiver - Quick Set Up Guide
4.1 Installing Your Digital Receiver – Quick Set Up Guide Installation SCART Mode The first time the digital receiver is installed, or after Default Condition is restored (section 6.4), you will be asked to select the video connection format. Select the video format that is the same as the AV lead connect you have made to the TV display (refer Quick Connect Guide section 4). -
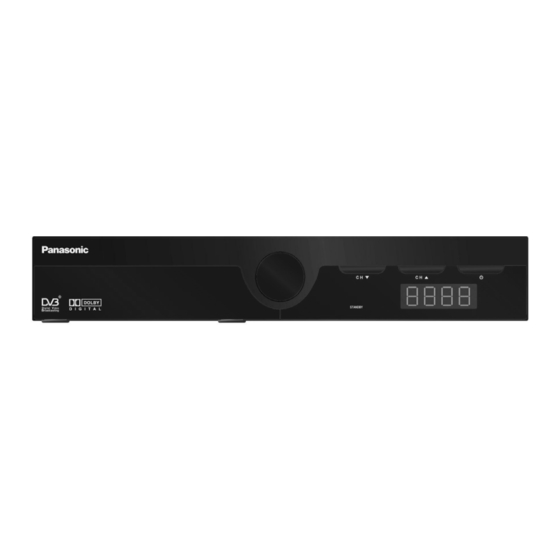
Page 9: Operating Instructions: Knowing Your Basic Controls
5 Operating Instructions: Knowing your basic controls To become acquainted with the operations and functions of your receiver, y how to use the control buttons on the Front Panel and the Remote Control. The following section is an introduction to the features that will be most com 5.1 Switching On Your Digital Receiver Ensure the power lead of the power ad the 240V AC socket at the wall. -
Page 10: Changing Or Selecting Channels
Changing or Selecting Channels There are several methods to chan panel on the receiver or the remote control buttons. The following methods are available for you to choos Press on the remote control (channel changes a settings). Directly enter a channel number by using the number keys on the remote control. Use arrow up/down to change channel. -
Page 11: Program Guide
(4) Restore Default Settings (5) Region Select STB Information: (1) To display the Software Version number and Serial ID of your receiver. 6.1 Program Guide Program Schedule By choosing the Pro gram Guide banner on the Main OSD, the Electronic Program Guide (EPG) appears. The EPG is, in classic terms, a TV Guide, except it is presented on your TV screen. - Page 12 Coloured “ Hot Keys” On the Program Guide window, you will notice two coloured hot keys. They provide instant access to various services. Category Selection This special feature enables you to identify your preferred programs by program Category or type. You can gain access to this feature by pressing the .button (yello Use the arrow buttons to highlight the categories, and...
-
Page 13: Tv/Radio Channels
6.2 TV/Radio Channels You may highlight any channel in the list by pressing up/down keys, then press This feature allows you to personalise your list of favourite channels, TV or Radio. Highlight a channel by using the buttons, then press the unselect. - Page 14 Screen Format This setting affects the video format at the TV output. (4:3 relates to normal screen format, 16:9 relates to widescreen format) If your display is 4:3 format and the transmission of a program happens to be 16:9, the Normal/Letterbox mode will give you a complete picture, but black areas will appear at the top and bottom.
- Page 15 If the default Audio Mode is Dolby D, and the input signal contains only MPEG1, the default Mode will change to MPEG1 automatically. Mode is set to Dolby D, the digital receiver will automatically select a Dolby D soundtrack when it is available.
- Page 16 Off: There will be only stereo audio information (L / R) to be included in Audio L&R output. Audio Balance You can adjust the value from L+7 to R+7. The selection “0” means balanced (equal level) output on the two front speakers. Audio Delay Different displays may have different delay in displaying pictures, which may cause a slight problem with lip sync.
- Page 17 TOP (Table Of Pages) MODE In TOPTEXT mode, the red button moves to the previous page number and the green button moves to the next page number. The yellow and blue buttons correspond to different subjects. Pushing the coloured button can access these subjects. This is the current preferred method of operation in Australia.
-
Page 18: Advanced Settings
Sub Coded Page Access When Teletext information exceeds more than one page, it may take some time for the automatic changing of the sub pages to reach the sub page you require. As each sub page is found its number is displayed at the bottom of the page so that you may select it by pressing left or right cursor key. - Page 19 However, not all transmissions carry ratings information to activate this function. Change password From here you can change the password. FORGET IT! If you change the password, we strongly suggest that you write down the new the □□□□ password in that require you to provide the correct password! Channel Installation When the receiver is initially set up, conduct a channel...
-
Page 20: Stb Information
Select Region Using you may select your local region: NSW, Victoria, Queensland, South Australia, Western Australia, Tasmania, Northern Territory, and Australian Capital Territory. This setting will allow the digital receiver to display the current time in the I-Plate or when the receiver is in Stand-By mode. -
Page 21: Glossary
7 Glossary Information Plate: A small window with simple navigation tools to display information about individual channels. Menu: An on screen display offering a list of commands to select from. Normal viewing: The state of your receiver when no menus or windows are displayed on the screen, and a valid channel is tuned. -
Page 22: Troubleshooting
8 Troubleshooting Problem Possible causes The display on the panel Power adaptor is not connected does not light up / is not lit No sound or picture The SCART to RCA connector Cable is not properly connected Wrong selection of output mode The remote control is not Battery exhausted working... -
Page 23: Technical Specifications
9 Technical Specifications of Model TU-SZT105A Terrestrial Input frequency Tuner/Demodulator Standard Channel Bandwidth COFDM System Demodulation type Guard Interval System CPU / Clock Transport Flash memory Shared memory Video decoder Bitstream accepted for Video MPEG-2 profiles / levels Supported Video data rate supported... - Page 24 Power Supply External Adaptor Main AC input DC output to STB Accessory Remote Control Batteries User’s Manual SCART to RCA (6) RF Cable EMC / Safety Compliant to AS/NZS 1053 / AS/NZS 60065 General Information Dimensions Weight (Net) 100 - 250 VAC~, 50/60 Hz 12VDC, 1A Panasonic RO3 AAA One (CVBS/Y/Pb/Pr/AL/AR)