Table of Contents
Advertisement
Available languages
Available languages
Advertisement
Table of Contents

Related Manuals for Philips S5420


Summary of Contents for Philips S5420
- Page 1 S5420, S5070 www.philips.com/support/ifu...
- Page 5 English 6 Bahasa Indonesia 27...
-
Page 6: General Description (Fig. 1)
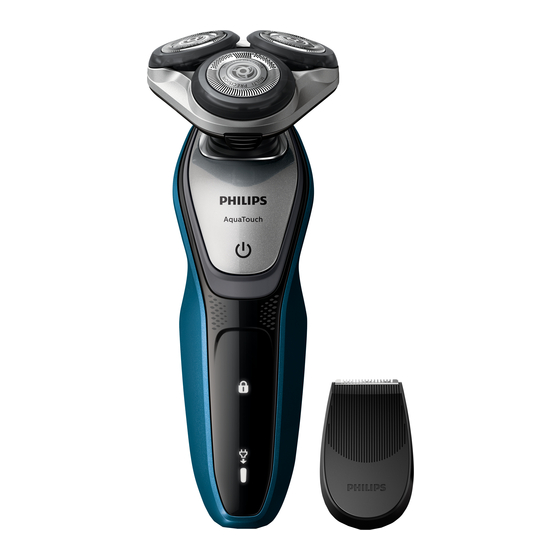
English Introduction Congratulations on your purchase and welcome to Philips! To fully benefit from the support that Philips offers, register your product at www.philips.com/welcome. General description (Fig. 1) Comb for beard styler attachment (S5420/24 only) 2 Click-on beard styler attachment (S5420/24... - Page 7 English Danger - Keep the supply unit dry. Warning - To charge the battery, only use the detachable supply unit (HQ8505) provided with the appliance. - The supply unit contains a transformer. Do not cut off the supply unit to replace it with another plug, as this causes a hazardous situation.
- Page 8 - If your shaver comes with a cleaning system, always use the original Philips cleaning fluid (cartridge or bottle, depending on the type of cleaning system). - Always place the cleaning system on a stable, level and horizontal surface to prevent leakage.
-
Page 9: Electromagnetic Fields (Emf)
English Electromagnetic fields (EMF) This Philips appliance complies with all applicable standards and regulations regarding exposure to electromagnetic fields. General - This shaver is waterproof. It is suitable for use in the bath or shower and for cleaning under the tap. -
Page 10: Battery Low
English Note: This appliance can only be used without cord. When the battery is fully charged, the battery charge indicator lights up white continuously. Battery low When the battery is almost empty, the battery charge indicator flashes orange. ’Unplug for use’ reminder The ‘unplug for use’... -
Page 11: Cleaning Reminder
English While you activate the travel lock, the travel lock symbol lights up continuously. When the travel lock is activated, the travel lock symbol flashes. Deactivating the travel lock 1 Press the on/off button for 3 seconds. While you deactivate the travel lock, the travel lock symbol lights up briefly and the shaver produces a short sound. -
Page 12: Using The Appliance
English Charging Charge the shaver before you use it for the first time and when the display indicates that the battery is almost empty. Charging takes approx. 1 hour. Note:You cannot use the appliance while it is charging. Charging with the supply unit 1 Make sure the appliance is switched off. -
Page 13: Dry Shaving
English your skin to adapt to this new appliance, we advise you to shave regularly (at least 3 times a week) and exclusively with this appliance for a period of 3 weeks. Dry shaving 1 Switch on the appliance. 2 Move the shaving heads over your skin in circular movements to catch all hairs growing in different directions. -
Page 14: Using The Click-On Attachments
English 3 Rinse the shaving unit under the tap to ensure that the shaving unit glides smoothly over your skin. 4 Switch on the appliance. 5 Move the shaving heads over your skin in circular movements to catch all hairs growing in different directions. - Page 15 English 3 Insert the lug of the attachment into the slot in the top of the appliance. Then press down the attachment to attach it to the appliance (‘click’). Using the precision trimmer attachment You can use the precision trimmer attachment to touch up your beard, sideburns and moustache.
-
Page 16: Using The Beard Styler Attachment Without Comb
English 2 Slide the comb straight into the guiding grooves on both sides of the beard styler attachment (‘click’). 3 Press the length selector and then push it to the left or right to select the desired hair length setting. 4 Switch on the appliance. -
Page 17: Cleaning And Maintenance
English 3 Hold the beard styler attachment perpendicular to the skin and move the appliance downwards while you exert gentle pressure. 4 Clean the attachment after use (see 'Cleaning and maintenance'). Cleaning and maintenance Note: The accessories supplied may vary for different products. -
Page 18: Cleaning The Click-On Attachments
English 3 Switch off the appliance. Press the release button to open the shaving unit. 4 Rinse the hair chamber under the tap. 5 Rinse the shaving head holder under a warm tap. 6 Carefully shake off excess water and let the shaving head holder air-dry completely. -
Page 19: Cleaning The Beard Styler Attachment
English 2 Rinse the attachment under a warm tap. 3 After cleaning, switch off the appliance. 4 Carefully shake off excess water and let the attachment air-dry completely. For optimal performance, lubricate the teeth of the attachment with a drop of sewing machine oil every six months. -
Page 20: Replacing The Shaving Heads
Replace damaged shaving heads immediately. Always replace the shaving heads with original Philips shaving heads (see 'Ordering accessories'). Replacement reminder (S5420 only) The replacement reminder indicates that the shaving heads need to be replaced.The shaving unit symbol and arrows light up when you switch off the appliance. - Page 21 English 2 Press the release button to open the shaving unit. 3 Pull the shaving head holder off the bottom part of the shaving unit. 4 Turn the retaining rings counterclockwise and remove them. Place them aside in a safe place. 5 Remove the shaving heads from the shaving head holder.
- Page 22 English Note: Make sure that the projections of the shaving heads fit exactly into the recesses of the shaving head holder. 7 Place the retaining rings back onto the shaving heads and turn them clockwise to reattach the retaining ring. Each retaining ring has two recesses and two projections that fit exactly in the projections and recesses of the shaving head holder.
-
Page 23: Ordering Accessories
7 seconds. 7 sec. Ordering accessories To buy accessories or spare parts, visit www.philips.com/parts-and-accessories or go to your Philips dealer. You can also contact the Philips Consumer Care Center in your country (see the international warranty leaflet for contact details). Recycling... - Page 24 English appliance is disconnected from the mains and that the battery is completely empty. Take any necessary safety precautions when you handle tools to open the appliance. Be careful, the battery strips are sharp. 1 Remove the screw in the back of the shaver. 2 Remove the back panel.
-
Page 25: Warranty And Support
7 Remove the rechargeable batteries. Warranty and support If you need information or support, please visit www.philips.com/support or read the international warranty leaflet. Warranty restrictions The shaving heads (cutters and guards) are not covered by the terms of the international warranty because they are subject to wear. - Page 26 English Problem Possible cause Solution The travel lock is Press the on/off button activated. for 3 seconds to deactivate the travel lock. The shaving unit is Clean the shaving heads soiled or damaged thoroughly or replace to such an extent them.
-
Page 27: Keterangan Umum (Gbr. 1)
7 Tombol on/off 8 Gagang 9 Soket untuk steker kecil 10 Indikator daya baterai 11 Simbol cabut untuk menggunakan 12 Simbol kunci perjalanan 13 Pengingat penggantian (Khusus S5420/02, S5420/24) 14 Peringatan pembersihan (Khusus S5420/02, S5420/24) 15 Steker kecil 16 Unit catu daya... - Page 28 Bahasa Indonesia Bahaya - Usahakan unit catu daya tetap kering. Peringatan - Untuk mengisi daya baterai, hanya gunakan unit catu daya yang dapat dilepas (HQ8505) yang disertakan dengan alat ini. - Unit catu daya terdiri atas transformator. Jangan memotong unit catu daya dan menggantinya dengan steker lain, karena hal ini menimbulkan situasi berbahaya.
- Page 29 - Jika alat cukur Anda dilengkapi dengan sistem pembersih, selalu gunakan cairan pembersih Philips asli (kartrid atau botol, tergantung tipe sistem pembersihnya). - Selalu letakkan sistem pembersih pada permukaan datar yang stabil dan rata untuk mencegah kebocoran.
-
Page 30: Medan Elektromagnet (Emf)
Medan elektromagnet (EMF) Alat Philips ini mematuhi semua standar dan peraturan yang berlaku terkait paparan terhadap medan elektromagnet. Umum - Alat cukur ini kedap air. Alat ini cocok untuk digunakan di bak mandi atau shower dan untuk membersihkan di bawah keran. -
Page 31: Baterai Terisi Penuh
Bahasa Indonesia Ketika alat sedang diisi daya, indikator daya baterai akan berkedip lambat sampai alat menunjukkan bahwa baterai telah terisi penuh. Baterai terisi penuh Catatan: Saat baterai penuh, layar akan mati secara otomatis setelah 30 menit. Catatan: Alat ini hanya dapat digunakan tanpa kabel. - Page 32 Bahasa Indonesia Travel lock (kunci perjalanan) Anda dapat mengunci alat saat Anda akan bepergian. Kunci perjalanan mencegah alat agar tidak dihidupkan tanpa sengaja. Mengaktifkan kunci perjalanan 1 Tekan tombol daya selama 3 detik untuk masuk ke mode kunci perjalanan. 3 sec. Apabila Anda mengaktifkan kunci perjalanan, simbol kunci perjalanan akan menyala terus- menerus.
-
Page 33: Pengisian Daya
Bahasa Indonesia Pengingat penggantian Untuk memperoleh performa pencukuran maksimal, sebaiknya Anda mengganti kepala cukur setiap dua tahun.Alat ini dilengkapi dengan pengingat penggantian yang akan mengingatkan Anda untuk mengganti kepala cukur. Simbol unit pencukur dan tanda panah akan menyala untuk menandakan bahwa kepala cukur harus diganti. Catatan: Setelah mengganti kepala cukur, Anda harus mengatur ulang pengingat penggantian dengan menekan tombol on/off selama 7 detik. - Page 34 Bahasa Indonesia Menghidupkan dan mematikan alat 1 Untuk menghidupkan alat, tekan tombol daya satu kali. 2 Untuk mematikan alat, tekan tombol on/off satu kali. Mencukur Masa adaptasi kulit Hasil cukuran pertama Anda mungkin tidak memuaskan dan kulit Anda bahkan mengalami sedikit iritasi.
- Page 35 Bahasa Indonesia Untuk bercukur dengan busa atau gel cukur, ikuti langkah-langkah di bawah: 1 Basahi kulit Anda dengan sedikit air. 2 Oleskan busa atau gel cukur pada kulit Anda. 3 Bilas unit cukur di bawah keran untuk memastikan unit cukur meluncur mulus di atas kulit Anda.
- Page 36 Bahasa Indonesia Catatan: Pastikan Anda membilas semua busa atau gel cukur dari alat. Menggunakan sambungan click-on Aksesori yang disertakan dapat berbeda-beda, tergantung pada produk. Lihat kemasan untuk mengetahui aksesori yang disertakan bersama produk Anda. Melepas atau memasang sambungan click- 1 Pastikan alat telah dimatikan. 2 Tarik sambungan lurus dari alat sampai terlepas.
- Page 37 Bahasa Indonesia 3 Pegang sambungan pemangkas tegak lurus pada kulit dan geser alat ke bawah sambil menekan lembut. 4 Bersihkan sambungan setelah digunakan (lihat 'Pembersihan dan perawatan'). Menggunakan sambungan penata jenggot dengan sisir Anda dapat menggunakan sambungan penata jenggot dengan sisir terpasang untuk menata jenggot Anda dalam satu setelan tetap, tetapi juga dengan setelan panjang yang berbeda.
-
Page 38: Pembersihan Dan Perawatan
Bahasa Indonesia 3 Tekan pemilih panjang lalu tekan ke kiri atau kanan untuk memilih setelan panjang rambut yang diinginkan. 4 Hidupkan alat tersebut. 5 Geser alat ke atas sambil menekan lembut. Pastikan bagian depan sisir menyentuh kulit sepenuhnya. 6 Bersihkan sambungan setelah digunakan (lihat 'Pembersihan dan perawatan'). -
Page 39: Membersihkan Alat Cukur Di Bawah Keran
Bahasa Indonesia mengetahui aksesori yang disertakan bersama produk Anda. Membersihkan alat cukur di bawah keran Bersihkan alat cukur setelah setiap kali selesai digunakan agar performa tetap optimal. Perhatian: Berhati-hatilah saat menggunakan air panas. Selalu pastikan air tidak terlalu panas, untuk mencegah luka bakar pada tangan Anda. Jangan sekali-kali mengeringkan unit cukur dengan handuk atau kertas tisu, karena dapat merusak kepala cukur. - Page 40 Bahasa Indonesia 5 Bilas dudukan kepala cukur di bawah keran air panas. 6 Kibaskan kelebihan air dengan hati-hati dan biarkan dudukan kepala alat cukur benar-benar kering. 7 Tutup pemegang kepala alat cukur (hingga terdengar bunyi 'klik'). Membersihkan sambungan click-on Catatan: Jangan sekali-kali mengeringkan pemangkas atau sambungan penata jenggot dengan handuk atau kertas tisu, karena dapat merusak gigi pemangkas.
- Page 41 Bahasa Indonesia 1 Tarik sisir dari sambungan penata jenggot untuk melepasnya. Catatan: Pegang sisir di tengah untuk menariknya dari sambungan penata jenggot hingga terlepas. Jangan tarik dari bagian samping sisir. 2 Bilas unit pemotong dari potongan rambut yang menempel dengan air suam-suam kuku. 3 Bilas sisir dari potongan rambut yang menempel.
-
Page 42: Mengganti Kepala Alat Cukur
Anda mengganti kepala cukur setiap dua tahun.Segera ganti kepala cukur yang rusak. Selalu ganti kepala alat cukur dengan kepala (lihat 'Memesan aksesori') alat cukur Philips yang asli. Pengingat penggantian (hanya S5420) Simbol pengingat penggantian menunjukkan bahwa kepala alat cukur perlu diganti. Simbol unit alat cukur dan tanda panah akan menyala ketika Anda mematikan alat. - Page 43 Bahasa Indonesia 3 Lepaskan dudukan kepala cukur dari bagian bawah unit pencukur. 4 Putar cincin penahan berlawanan arah jarum jam, lalu lepaskan. Letakkan di tempat yang aman dan kering. 5 Lepaskan kepala cukur dari dudukan kepala cukur. Segera buang kepala cukur bekas agar tidak tercampur dengan kepala cukur baru.
-
Page 44: Memesan Aksesori
(hingga terdengar bunyi 'klik'). 9 Untuk mengatur ulang pengingat penggantian, tekan dan tahan tombol on/off selama kurang- 7 sec. lebih 7 detik. Memesan aksesori Untuk membeli aksesori atau suku cadang, buka www.philips.com/parts-and-accessories atau kunjungi dealer Philips terdekat. Anda juga dapat... -
Page 45: Mendaur Ulang
Harap bawa produk Anda ke lokasi pengumpulan resmi atau ke pusat servis Philips untuk melepas baterai isi ulang oleh teknisi profesional. - Patuhi peraturan di negara Anda untuk pengumpulan terpisah untuk produk listrik dan elektronik serta baterai isi-ulang. -
Page 46: Garansi Dan Dukungan
5 Keluarkan wadah baterai dan potong kabelnya dengan tang atau gunting. 6 Bengkokkan tag baterai ke samping dengan tang pemotong atau obeng. 7 Keluarkan baterai isi-ulang. Garansi dan dukungan Jika Anda membutuhkan informasi atau dukungan, silakan kunjungi www.philips.com/support atau bacalah pamflet garansi internasional. -
Page 47: Batasan Garansi
Mengatasi masalah Bab ini merangkum masalah yang paling umum terjadi pada alat Anda. Jika Anda tidak dapat menyelesaikan masalah dengan informasi di bawah, kunjungi www.philips.com/support untuk daftar pertanyaan umum atau hubungi Pusat Layanan Konsumen di negara Anda. Alat cukur Masalah... - Page 48 PHILIPS S5070/04 Pencukur Elektrik 100-240 V ~ 50-60 Hz 9 W Negara Pembuat: Cina Diimpor oleh: PT Philips Indonesia Commercial Gedung Cibis Nine Lantai 10 JI. T.B. Simatupang No. 2 RT. 001 RW. 005 Kel. Cilandak Timur, Kec. Pasar Minggu,...
- Page 52 © 2019 Koninklijke Philips N.V. All rights reserved 3000.016.7906.2 (6/3/2019) >75 % recycled paper >75 % papier recyclé...