Advertisement
Available languages
Available languages
Quick Links
Bauanleitung
D
Building instructions
GB
Notice de construction
F
Istruzioni di montaggio
I
Instrucciones de montaje 43 ... 50
E
© Copyright by MULTIPLEX 2005
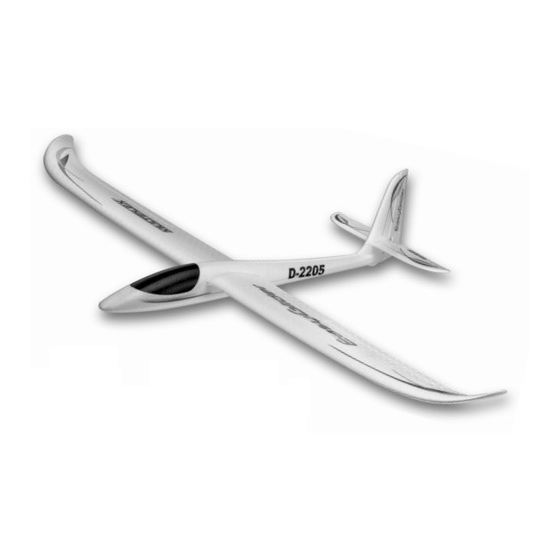
KIT EasyGlider
KIT EasyGlider Electric # 21 4207
# 21 4205
03 ... 10
11 ... 19
20 ... 34
35 ... 42
Version 3.0
1
Advertisement

Subscribe to Our Youtube Channel
Related Manuals for Multiplex EasyGlider Electric


Summary of Contents for Multiplex EasyGlider Electric
-
Page 1: Building Instructions
KIT EasyGlider # 21 4205 KIT EasyGlider Electric # 21 4207 Bauanleitung 03 ... 10 Building instructions 11 ... 19 Notice de construction 20 ... 34 Istruzioni di montaggio 35 ... 42 Instrucciones de montaje 43 ... 50 © Copyright by MULTIPLEX 2005... - Page 2 Sicherheitshinweise ☺ Prüfen Sie vor jedem Start den festen Sitz des Motors und der Luftschraube - insbesondere nach dem Transport, härteren Landungen sowie Abstürzen. Prüfen Sie ebenfalls vor jedem Start den festen Sitz und die richtige Position der Tragflächen auf dem Rumpf. ☺...
- Page 3 Machen Sie sich mit dem Bausatz vertraut! MULTIPLEX - Modellbaukästen unterliegen während der Produktion einer ständigen Materialkontrolle. Wir hoffen, dass Sie mit dem Baukasteninhalt zufrieden sind. Wir bitten Sie jedoch, alle Teile (nach Stückliste) vor Verwendung zu prüfen, da bearbeitete Teile vom Umtausch ausgeschlossen sind.
- Page 4 Wichtiger Hinweis 5. Hochstarthaken einbauen (nur beim Segler) Dieses Modell ist nicht aus Styropor ™! Daher sind Verkle- Beim Segelflugmodell wird nun der Hochstarthaken 32 in das bungen mit Weißleim oder Epoxy nicht möglich. Verwenden Formnest der Rumpfhälfte 4 geklebt. Sie nur Cyanacrylatkleber (Sekundenkleber), vorzugsweise Abb.
- Page 5 Fertigstellung der Tragflächen nach unten ca. 3 bis 4mm länger schneiden, damit Seiten- und Höhenruder später bequem auf dem Rumpf montiert werden 16. Querruder gängig machen können. An den Tragflächen 8 und 9 die Querruder seitlich freischneiden Abb. 17 (1 mm Spalt). Die Scharnierkanten durch hin- und herbewegen „gängig“...
- Page 6 22. Tragflächen-Steckung überprüfen Der Akku wird in das Fach hinter dem Empfänger unter den Montieren Sie das Modell mit dem Holmverbinder 40. Die Ka- Flügel geschoben. Je nach Akku klemmt sich dieser im Schacht bel der Querruder werden durch die Aussparung im Rumpf fest oder muss ggf.
- Page 7 Kanälen, in Betrieb sind! Der Thermikblasen sind die Folge. Die aufsteigende Warmluft gilt Test muss beim EasyGlider Electric mit laufendem Motor wie- es zu finden und zu "zentrieren". Dabei sollte das Modell durch derholt werden. Dabei darf sich die Reichweite nur unwesent- Steuerkorrekturen immer im Zentrum des Aufwindes gehalten lich verkürzen.
- Page 8 Denken Sie immer daran, dass auch die allerbeste Fernsteue- Elektroflug rung jederzeit durch äußere Einflüsse gestört werden kann. Mit der Elektrovariante, dem EasyGlider Electric, haben Sie das Auch langjährige, unfallfreie Flugpraxis ist keine Garantie für die höchste Maß der Unabhängigkeit. Sie können in der Ebene aus nächste Flugminute.
- Page 9 Stückliste BK EasyGlider # 21 4205 BK EasyGlider Electric # 21 4207 Lfd. Stück Bezeichnung Material Abmessungen Bauanleitung Papier DIN-A4 Dekorbogen bedruckte Klebefolie 350 x 1000mm Rumpfhälfte links Glider Elapor geschäumt Fertigteil Rumpfhälfte rechts Glider Elapor geschäumt Fertigteil Rumpfhälfte links Electric Elapor geschäumt...
- Page 10 Grundlagen am Beispiel eines Flugmodells Ein Flugzeug bzw. Flugmodell läßt sich mit den Rudern um folgende 3-Achsen steuern - Hochachse, Querachse und Längsach- Die Betätigung des Höhenruders ergibt eine Veränderung der Fluglage um die Querachse. Bei Seitenruderausschlag dreht das Modell um die Hochachse. Wird Querruder gesteuert, so rollt das Modell um die Längsachse. Je nach äusseren Einflüssen wie z.B.
- Page 11 Examine your kit carefully! MULTIPLEX model kits are subject to constant quality checks throughout the production process, and we sincerely hope that you are completely satisfied with the contents of your kit. However, we would ask you to check all the parts before you start construction, as we cannot exchange components which you have already worked on.
- Page 12 Important note 5. Installing the towhook (glider version only) This model is not made of styrofoam™, and it is not possible If you are building the glider version, the towhook 32 should now to glue the material using white glue or epoxy. Please be sure be glued in the integral recess in the fuselage shell 4.
- Page 13 10. Attaching the horn to the rudder 17. Attaching the horns to the ailerons Cut down the T-piece of the horn 24 for the rudder 13 to a depth Fit the pushrod connectors 25 in the outermost holes in the of about 2 mm, using side-cutters.
- Page 14 Note: the wings must not be glued to the fuselage. This permits in which case it does not need to be secured separately. If it is the model to be dismantled at any time for ease of transport. a loose fit, pack extra foam round it. Fig.
- Page 15 (EasyGlider Electric only). There should be no more than a very The most obvious thermal triggers include sharply defined snow slight reduction in effective radio range with the motor turning.
- Page 16 The real expert does not need to prove himself in With the electric version - the EasyGlider Electric - you have the such childish ways. Let other pilots know that this is what you optimum level of autonomy and independence.
- Page 17 The fascination of it all Model flying is, and always has been, a fascinating hobby, and a We - the MULTIPLEX team - wish you many hours of pleasure in thoroughly enjoyable way of spending your leisure hours. Take building and flying your new model. Happy landings! your time to get to know your new EasyGlider / EasyGlider Electric really well.
-
Page 18: Parts List
1 Fin, motor retainer Moulded Elapor foam Ready made 1 Motor, gearbox, propeller Metal / plastic Ready made Small items set, EasyGlider + EasyGlider Electric 2 Hook-and-loop tape, hook Plastic 25 x 60 mm 2 Hook-and-loop tape, loop Plastic 25 x 60 mm 2 Canopy-Lock, latch catch Inj. - Page 19 Basic information relating to model aircraft Any aircraft, whether full-size or model, can be controlled around the three primary axes: vertical (yaw), lateral (pitch) and longitudinal (roll). When you operate the elevator, the model’s attitude alters around the lateral axis. If you apply a rudder command, the model swings around the vertical axis.
- Page 20 Familiarisez-vous avec le kit d’assemblage! Les kits d’assemblages MULTIPLEX sont soumis pendant la production à des contrôles réguliers du matériel. Nous espérons que le contenu du kit répond à vos espérances. Nous vous prions de vérifier le contenu (suivant la liste des pièces) du kit avant l’assemblage, car les pièces utilisées ne sont pas échangées.
- Page 21 Information importante de table) et collez y la gaine extérieure 44 sur toute la longueur Ce modèle n’est pas en polystyrène™!De ce fait, n’utilisez pas de la rainure avec de la colle rapide de colle blanche ou époxy. N’utilisez que des colles Fig.
- Page 22 9. Mise en place des charnières pour la direction travaillé lors de la réalisation de cette étape, vous allez le regretter Collez la charnière 31 avec un peu de colle rapide à l’arrière du toute la vie de votre modèle. fuselage.
- Page 23 "Bilderbuch" KIT EasyGlider # 21 4205 KIT EasyGlider Electric # 21 4207 "Illustrations" "Illustrations" "Illustrazioni" "Ilustraciónes" © Copyright by MULTIPLEX 2005 Version 3.0...
- Page 24 13.1 Abb. 1 Abb. 2...
- Page 25 3 / 5 Abb. 3 Abb. 4 3 / 5 4 / 6 3 / 5 Abb. 5 Abb.6 4 / 6 4 / 6 Abb. 7 Abb. 8 13.1 Abb. 9 Abb. 10...
- Page 26 4 / 6 Detail 13.1 Abb. 11E Abb.12 3 / 5 3 / 5 4 / 6 Abb. 14 Abb. 13 Abb. 15 Abb. 16 Abb. 17 Abb. 18...
- Page 27 Abb. 19 Abb. 20 Abb. 21 Abb. 22 8 / 9 Abb. 23 Abb. 24 8 / 9 8 / 9 Abb. 25 Abb. 26...
- Page 28 10 / 11 8 / 9 Abb. 27 Abb. 28 Abb. 30 Abb. 29 switch battery battery controller Abb. 31 Abb. 32 20mm 25mm 25mm 13mm 13mm Abb. 33 Abb. 34...
- Page 29 8 - 10 mm / 0,3 - 0,4 in Abb. 35 Abb. 36 Auftriebskraft α MULTIPLEX Modellsport GmbH & Co.KG • Neuer Weg 2 • D-75223 Niefern-Öschelbronn • www.multiplex-rc.de...
- Page 30 colle rapide. Veillez surtout à ne pas mettre de la colle sur la Pôle plus du régulateur sur le pôle moins du moteur zone qui accueillera par la suite la clé d’aile 40. N’effectuez un Pôle moins du régulateur sur le pôle plus du moteur test d’assemblage de la clé...
- Page 31 Vous pouvez télécharger gratuitement ce simulateur sur notre brindille, un arbre, une clôture, une lisière de forêt, une petite page internet www.multiplex-rc.de. Le câble d’interface est dis- pente, une voiture qui passe, ou même par le passage de votre ponible chez votre revendeur (Nr. Com. # 8 5153).
- Page 32 Que signifie une performance pour les planeurs ? Le paramètre le plus important est la finesse et l’angle de glisse. Nous, le Team MULTIPLEX, vous souhaitons beaucoup de plaisir On comprend par finesse le taux de chute par seconde pour l’air et de succès pendant la construction et le pilotage.
- Page 33 Liste des pièces Kit EasyGlider # 21 4205 Kit EasyGlider Electric # 21 4207 Désignation Matière Dimensions Instructions de montage Papier DIN-A4 Planche de décoration Film autocollant 350 x 1000mm Moitié fuselage gauche Glider mousse Elapor Complet Moitié fuselage droit Glider...
- Page 34 Bases du pilotage d’un modèle réduit Un avion, comme un modèle réduit se pilote avec les gouvernes suivant 3 axes - l’axe vertiical, l’axe longitudinal et l’axe latéral. Une action sur la commande de profondeur conduit à une modification de la position de vol autour de l’axe latéral. Une action sur la gouverne de direction conduit à...
- Page 35 Prenda confidenza con il contenuto della scatola di montaggio! Le scatole di montaggio MULTIPLEX sono soggette, durante la produzione, ad un continuo controllo della qualità e siamo pertanto certi che Lei sarà soddisfatto con la scatola di montaggio. La preghiamo tuttavia, di controllare tutte le parti prima del loro utilizzo (consultando la lista materiale), poiché...
- Page 36 Nota importante 4. Installare la guaina per l’antenna Questo modello non è in polistirolo™! Per questo motivo non Incollare la guaina 47 nel semiguscio destro – fare attenzione usare per gli incollaggi colla vinilica o epoxy. Usare a non piegare la fusoliera! Fig. 9 esclusivamente colla cianoacrilica, possibilmente assieme all’attivatore (Kicker).
- Page 37 modo da riuscire ad installare successivamente con più facilità 17. Fissare le squadrette sugli alettoni il direzionale e l’elevatore sulla fusoliera. Inserire rispettivamente un raccordo 25 nel foro più esterno Fig. 17 delle squadrette 24 e fissarli con una rondella 26 e dado 27. Attenzione: 1x destra, 1x sinistra! Serrare attentamente il dado 10.
- Page 38 23. Incollare le linguette di fissaggio nella capottina Accendere la radio e collegare il pacco batteria al regolatore ed Installare le due linguette di chiusura 23 nella capottina 7 – le il regolatore alla ricevente. E’ indispensabile che il regolatore linguette rivolte verso l’interno! Applicare sulla parte dentata disponga della funzione BEC (alimentazione dell’impianto RC ciano denso –...
- Page 39 Il simulatore può essere scaricato a titolo gratuito dal nostro spostata dal vento a poca distanza da terra. La “bolla” d’aria sito www.multiplex-rc.de. Il cavo d’interfaccia per radio MPX calda si può staccare da terra e cominciare a salire per colpa di è...
- Page 40 Volo elettrico Informarsi su come caricare correttamente le batterie. Fare uso Con la versione elettrica, EasyGlider Electric si ha il maggior di prodotti che migliorano la sicurezza. Nel nostro catalogo grado d’indipendenza. In pianura il modello può salire ad una generale MULTIPLEX si possono trovare tutti i prodotti più...
- Page 41 Sm EasyGlider # 21 4205 Sm EasyGlider Electric # 21 4207 Pos. Pezzi Descrizione Materiale Dimensioni Istruzioni di montaggio carta DIN-A4 Decals foglio adesivo stampato 350 x 1000mm Semiguscio sinistro fusoliera Glider espanso Elapor finito Semiguscio destro fusoliera Glider espanso Elapor...
- Page 42 ozioni fondamentali Come ogni aereo, anche gli aeromodelli, possono muoversi, grazie ai timoni, intorno ai seguenti 3 assi – d’imbardata, di beccheggio e di rollio. Il movimento dell’elevatore fa variare la direzione di volo attorno all’asse di beccheggio. Muovendo il direzionale, il modello gira sull’asse d’imbardata.
- Page 43 ¡Familiaricese con el kit! Los kits de MULTIPLEX durante su producción, están sujetos a un continuo control de los materiales. Esperamos que este satisfecho con su kit. Aun así, le rogamos, que compruebe que todas las piezas están disponibles antes de empezar a montar, ya que cualquier pieza que haya sido manipulada no podrá...
- Page 44 5. Montaje del gancho para Hi-Start (solo velero) Advertencia importante Sólo en el modelo sin motorizar, se pegará ahora el gancho ¡Este modelo no es de Styropor ™! Por este motivo no es para Hi-Start 32 en su ubicación en el fuselaje (hueco) 4. posible pegar con cola blanca o Epoxy.
- Page 45 17. Fijación de los horns en los alerones 10. Instalación del horn en el timón de dirección En cada horn de los alerones, fije el retén de las varillas 25 en Recorte la pieza con forma de T del horn 24 para el timón de el agujero más externo de la palanca 24.
- Page 46 23. Pegado de la cabina y cierres con el regulador y el regulador con el receptor. Es imprescindible Ambas pestañas de cierre 23 se instalarán en la cabina 7 – que el regulador esté equipado con BEC (Alimentación del receptor vía batería del motor). ¡Ambas pestañas se apuntan entre sí! Aplique un poco de Active el motor y compruebe el sentido de giro de la hélice pegamento en la parte dentada - ¡Sin activador por ahora! -,...
- Page 47 Tenga en cuenta que verá mejor su otra frecuencia! Si posee el EasyGlider Electric deberá repetir la modelo si lo contrasta con una zona del cielo libre de nubes prueba con el motor en marcha.
- Page 48 Vuelo eléctrico Mantenga siempre los modelos y la emisora en perfecto estado. Con la versión eléctrica, el EasyGlider Electric, obtendrá lo Infórmese acerca de las técnicas de carga de las baterías que máximo en independencia. Con una sola carga de las baterías vaya a utilizar.
- Page 49 Lista de componentes BK EasyGlider # 21 4205 BK EasyGlider Electric # 21 4207 Nº. Ud. Descripción Material Dimensiones Instrucciones Papel DIN-A4 Lámina decorativa Lámina impresa 350 x 1000mm Fuselaje velero. Mitad izquierda. Elapor Pieza prefabricada Fuselaje velero. Mitad derecha.
- Page 50 Principios básicos tomando como ejemplo un avión Un avión, o mejor dicho, un avión de radiocontrol, se manda con los timones por los siguientes 3 ejes: eje vertical, eje transversal y eje longitudinal. El accionamiento del timón de profundidad supone una modificación de la posición de vuelo en el eje transversal. En el caso de las desviaciones del timón de dirección, el modelo gira por el eje vertical.
- Page 51 KIT EasyGlider Electric # 21 4207 RR EasyGlider Electric # 26 4207 Information Antriebsakku/Drive battery/Accu de propulsion MIGNON (AA): 7/1500 NiMH M6 15 6030 wir empfehlen/we recommend/nous recommandons: 8/1500 NiMH M6 15 6037 LiPo: 2 / 1 1250 P M6...
- Page 52 Handle and Tow Line Propeller blades Dispositif de décollage Pales d’hélice en courant Pale elica Cora per decollo in corsa Palas de la hélice Kit lanzamiento manual (A la carrera) MULTIPLEX Modellsport GmbH & Co.KG Neuer Weg 2 D-75223 Niefern-Öschelbronn www.multiplex-rc.de...
Need help?
Do you have a question about the EasyGlider Electric and is the answer not in the manual?
Questions and answers